Additional Regions
What are Regions?
Regions allow you to adjust the chatbot to your user’s language depending on where the user is accessing the chatbot.
Why use Regions?
Regions allow you to deliver automated translations to your knowledge base, and ultimately give your users a localized experience.
This helps to increase customer satisfaction and to extend the benefits of automation throughout your organization.
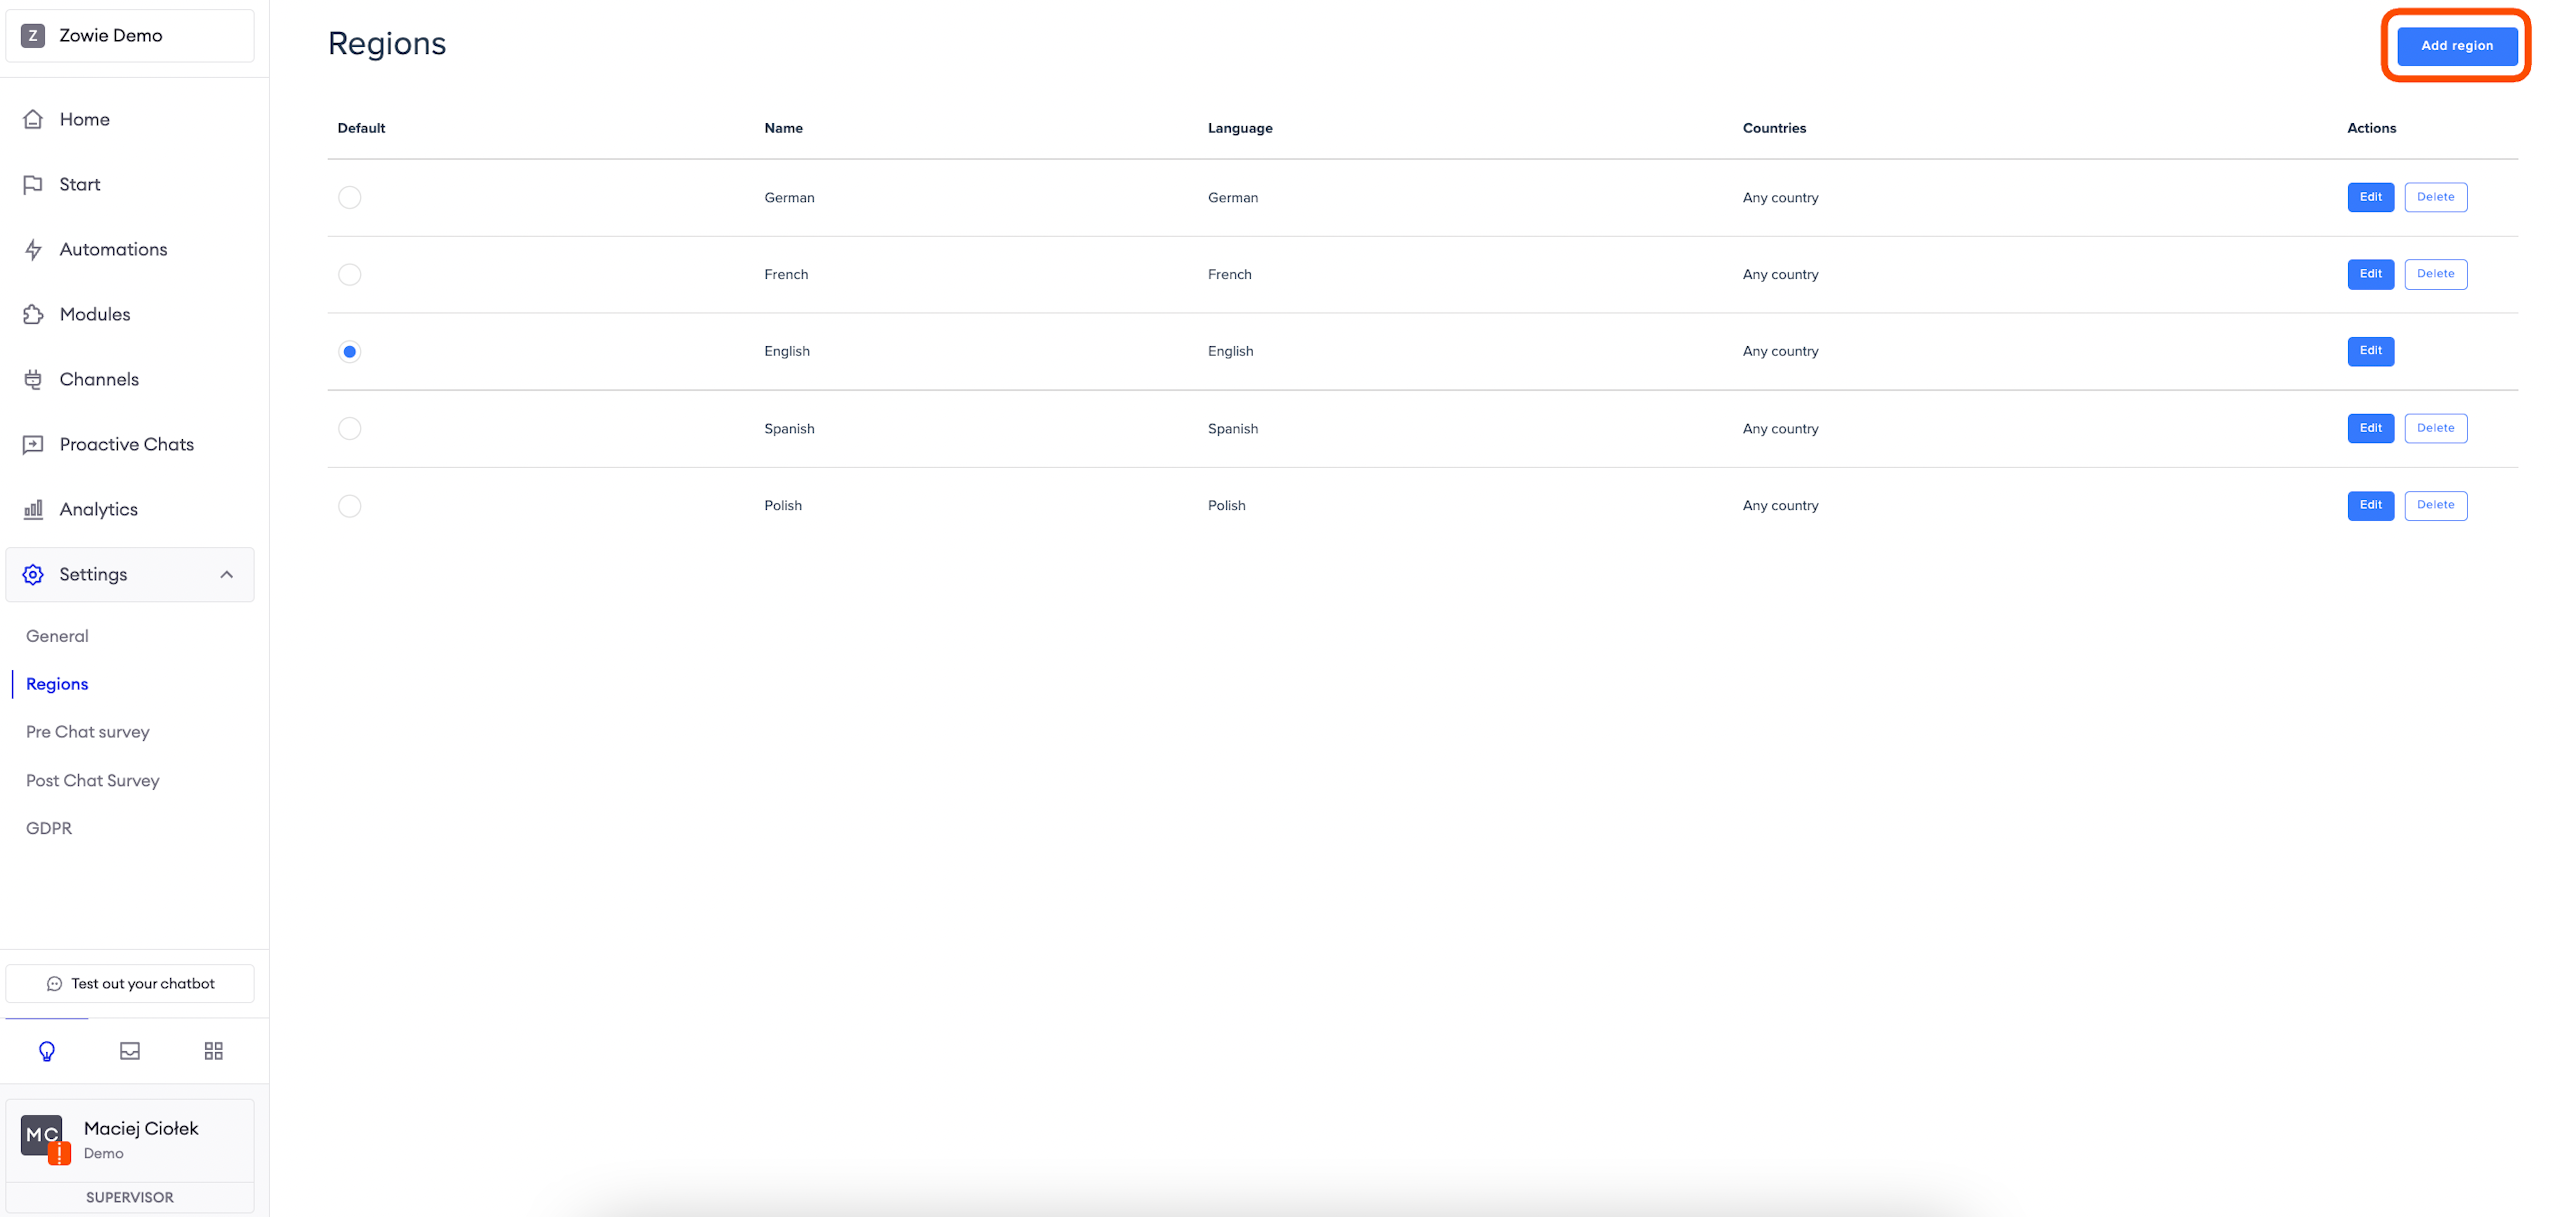
How to access Regions?
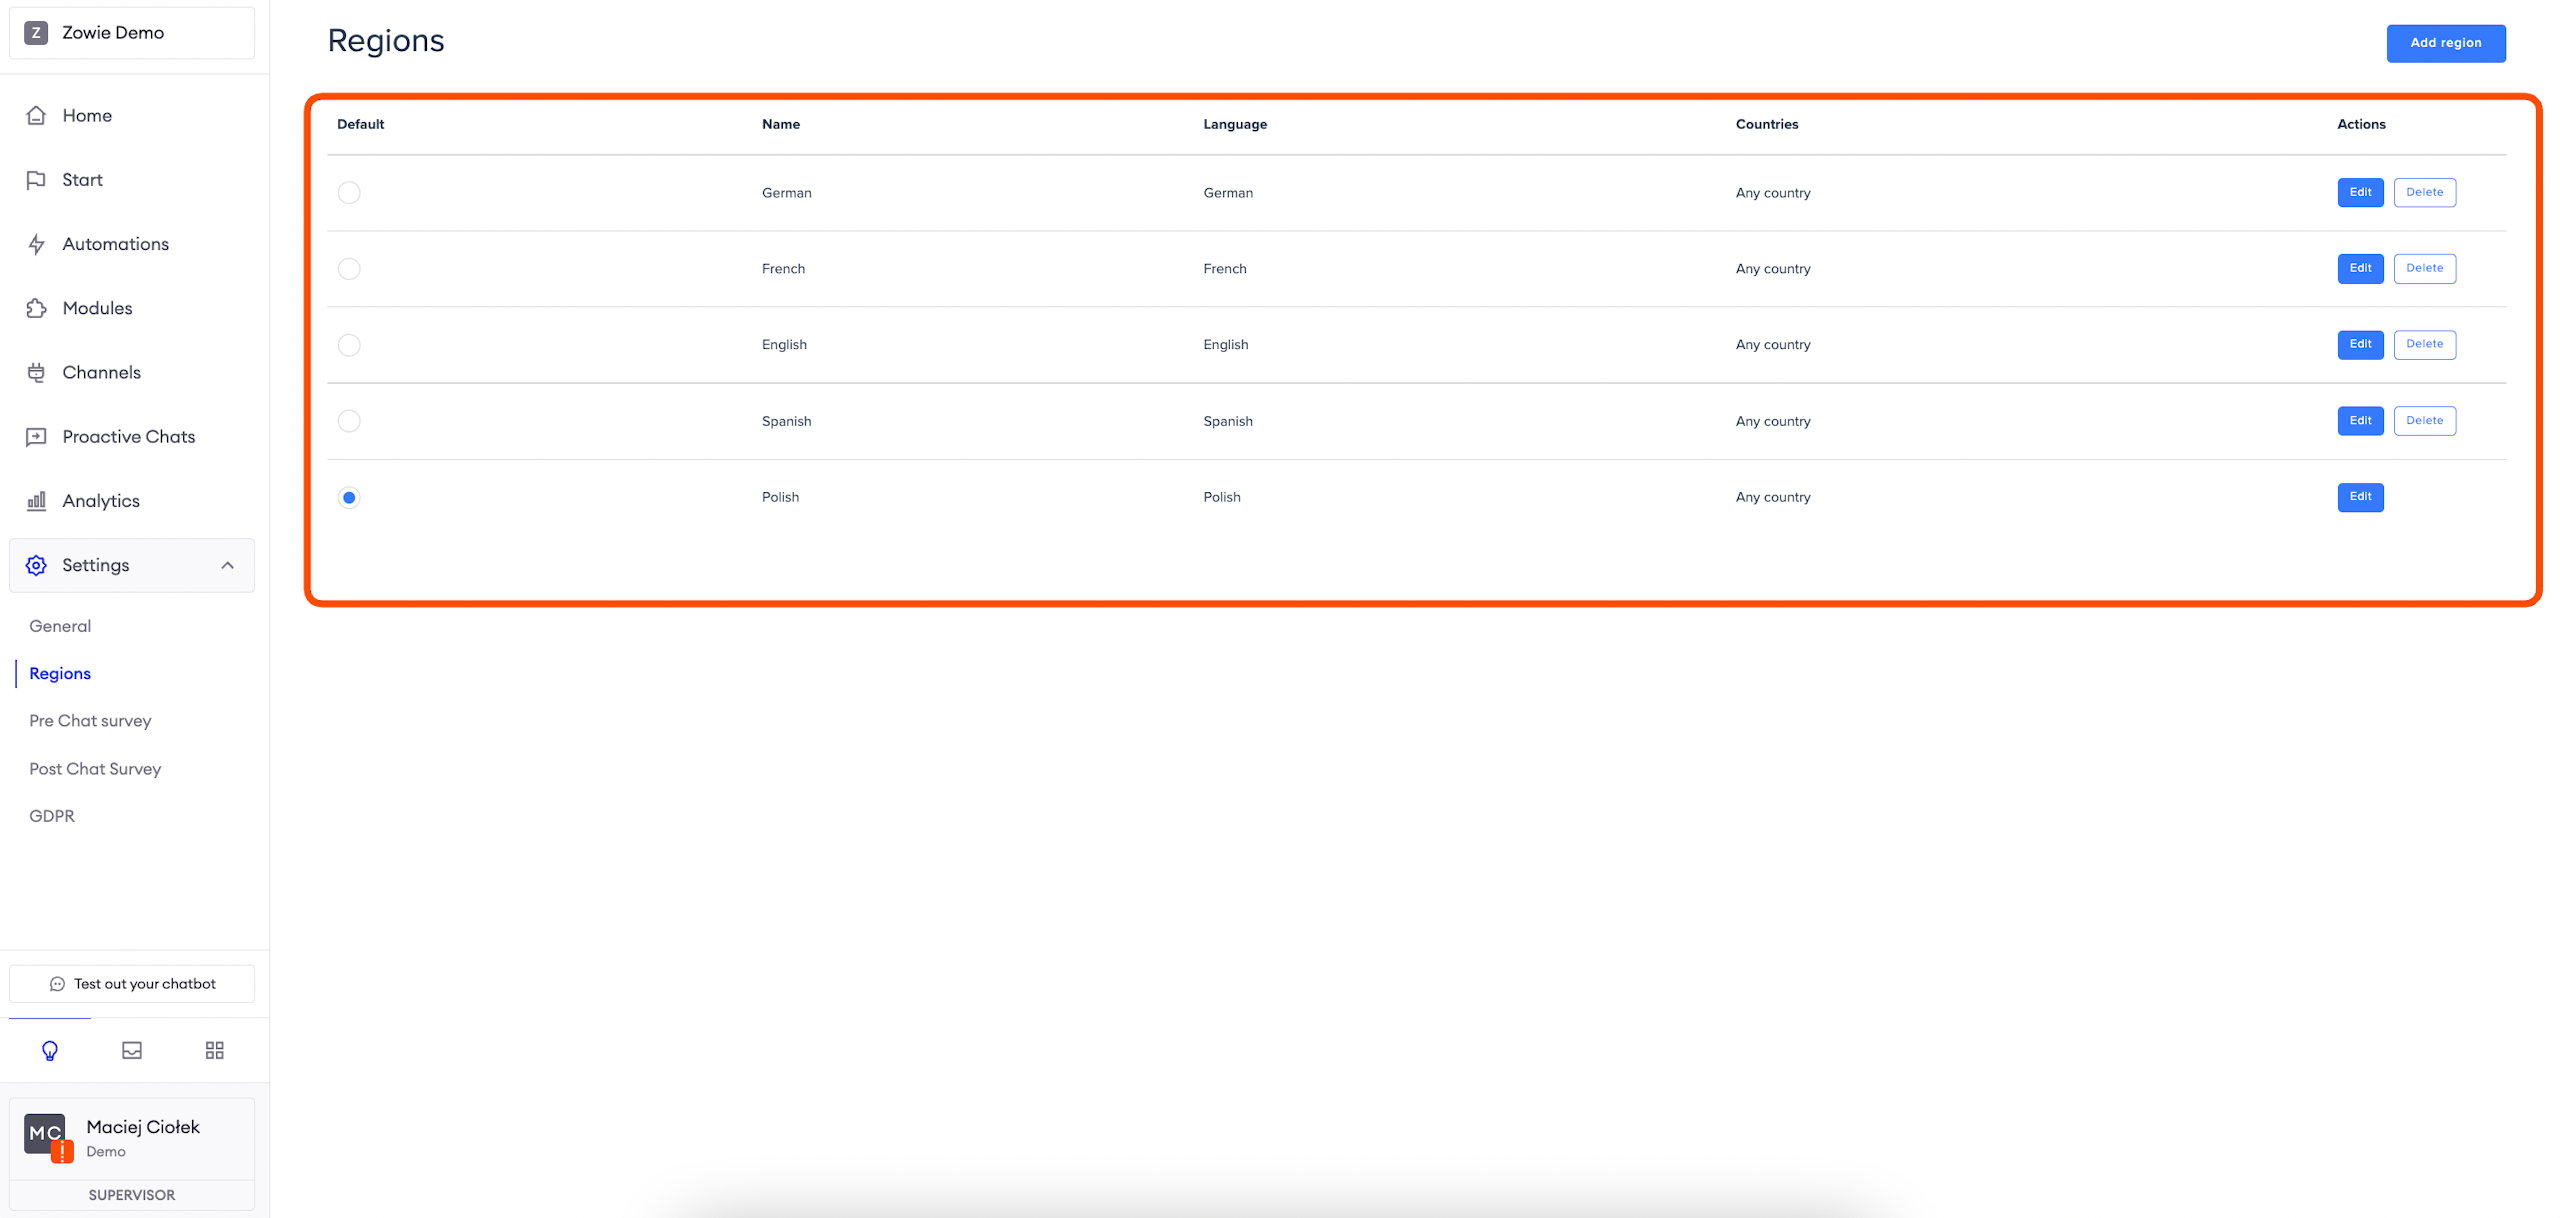
To access Regions, choose Settings > Regions from the main navigation panel.
Configuring a region
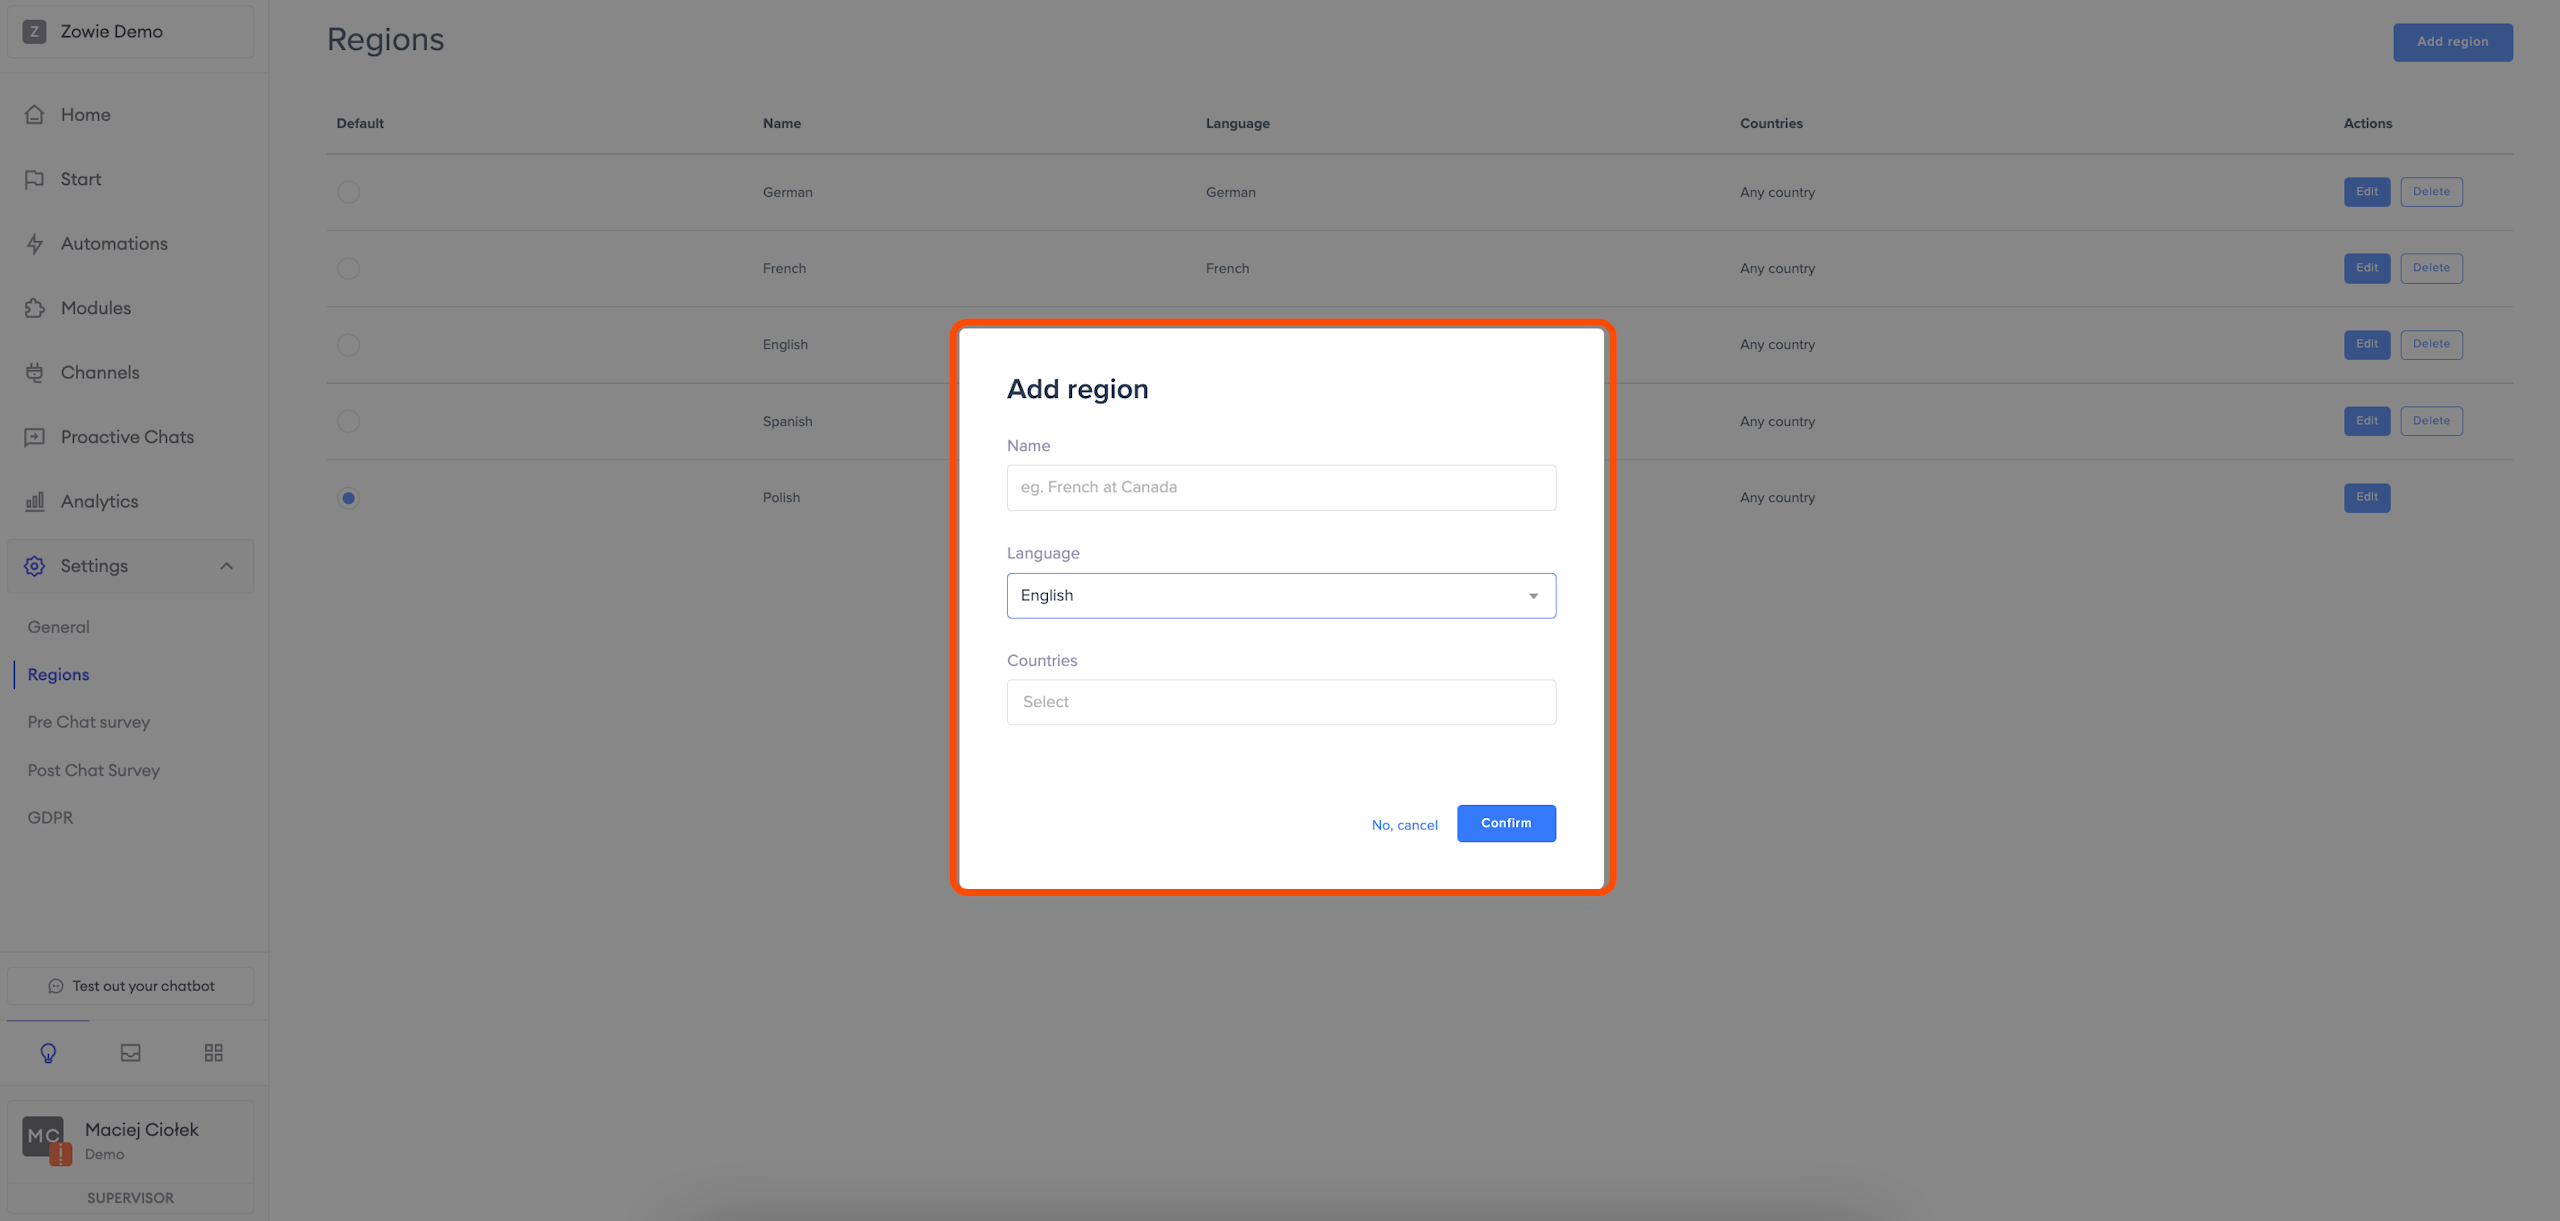
First, click the "Add Region" button in the top right corner. Then, fill in the following fields:
- Name: the Region’s name which will be displayed whenever you can select a region;
- Language: the language that should be used during conversations–you can only choose one;
- Country: countries with users who will fall into this Region - you can select multiple countries.
The chatbot is created with one Region (English). If you want to change the default Region, simply click on it from the list of Regions. From there, you can also edit or delete a Region.
Translating a region
By default, all appropriate content is automatically translated from the moment you configure a new region. Still, we recommend verifying these translations as they may not be aligned with your communication style.
This applies to the following parts:
- Start;
- Automations;
- Pre-chat survey;
- Post-chat survey;
- GDPR;
- Topic suggestions;
- Quality assurance.
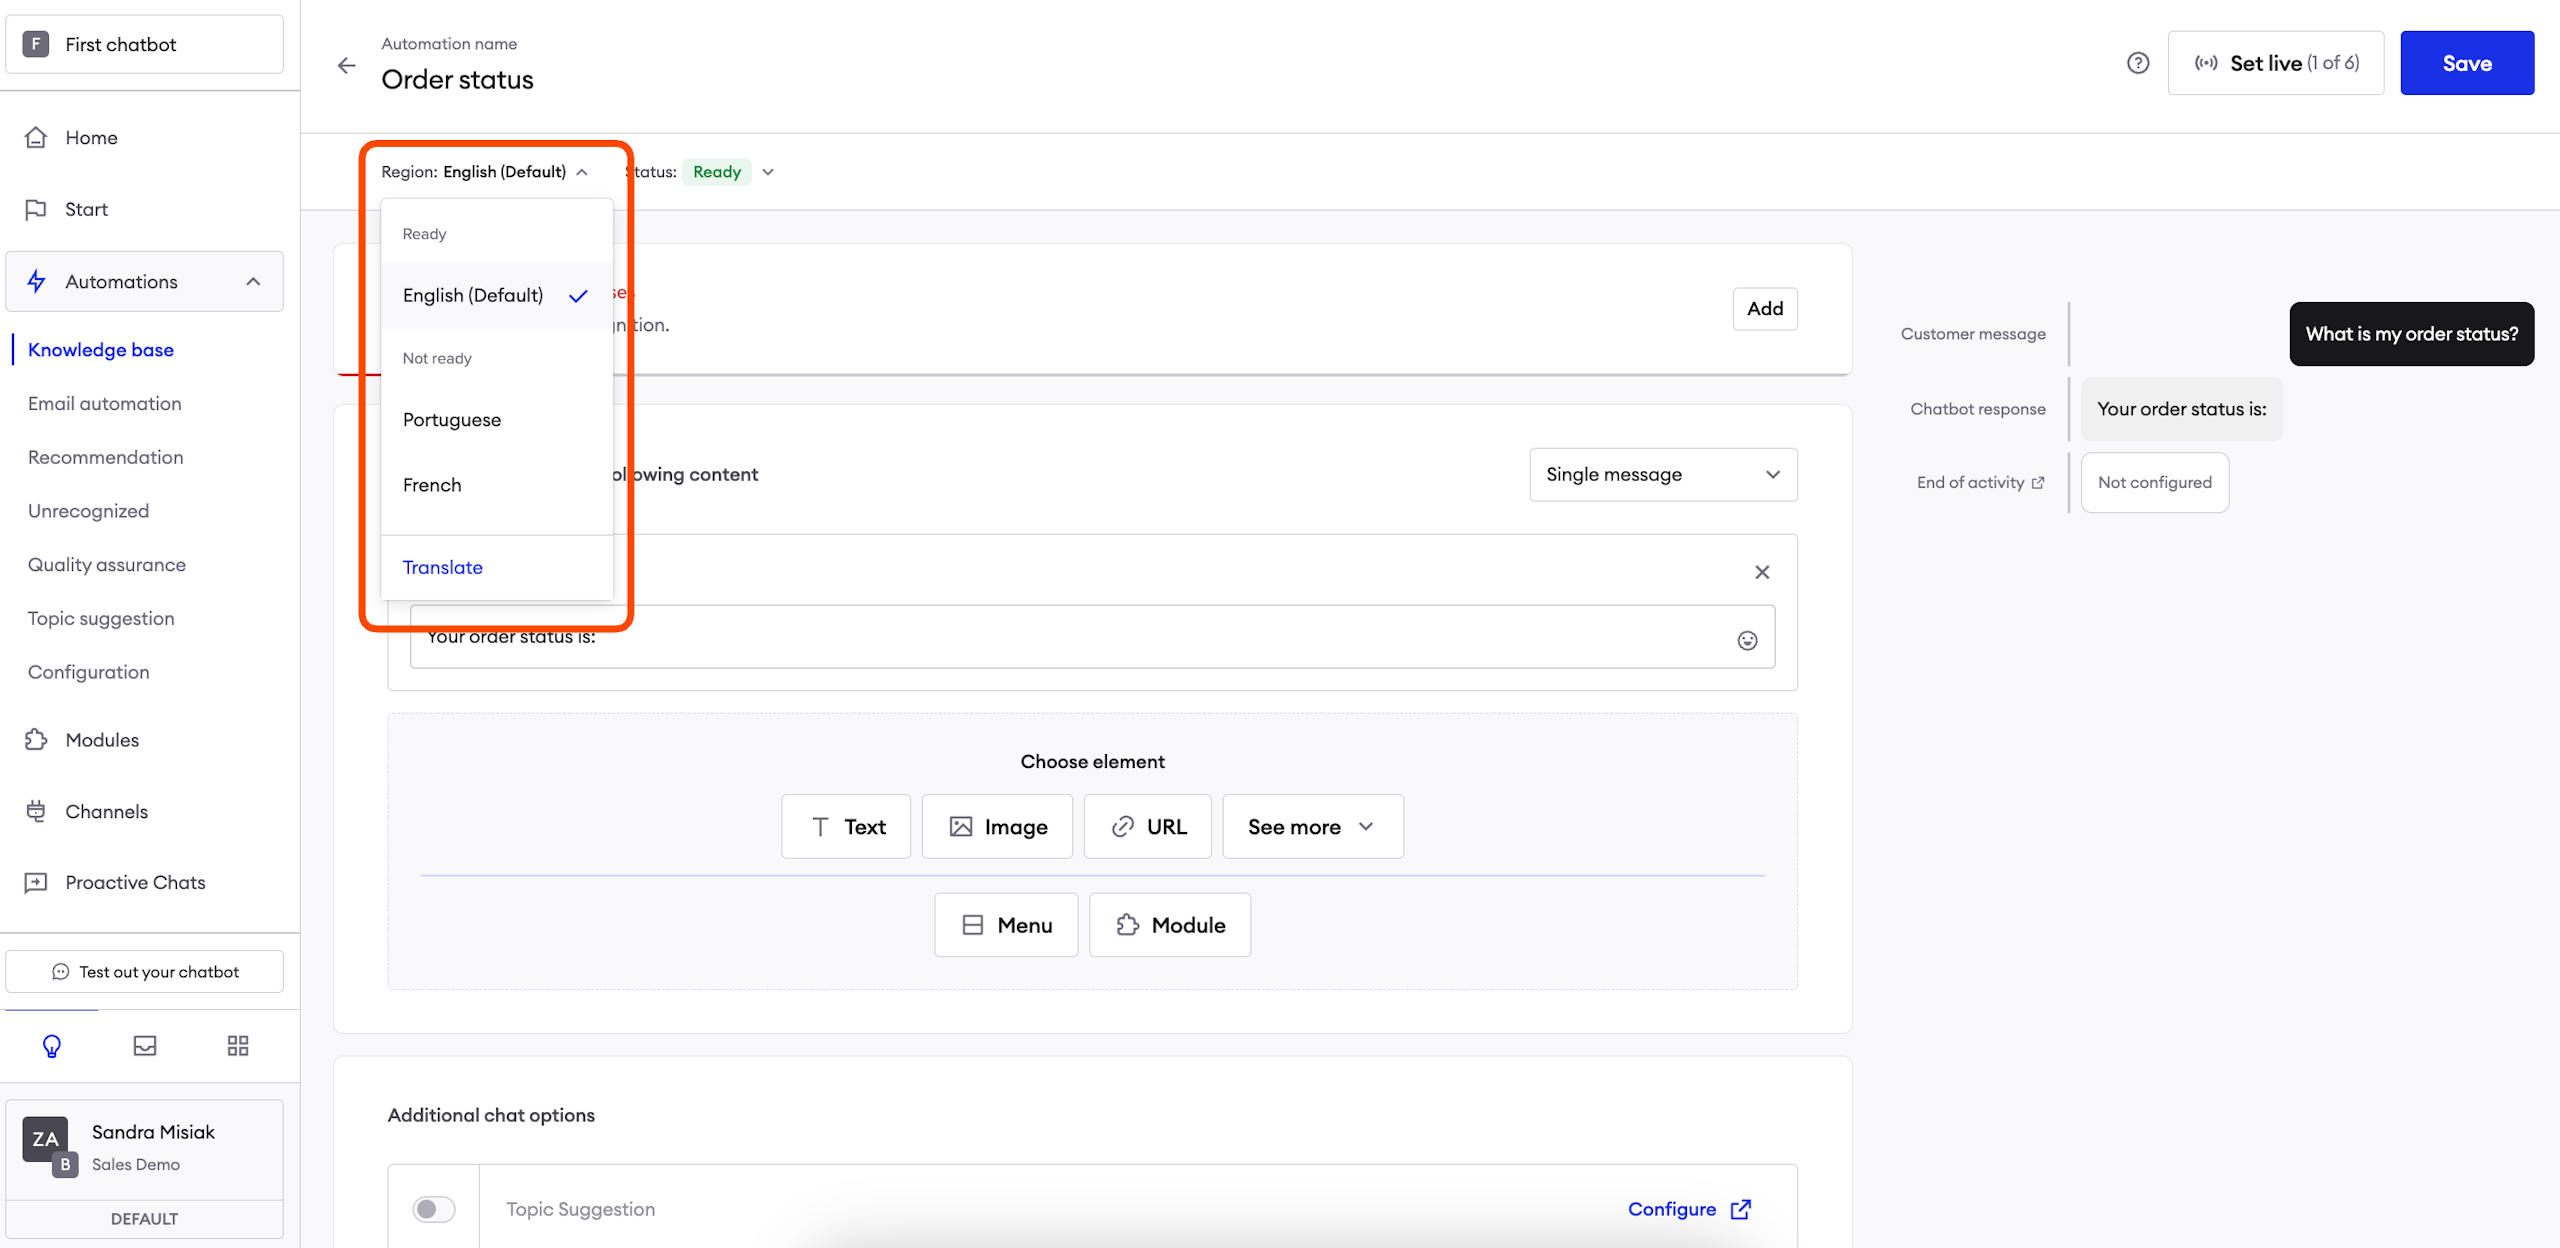
After configuring a Region, whenever you create a new element from the modules listed above (for example, you’re creating new Automation), you need to remember to add a translation for Regions other than the default. You can automate this by clicking the "Translate" button.
For now, only the modules mentioned above support multiple Regions. If you want to create a different module to be used in multiple Regions, create that module twice. Simply translate the text manually in the respective module's configuration and link the appropriate module in the correct Start menu/Automation.
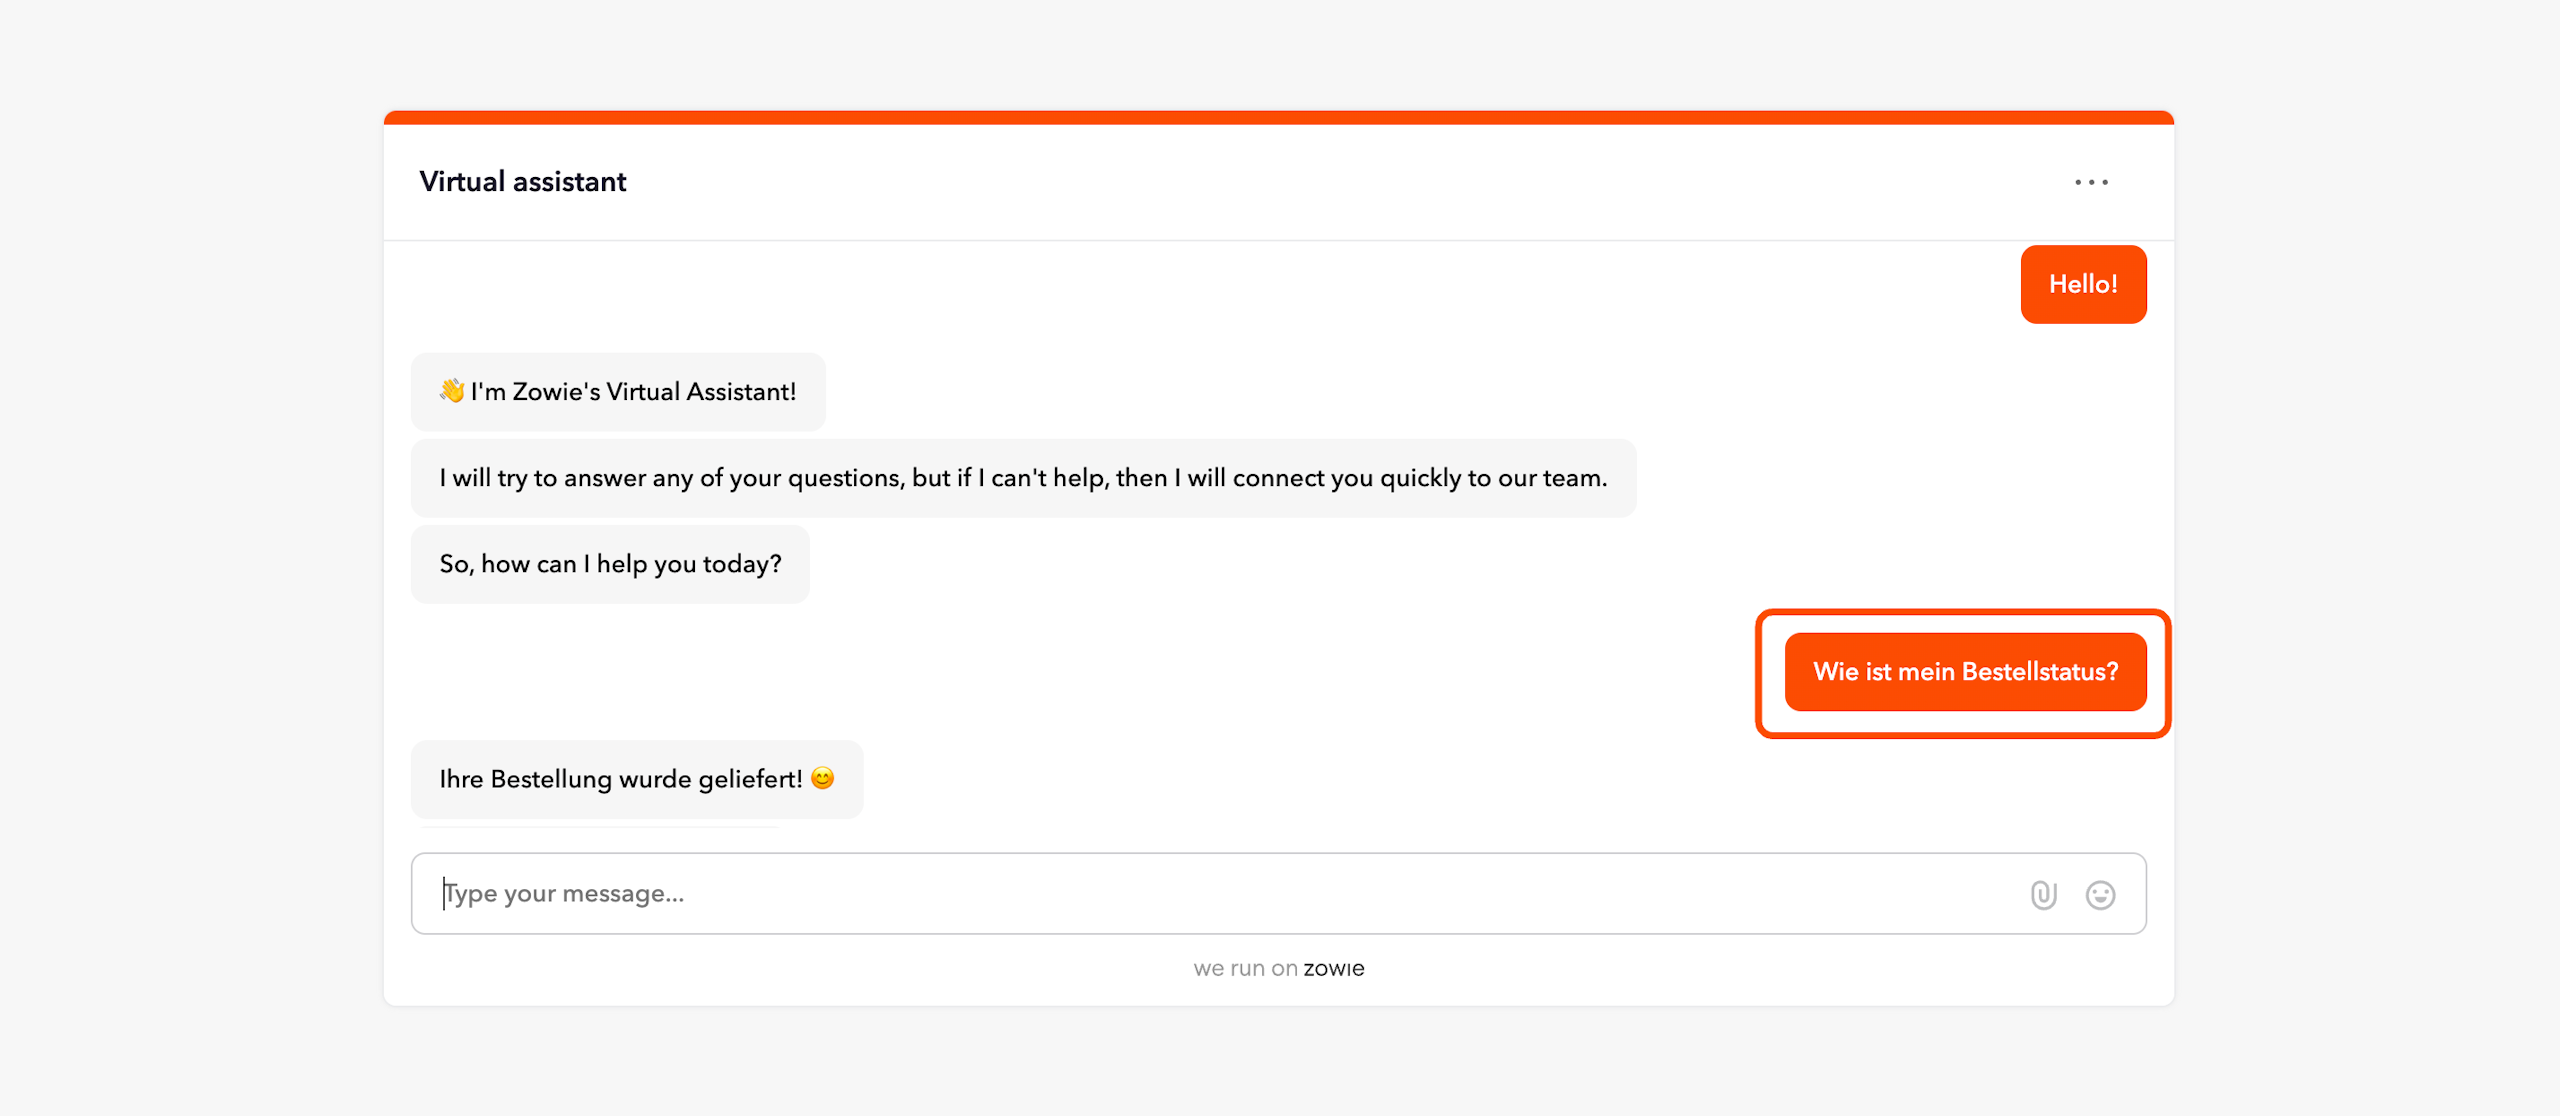
Adjusting chatbot's language
As a result of configuring a Region, the chatbot will be able to send messages in a different language than the default one. The chatbot will adjust the conversation language based on:
- the user’s browser language preferences (user locale): some channels (for example Zowie Chat widget, mobile SDK) provide the chatbot with the user’s locale, which is used to set the region;
- the user’s language: if the user’s message is recognized as a phrase in a language that matches a configured region, and the phrase is long enough, the chatbot changes the language.
Per Region configuration
You can customize chatbot interactions depending on the user’s region in the following places:
- Home: Welcome message, End of Activity, Don't understand;
- Automations: Knowledge Base, Topic Suggestions, Quality Assurance, Unrecognized;
- Pre-chat survey;
- Post-chat survey;
- GDPR module.
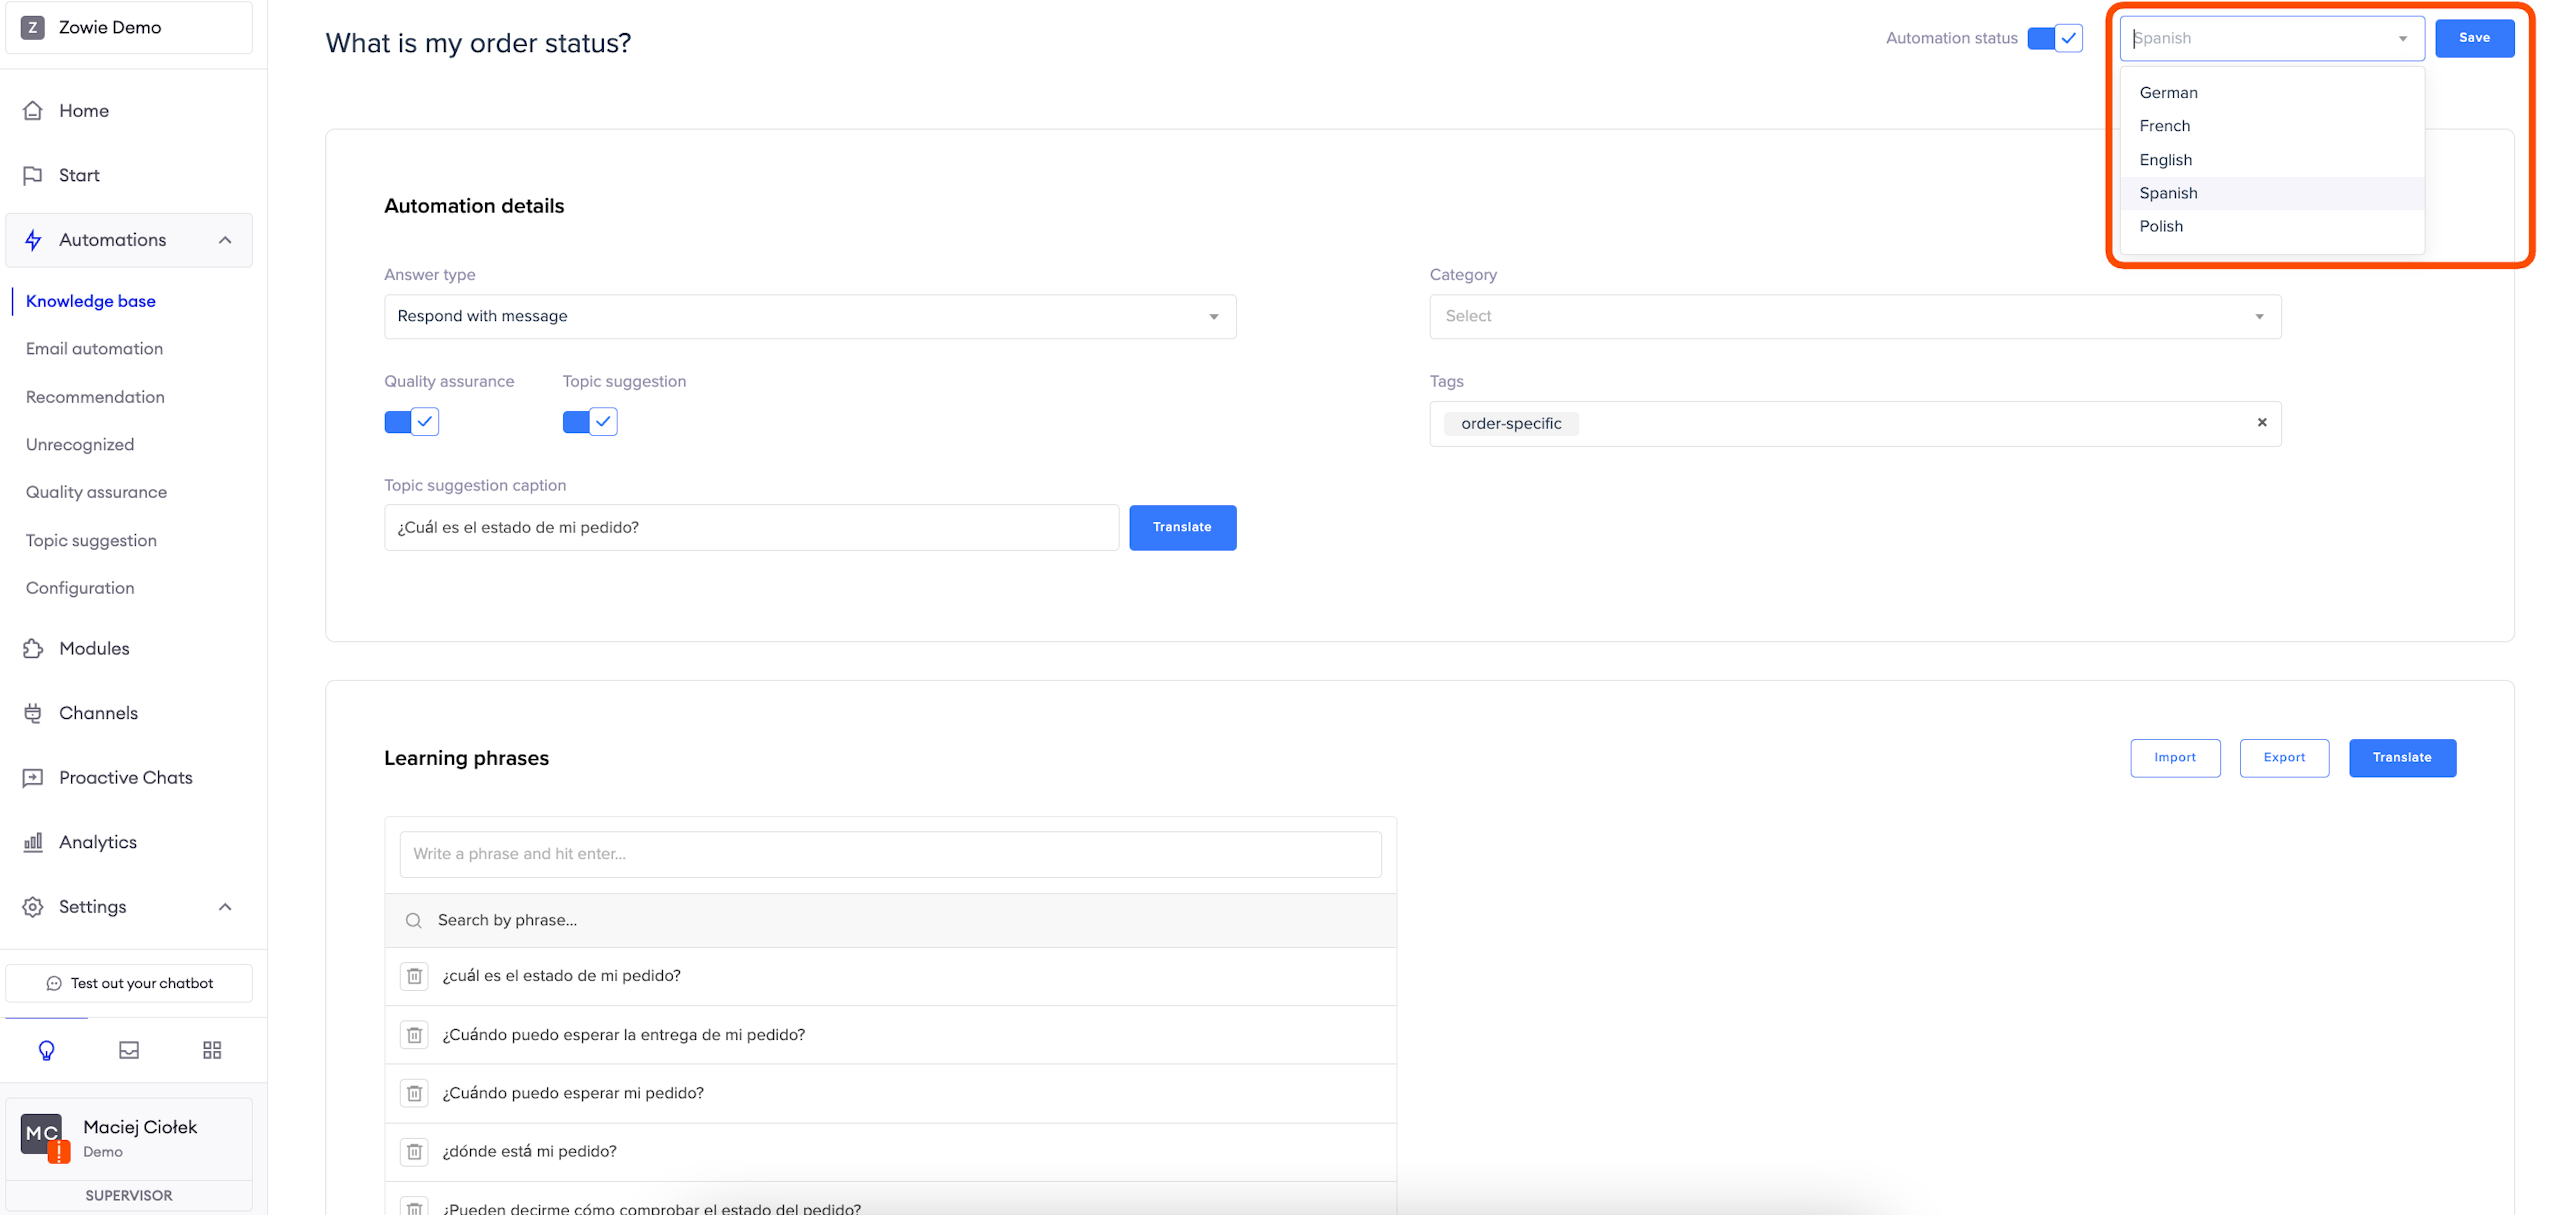
Regional versions of automations
Remember that you need to have the Regions feature enabled to see this view.
There are three key elements that can help you managing regional versions of automations:
The region picker allows you to pick the region you want to configure. It is sorted by the regional version's status for your convenience.
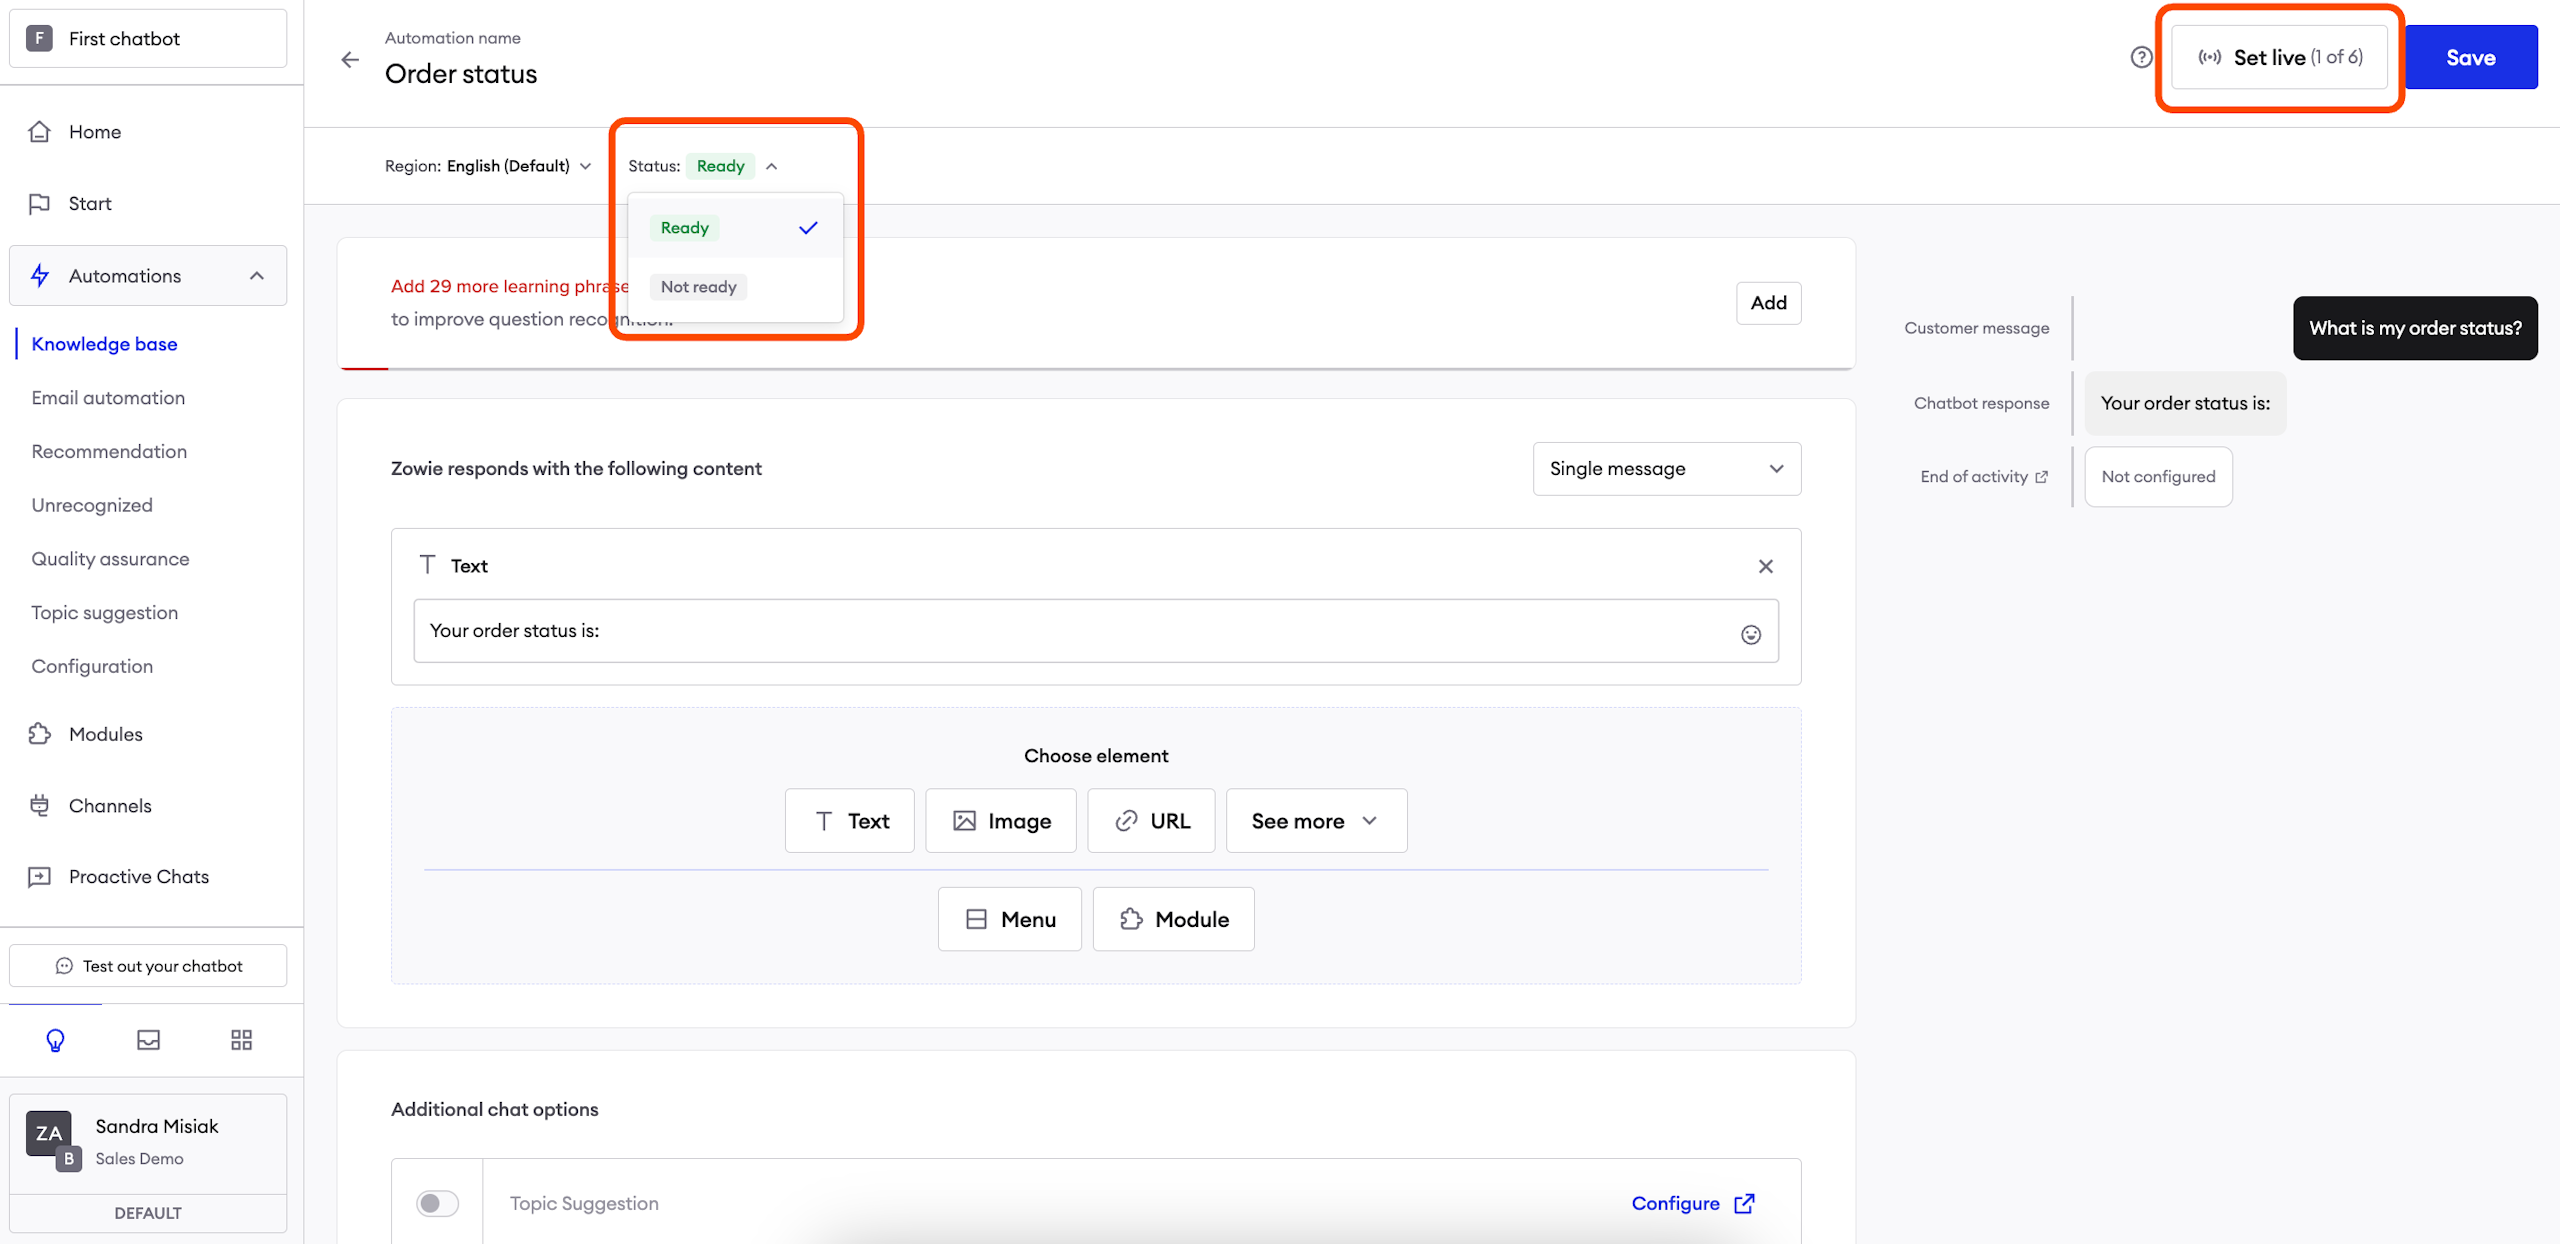
Region status picker that allows you to set a status to each regional configuration. The following statuses are available:
- Ready: when you set the automation live, all regional versions with the Ready status become available to end users;
- Not ready: regional versions with this status are not available to end users; you can freely change the configuration and save it until you feel confident it's ready for the world.
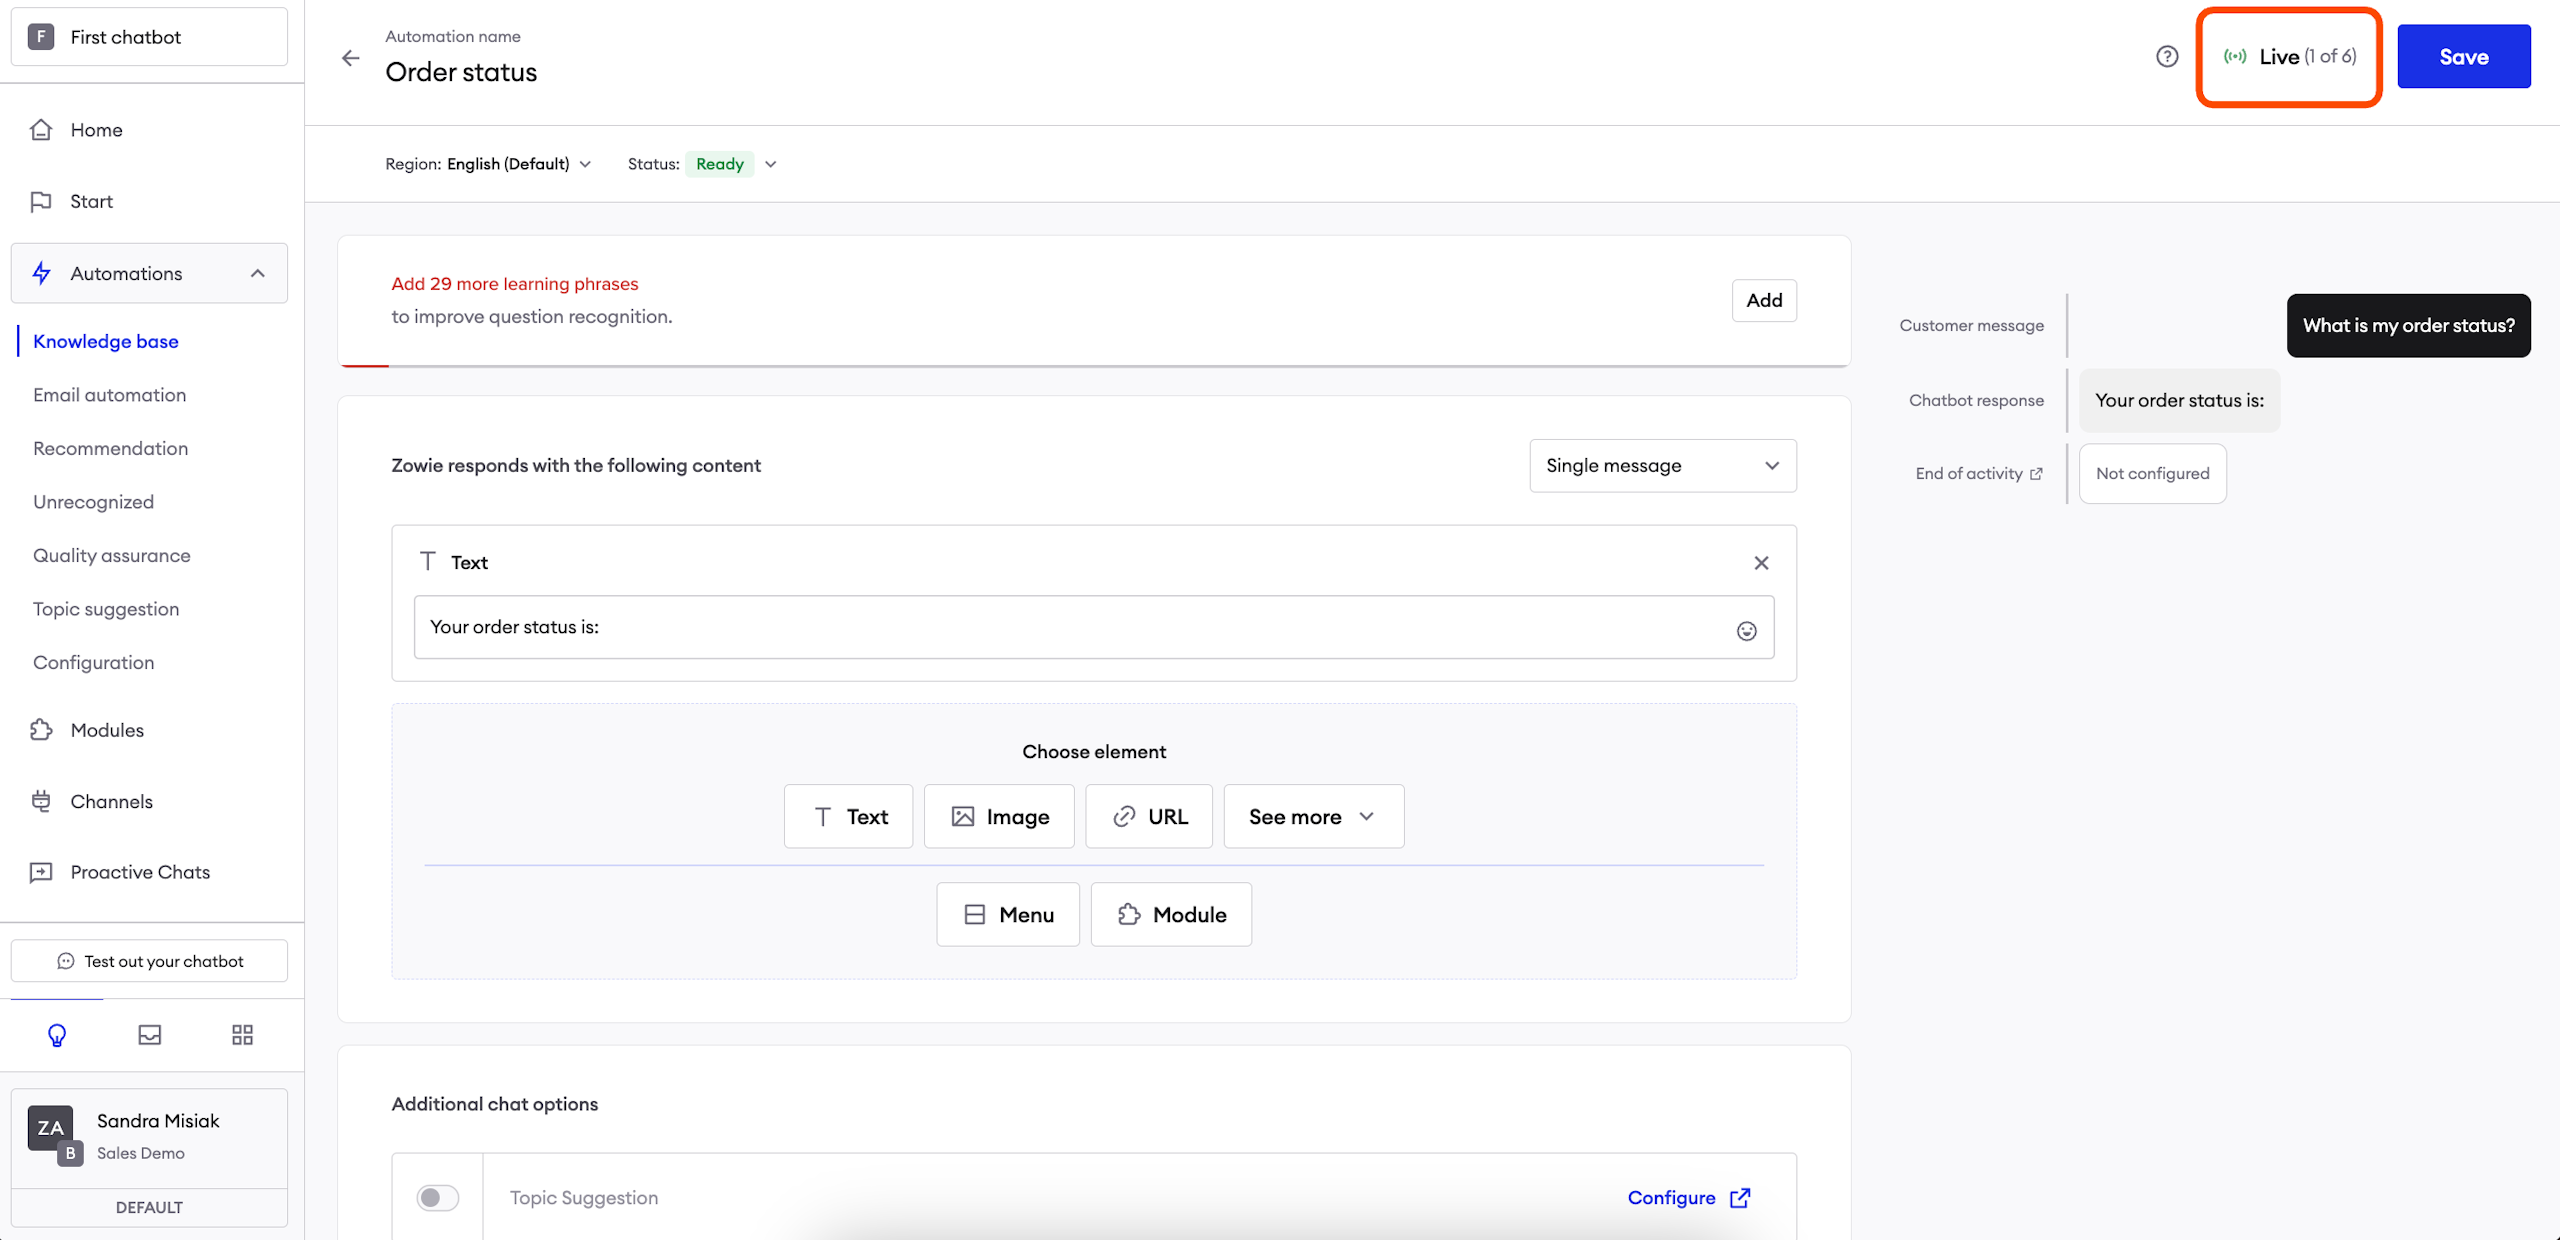
Automation status button allows you set the automation live (meaning, make it available to end users) and disable it (make it unavailable to end users).
In order to set an automation live, simply do the following:
- Configure the regional versions that you want enabled and assign the Ready status to them. You do not need to configure them all to set an automation live.
- Make sue that the Regions for the Ready regional versions are active.
- Click the Set live button in the top right corner of the screen. After the automation is live, it changes to show you how many regional versions are currently live.