Agent Profiles
What are Profiles?
Profiles represent groups of agents split by the way they work. When you have agents with similar responsibilities, you can manage agents' settings in an easy way through Profile management.
Why use Profiles?
Profiles, along with queues, allow you to streamline your user and agent experiences by directing users to the right agent based on topic, priority, or other factors. You can create a profile with agents specializing in sales, and another with agents responsible for technical support. Sales will help customers from sales-related queues, while technical support agents will only take customers from queues related to those topics. This also helps to optimize waiting time and to make sure that chat distribution is balanced between agents.
How to access Profiles?
You can access the Profiles by selecting _Inbox > Settings > Profiles _on the navigation bar.

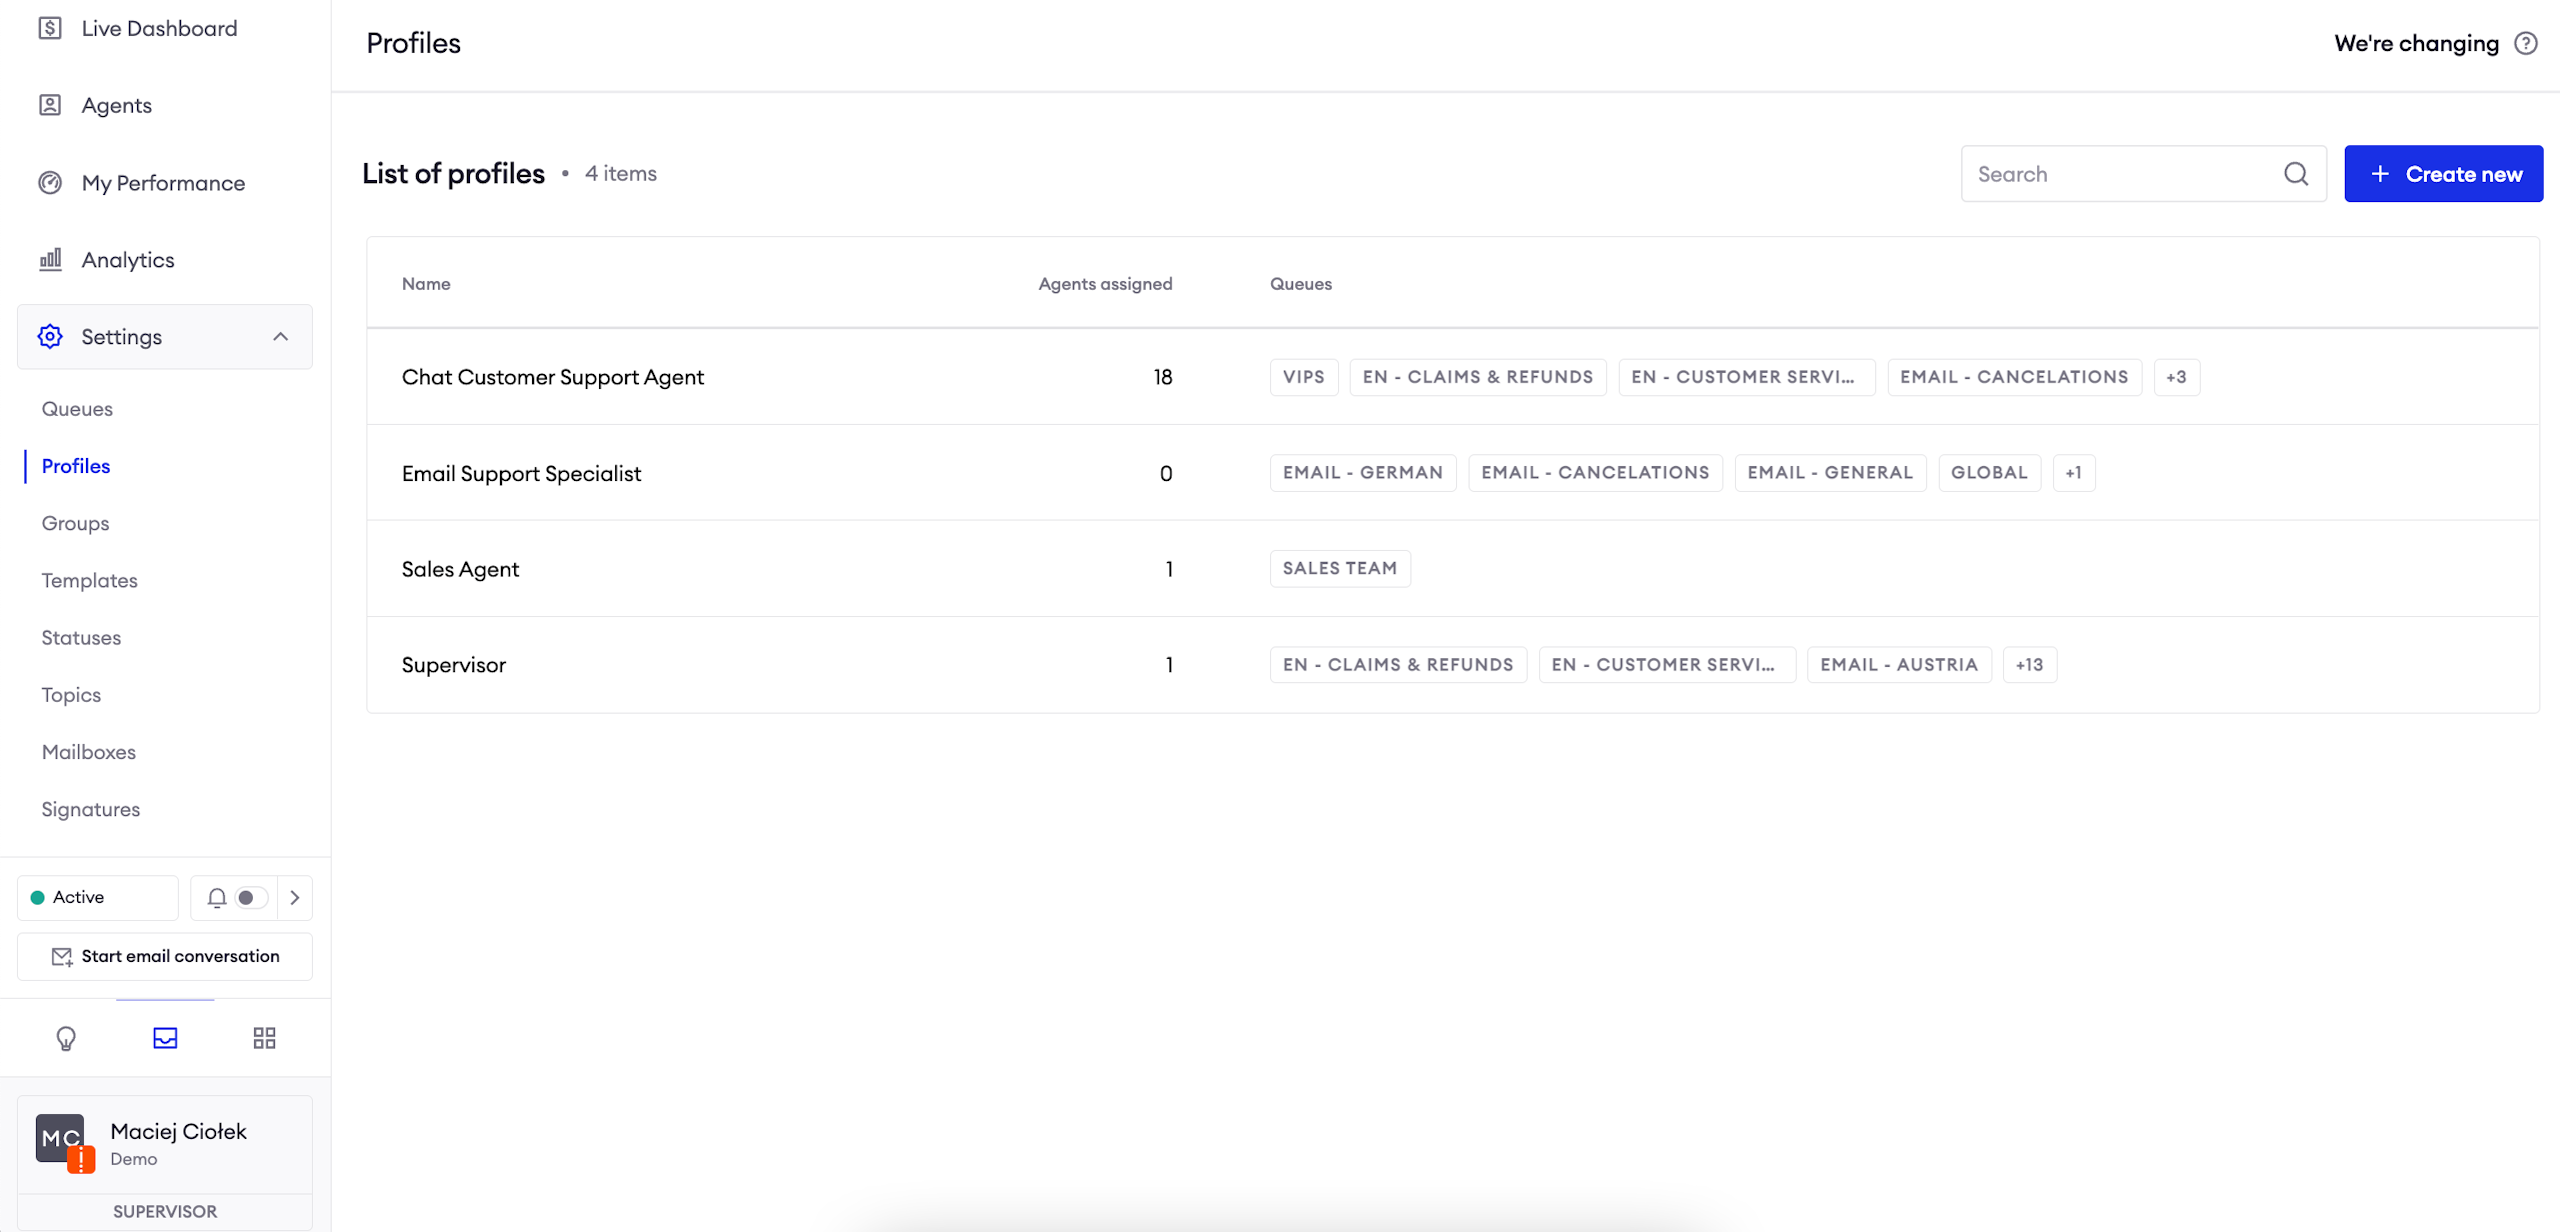
The list of Profiles
You can find it in the Settings tab of the Inbox section. It displays all configured profiles, and allows you to create a new one.
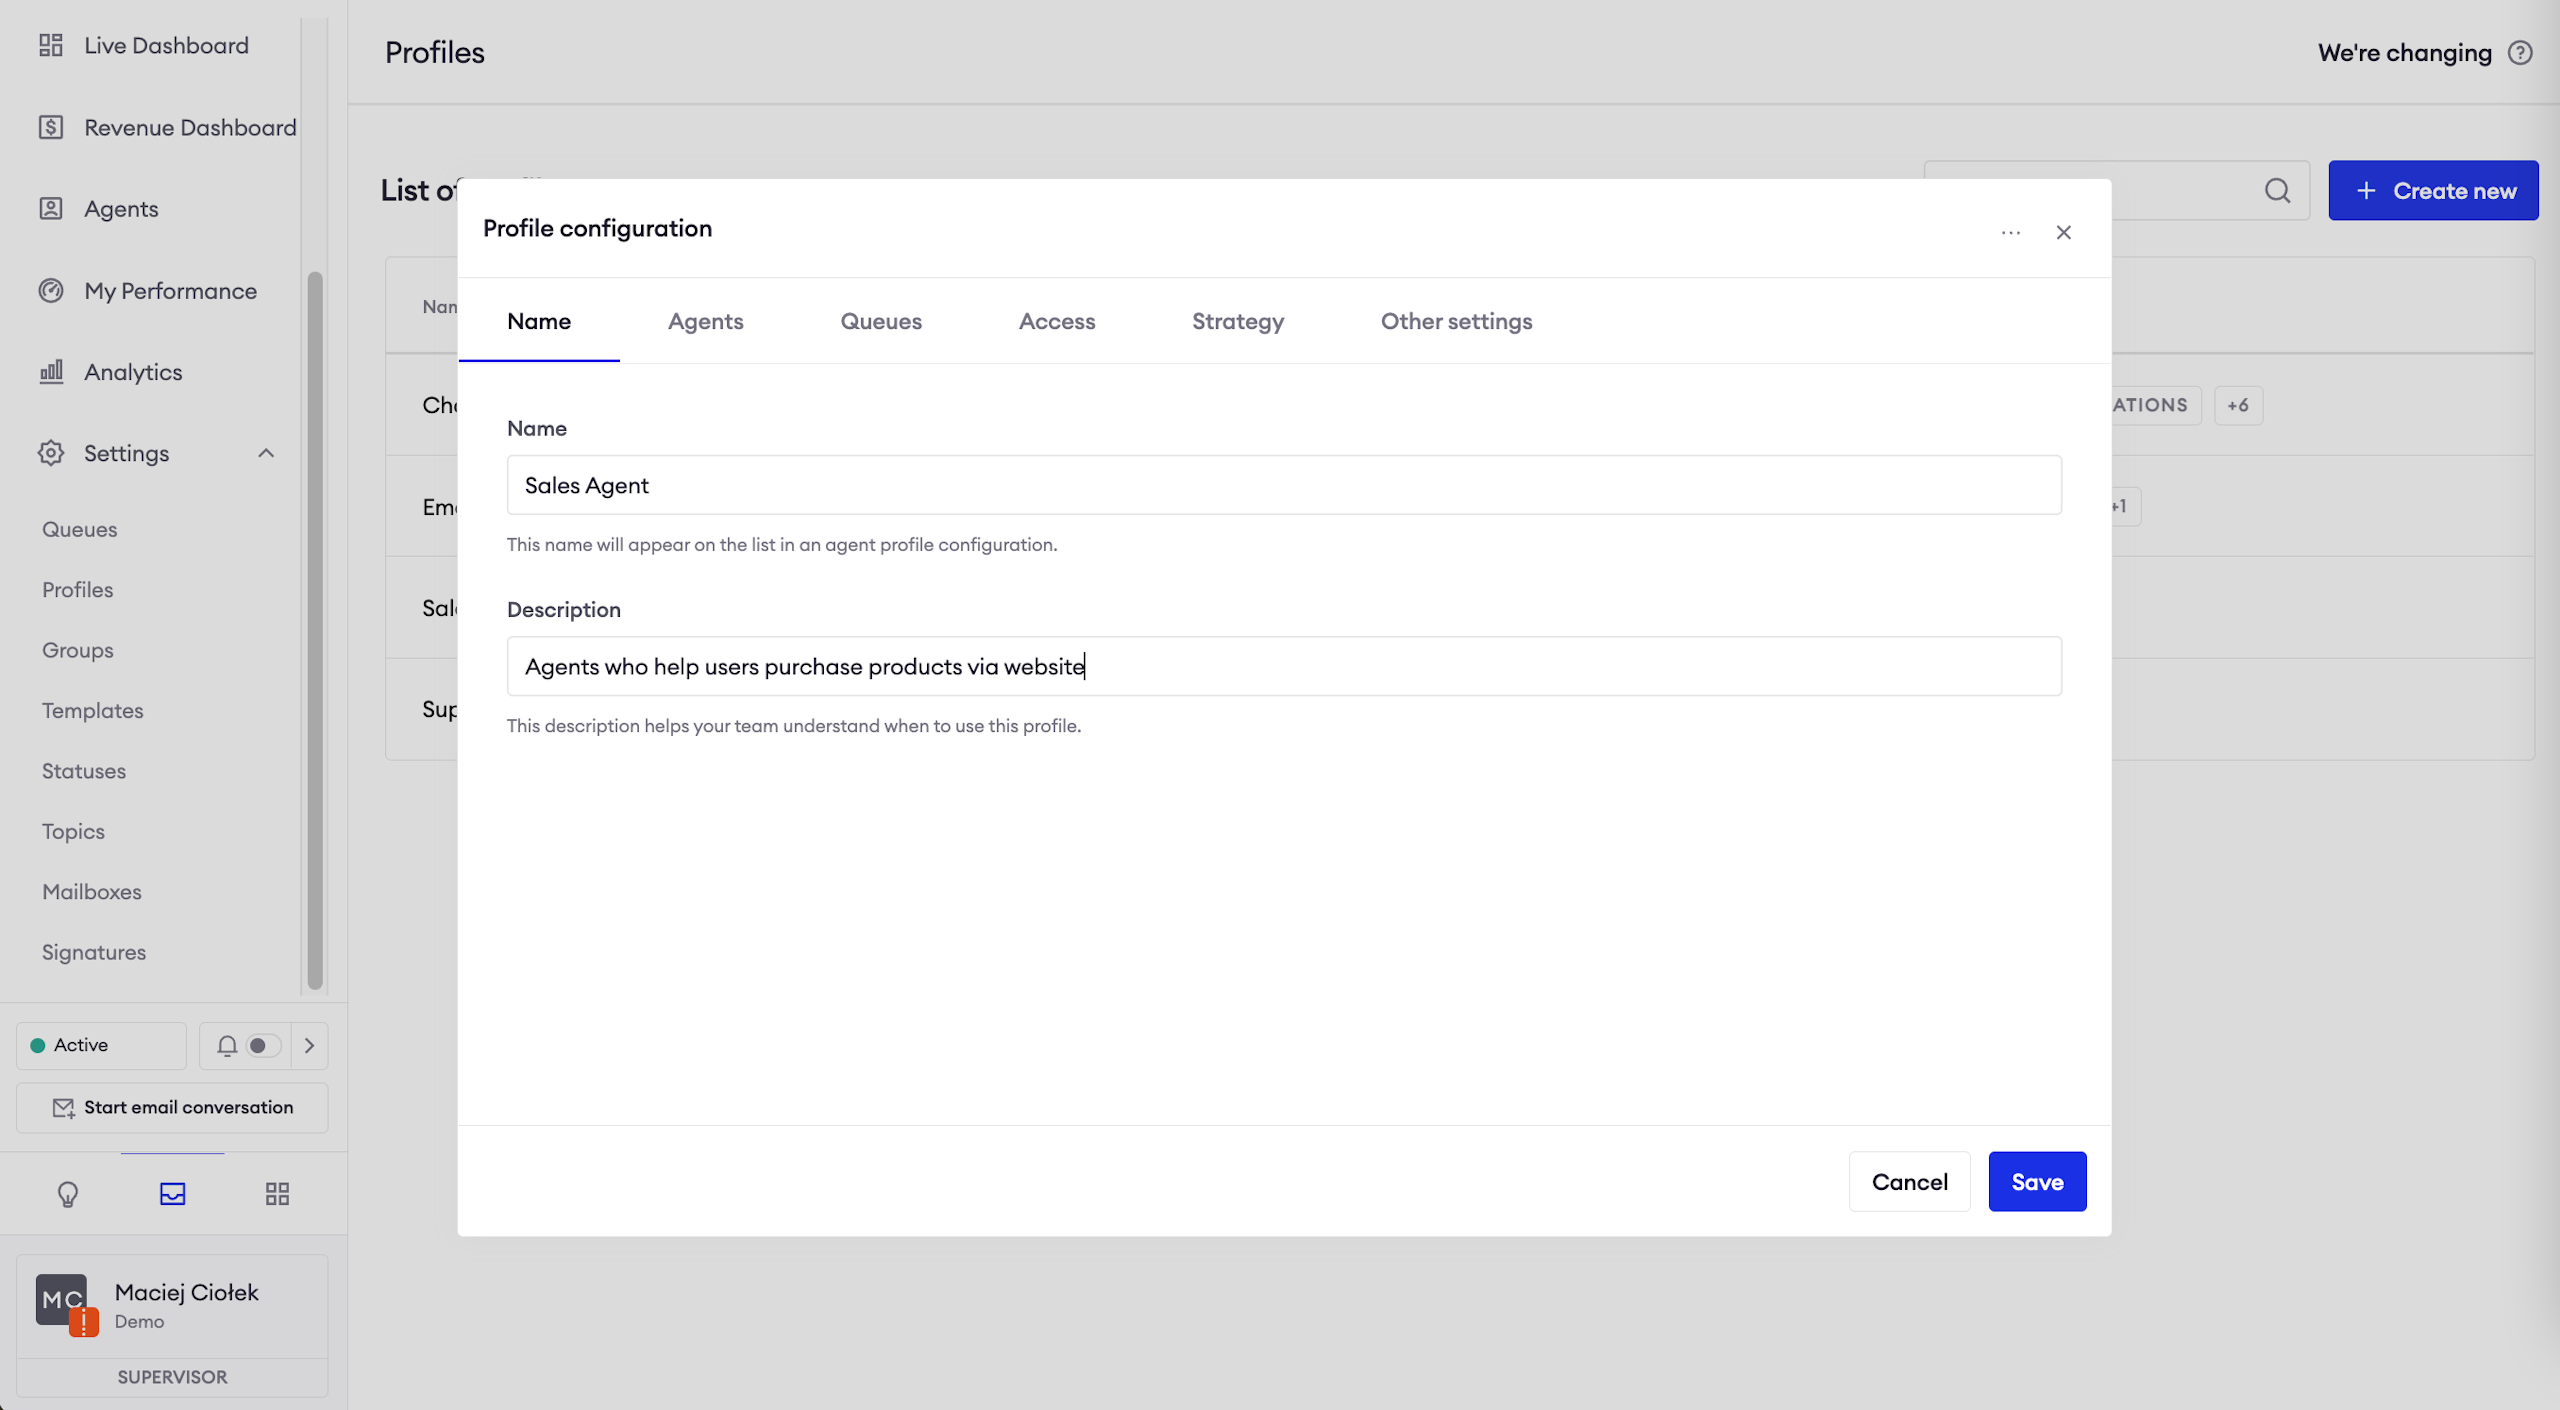
Profile name
Firstly, you need to give your profile a name. It will be displayed on the list of profiles, as well as in a number of other places in the application (such as the Live Dashboard).
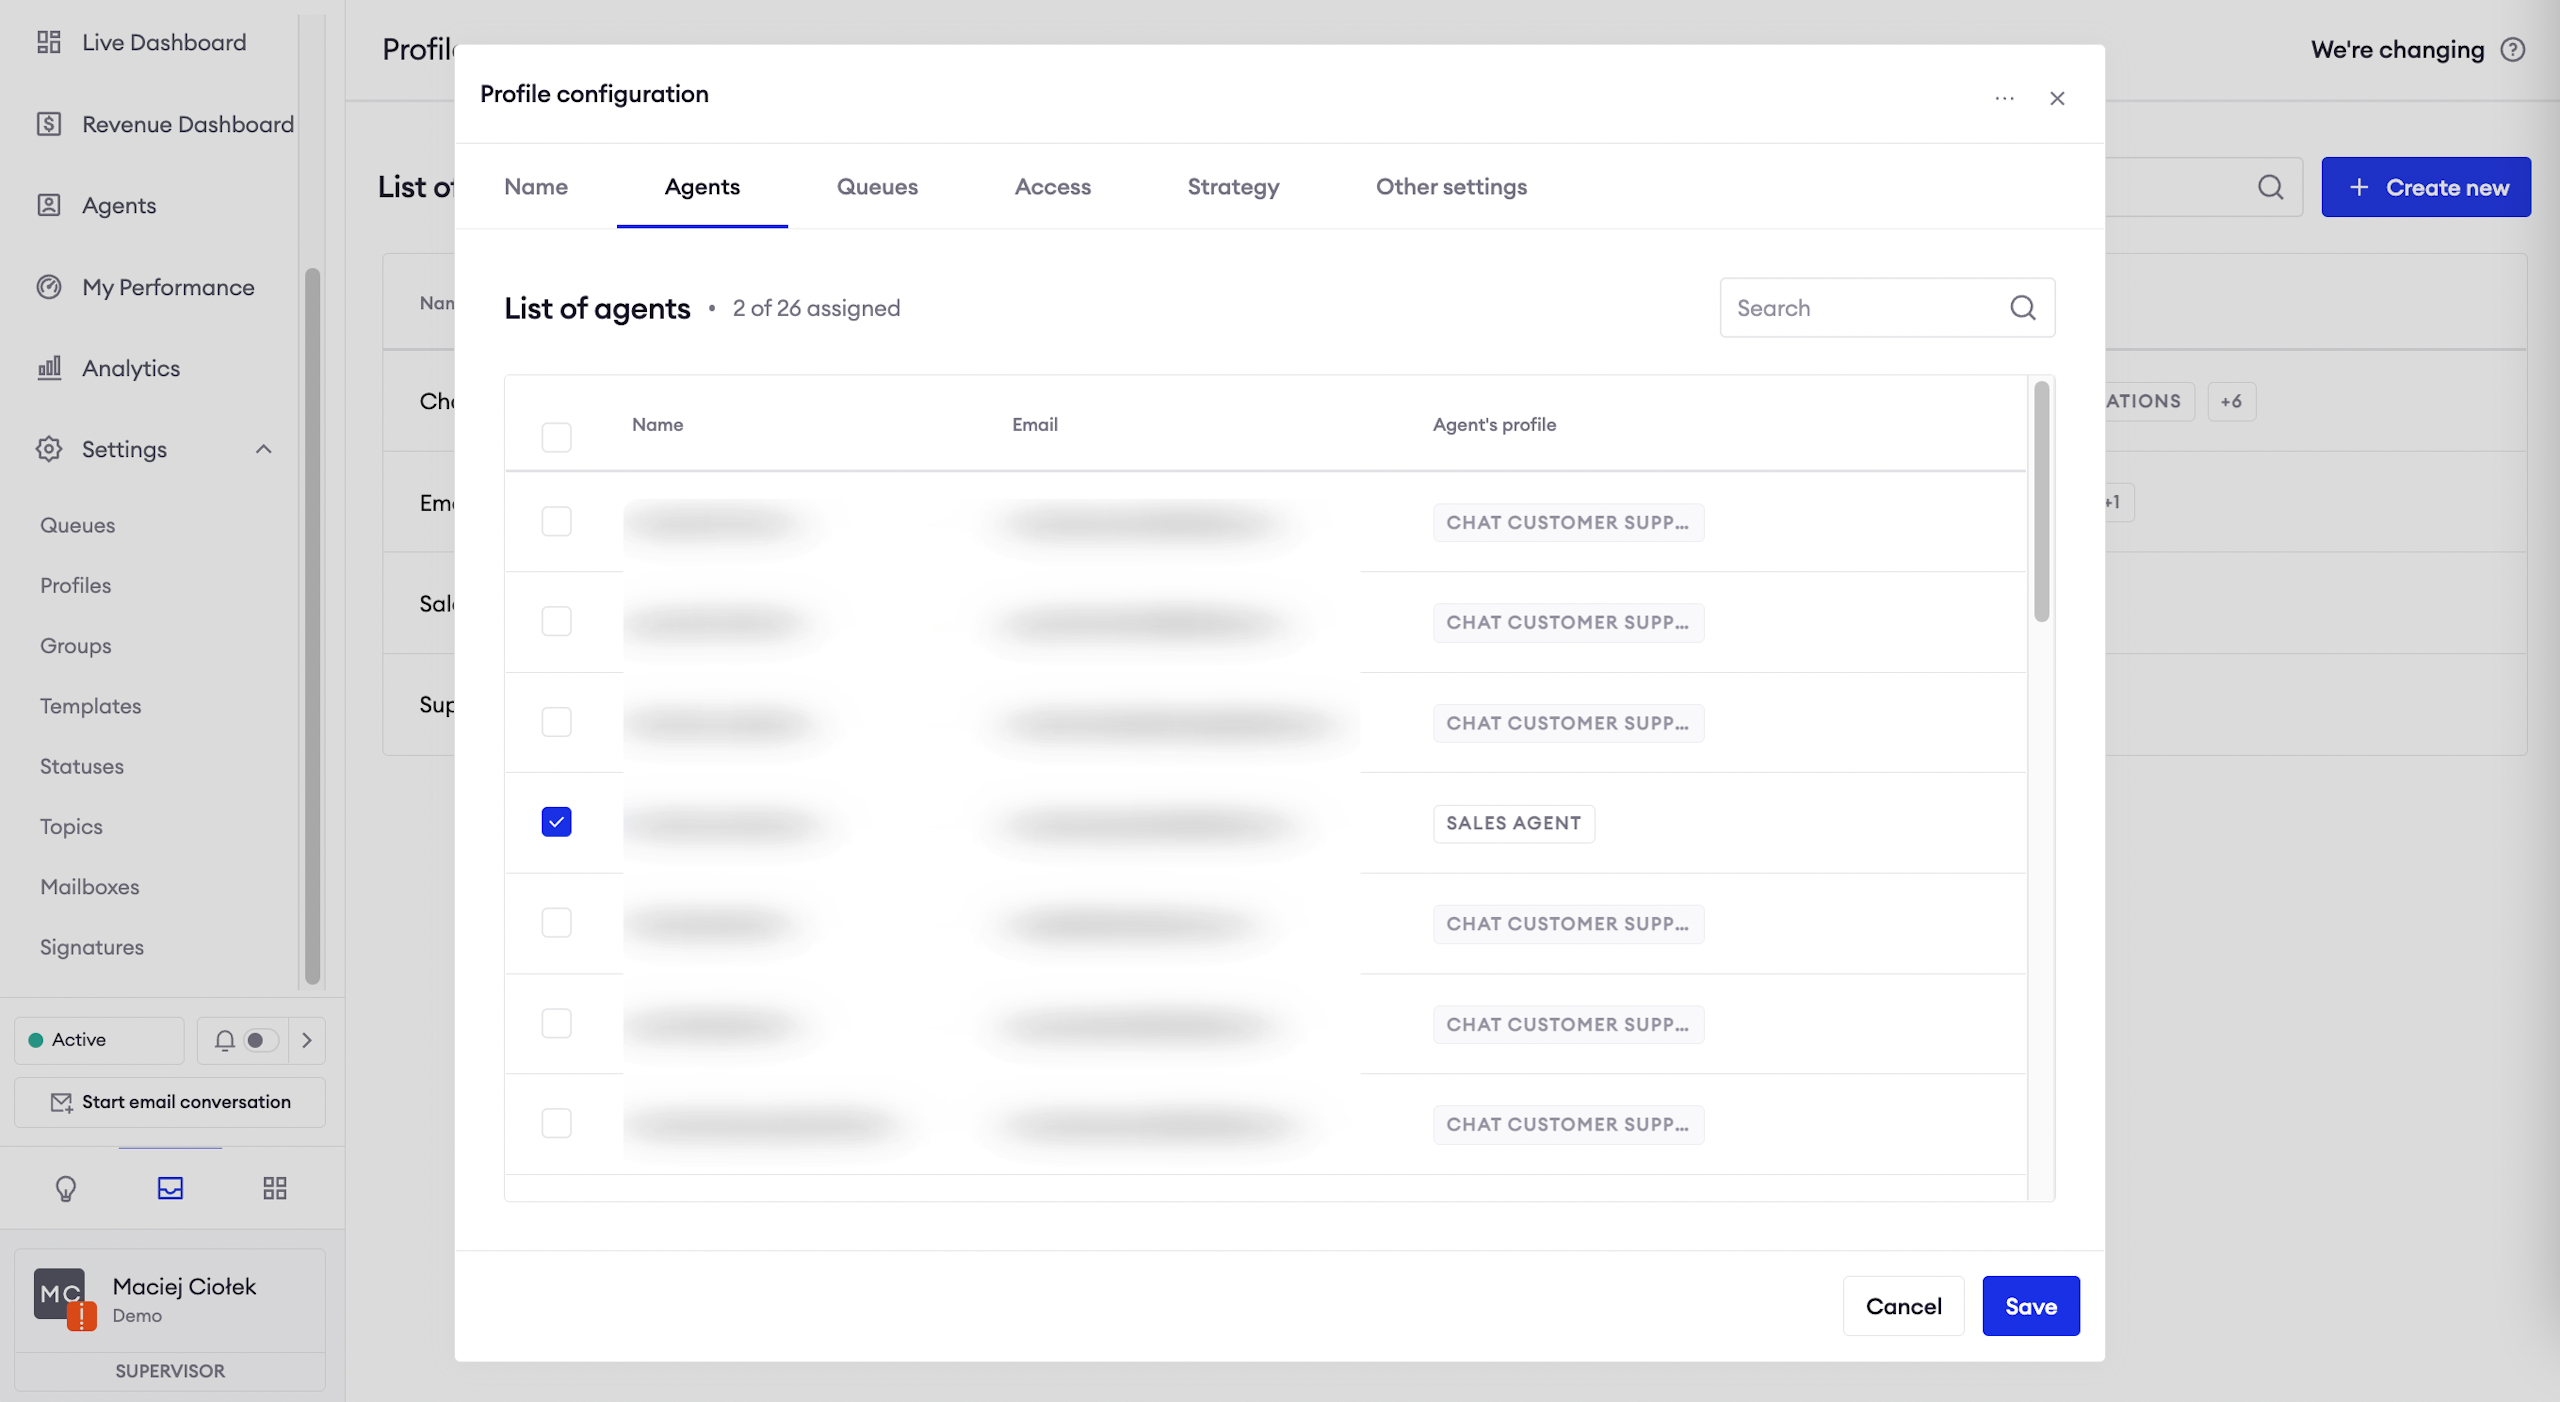
Agents
Secondly, you need to assign agents connected to the profile. An agent can belong to a single profile. Agents settings will be updated accordingly right after you save the configuration.
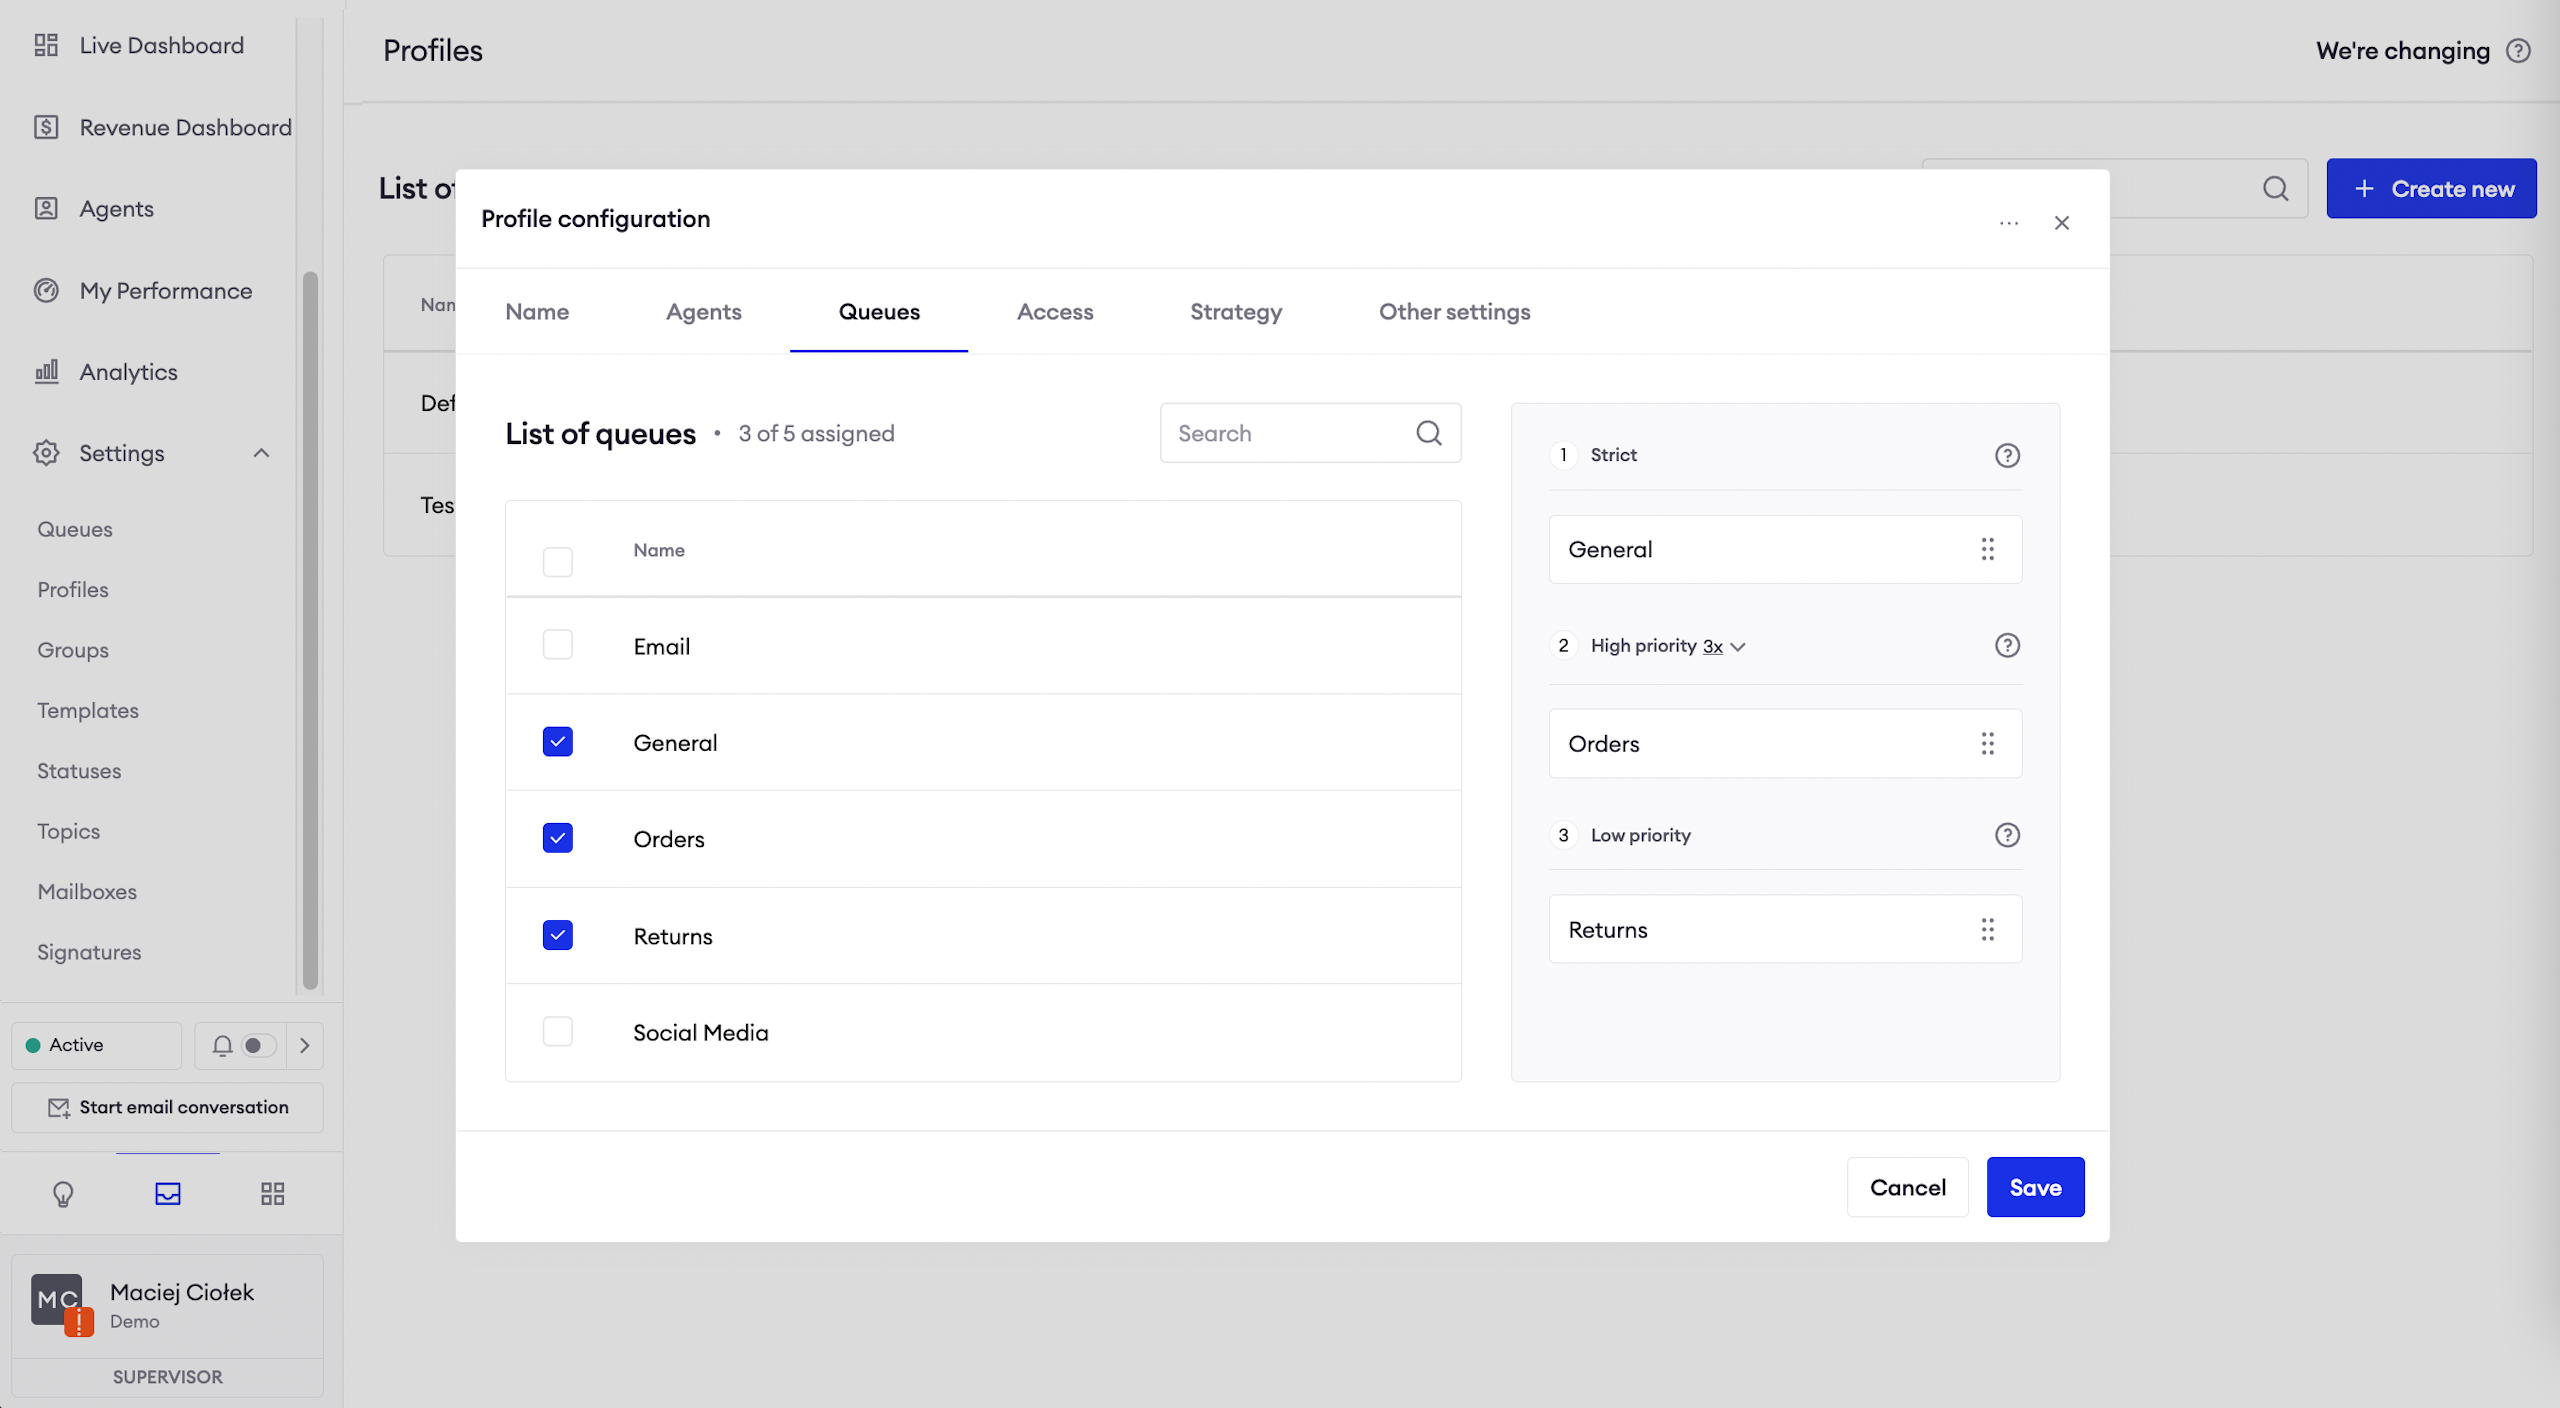
Queues
In the third step, you assign queues which agents in this profile will receive conversations from. On the right, you can find advanced options of chat routing. Just drag appropriate queues to the bracket of your choice. Below, you can find the description of each bracket.
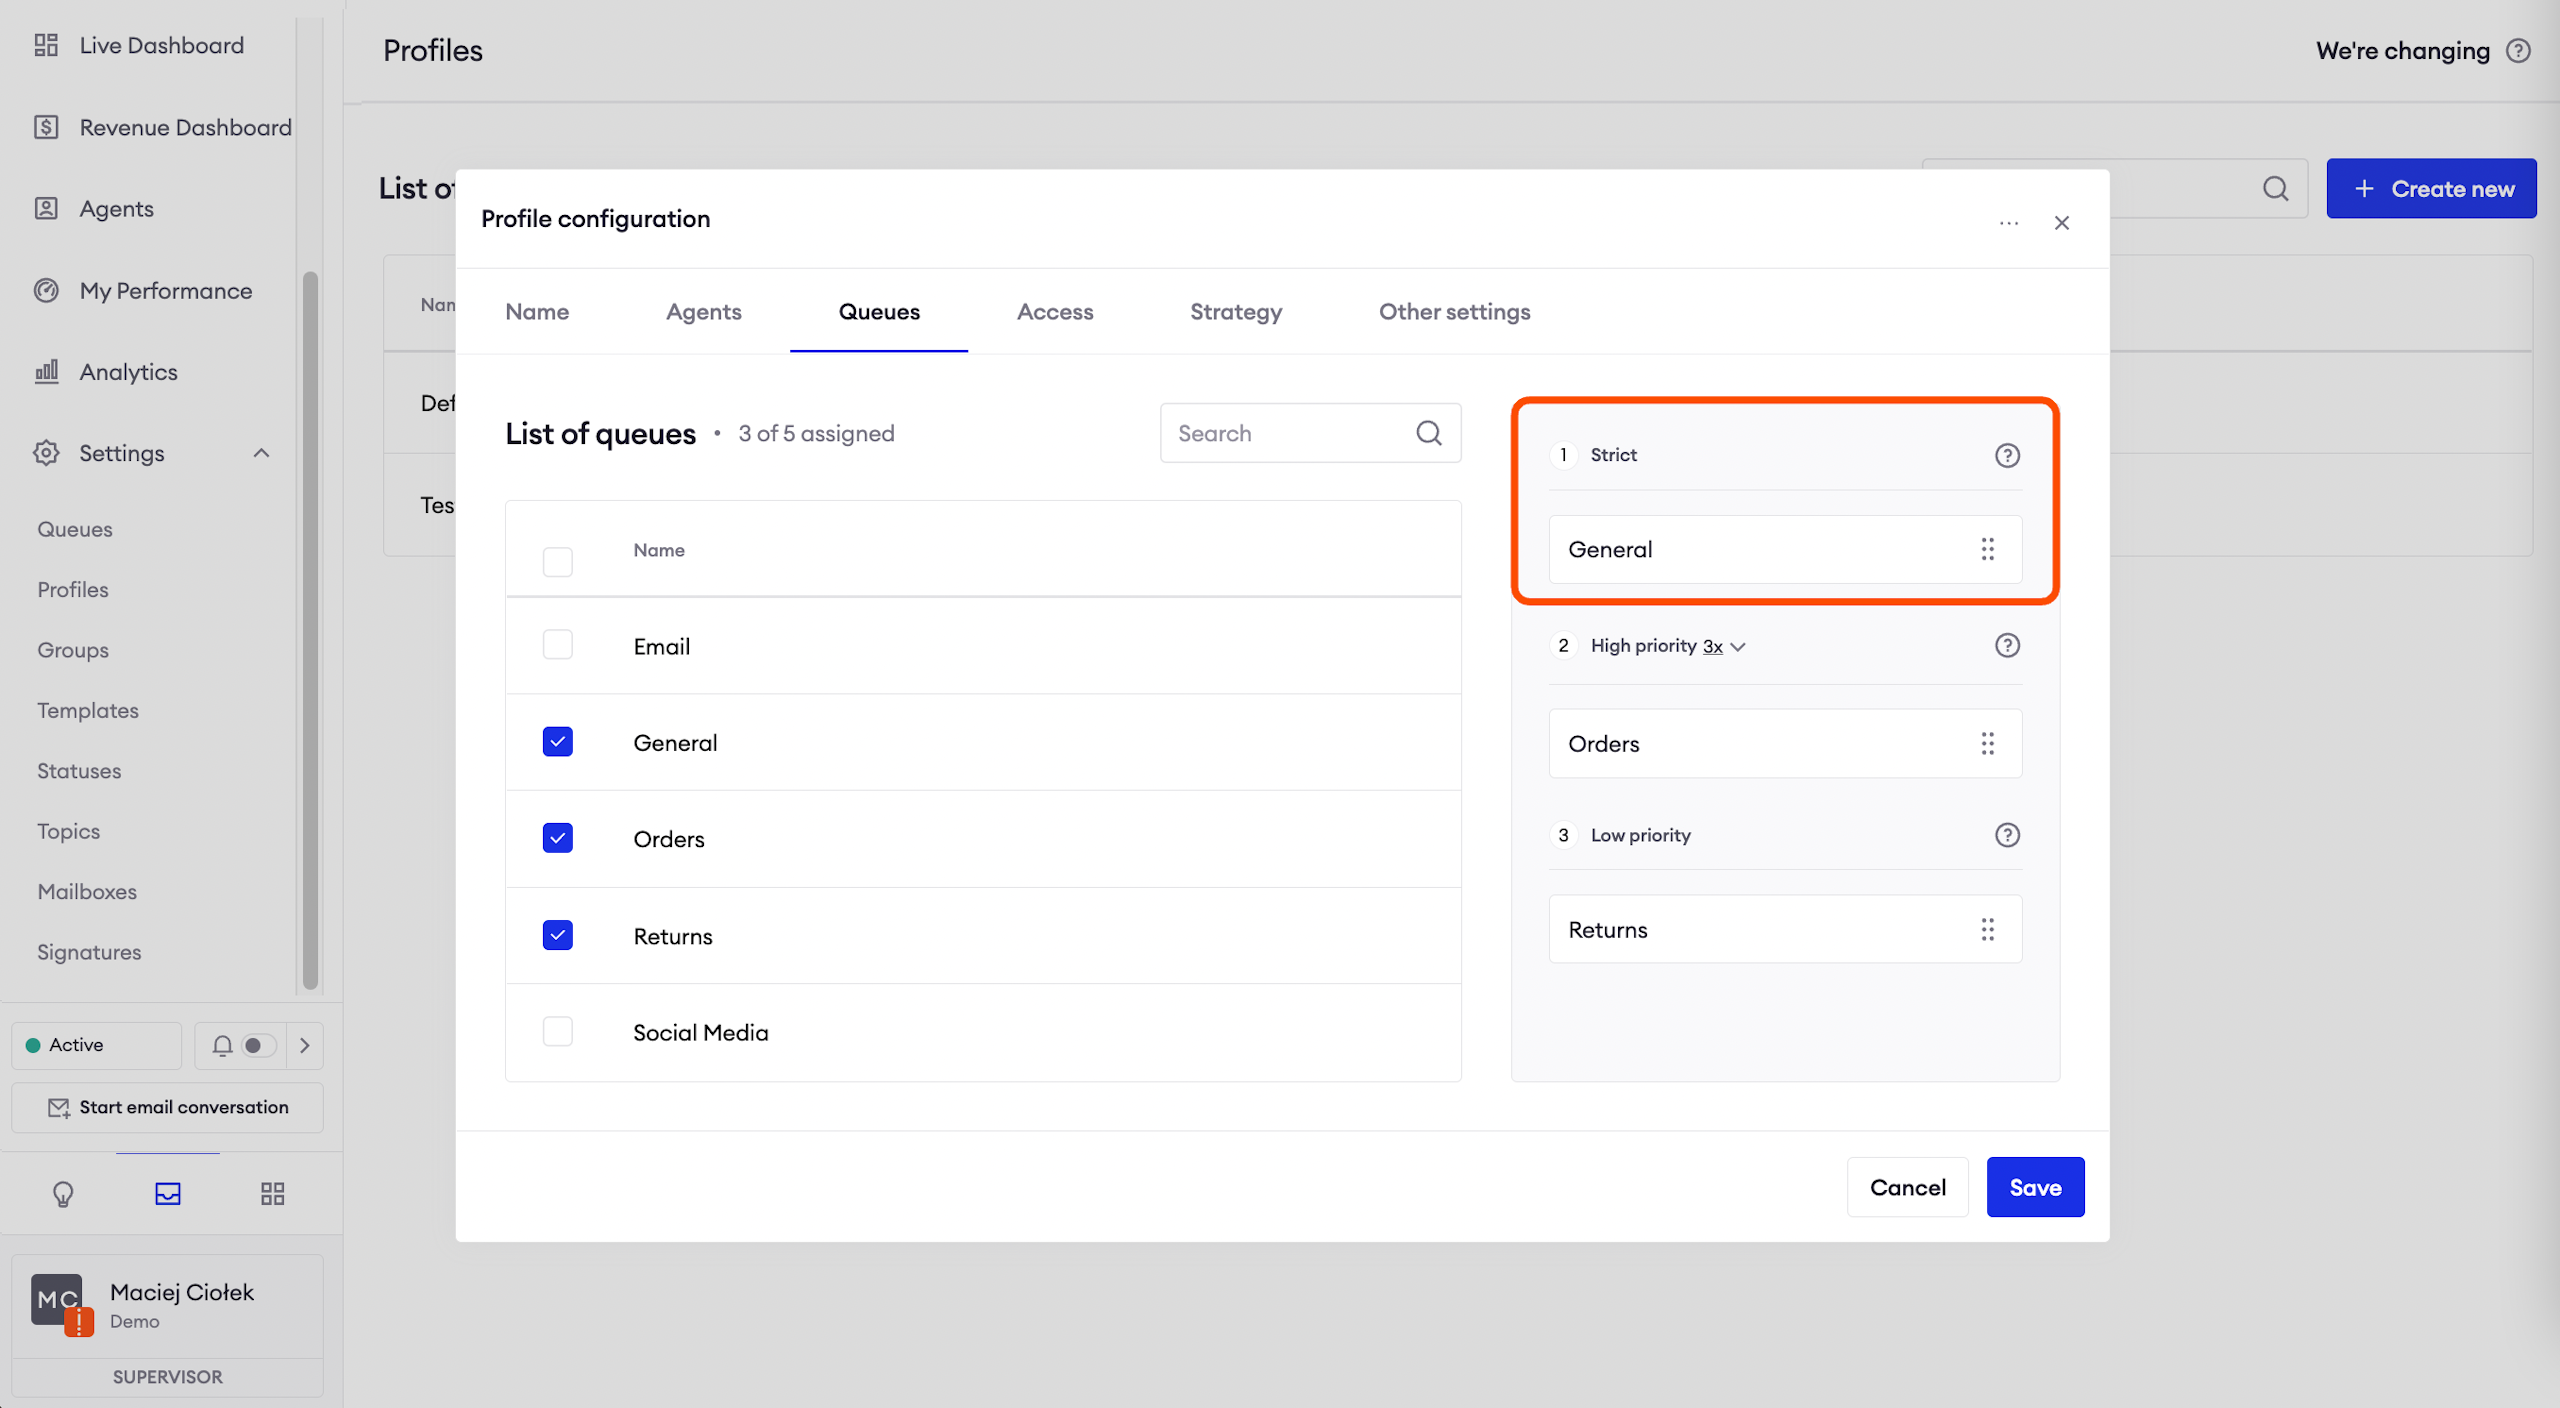
Strict
Chats will be prioritized according to the order they are placed in this bracket, from top to bottom. This bracket takes full precedence over others. Messages from other queues won't be assigned to agents until strict queues are empty.
Example:Chats from the sales questions queue will be assigned to Agents before chats from the Product questions queue.
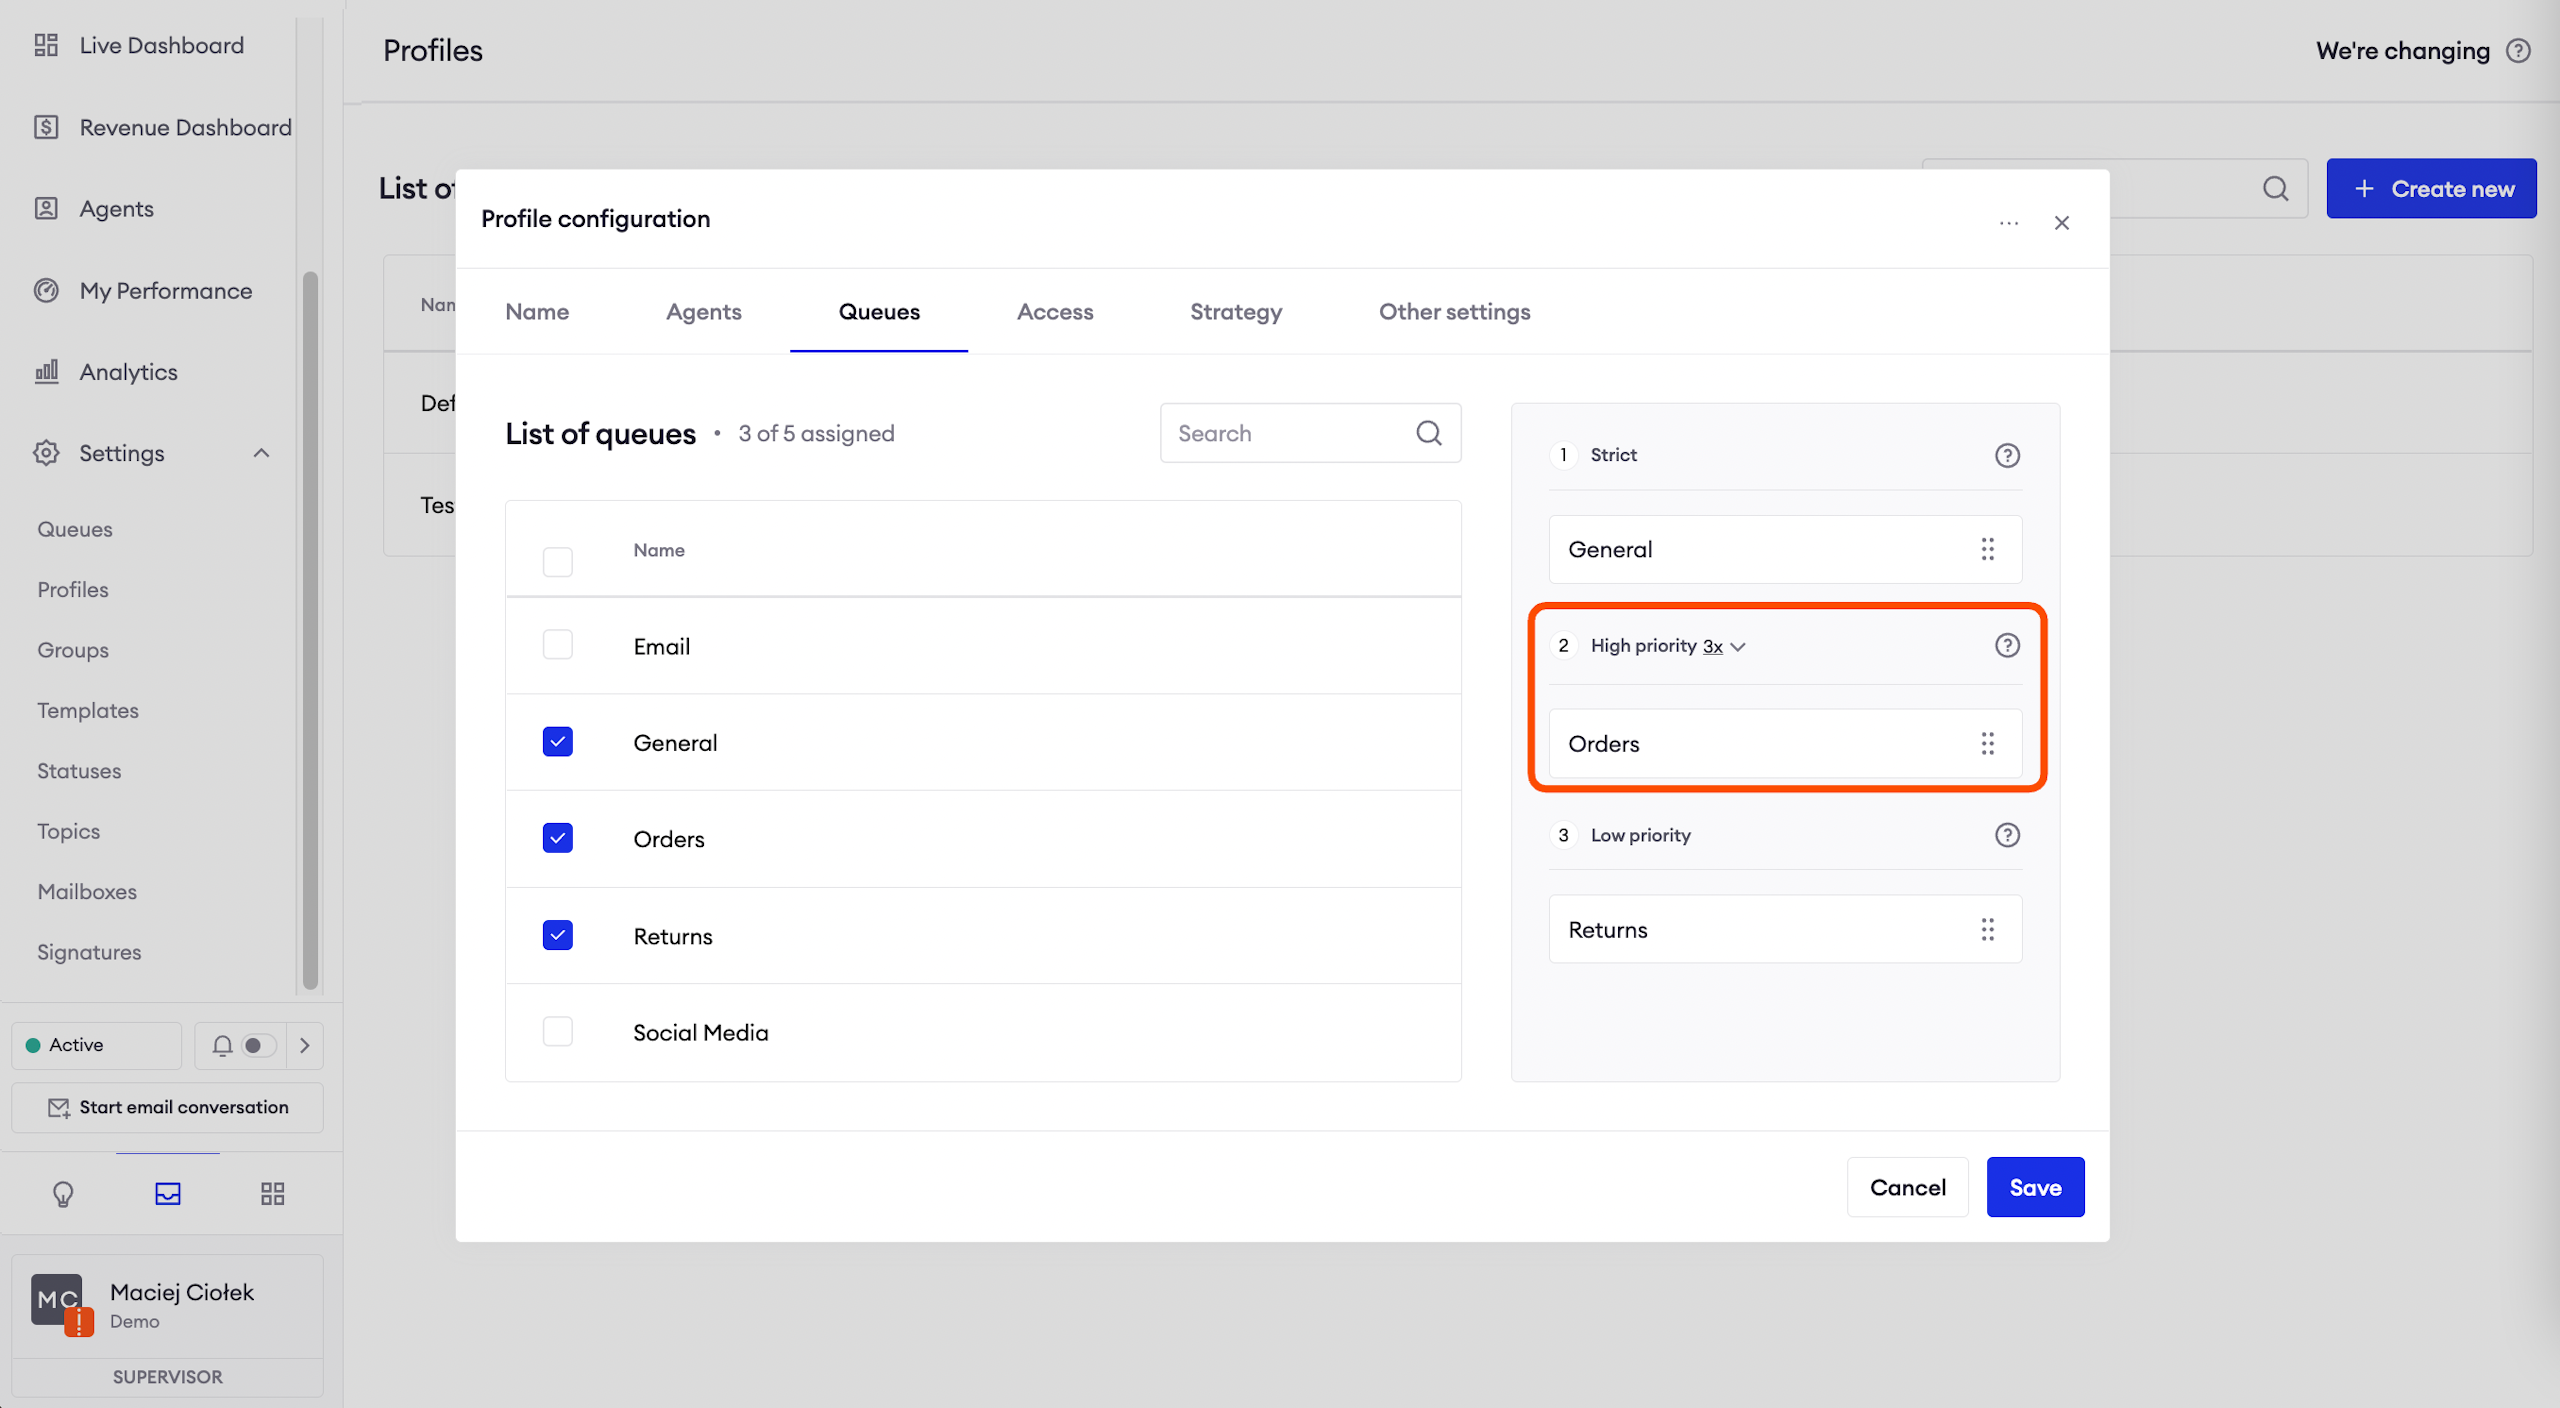
High priority
Chats from the high and low priority queues will be taken in the order which prioritizes conversations close to exceeding the First Response Time SLA. It means that the next conversation assigned to your agents will be one from either high or low priority bracket which is the closest to exceeding the SLA.
When first response time SLAs in all queues (within high and low priority) are exceeded, the number helps you set how many times more conversations should be assigned from the high priority group before the low priority gets handled. For example, if you set it to 4x, agents will receive four times more chats from high priority queues than low priority ones.
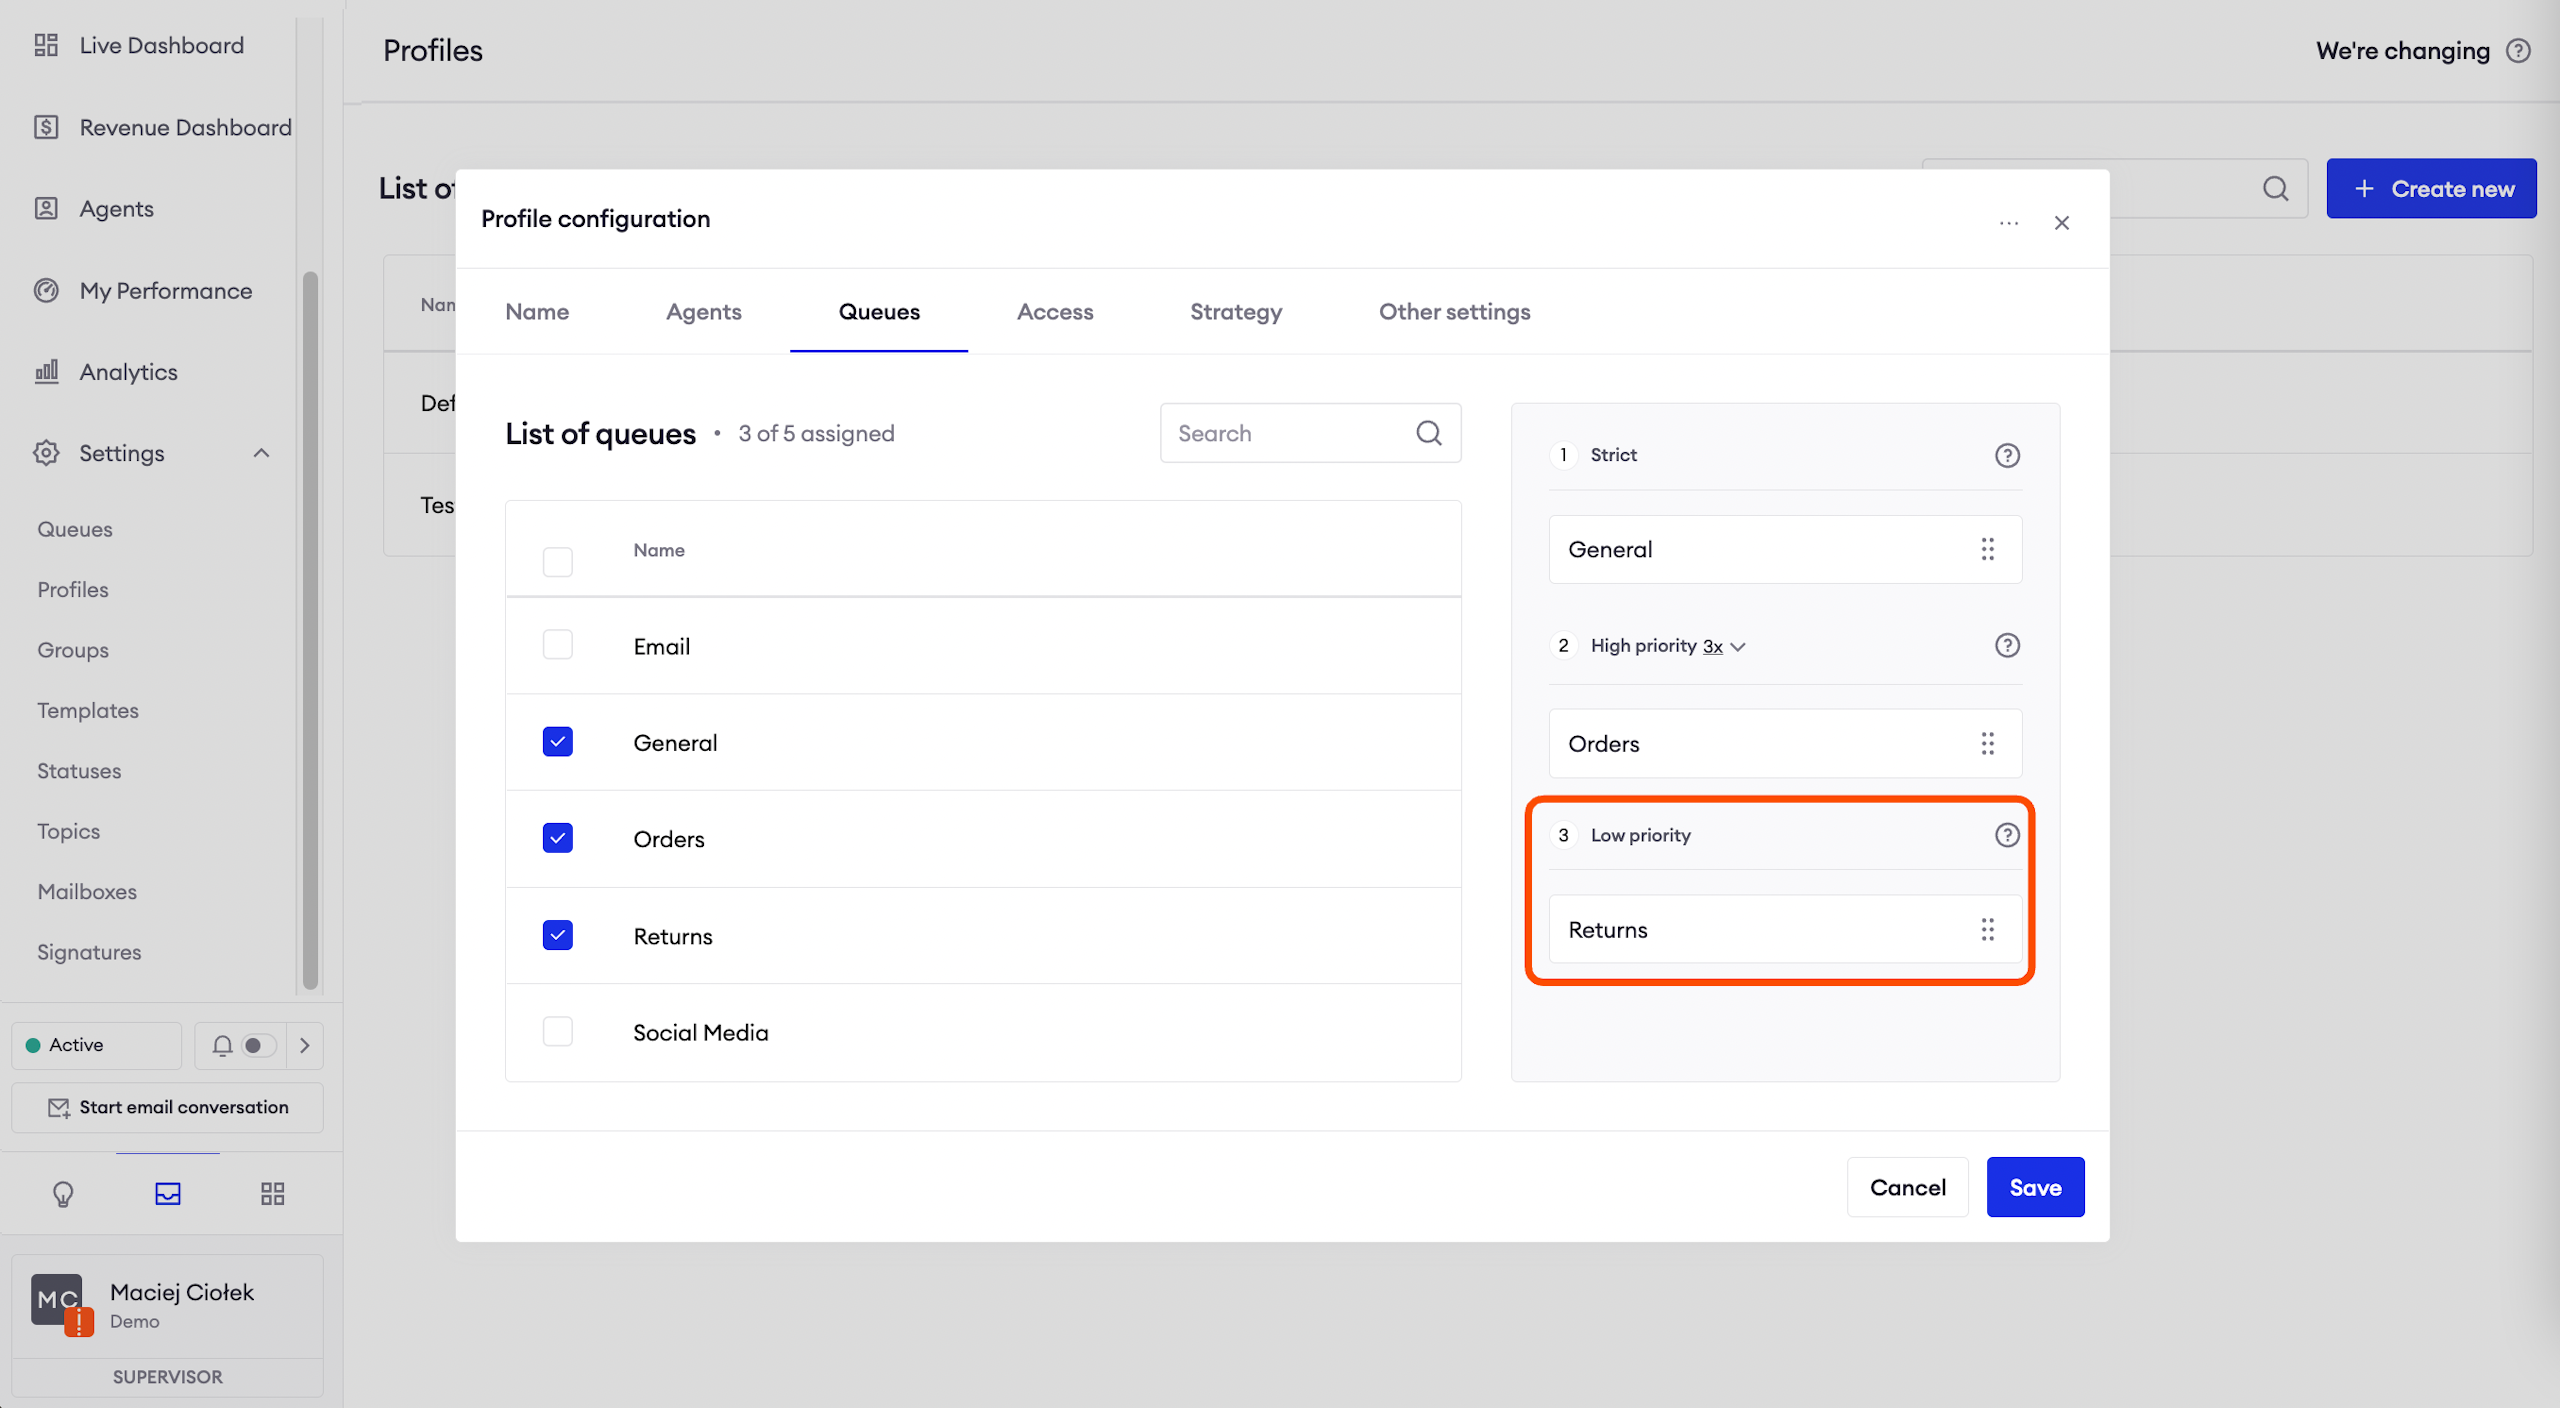
Low priority
Chats from the high and low priority queues will be taken in the order which prioritizes conversations close to exceeding the first response time SLA. It means that the next conversation assigned to your agents will be one from either high or low priority bracket which is the closest to exceeding the SLA.
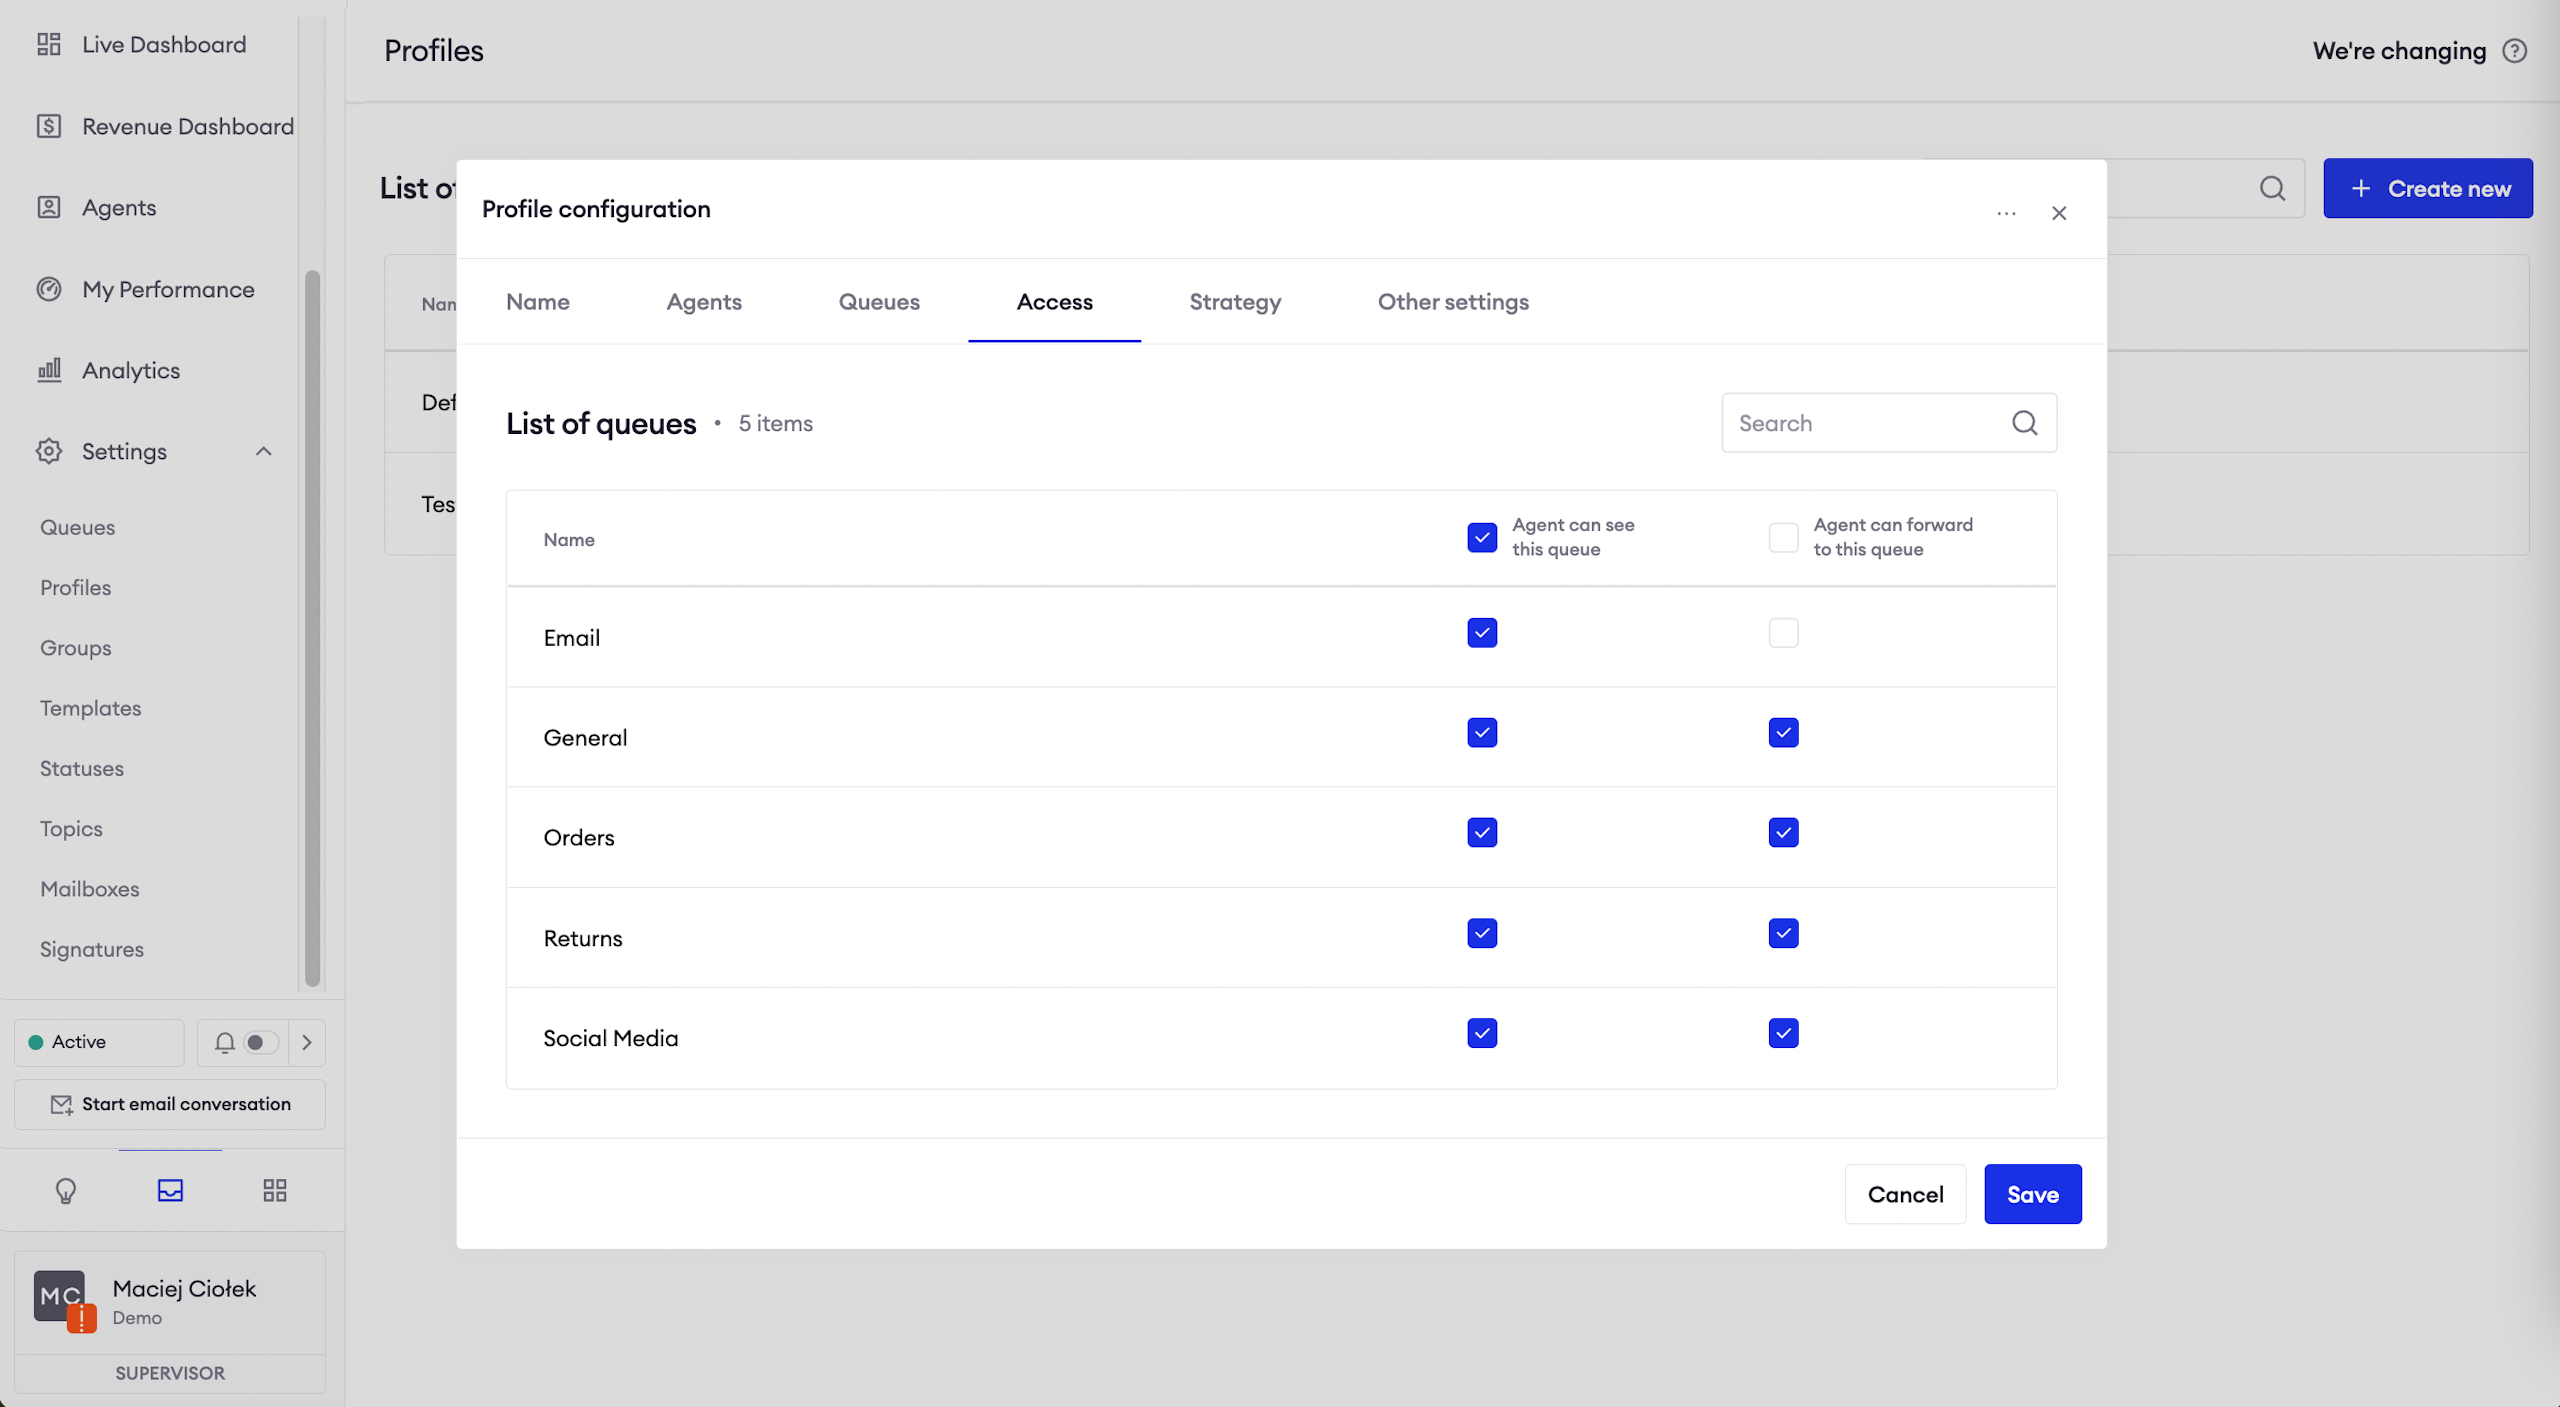
Access
Previously, we selected the queues from which agents in this profile will receive chats. During this step, we can customize agents’ access even further using the following options:
Agents can see this queue: it means that agents’ have visibility of this queue in Threads, Conversations and the Live Dashboard.
Example:Agents from the sales profile can’t see the mobile app queue. It means they won’t be able to find chats from this queue in threads or conversations view, and if they go to the Live Dashboard and click on the Waiting threads value, they will see the information that they don’t have permission to access the list of threads.
Agents can forward to this queue: select the queues which agents in this profile will be able to forward conversations to.
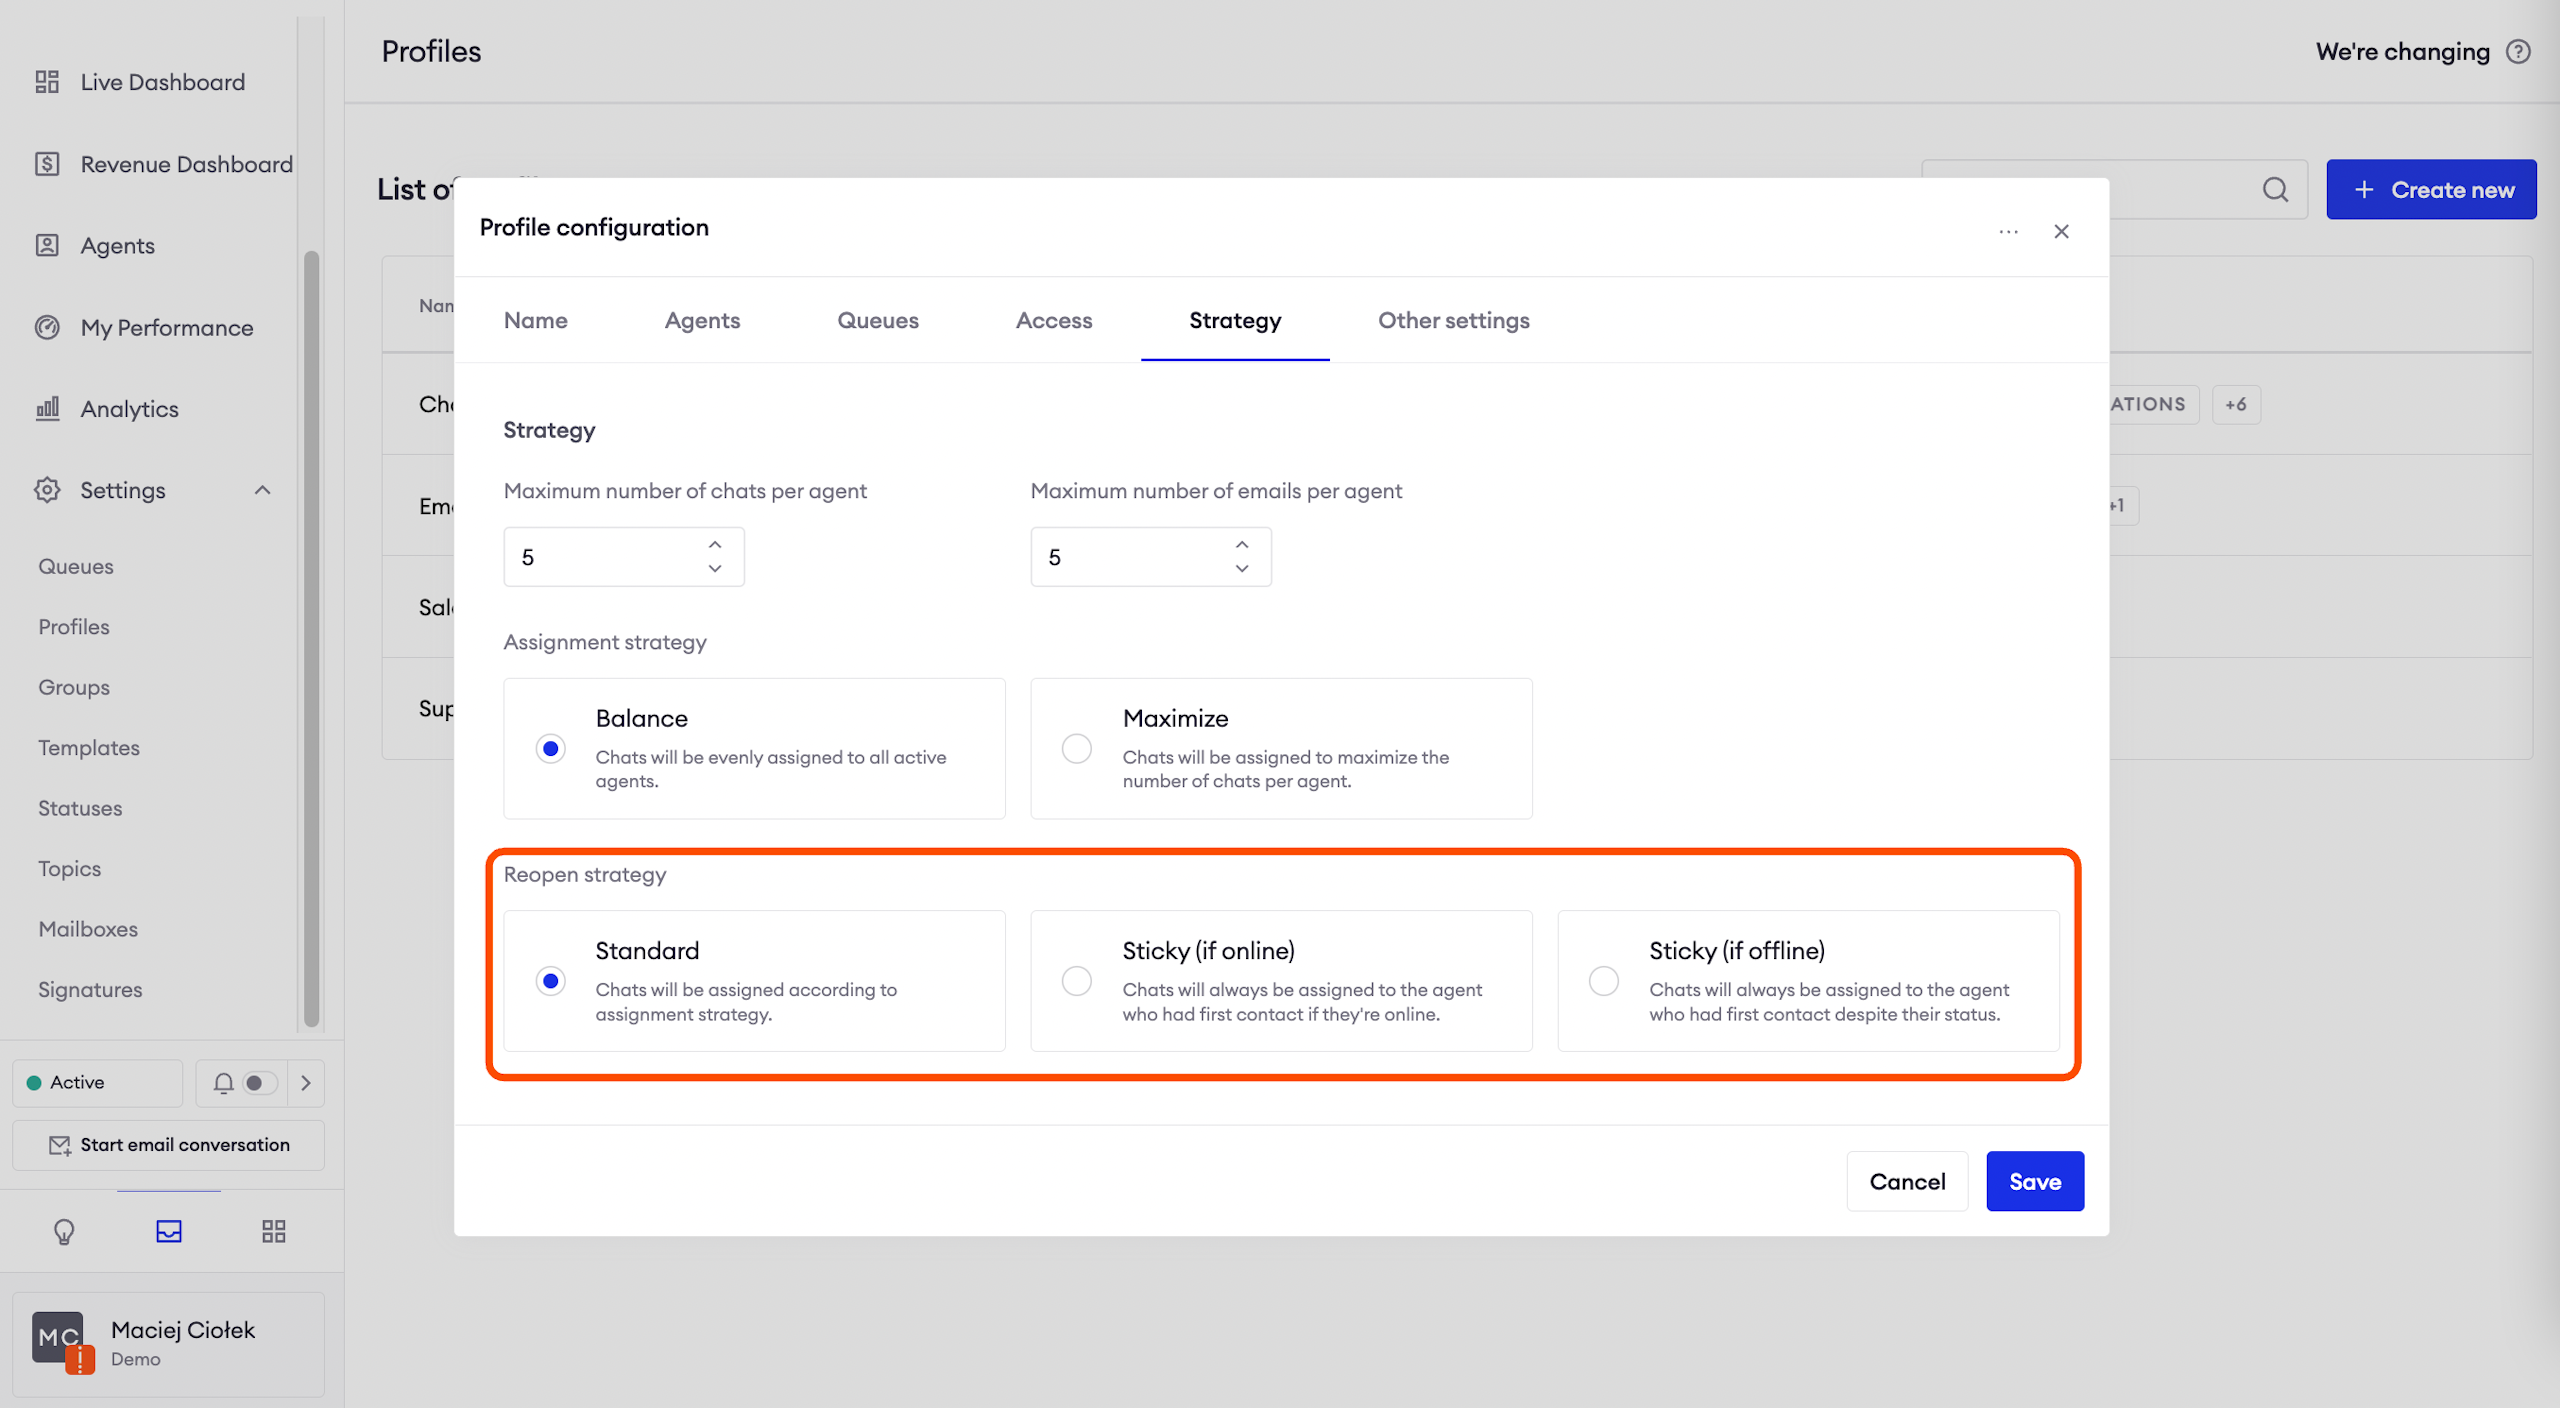
Strategy
This section allows you to determine how threads will be distributed among agents assigned to this profile.
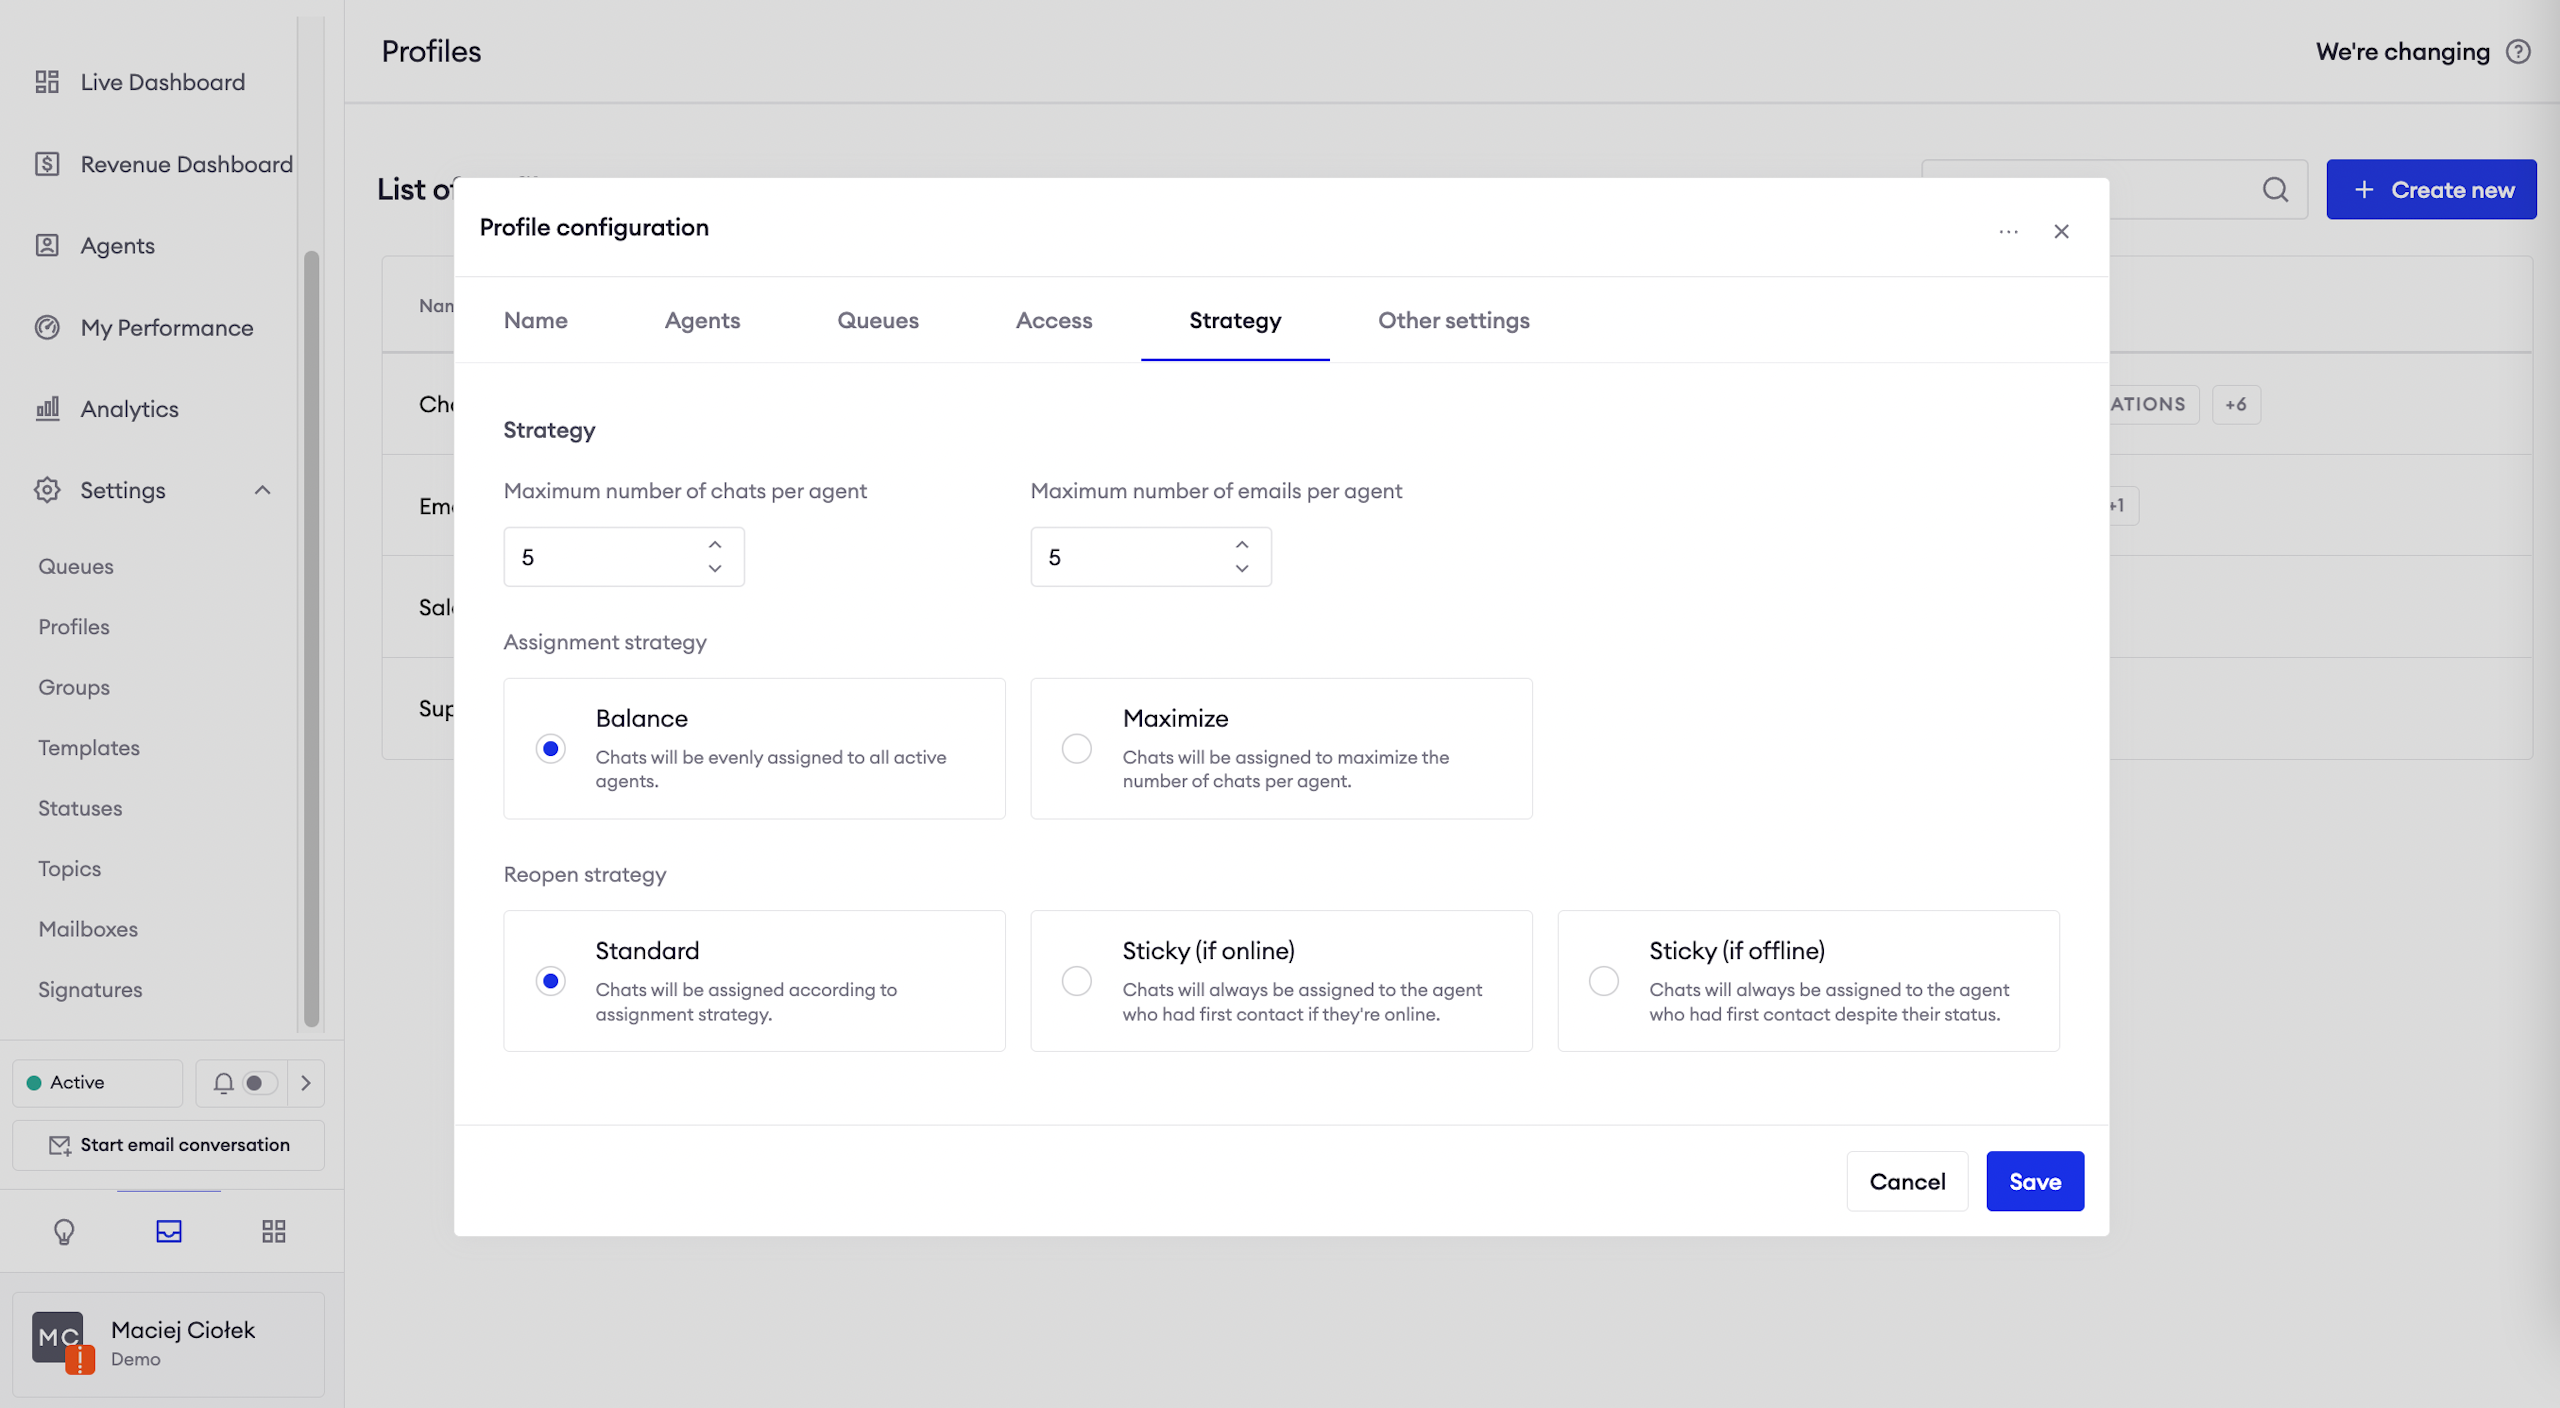
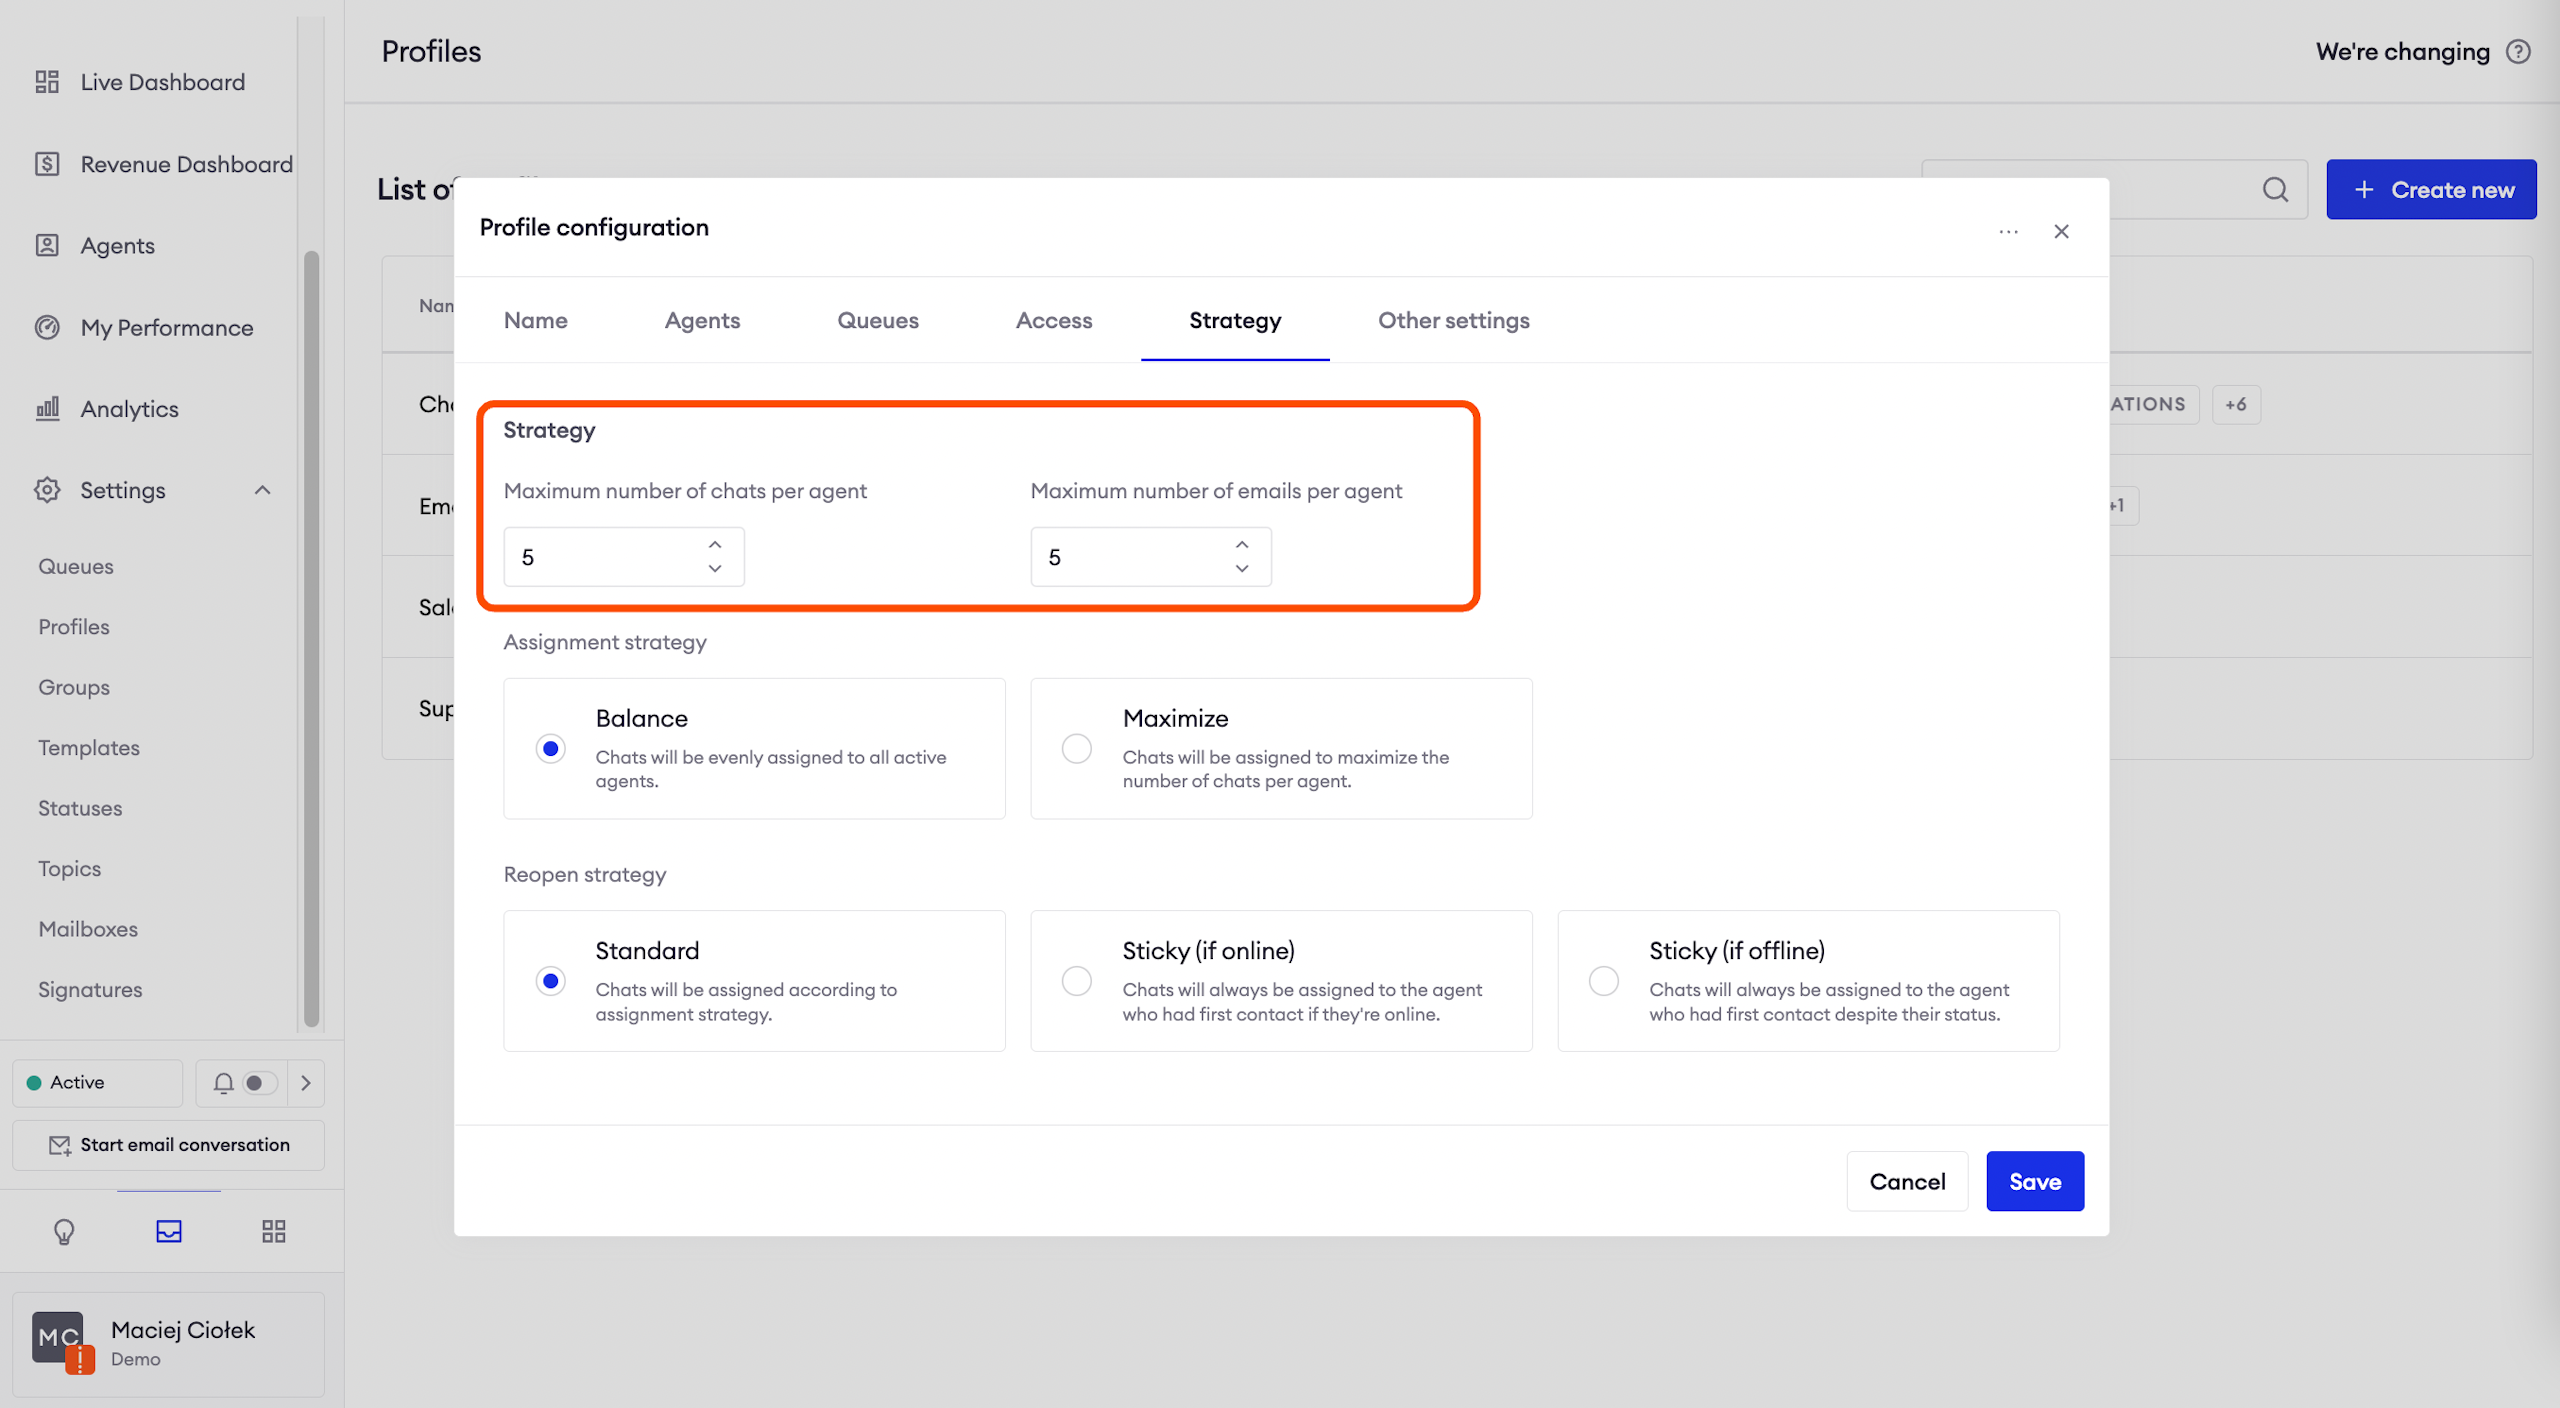
Agent's threads limits
You can set the maximum number of active chats and emails per agent.
AttentionRemember that chats in the Postponed folder will not be counted towards this limit.
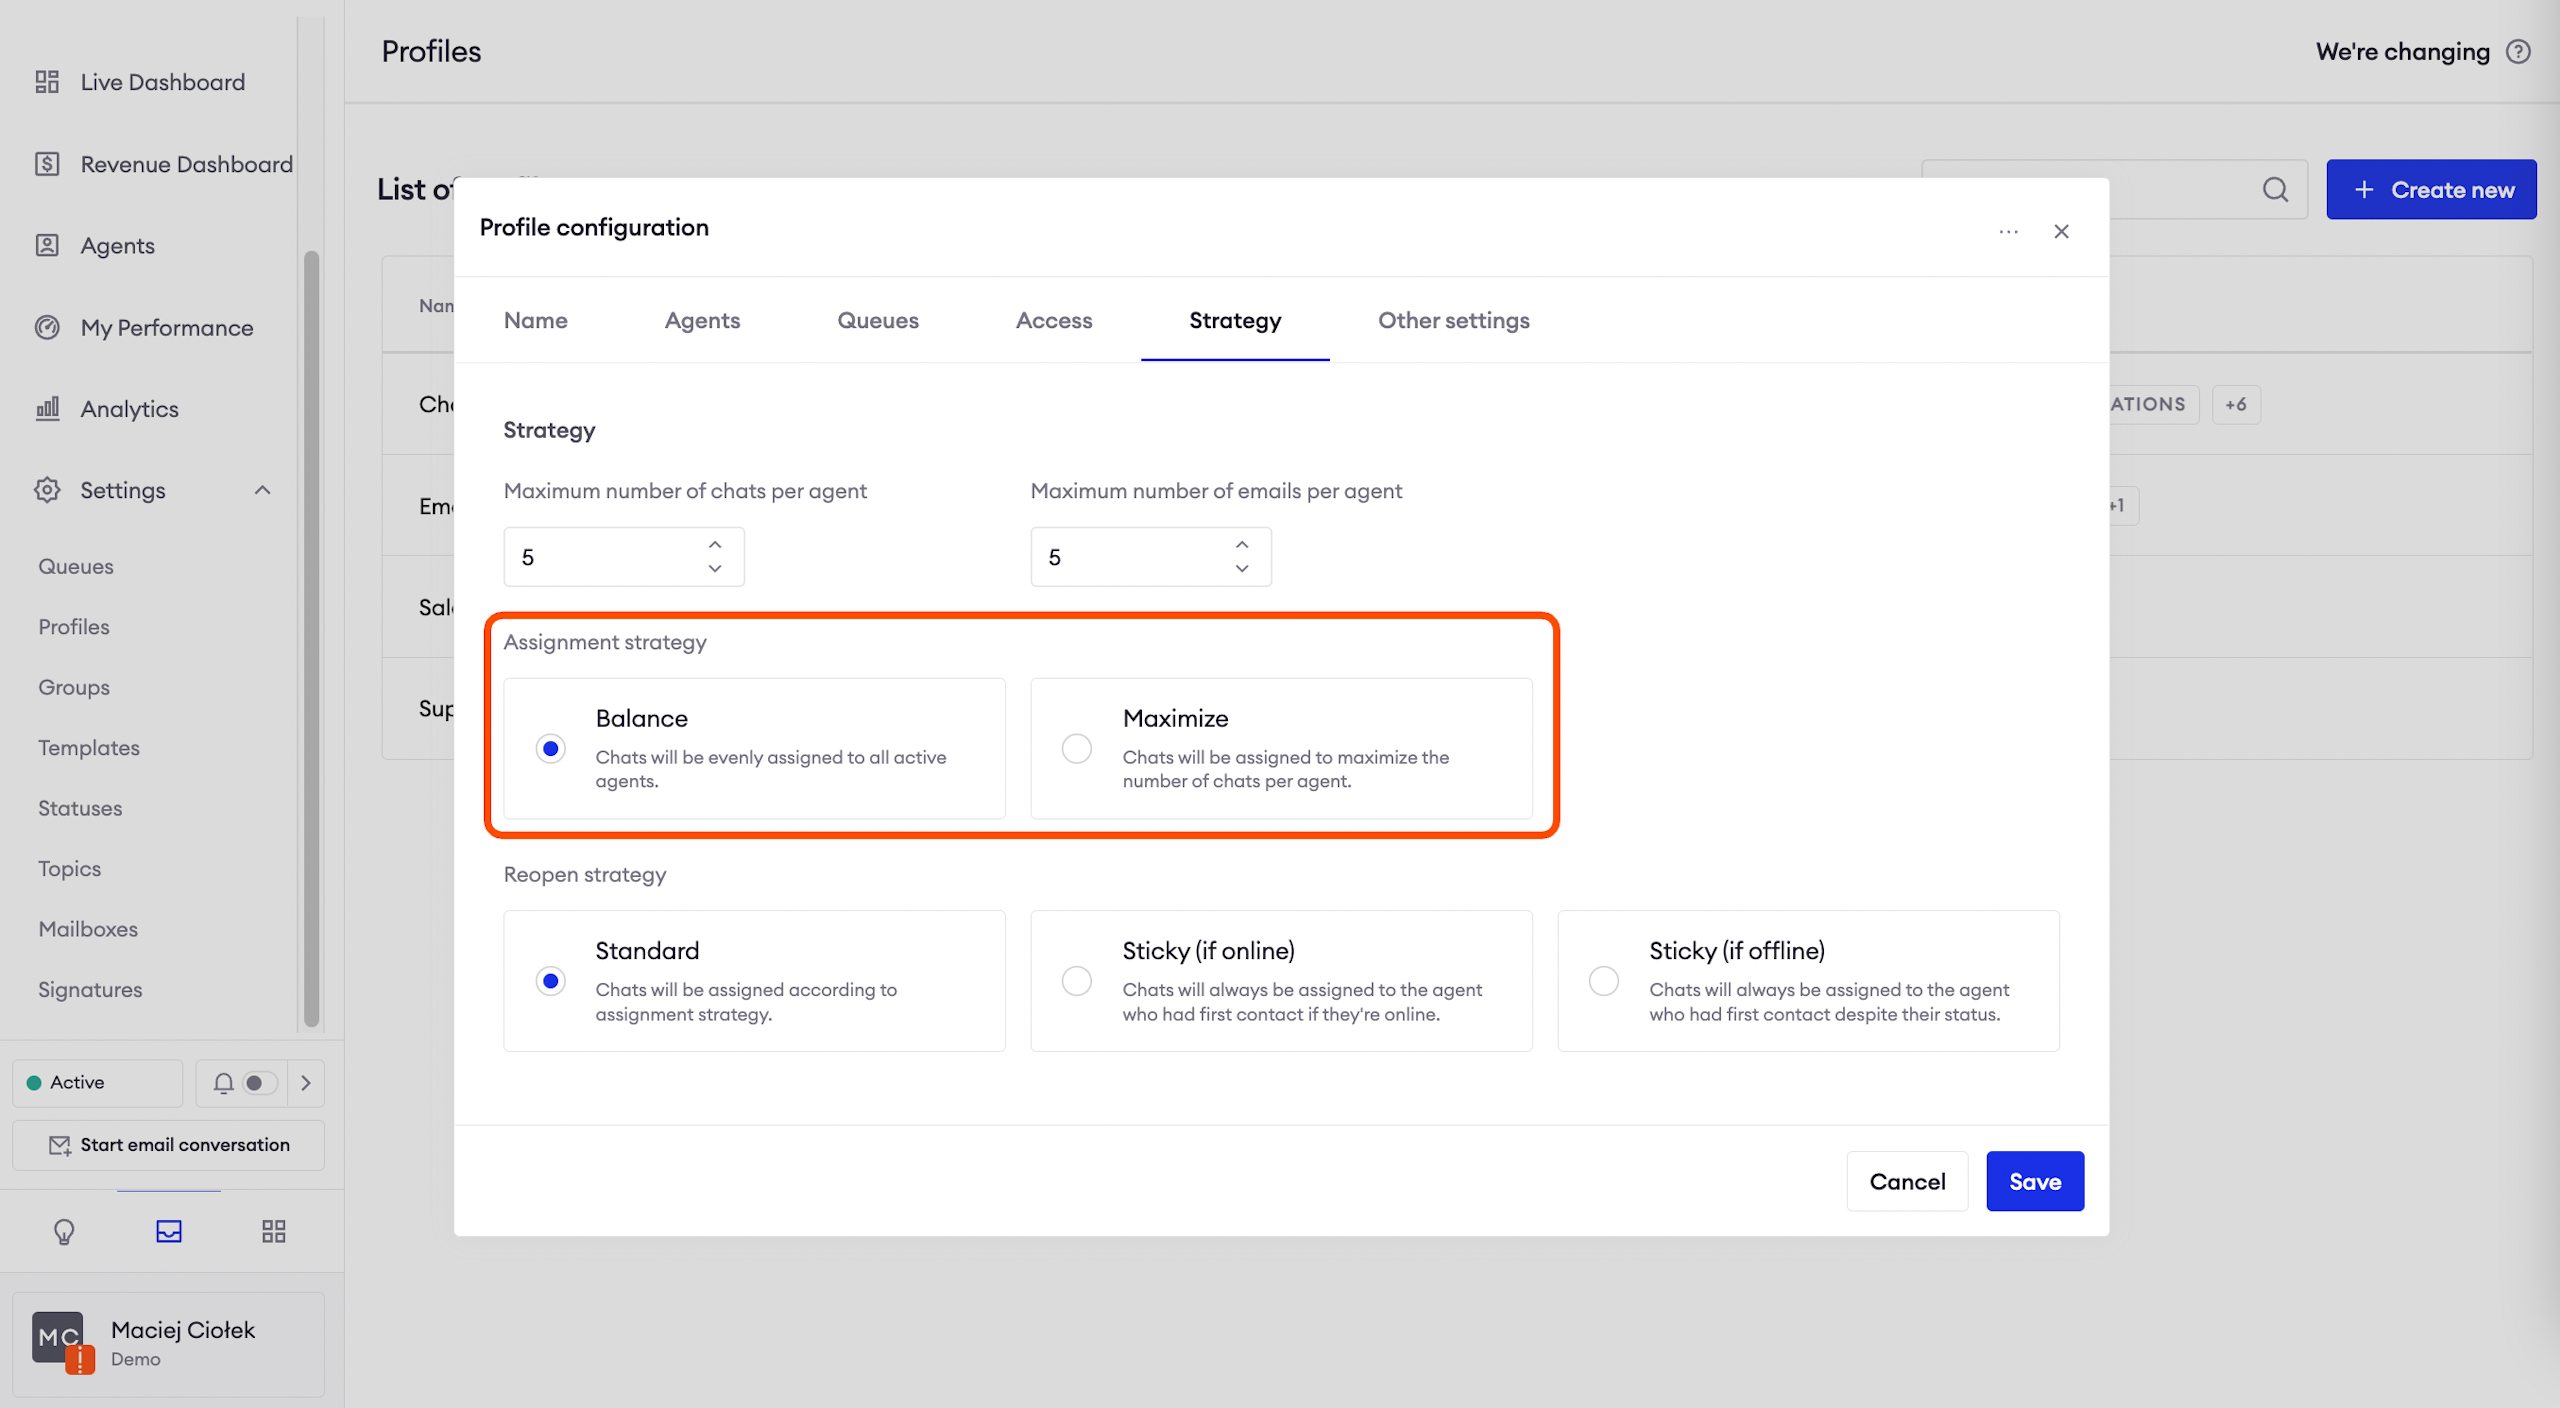
Assignment strategy
Balanced: each new thread will be assigned to another available agent who hasn’t hit the thread limit.
Maximize: new threads will be assigned to one agent until they hit the thread limit, in which case new chats will go to another agent.
Reopen strategy
Standard: the assignment strategy will be respected without exceptions.
Sticky (if online): despite the assignment strategy, a returning customer will be connected to the last agent who talked to them, if that agent is in active status and didn’t reach the maximum number of threads.
Sticky (if offline): despite the assignment strategy, a returning customer will be connected to the last agent who talked to them, regardless of that agent’s status or conversation limit.
Note that these settings do not apply to postponed conversations.
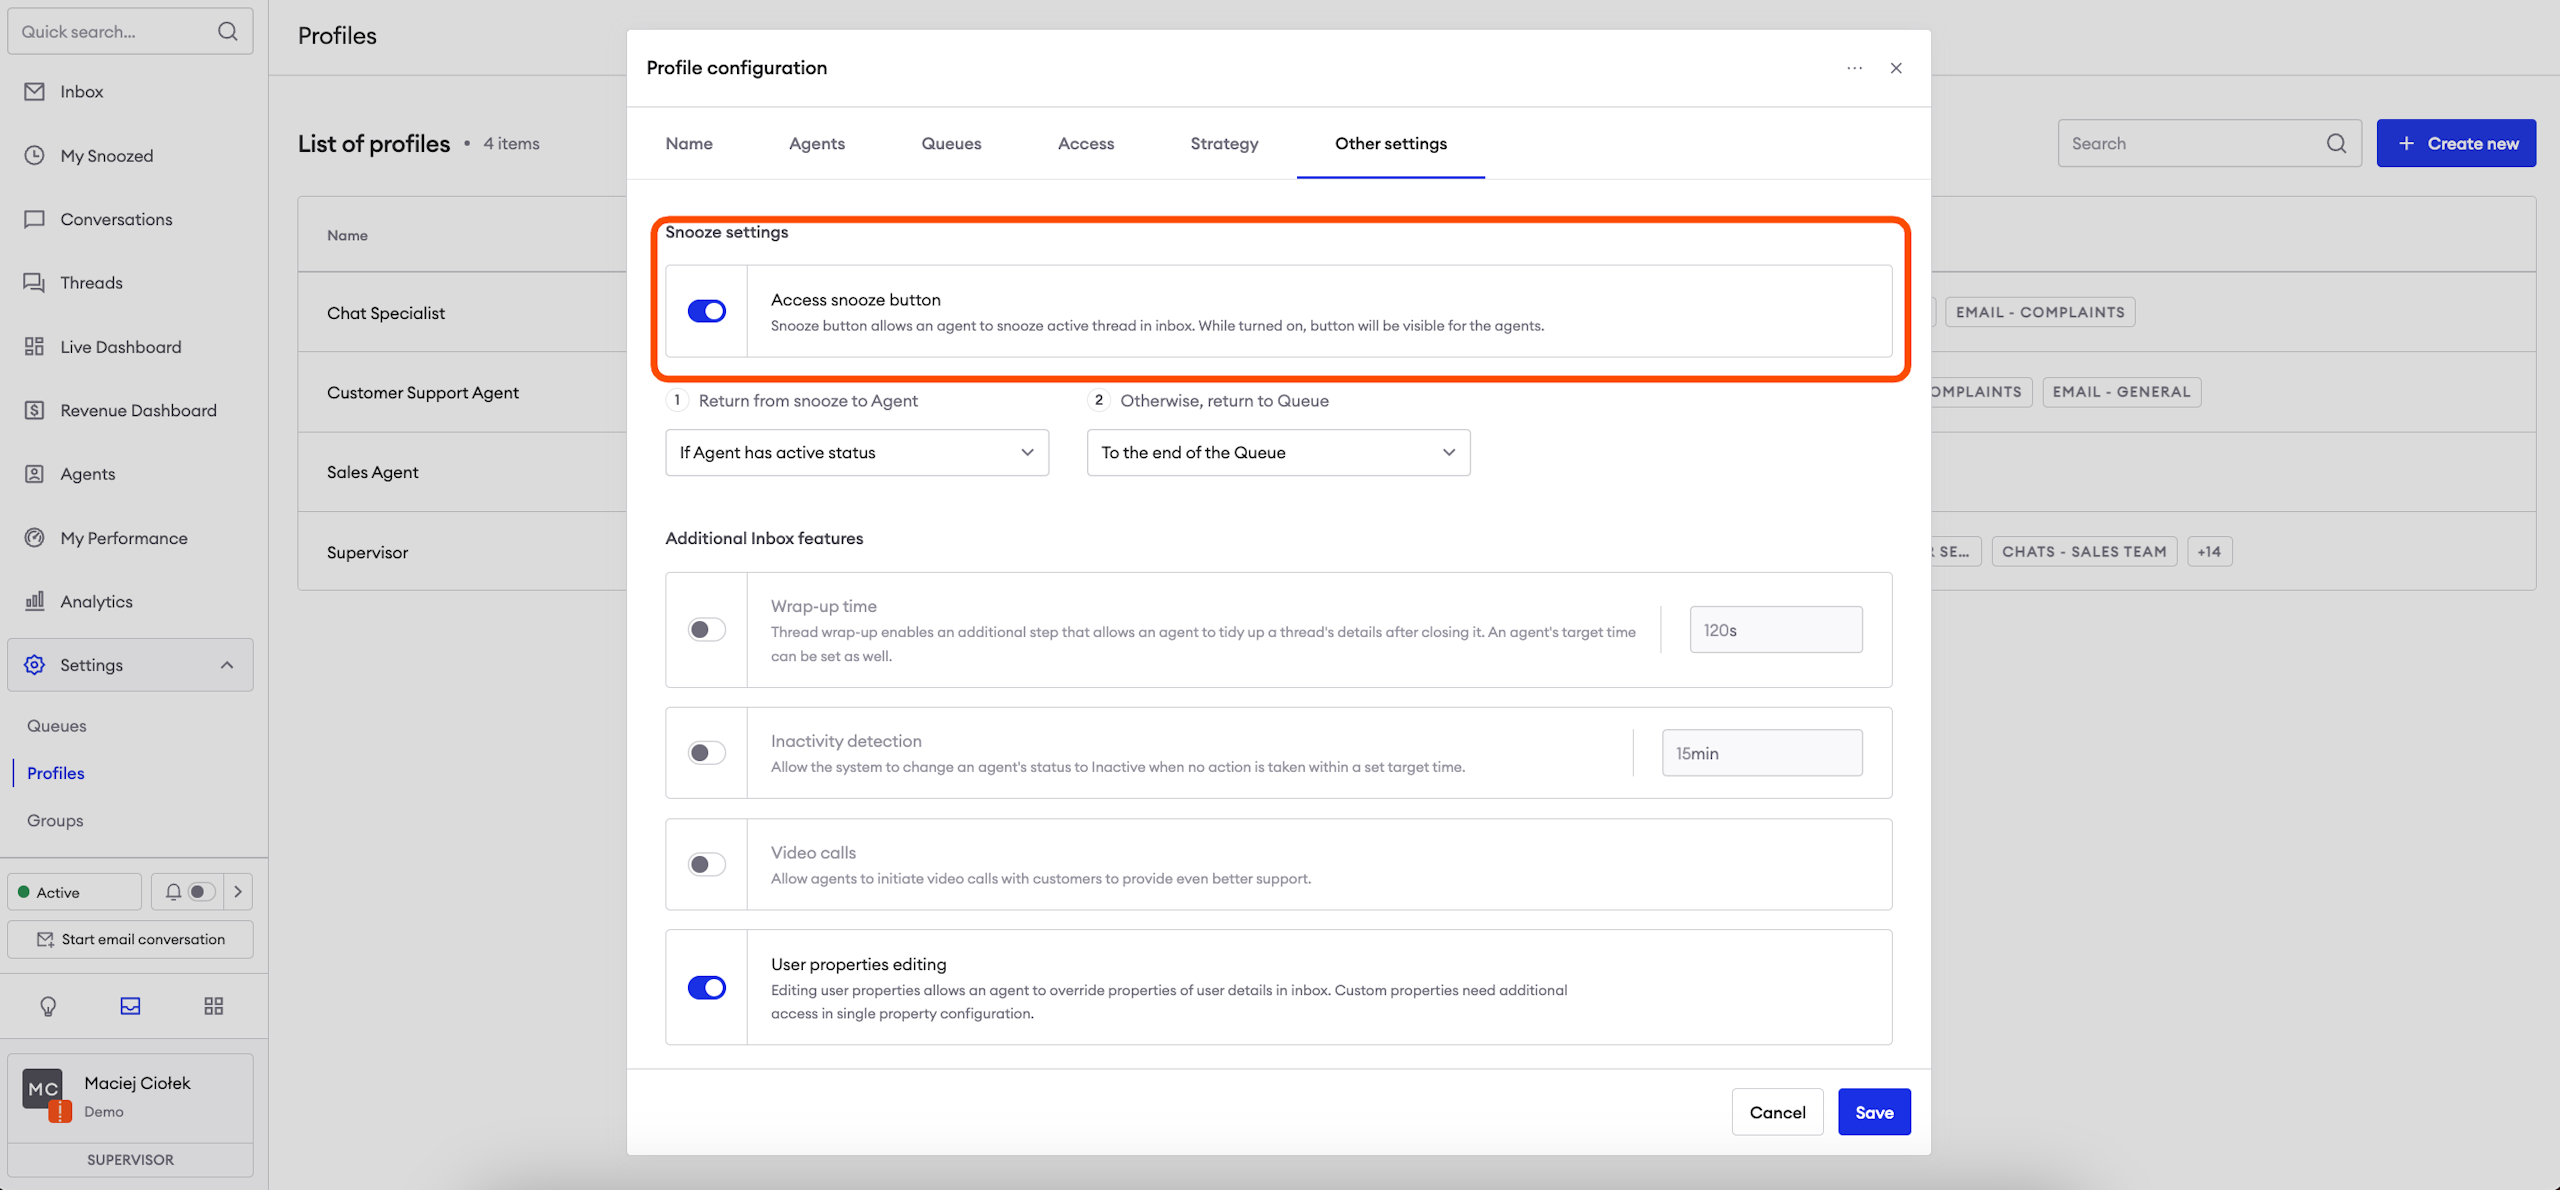
Snooze settings
If you enable access to the snooze button, your agents will be able to add conversations to the My Snoozed folder so that they can handle them at a later time. You can configure here which agents should receive chats coming from postponed, and what happens if the selected group of agents is not available or is in “Break” status.
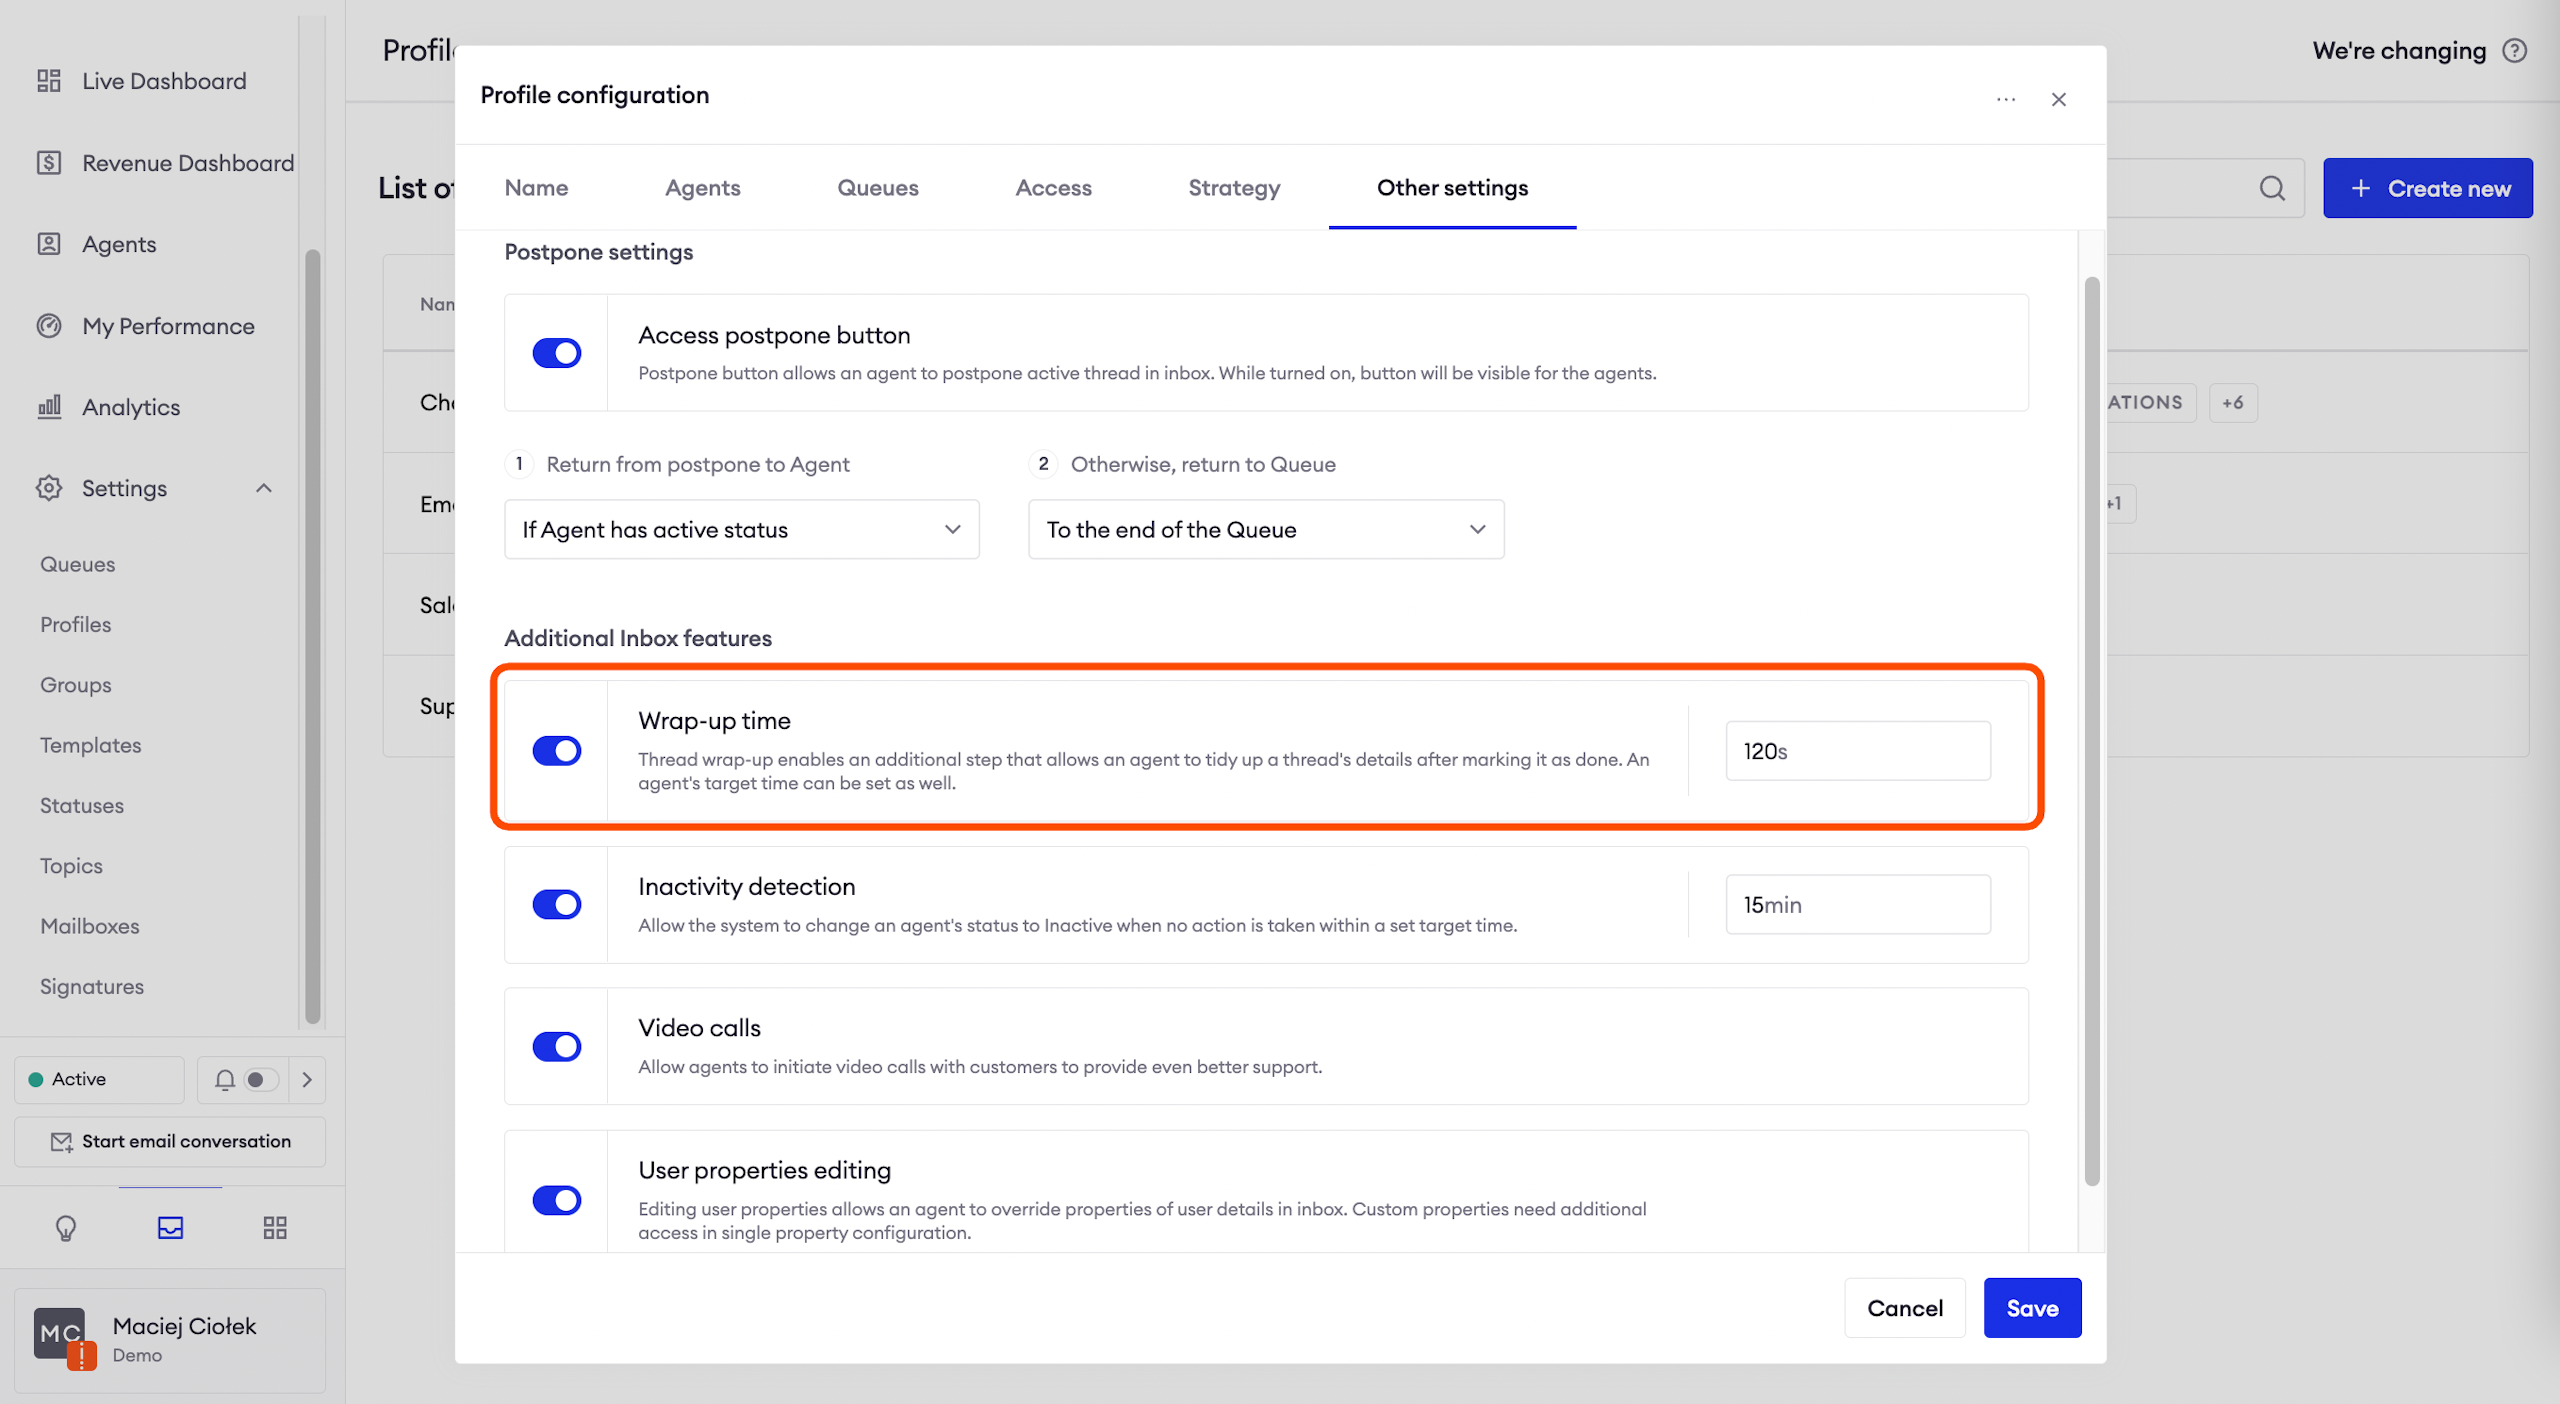
Wrap-up time
Wrap-up allows you to give your agents time to tidy up thread’s details after marking it as done. This time doesn’t count towards the resolution time metric, however it counts towards agent’s threads limit to prevent new threads from being assigned to them during wrap-up.
Example:an agent marked the conversation as done and the wrap-up timer started counting. The agent will go to their company’s external system to post notes about the conversation without worrying that it will affect their performance. Before the wrap-up time time defined by the environment admin passes, the agent clicks the button finish wrap-up.
Inactivity detection
Inactivity detection allows the system to switch an agent's status to inactive when they perform no actions within the set target time.

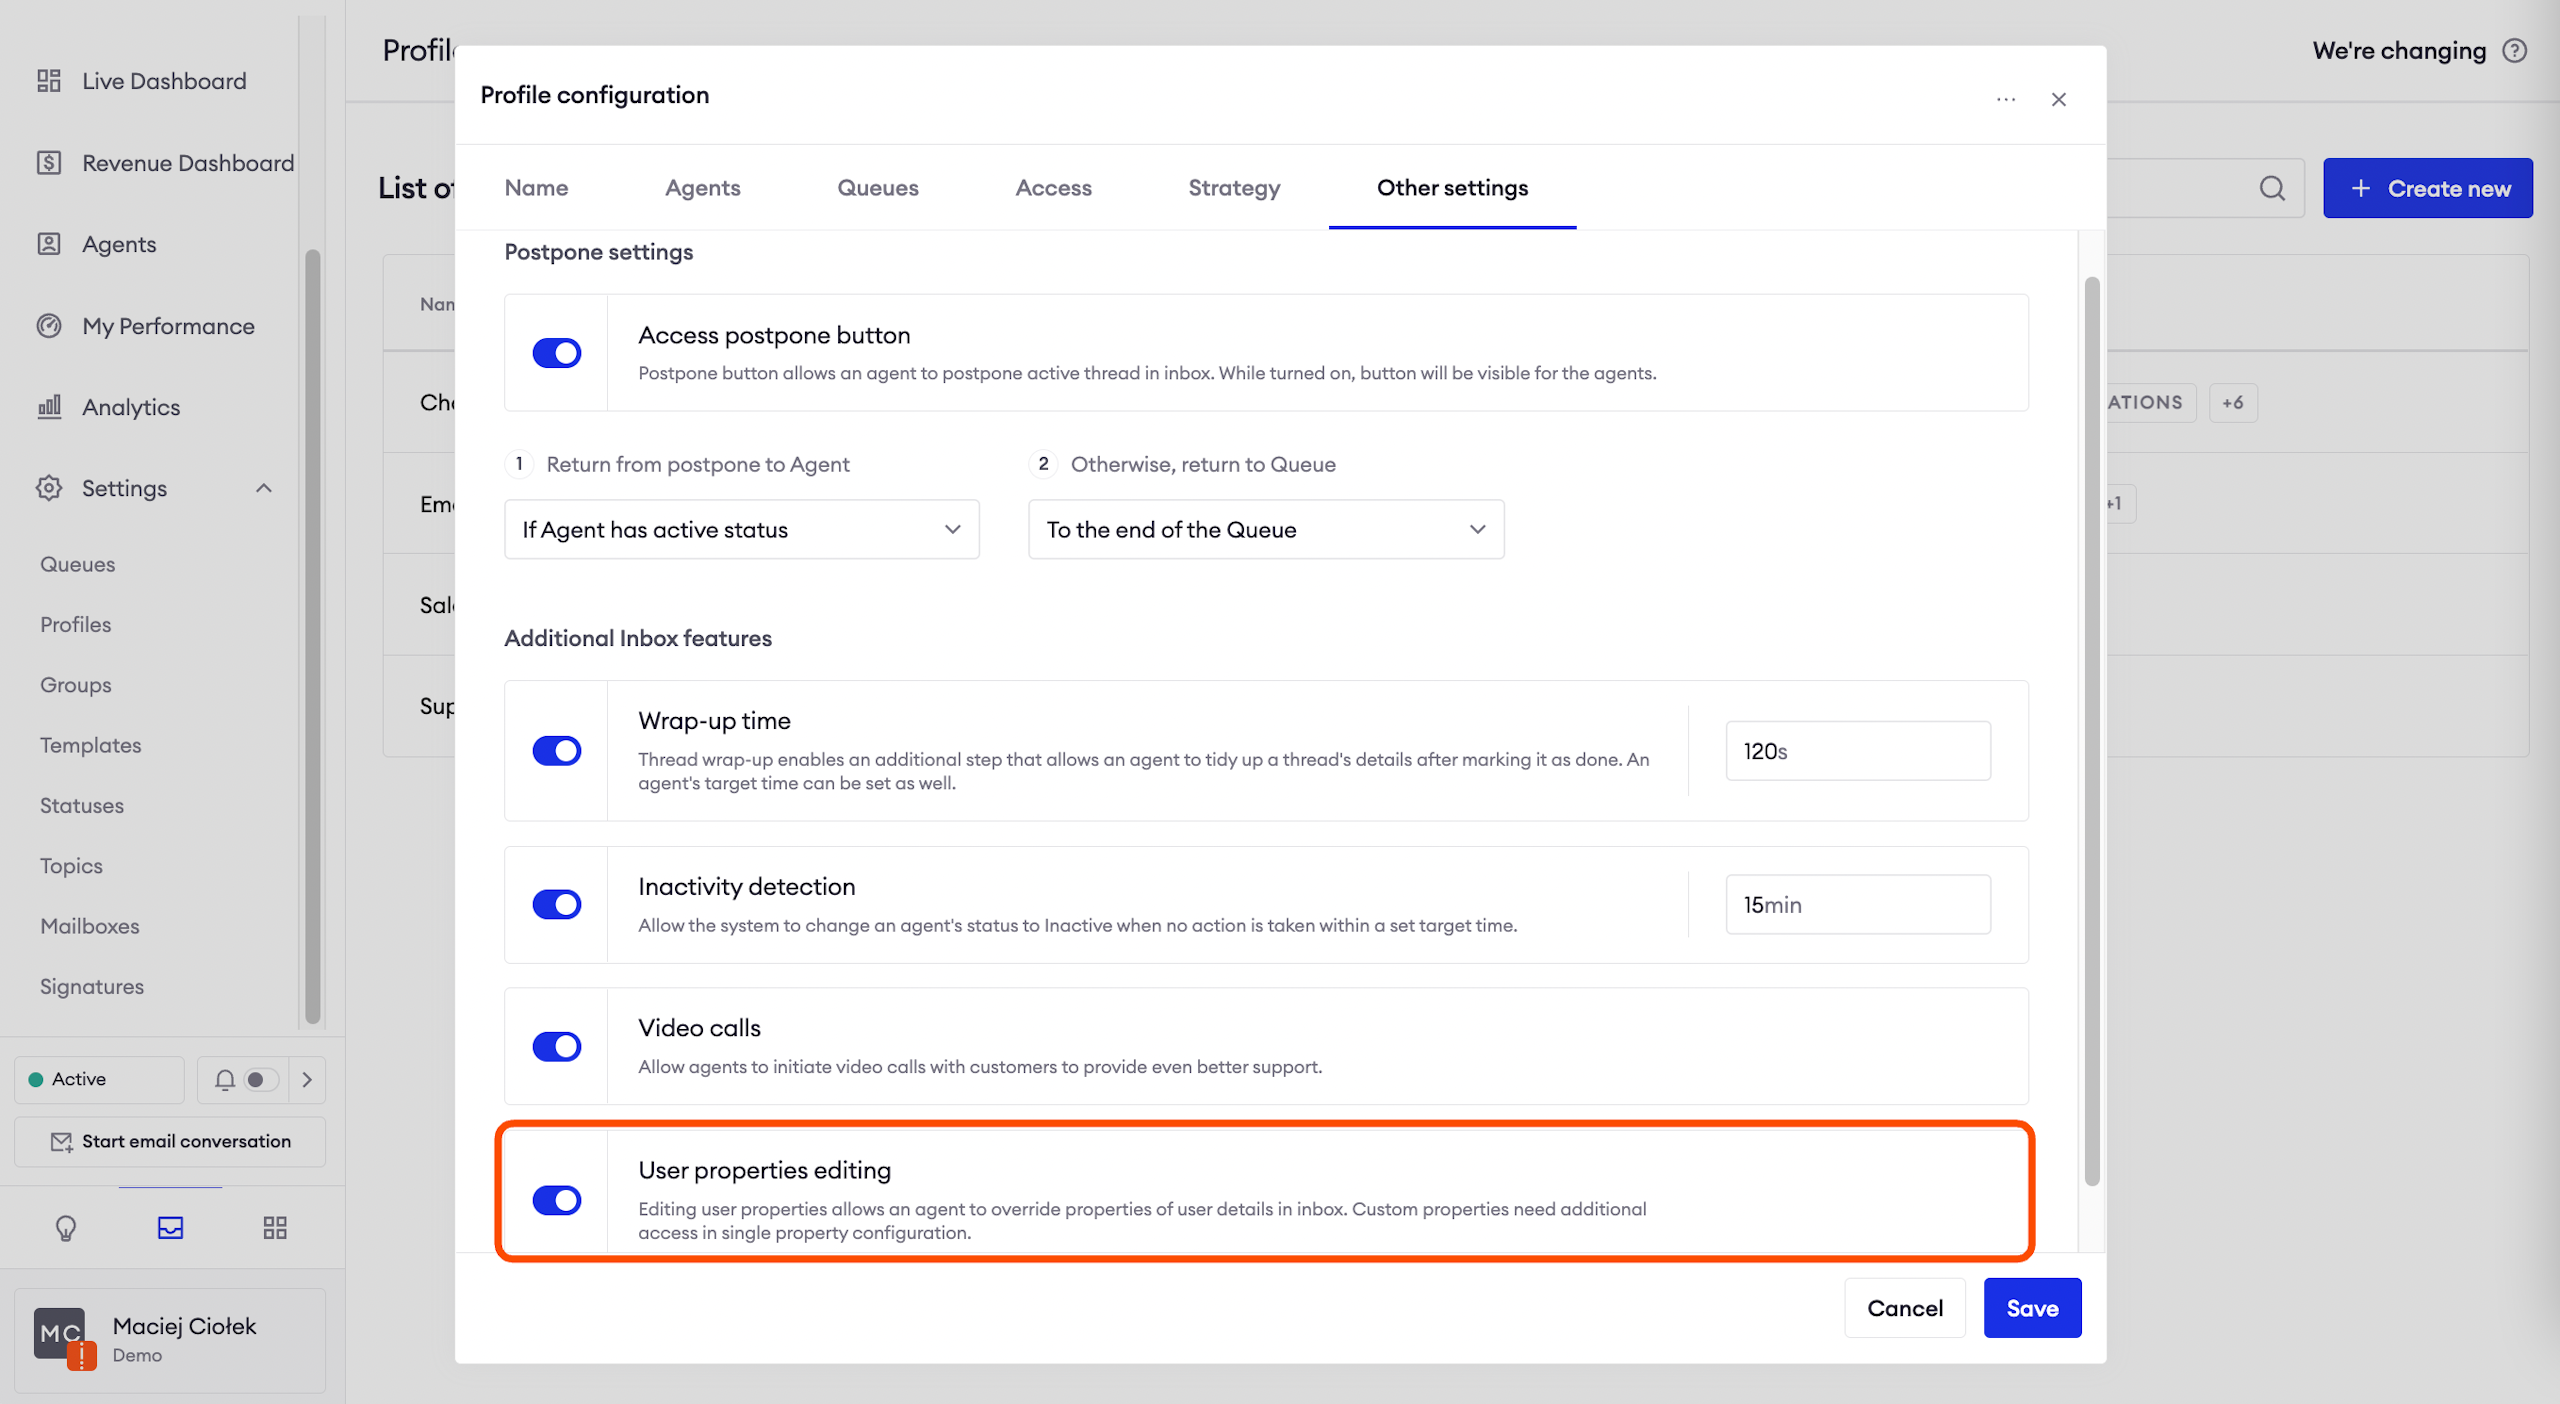
User properties editing
Editing user properties allows an agent to override properties of user details in inbox. You can customize if you want to edit custom properties on the “Edit” view of a single property.
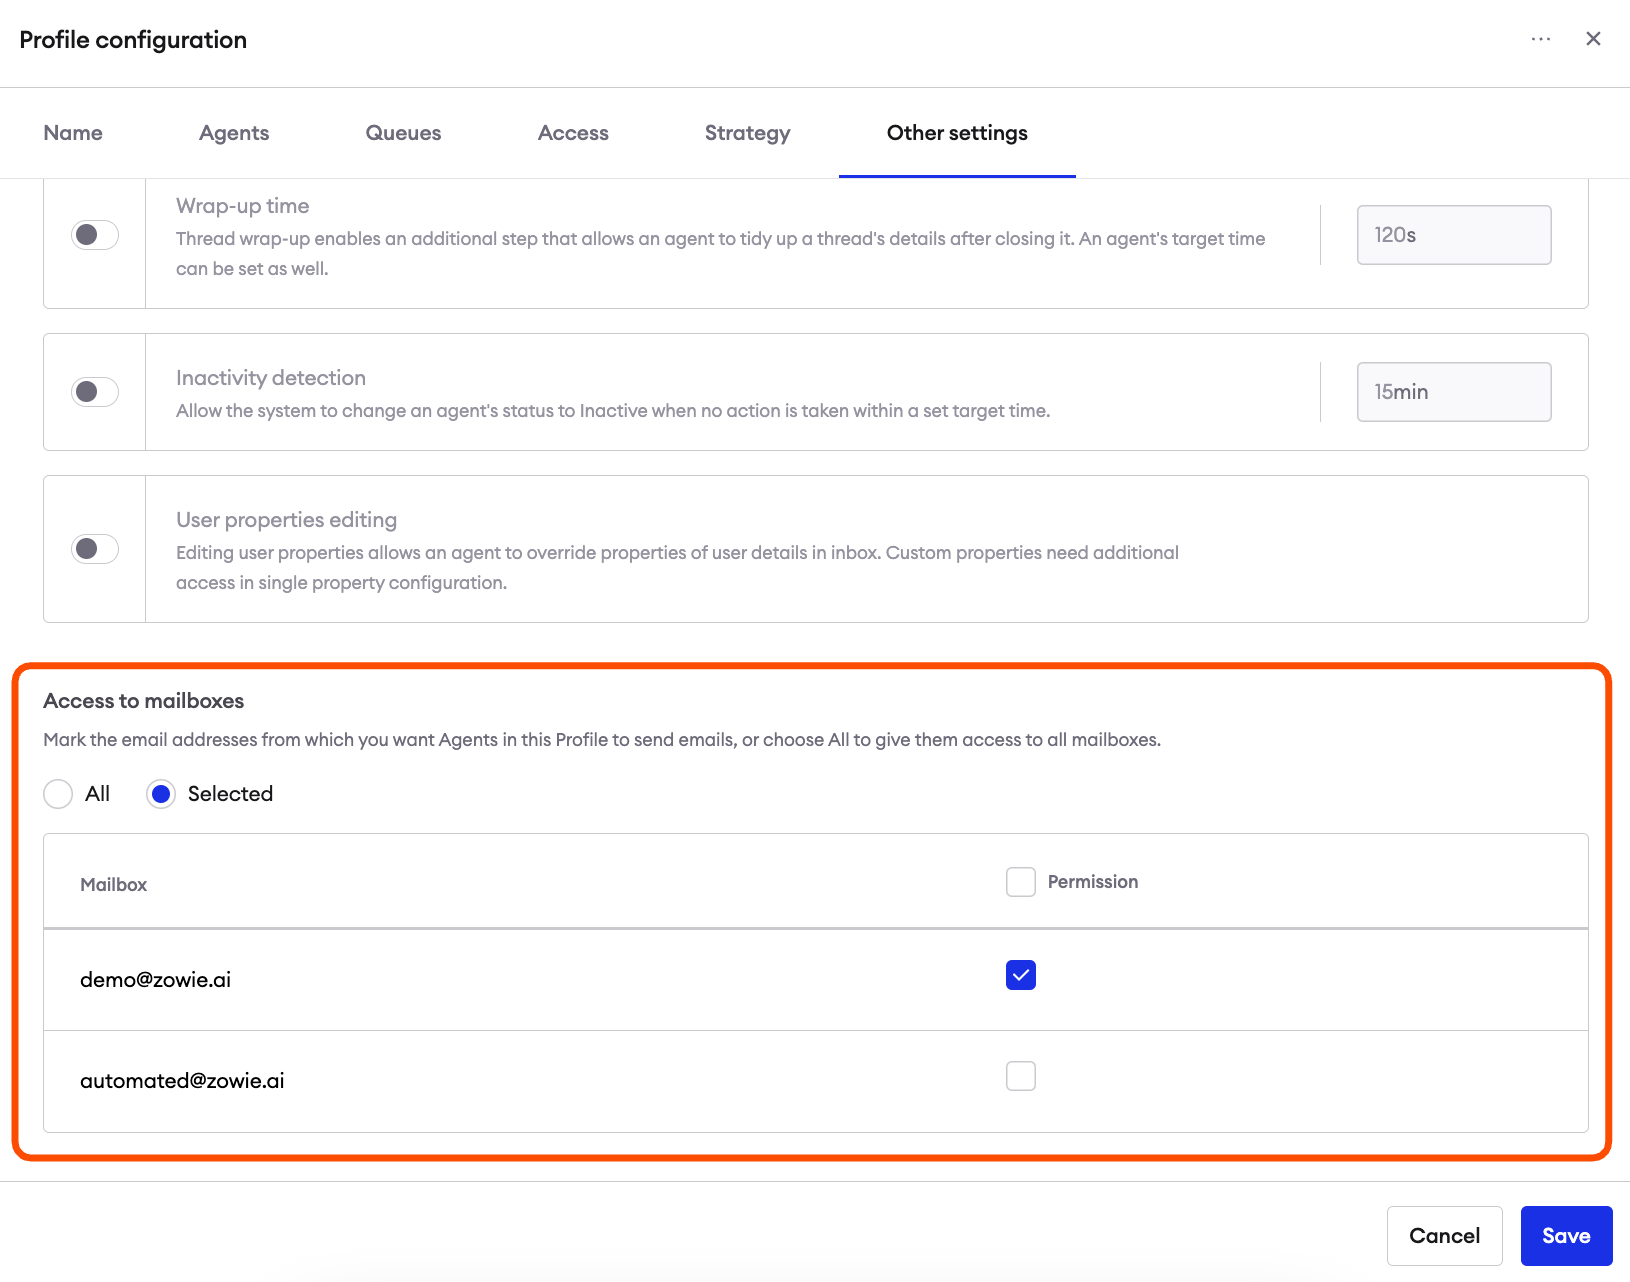
Access to mailboxes
This section allows you to determine from which email boxes Agents in this Profile can send messages. Just click on the "Selected" option and mark the email boxes that you want Agents in this Profile to use.
If you want everyone to have access, simply choose "All".