Chat
Social Media Channels
Enhance your customer experience by integrating Zowie with popular social media platforms. This enables your customers to reach you instantly through the channels they already use daily. Zowie makes it easy to automate support with your AI Agent or empower your agents to chat directly with customers for a more personalized approach.
Social Media Channel Considerations and Best Practices
Channel-Specific Considerations
- Asynchronous Communication: Social media channels are primarily asynchronous, where customers may message at any time and expect a response within hours
- Message Format Support: Different platforms support various formats including text, images, quick replies, and button templates
- Response Time Expectations: Customers typically expect faster responses on social media compared to email but don't require immediate replies as with live chat
Best Practices for Social Media Channels
- Create Dedicated Queues: Set up separate Handovers and Queues for each social media channel
- Configure 24/7 Availability: Since customers can message anytime, configure handovers with 24/7 availability
- Set Appropriate SLAs: Establish different service level agreements for social media channels Show Image Show Image
- Implement Topic-Specific Routing: Create separate Handovers for specific topics (e.g., marketing inquiries vs. support questions) Show Image
- Multiple Fanpages Management: For businesses with multiple social media accounts, coordinated setup through your Customer Success Manager is recommended
Facebook Messenger
Facebook Messenger integration allows customers to interact with your AI Agent directly through your Facebook business page.
Setup Requirements
Prerequisites:
- A ready-to-deploy AI Agent
- Configured Zowie Inbox with appropriate Queues connected to Profiles
- Configured Routing in the Handover modules
- Full admin permissions to the Facebook page
Step-by-Step Configuration
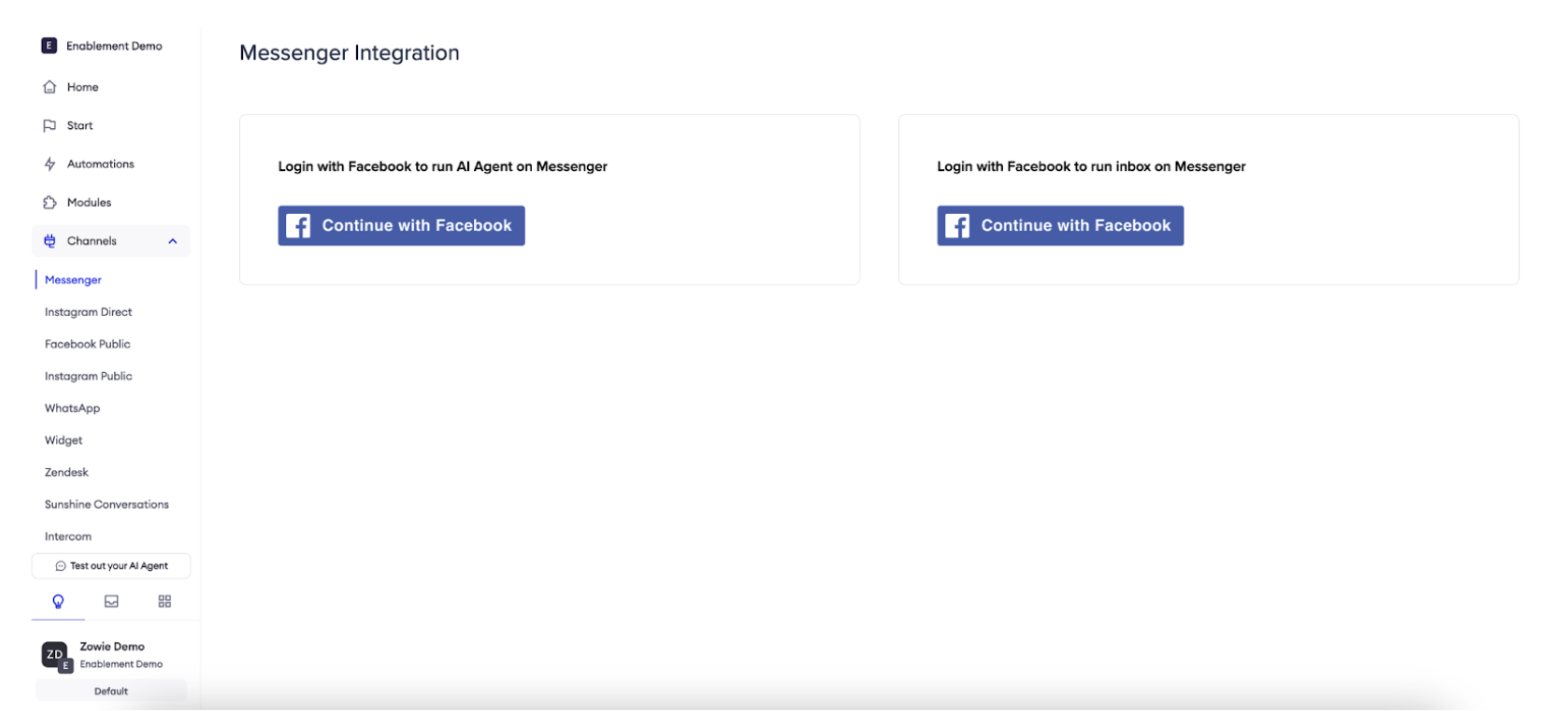
1. Connect Your AI Agent to Messenger
- Navigate to AI Agent → Channels → Messenger
- Click "Continue with Facebook" next to "Login with Facebook to run AI Agent on Messenger"
- Follow the Facebook authentication flow in the popup
2. Accept Facebook Permissions
- Accept all required Facebook permissions
- If you have multiple pages, click "Subscribe" next to the page you want to connect
3. Connect Zowie Inbox to Messenger
- Click "Continue with Facebook" next to "Login with Facebook to run Inbox on Messenger"
- Follow the same authentication flow
4. Configure Facebook Page Settings
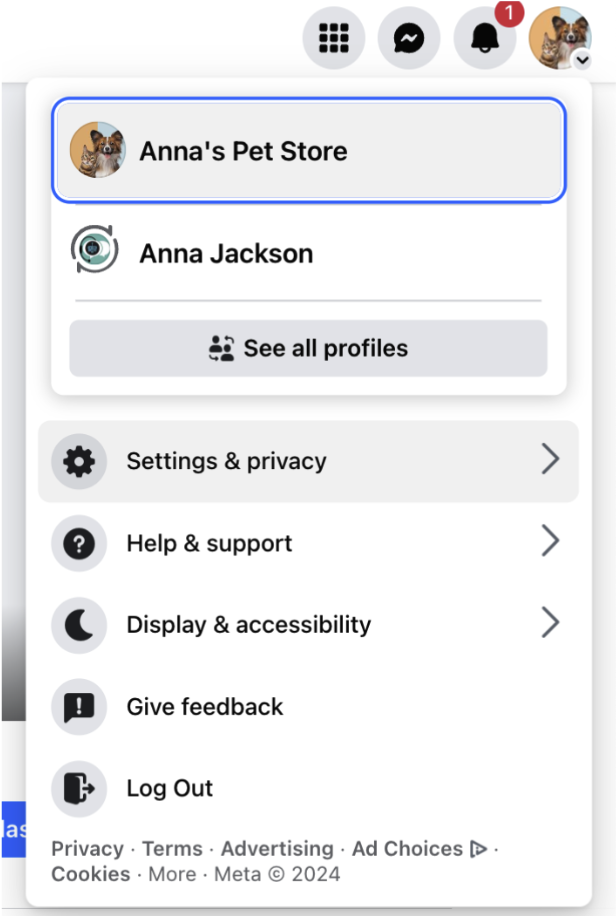
- Log into your Facebook account
- Switch to your business page
- Navigate to "Settings and privacy" → "Settings"
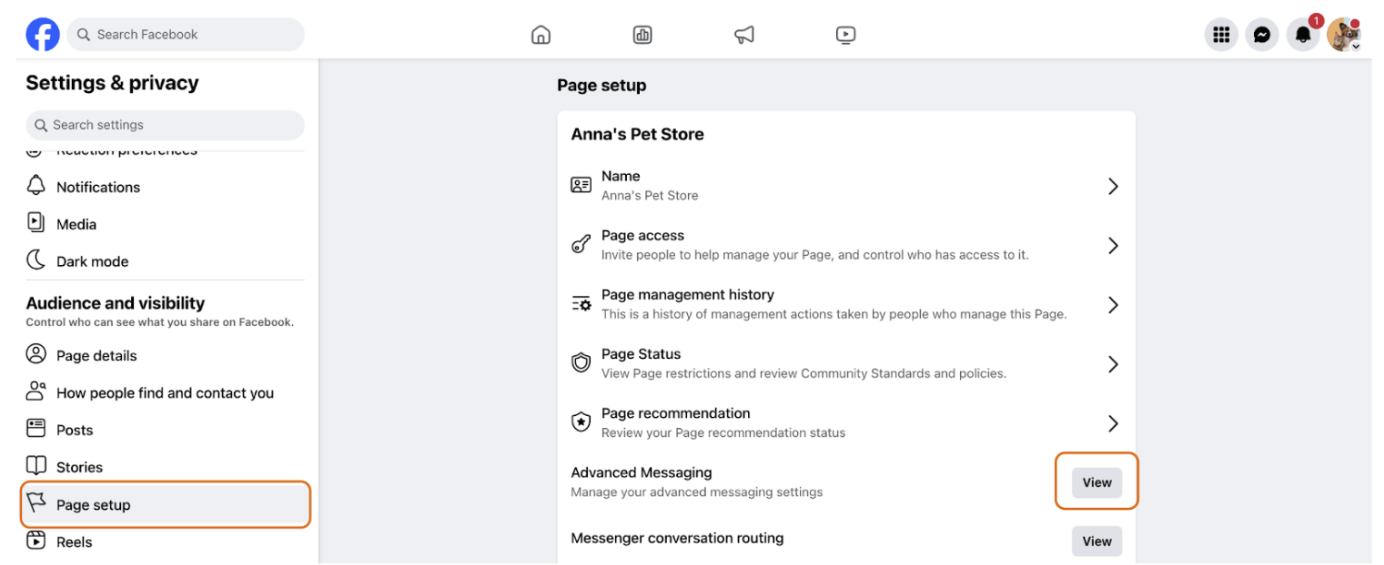
- Click on "Page setup" → "Advanced messaging"
5. Configure Handover Protocol
- In "App settings," set the following configurations:
- For Messenger receiver: Zowie Chatbot
Multiple Fanpages Configuration
If you have multiple Facebook pages and want to connect them to one AI Agent, contact your Customer Success Manager. This requires a scheduled online meeting with the Solution Engineering team.
Troubleshooting
Chatbot Not Responding
- Check if automatic messages are enabled on your Facebook page
- Disable them by logging into Facebook → Business Profile → Messenger → Automations

Can't See Facebook Page in Zowie
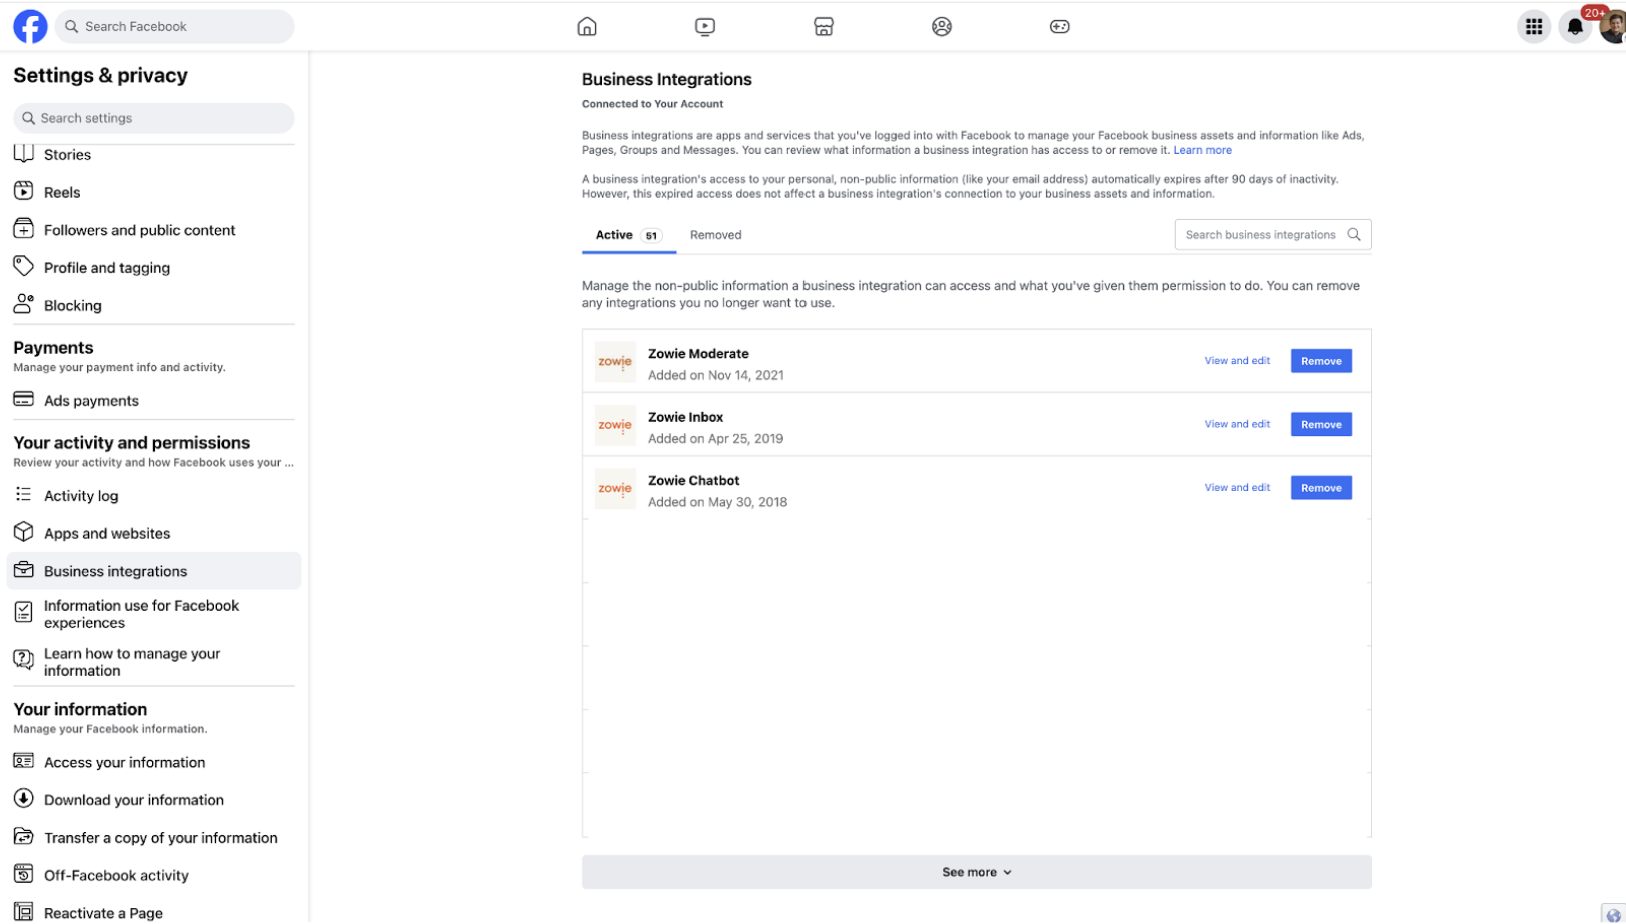
- Log into Facebook
- Go to Settings & privacy → Settings → Your activity and permissions → Business Integrations
- Remove both Zowie Inbox and Zowie Chatbot
- Reconnect following the steps above
- Verify you have full admin access to the page
Disconnecting Messenger from Zowie
- Navigate to Chatbot → Channels → Messenger
- Click the "Disconnect" button
Instagram Direct
Instagram Direct integration allows your AI Agent to handle customer inquiries that come through your Instagram business account.
Setup Requirements
- A ready-to-deploy AI Agent
- Configured Zowie Inbox with appropriate Queues connected to Profiles
- Configured Routing in the Handover modules
- Full admin permissions to the Instagram business account
- Connected Facebook page (Instagram business accounts must be linked to a Facebook page)
Step-by-Step Configuration
1. Connect Your Chatbot to Instagram Direct
- Navigate to Automate → Channels → Instagram Direct
- Click "Continue with Facebook" next to "Login with Facebook to run AI Agent on Instagram Direct"
- Follow the authentication flow
2. Connect Inbox to Instagram Direct
- Click "Continue with Facebook" next to "Login with Facebook to run Inbox on Instagram Direct"
- Follow the same authentication flow
3. Configure Instagram Handover Protocol
- Follow the same steps as for Facebook Messenger
- In "App settings," ensure Instagram receiver is set to Zowie Chatbot
Multiple Fanpages Configuration
If you have multiple Facebook pages and want to connect them to one AI Agent, contact your Customer Success Manager. This requires a scheduled online meeting with the Solution Engineering
Troubleshooting Instagram and Facebook
If you need to reconnect due to issues, follow this exact order:
- Disconnect Inbox from Instagram
- Disconnect Chatbot from Instagram
- Disconnect Inbox from Messenger
- Disconnect Chatbot from Messenger
- Connect Chatbot for Instagram
- Connect Inbox for Instagram
- Connect Chatbot for Messenger
- Connect Inbox for Messenger
WhatsApp
WhatsApp integration lets your AI Agent communicate with customers through this popular messaging platform.
Setup Requirements
- Contact your Customer Success Manager to initiate the connection
- Prepare the following information:
- WhatsApp Phone number you want to connect to Zowie
- Facebook Business ID
No self-service setup is currently available for this channel.
Viber
Viber integration enables your AI Agent to handle customer conversations on the Viber messaging platform.
Setup Requirements
Contact your Customer Success Manager to initiate the connection. No self-service setup is currently available.
Other channels
Google Actions
Google Actions integration allows customers to interact with your AI Agent through Google Assistant.
Setup Requirements
1. Setup Your Google Actions Project
- Go to the Actions console
- Click "Add Project", enter a project name, and click "Create Project"
- Under "More options" at the bottom of the page, click "Actions SDK"
- Copy the project ID after the '--project' argument in the command
- Download and install Google Actions CLI
Additional configuration steps will be provided by your Customer Success Manager.