How to add Zowie Widget to Shopify Storefront and Checkout Page?
This guide explains how to integrate the Zowie Widget into your Shopify Storefront and Checkout pages
Prerequisites
Before installing the Zowie Widget, ensure you have completed the following:
-
Connect Your Shopify Integration
-
In your Zowie Dashboard, go to:
Workspace > Integrations > Shopify -
Press Connect and follow the connection process.
-
-
Shopify Plus Plan (Optional)
- You must be on Shopify Plus if you’d like to add the Zowie Widget to your Checkout pages.
Installing the Zowie Widget on Your Shopify Store Pages
Follow the steps below to add the Zowie Widget to your Shopify storefront pages.
-
Navigate to Shopify Install & Launch
-
In your Zowie Dashboard, go to:
Automate > Channels > Widget > Shopify Install & Launch
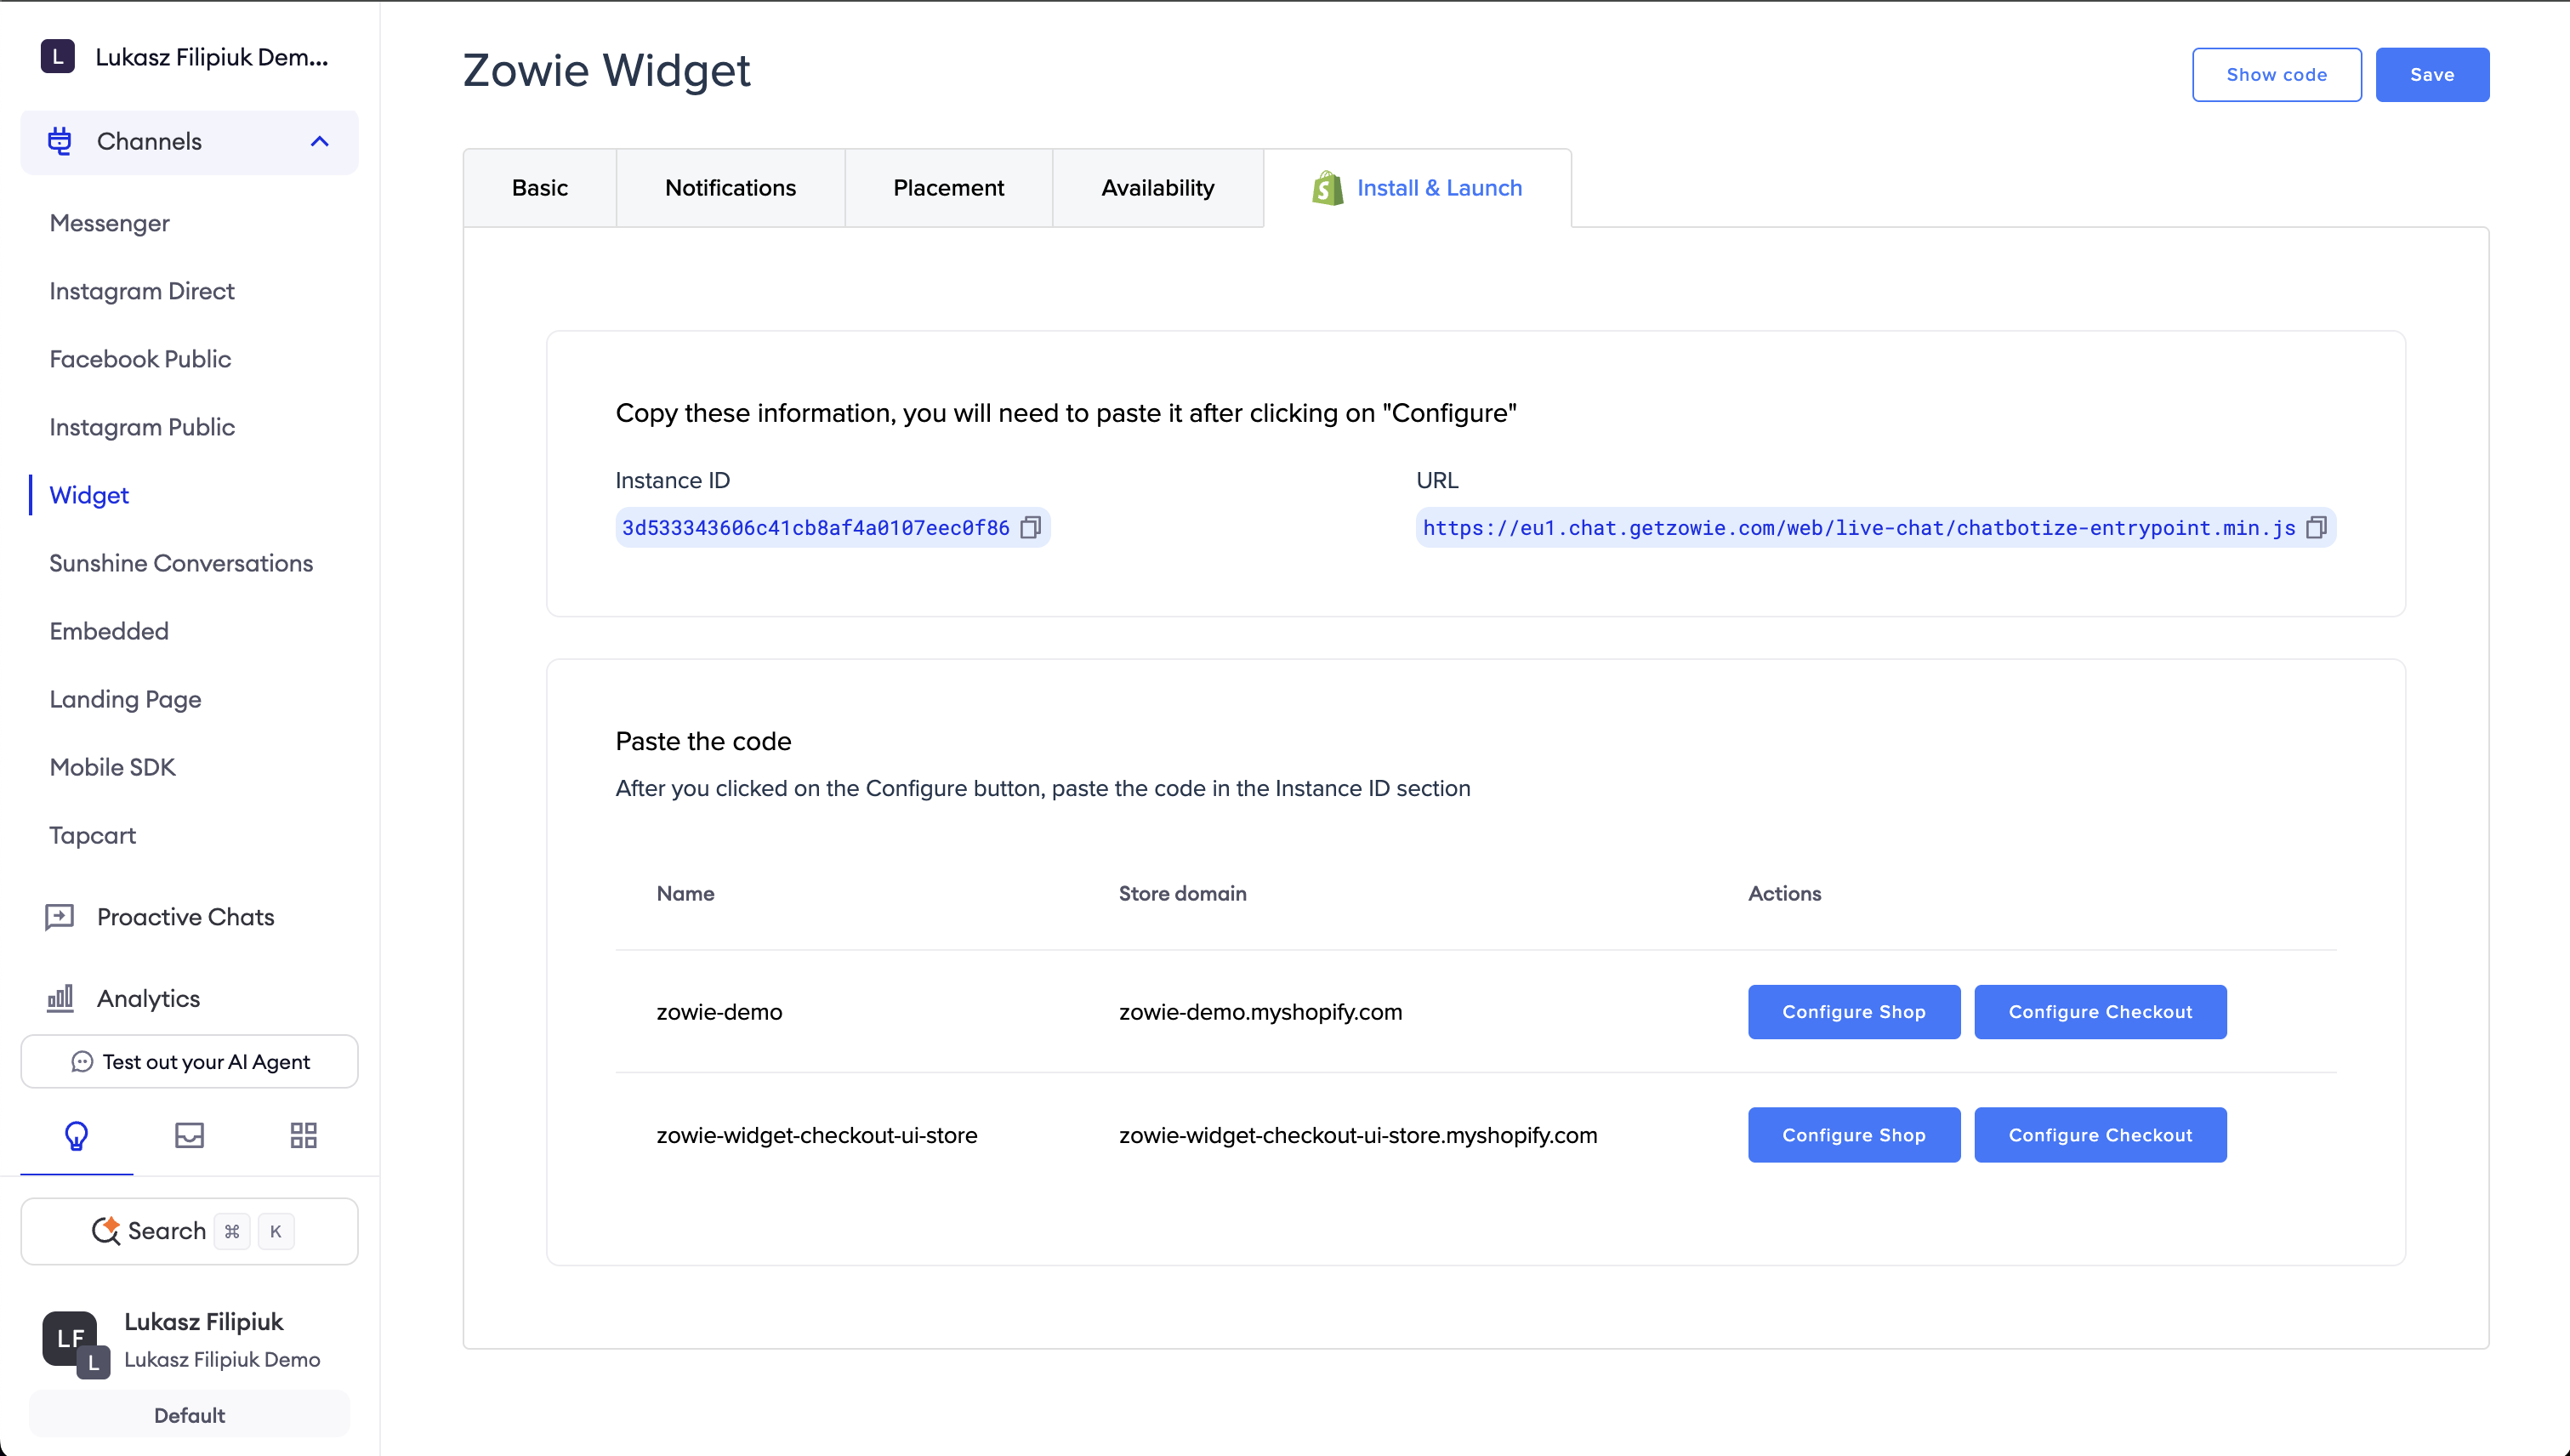
Installing Zowie Widget from Zowie Dashboard
-
-
Select Your Shopify Store
- From the list of connected stores, select the store where you’d like to install the widget.
- Click Configure Shop.
-
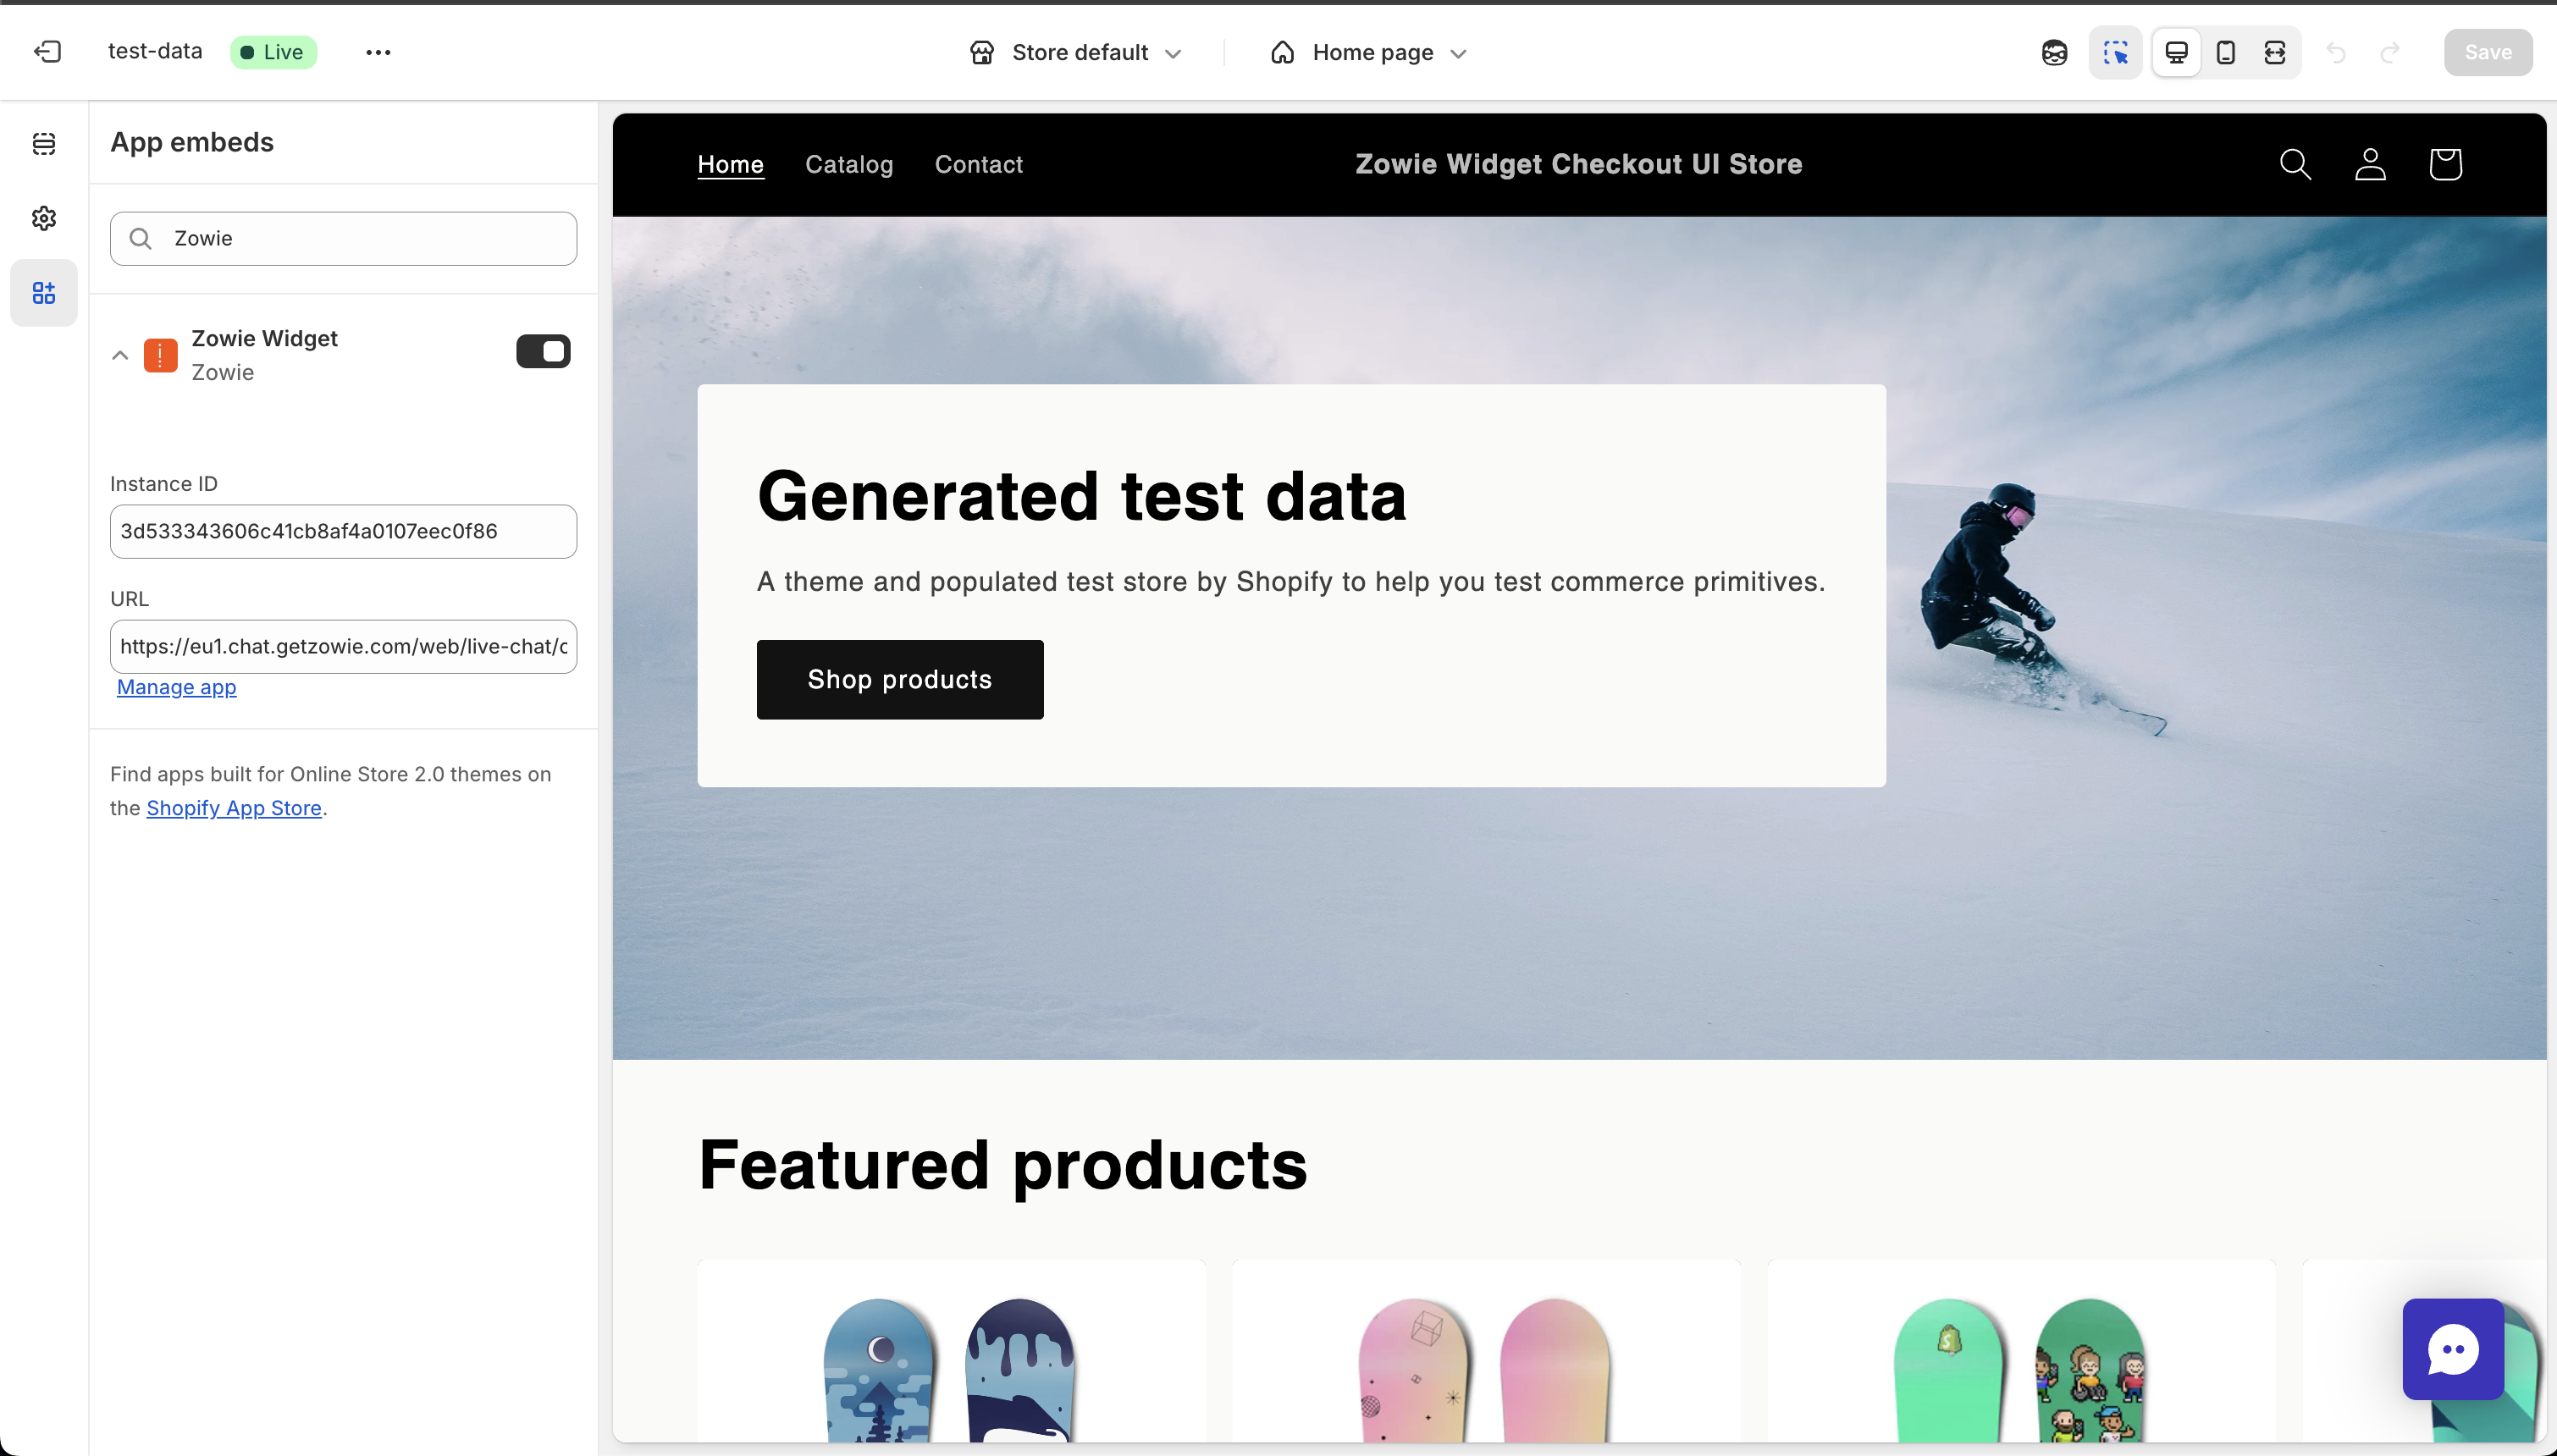
Redirect to Shopify Theme Editor
- You’ll be redirected automatically to the Shopify Theme Editor, directly to the Zowie Widget App Embed settings.
-
Copy Your Instance ID and Script URL
- Go back to the Shopify Install & Launch page in your Zowie Dashboard.
- Copy the following details:
- Instance ID
- URL
-
Paste Details in Shopify Theme Editor
- In the Shopify Theme Editor:
-
Locate the fields for Instance ID and URL.
-
Paste the copied values into the respective fields
Configuring Zowie Widget on Shopify Storefront
-
- In the Shopify Theme Editor:
-
Save Your Changes
- Click Save in the upper-right corner of the Shopify Theme Editor.
✅ Done! The Zowie Widget should now appear on your Shopify storefront pages.
Installing the Zowie Widget on Shopify Checkout Pages (Shopify Plus)
Note: Checkout page integrations are only available on Shopify Plus.
To install the Zowie Widget on your Checkout pages:
-
Navigate to Shopify Install & Launch
-
In your Zowie Dashboard, go to:
Automate > Channels > Widget > Shopify Install & Launch
-
-
Configure Checkout
- Click Configure Checkout for the desired Shopify store.
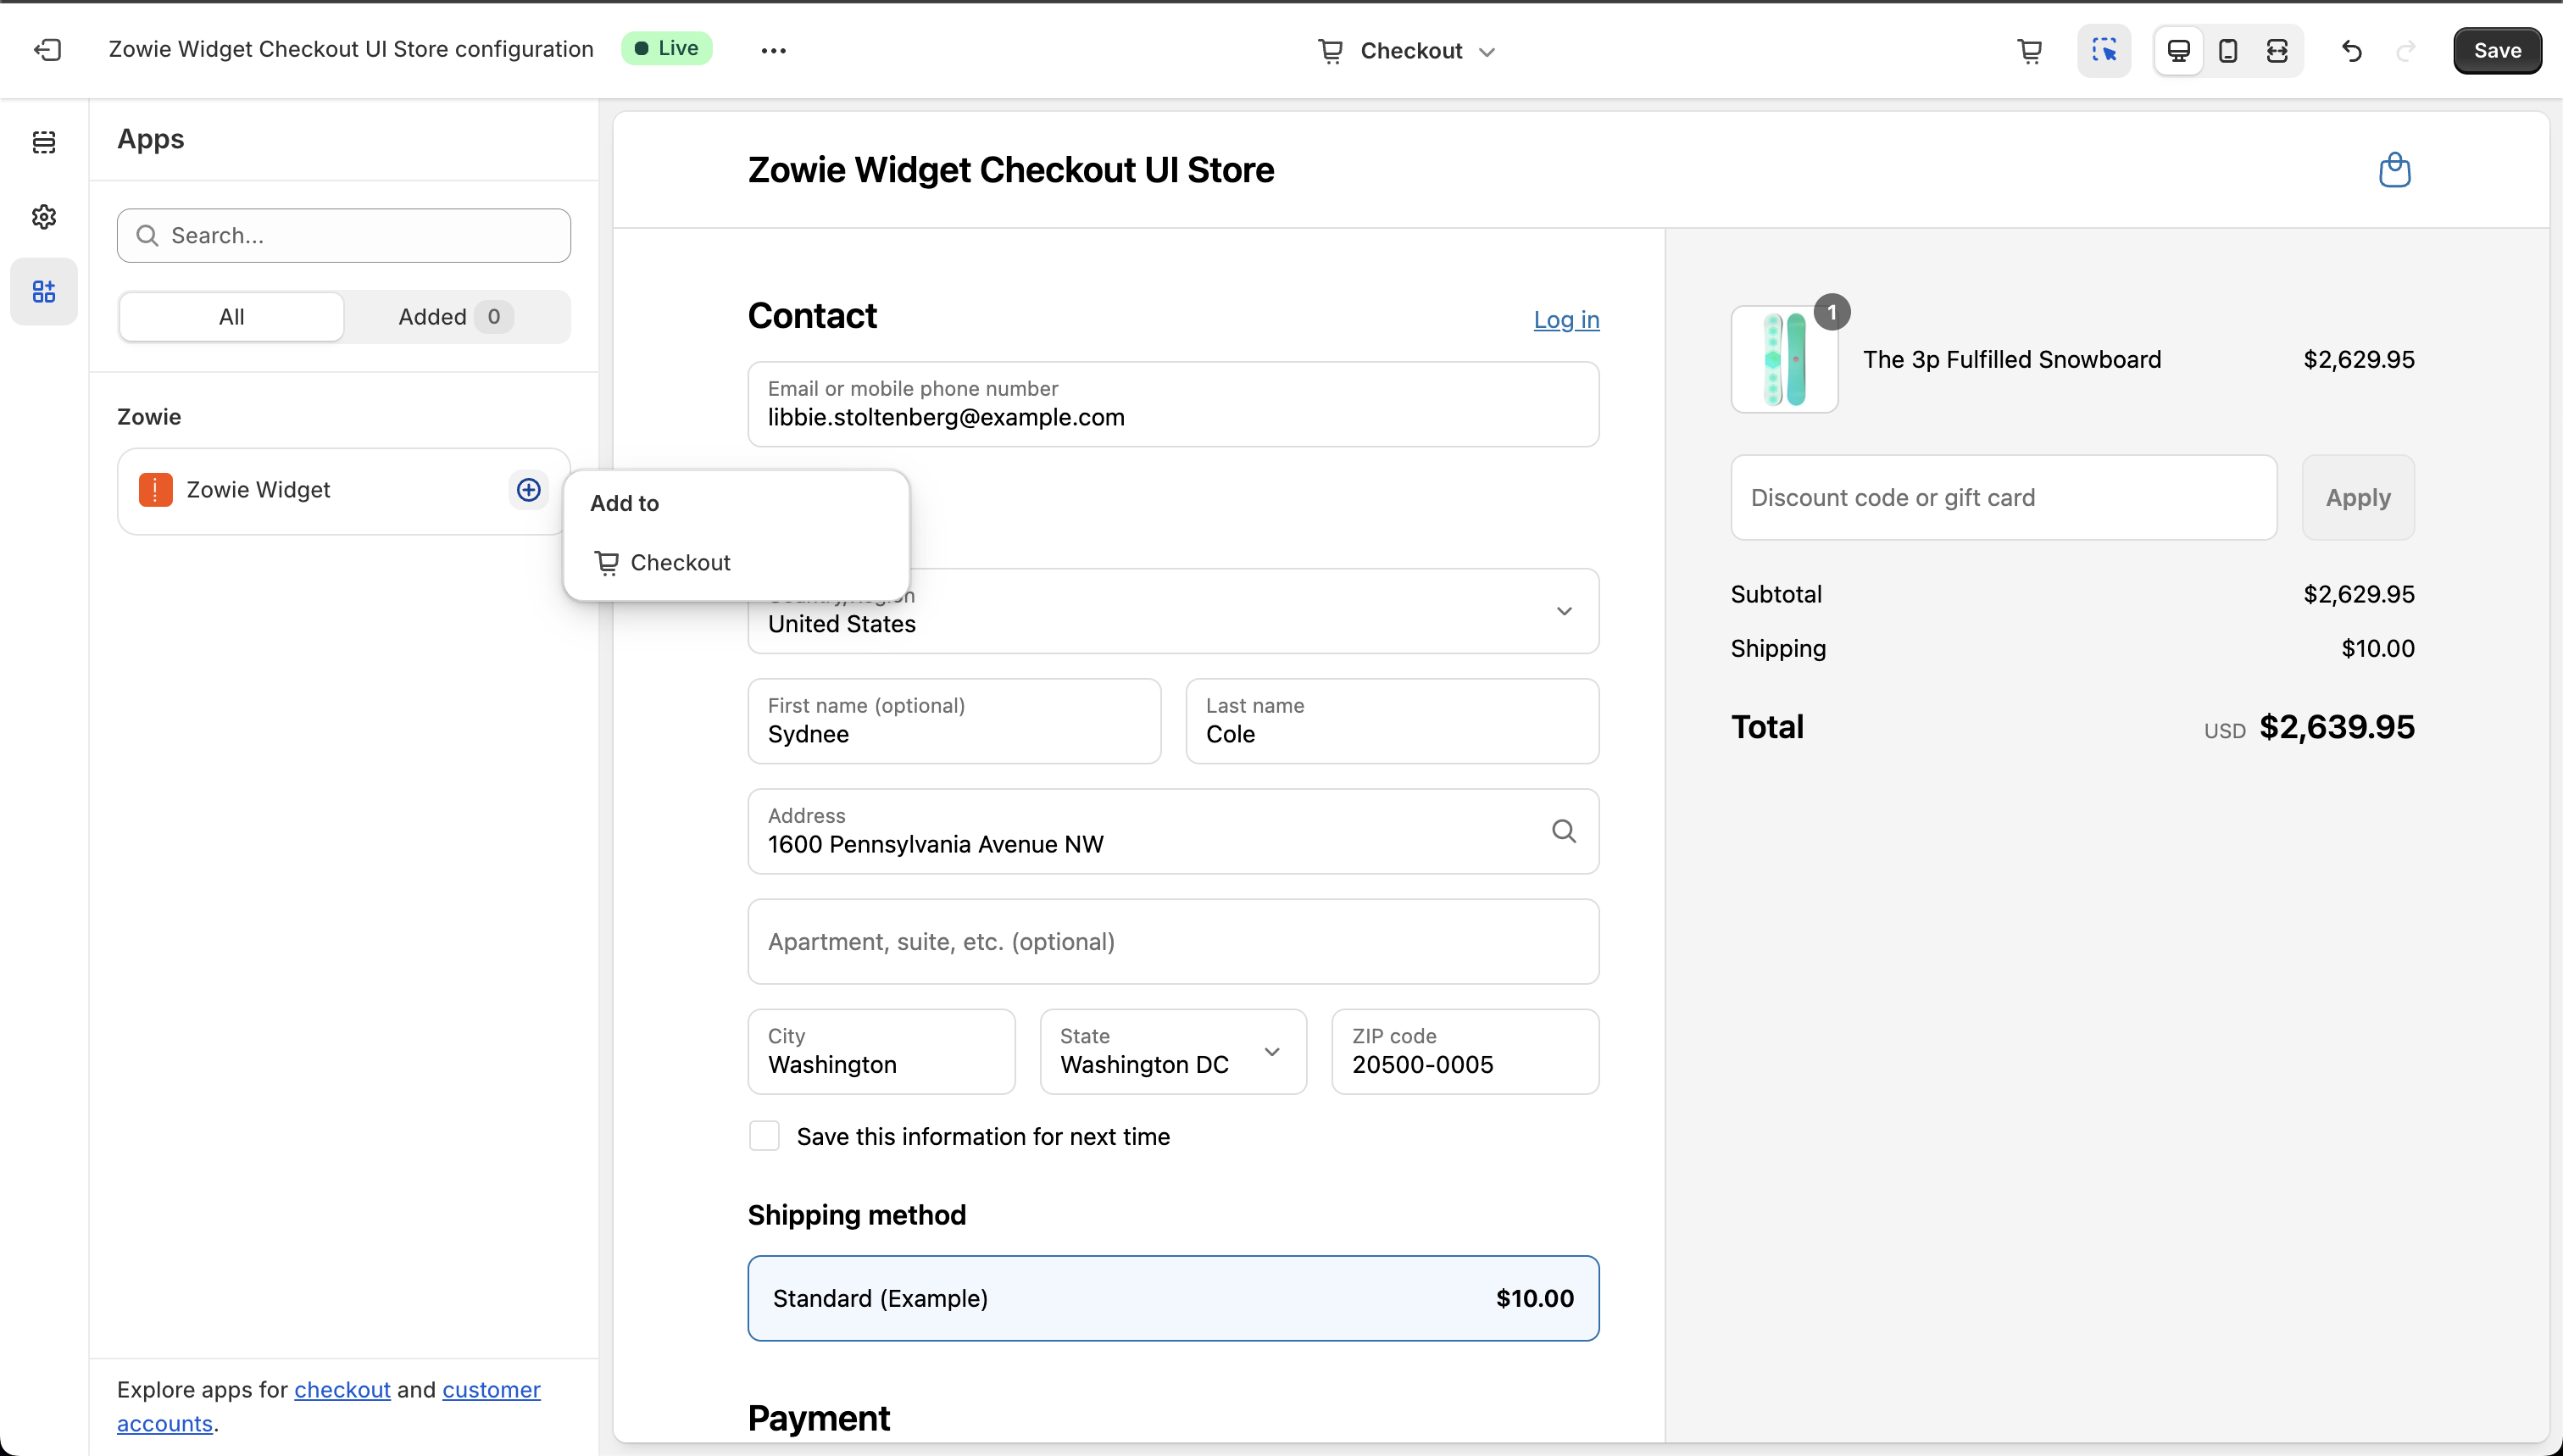
- You will be redirected to the Apps tab in the Shopify Checkout Editor.
-
Add Zowie to Checkout
- In the Checkout Editor:
-
Locate the Zowie app under Apps.
-
Click the ➕ plus icon.
-
Click Add to Checkout.
Installing Zowie Widget on Shopify Checkout Page
-
- In the Checkout Editor:
-
Copy Your Instance ID and Script URL
- Return to the Shopify Install & Launch page in your Zowie Dashboard.
- Copy:
- Instance ID
- URL
-
Paste Details in Checkout Settings
- In the Checkout Editor, locate the fields for Instance ID and Script URL.
- Paste the copied values into the respective fields.
-
Save Your Changes
- Click Save in the Shopify Checkout Editor.
✅ Done! The Zowie Widget will now appear on your Shopify Checkout pages.
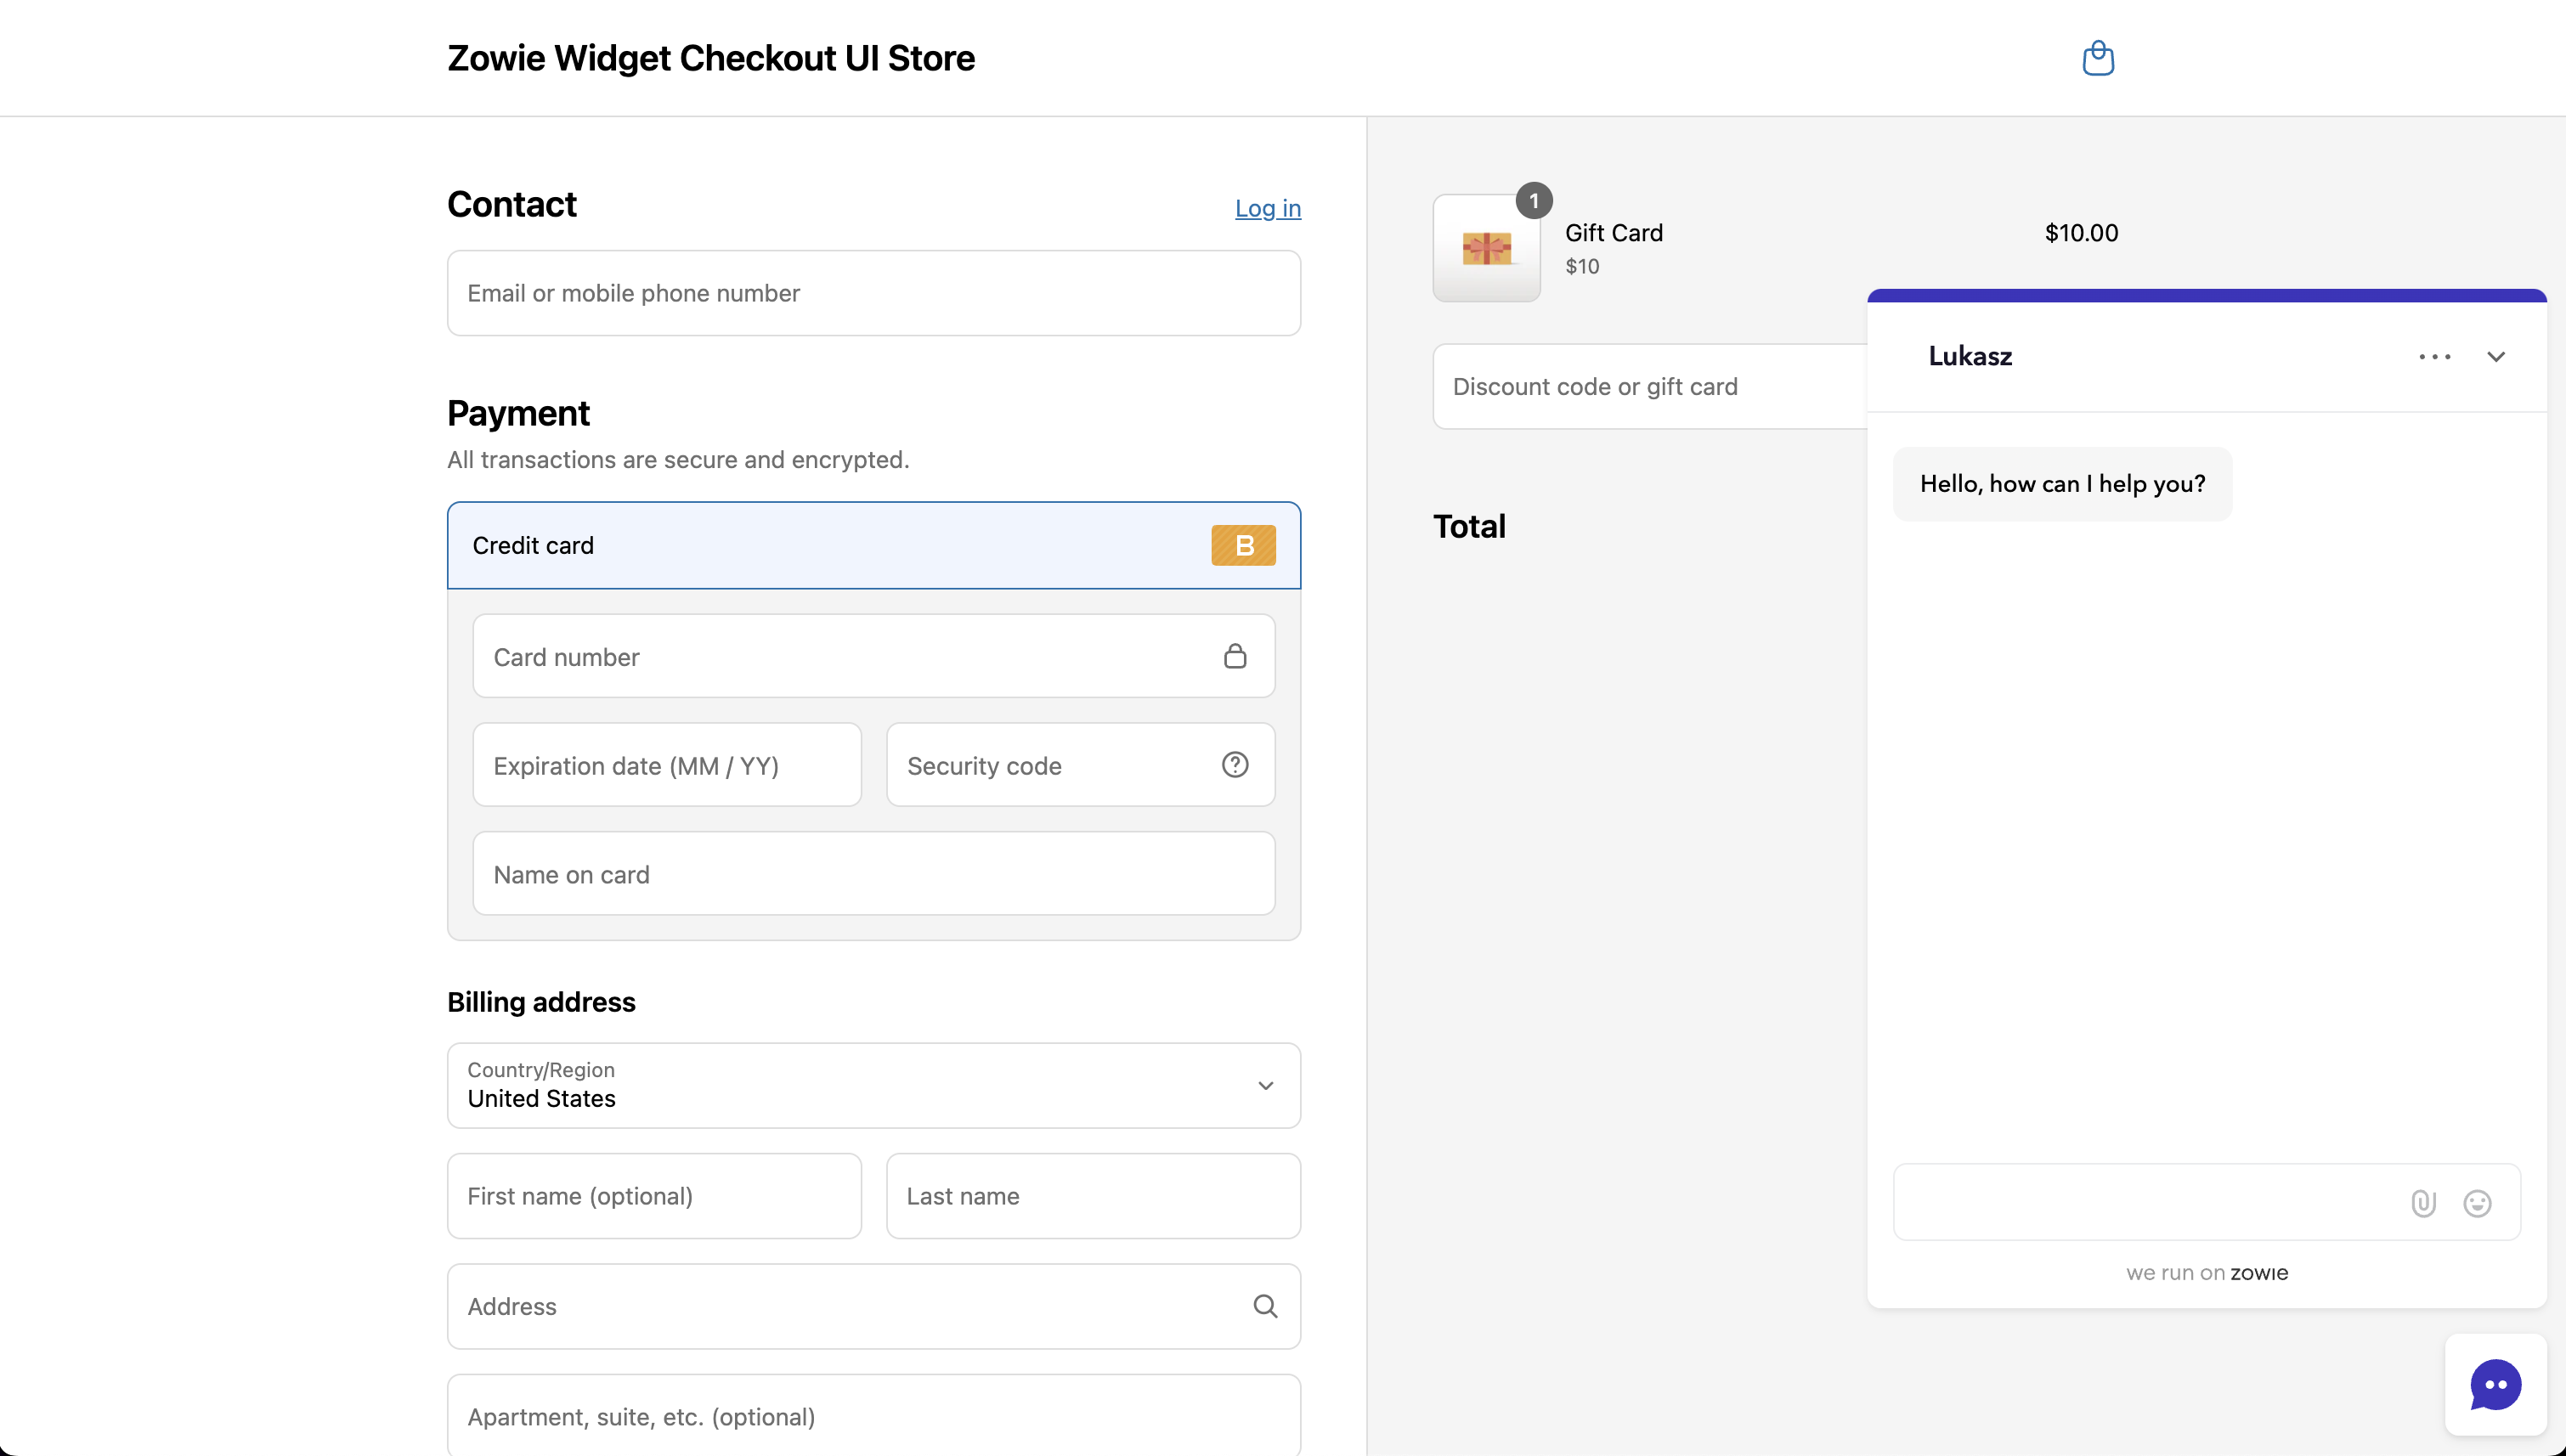
Zowie Widget on Shopify Checkout Page