Integration of Ecommerce Modules with Zowie Platform
Integrating Shopify with Zowie
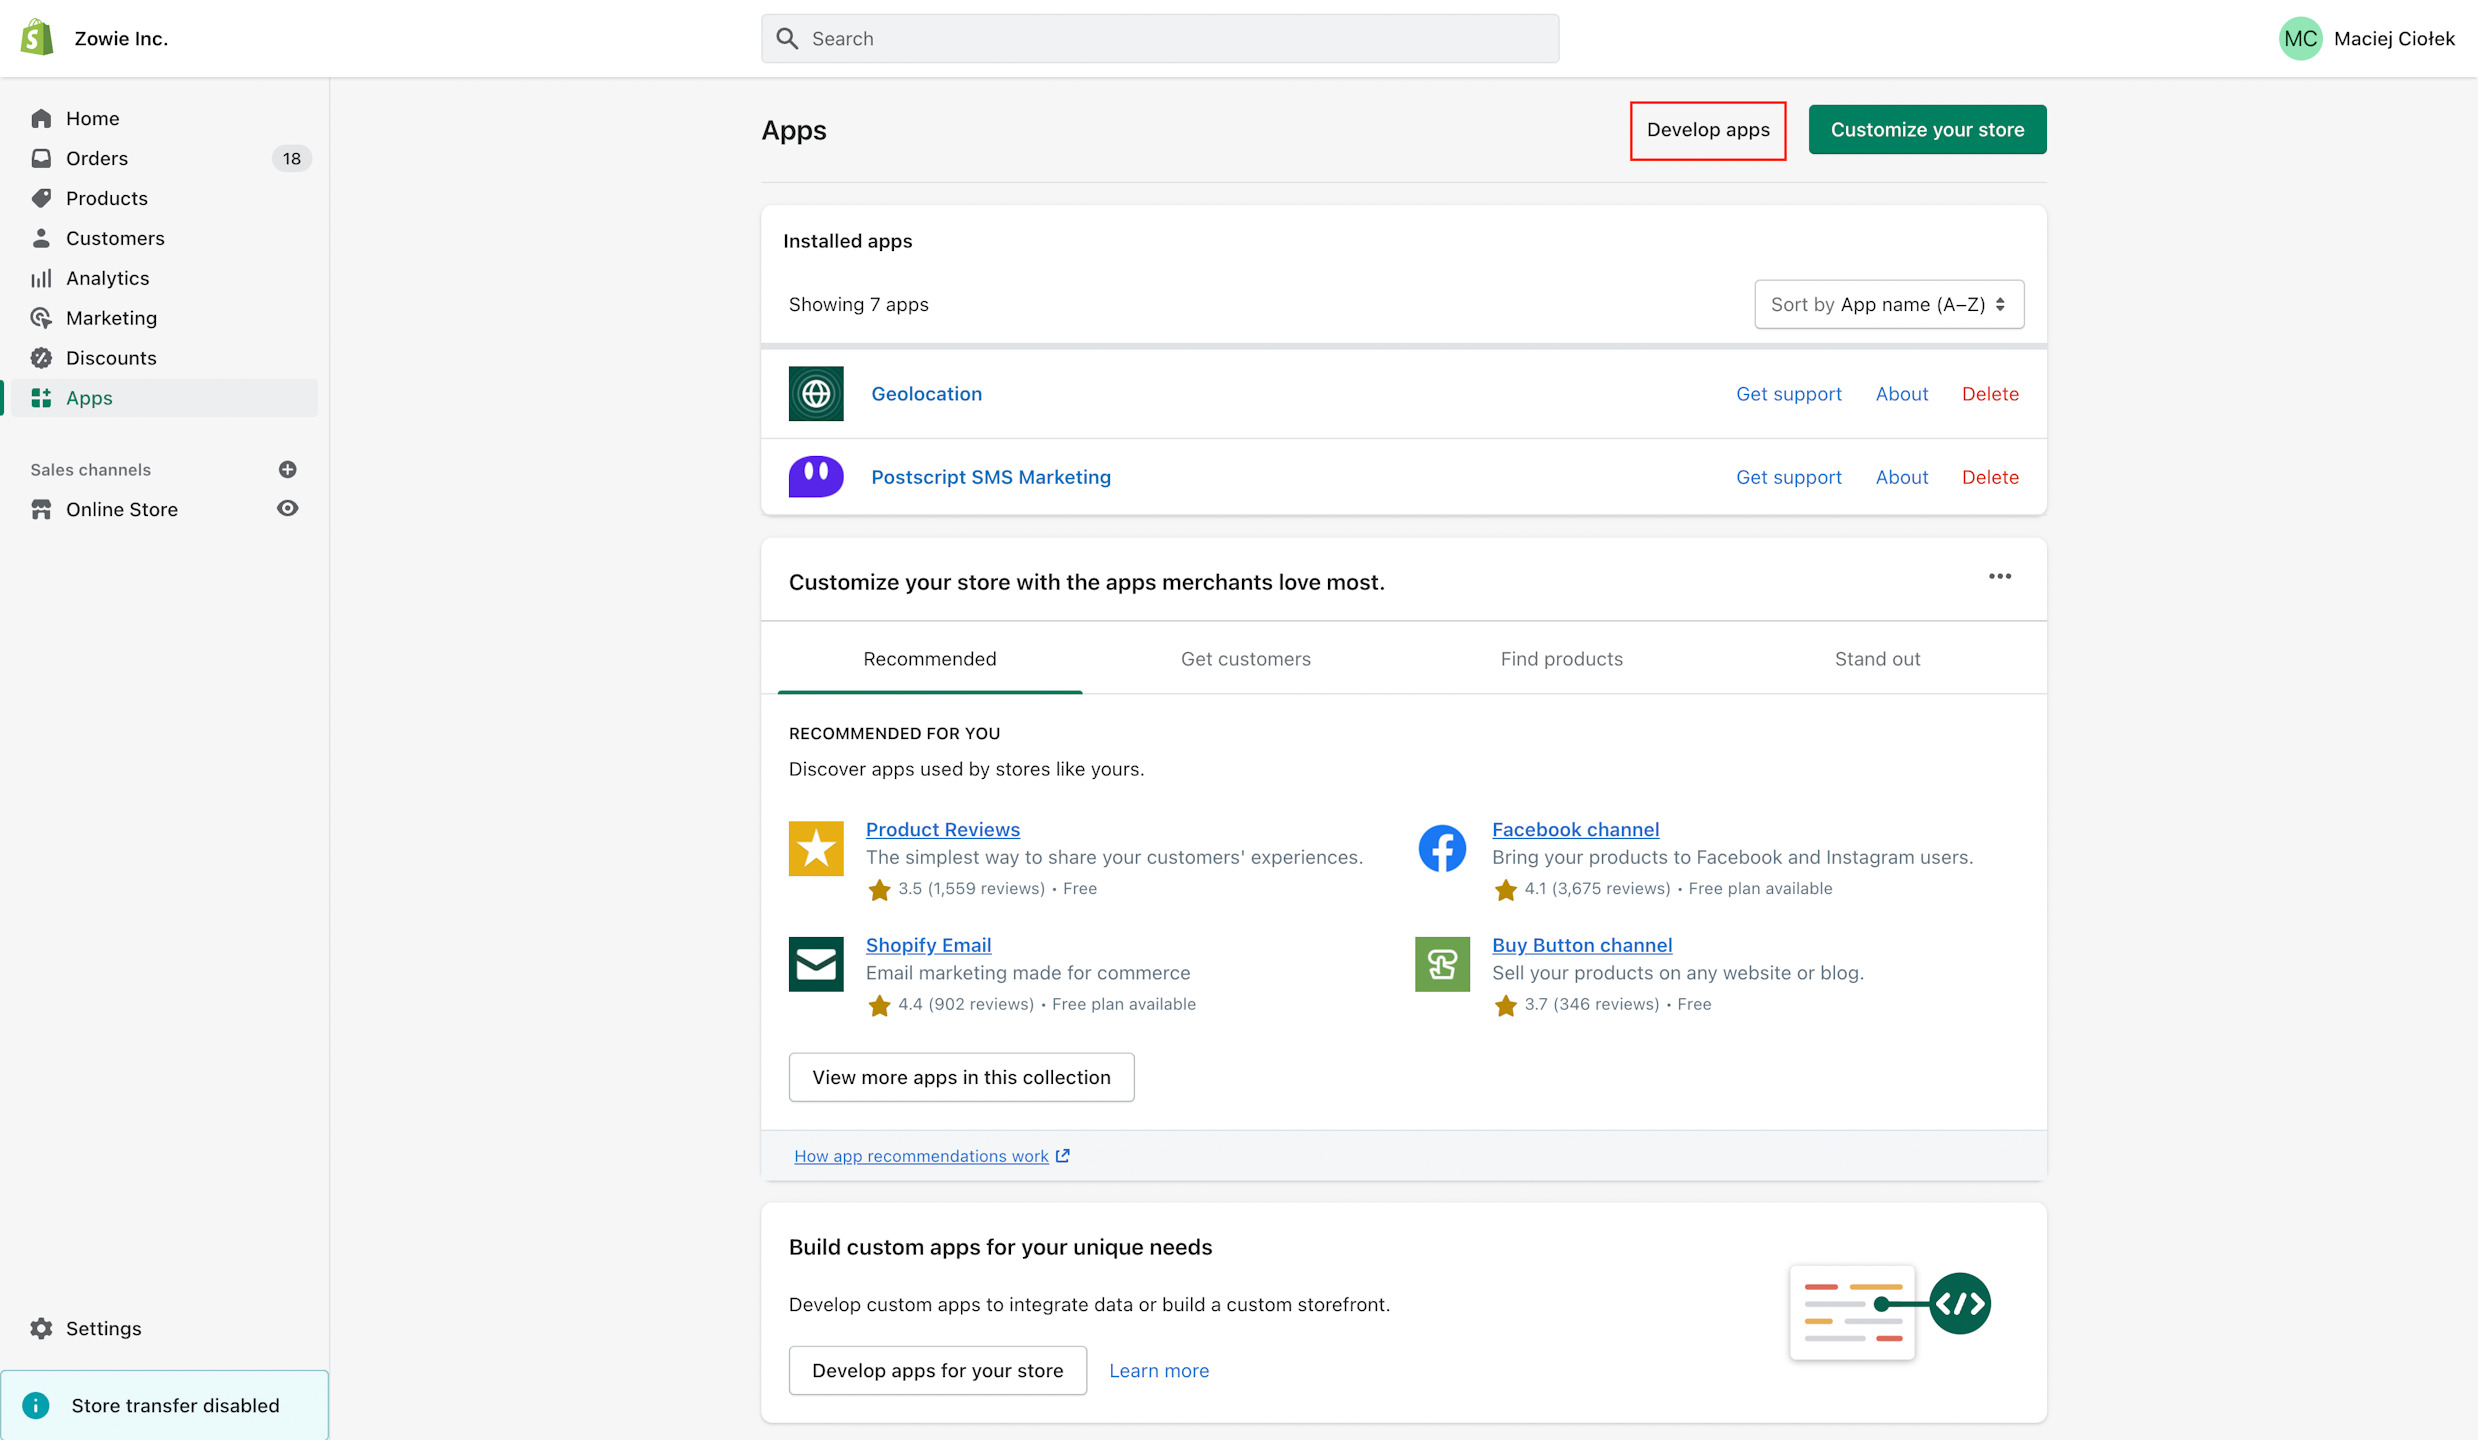
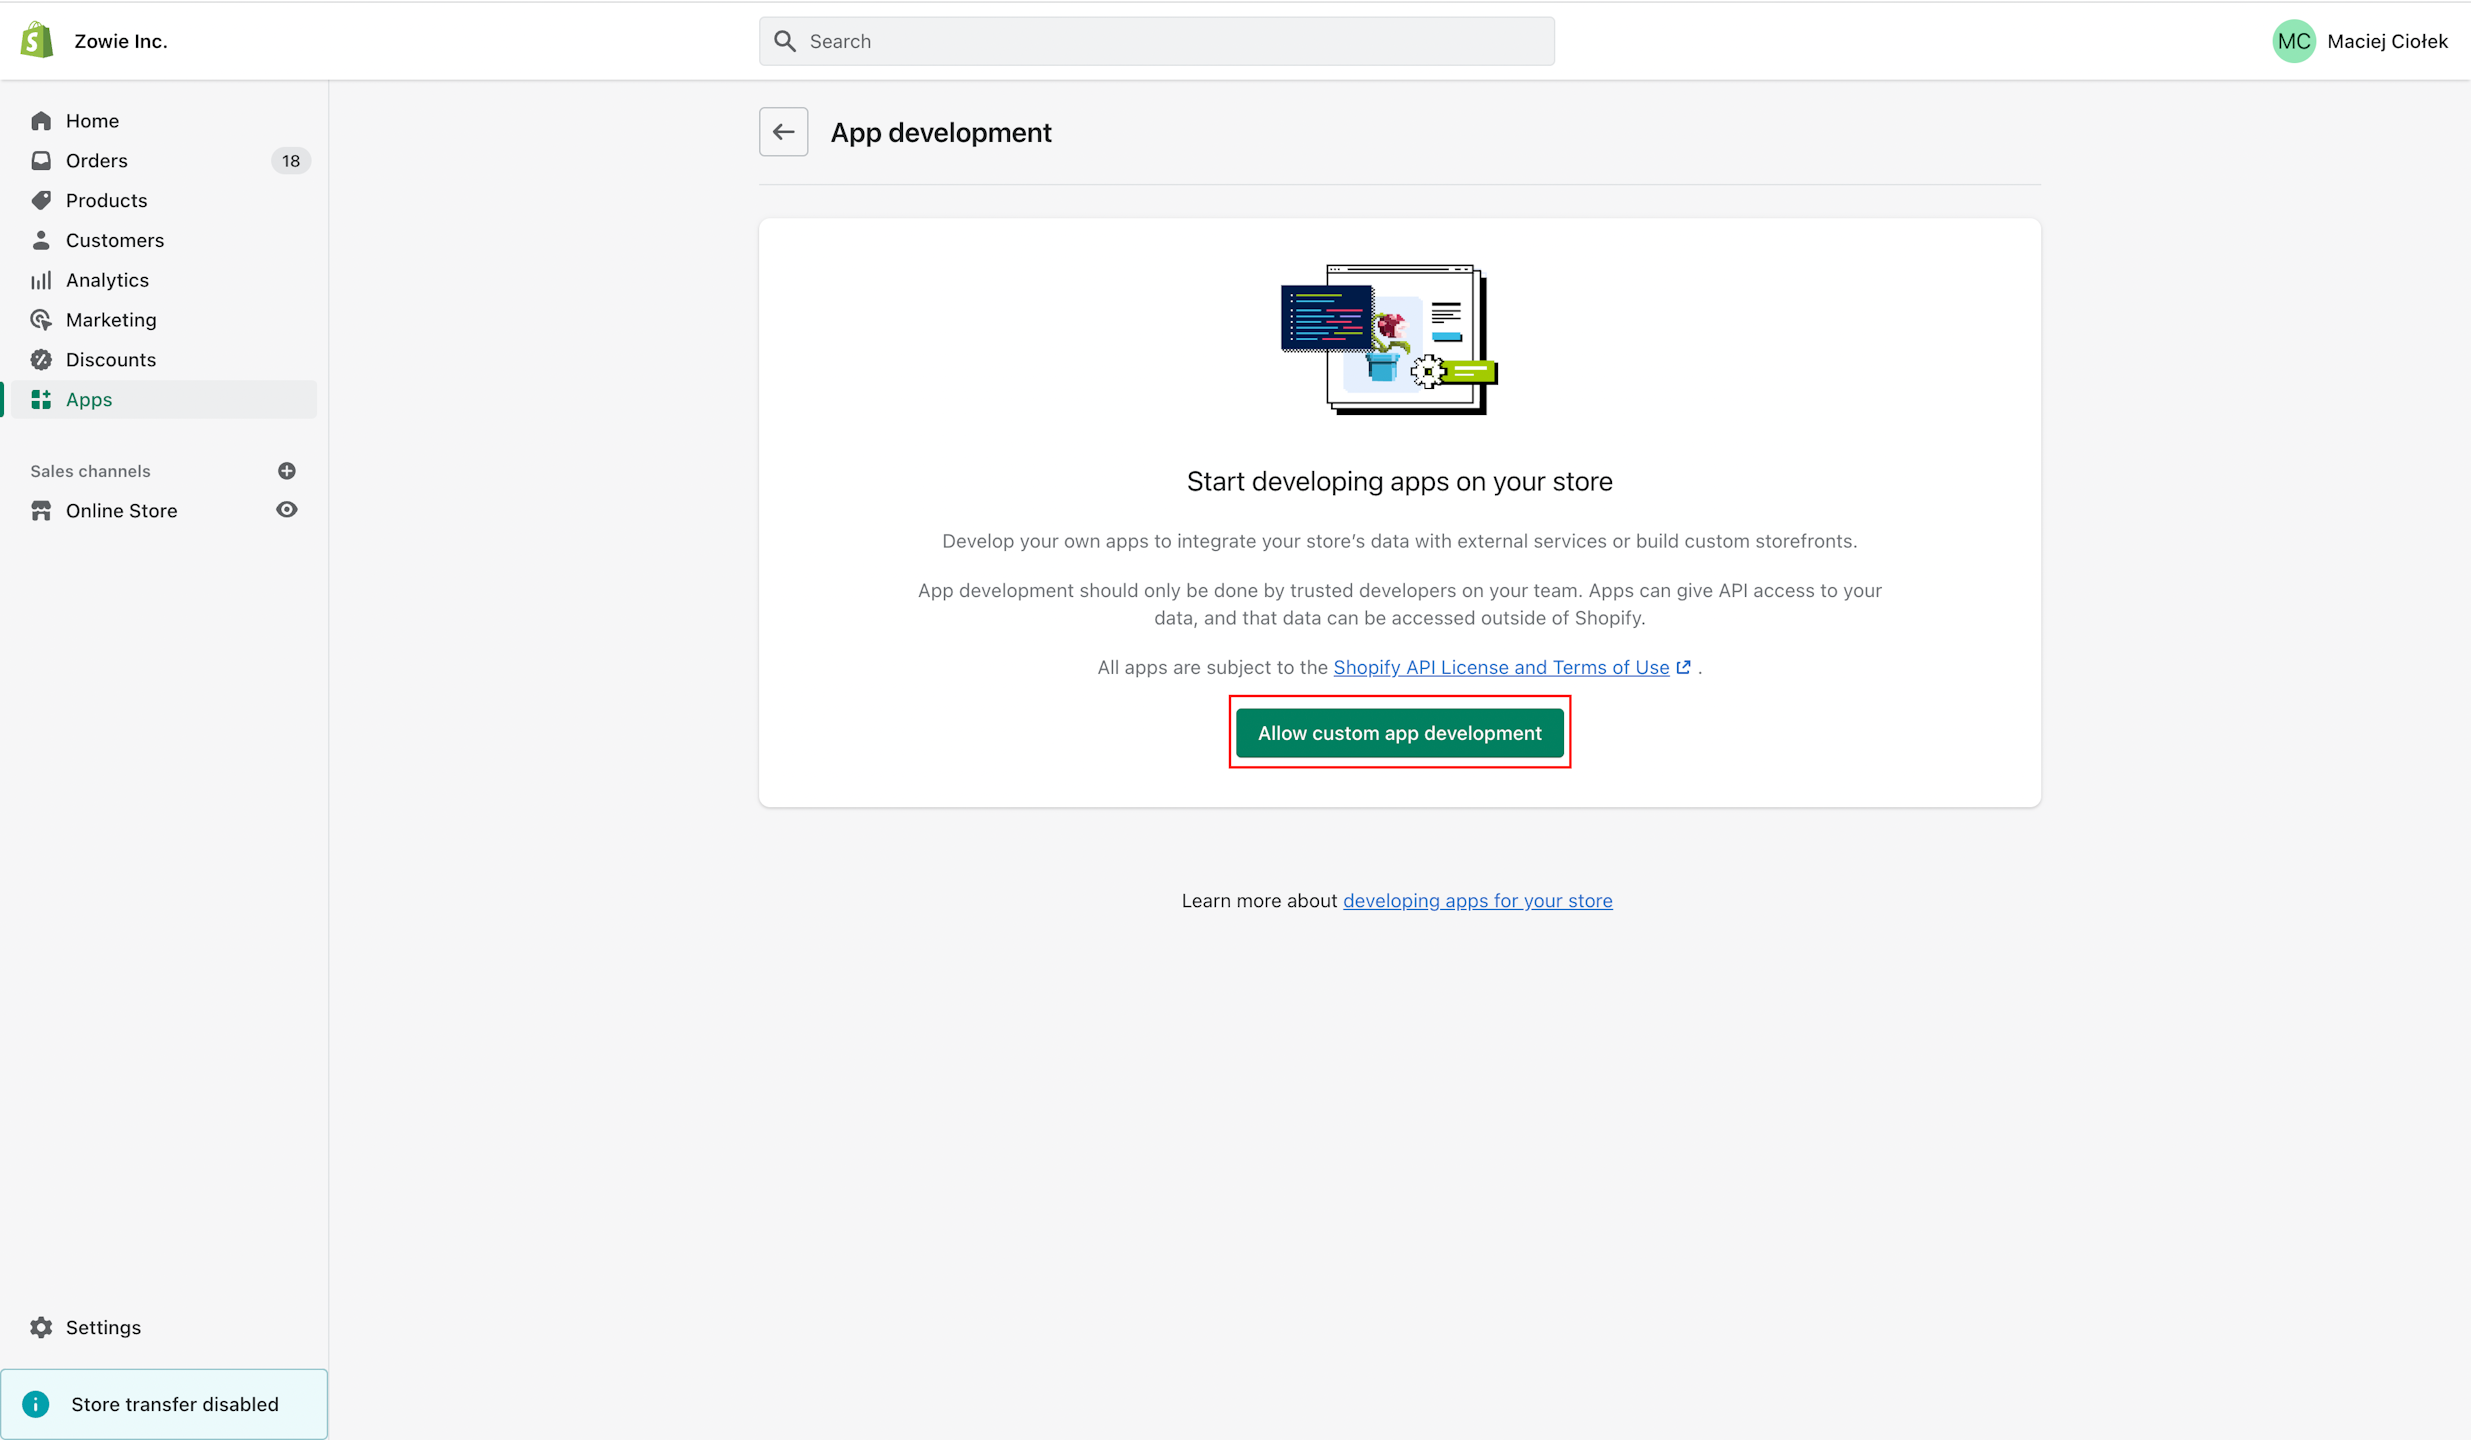
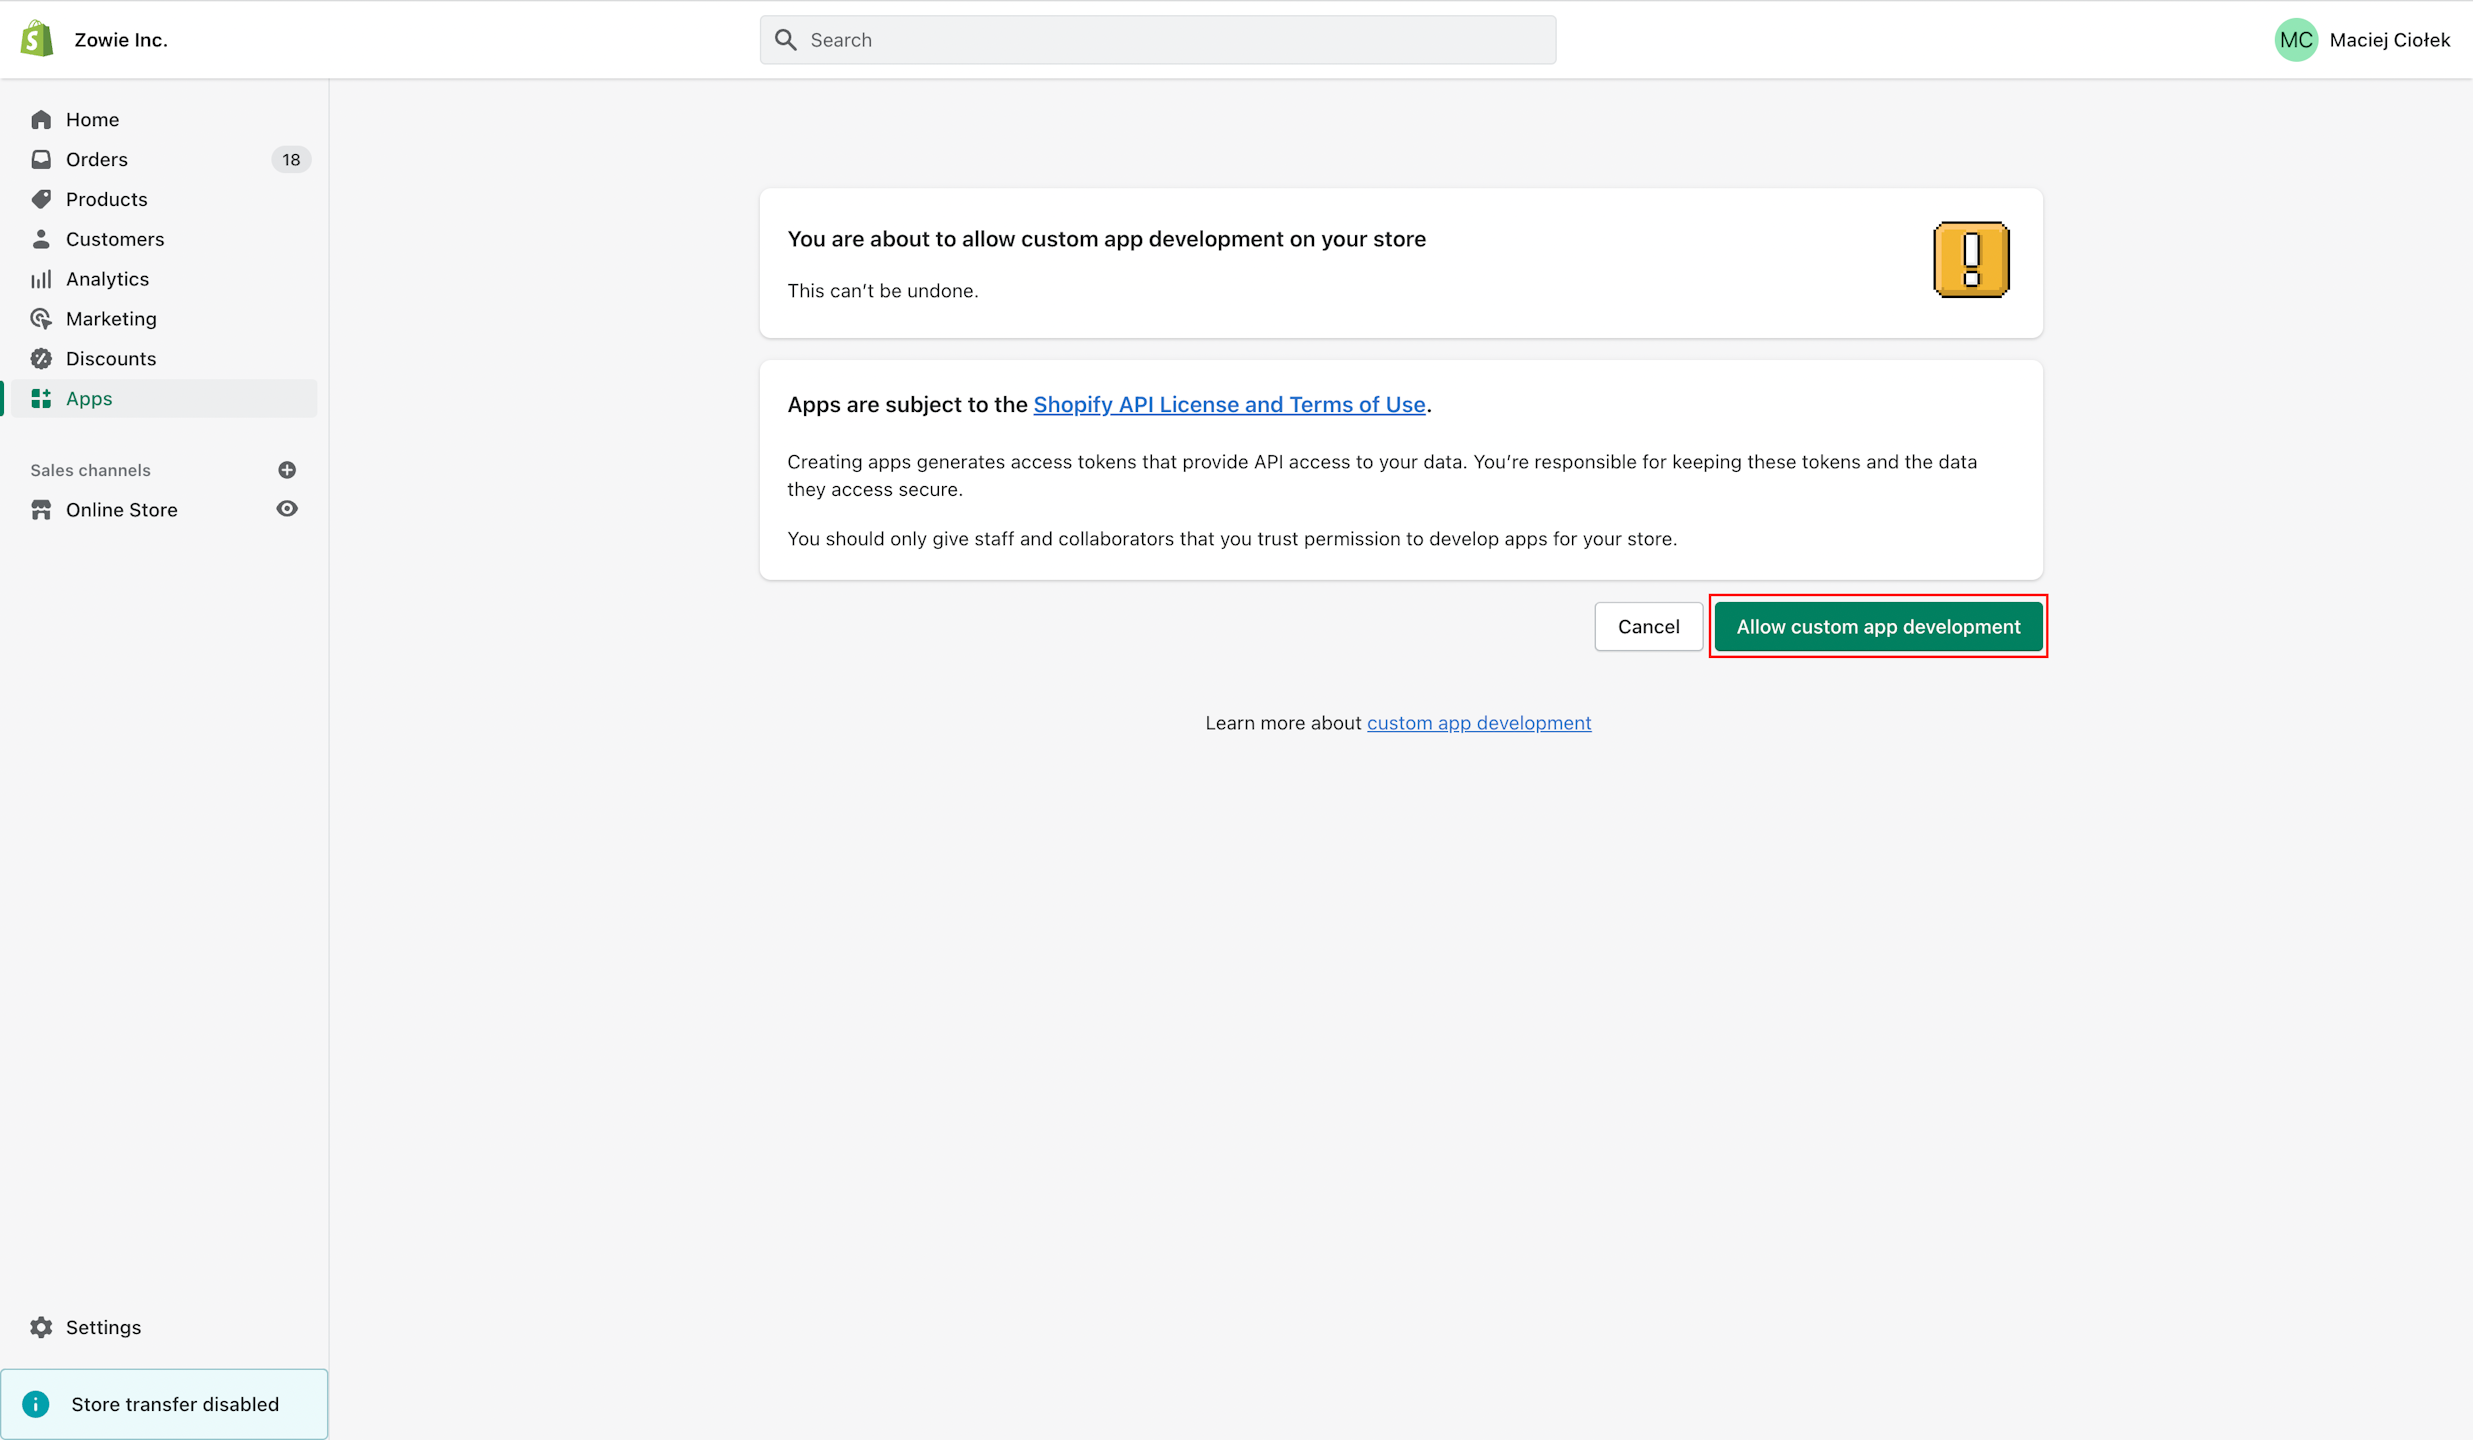
Step 1
Log in to your Shopify Admin and go to the Apps section. Then click/select Allow custom app development, if not enabled yet.
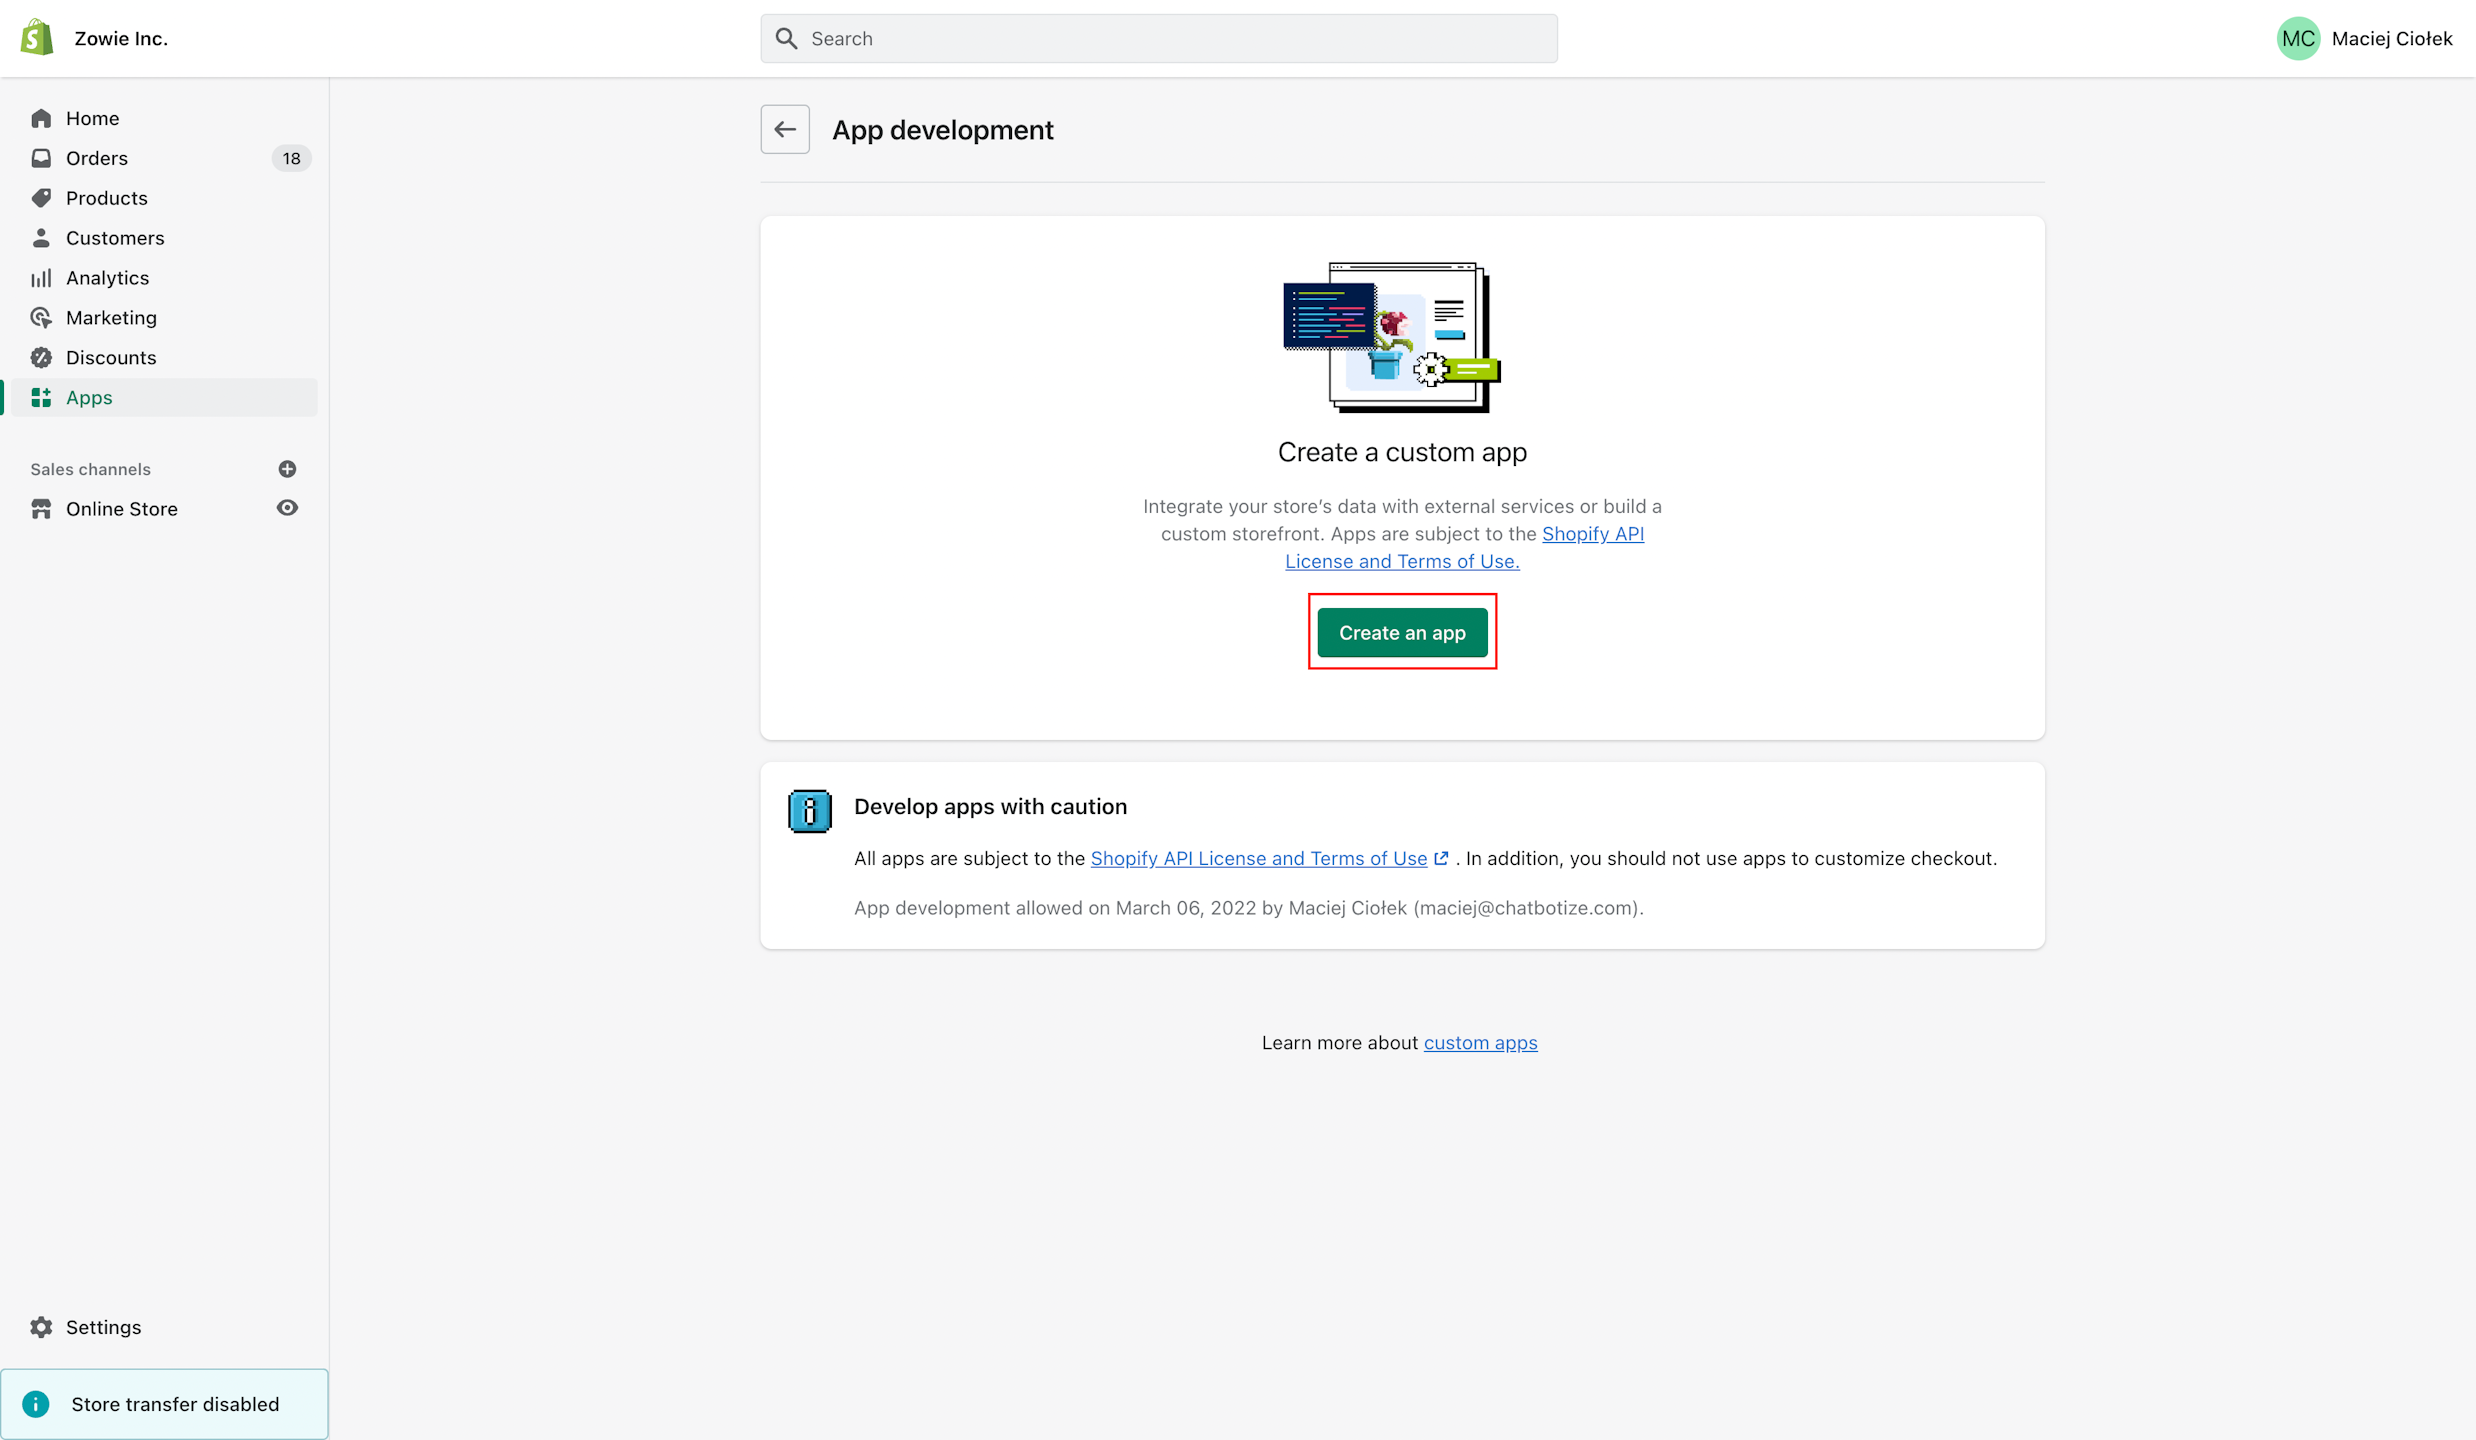
Step 2
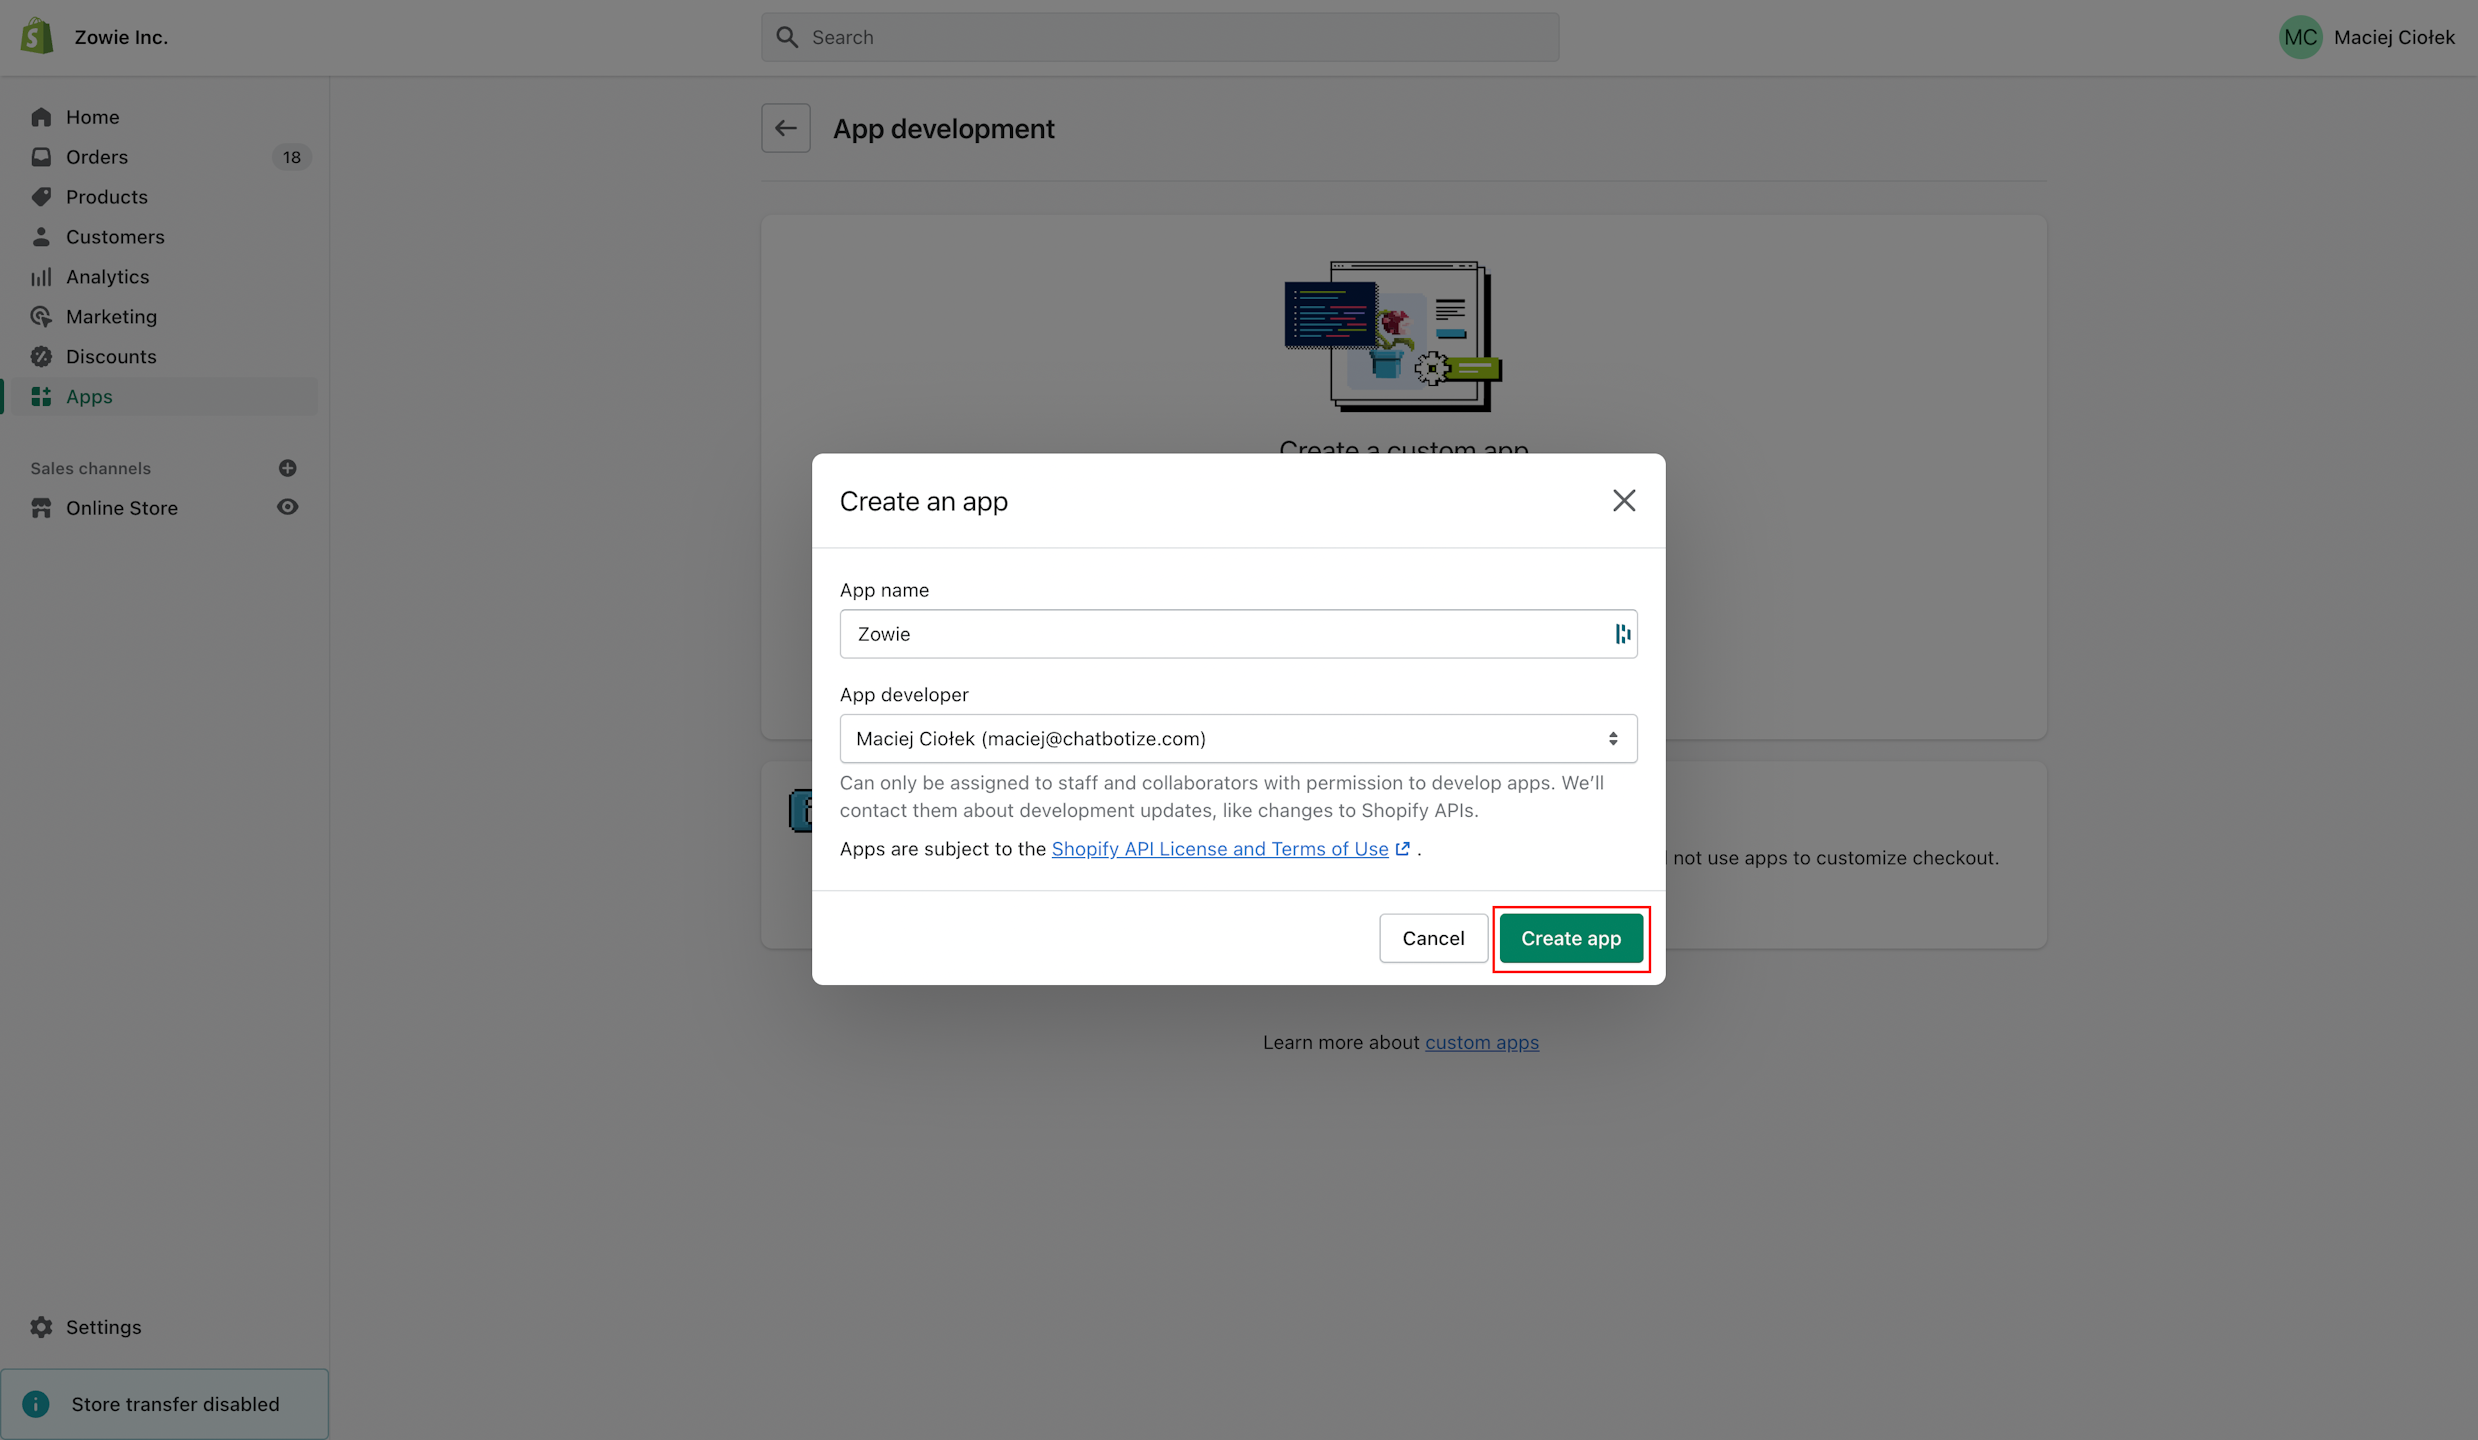
Once you allowed for customer app development, click Create an app to configure integration for Zowie. Provide a name for it and click Create app.
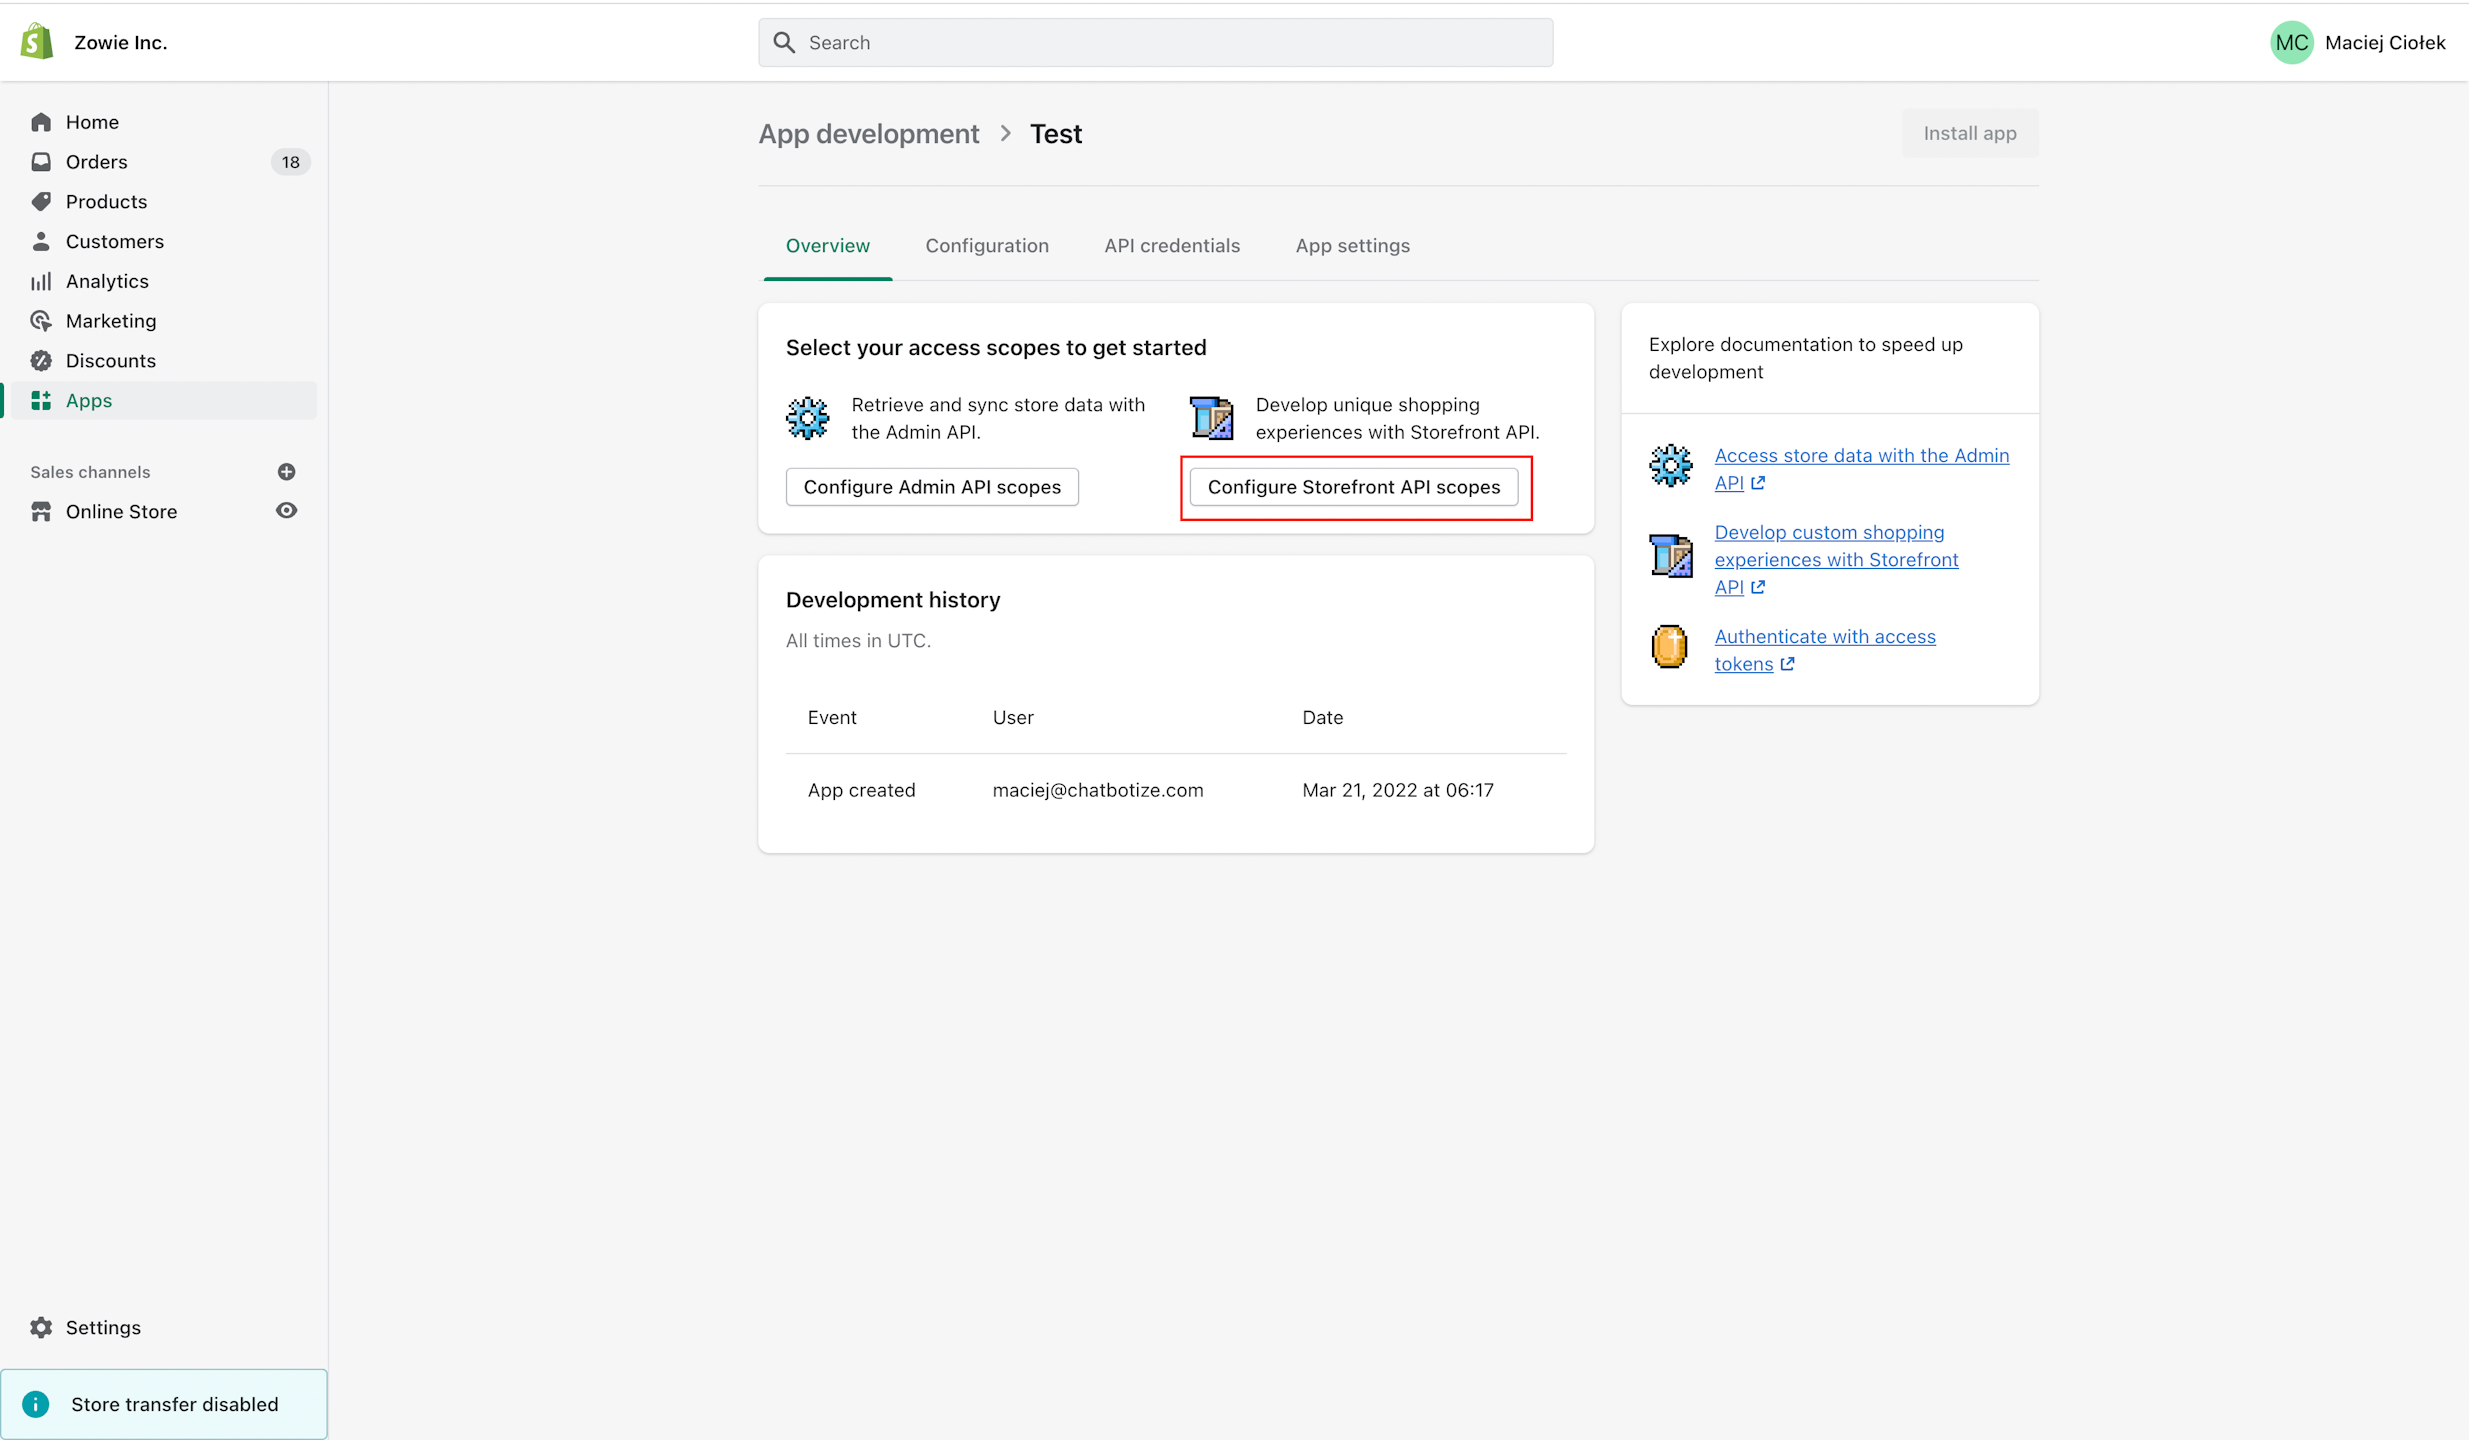
Step 3
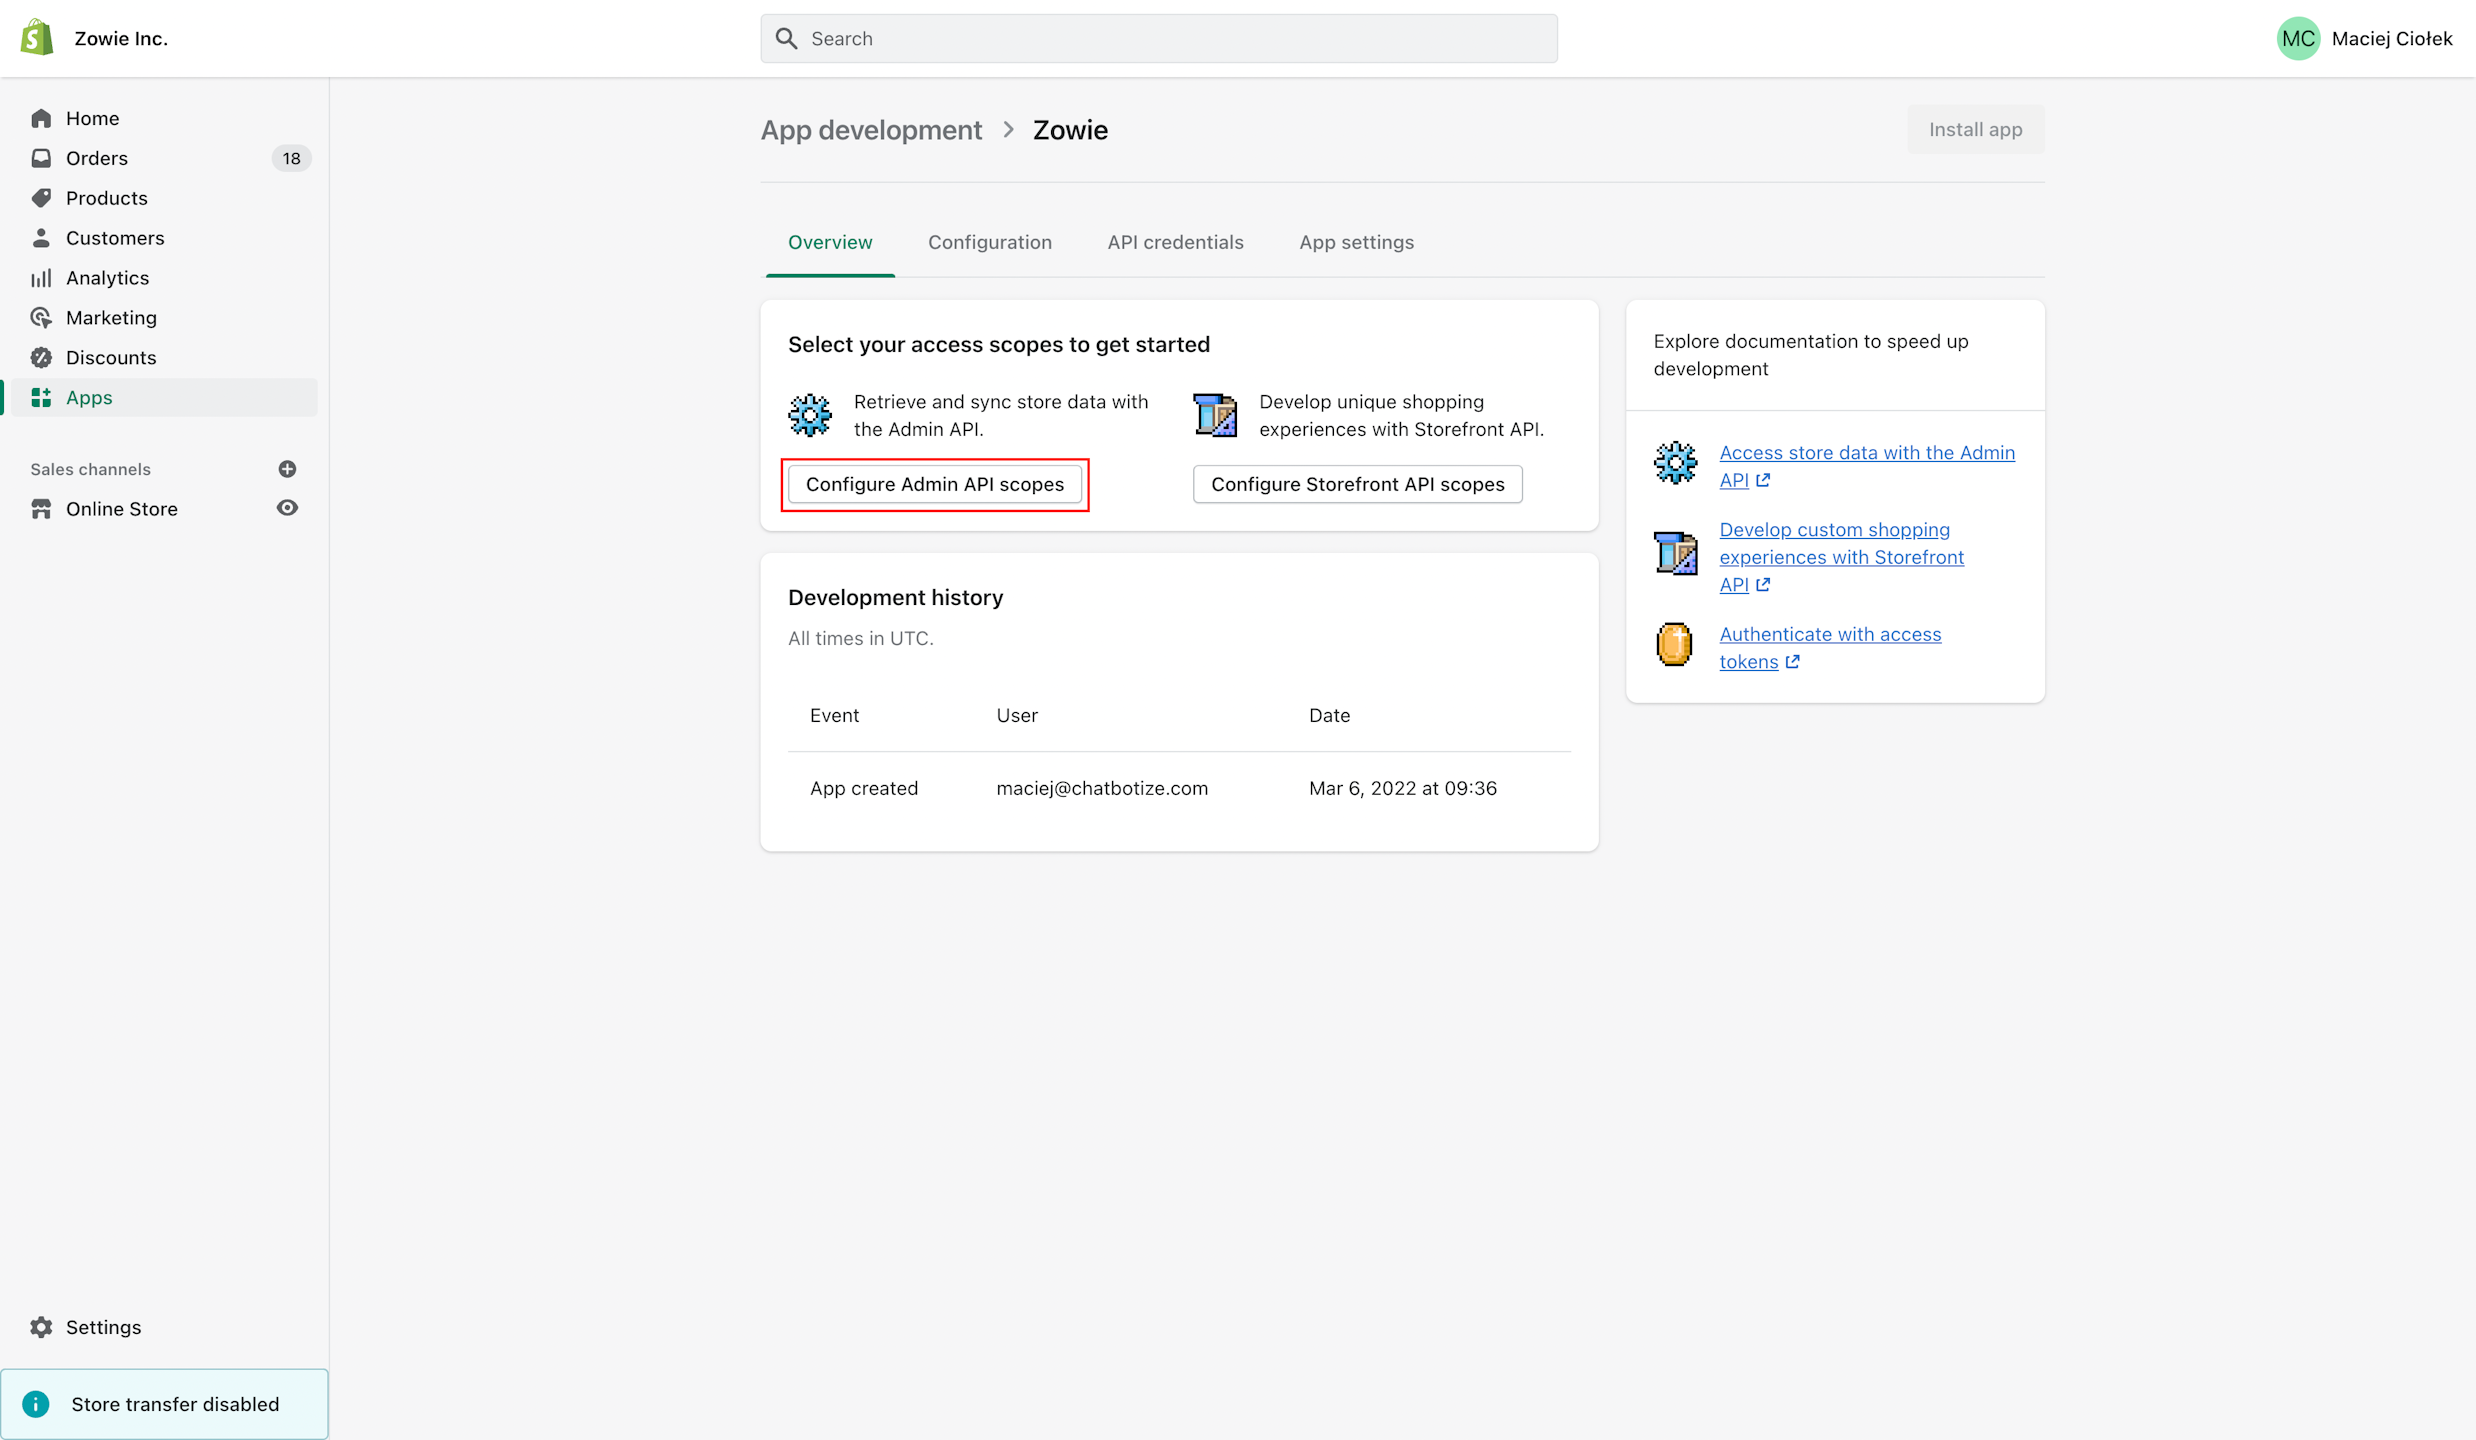
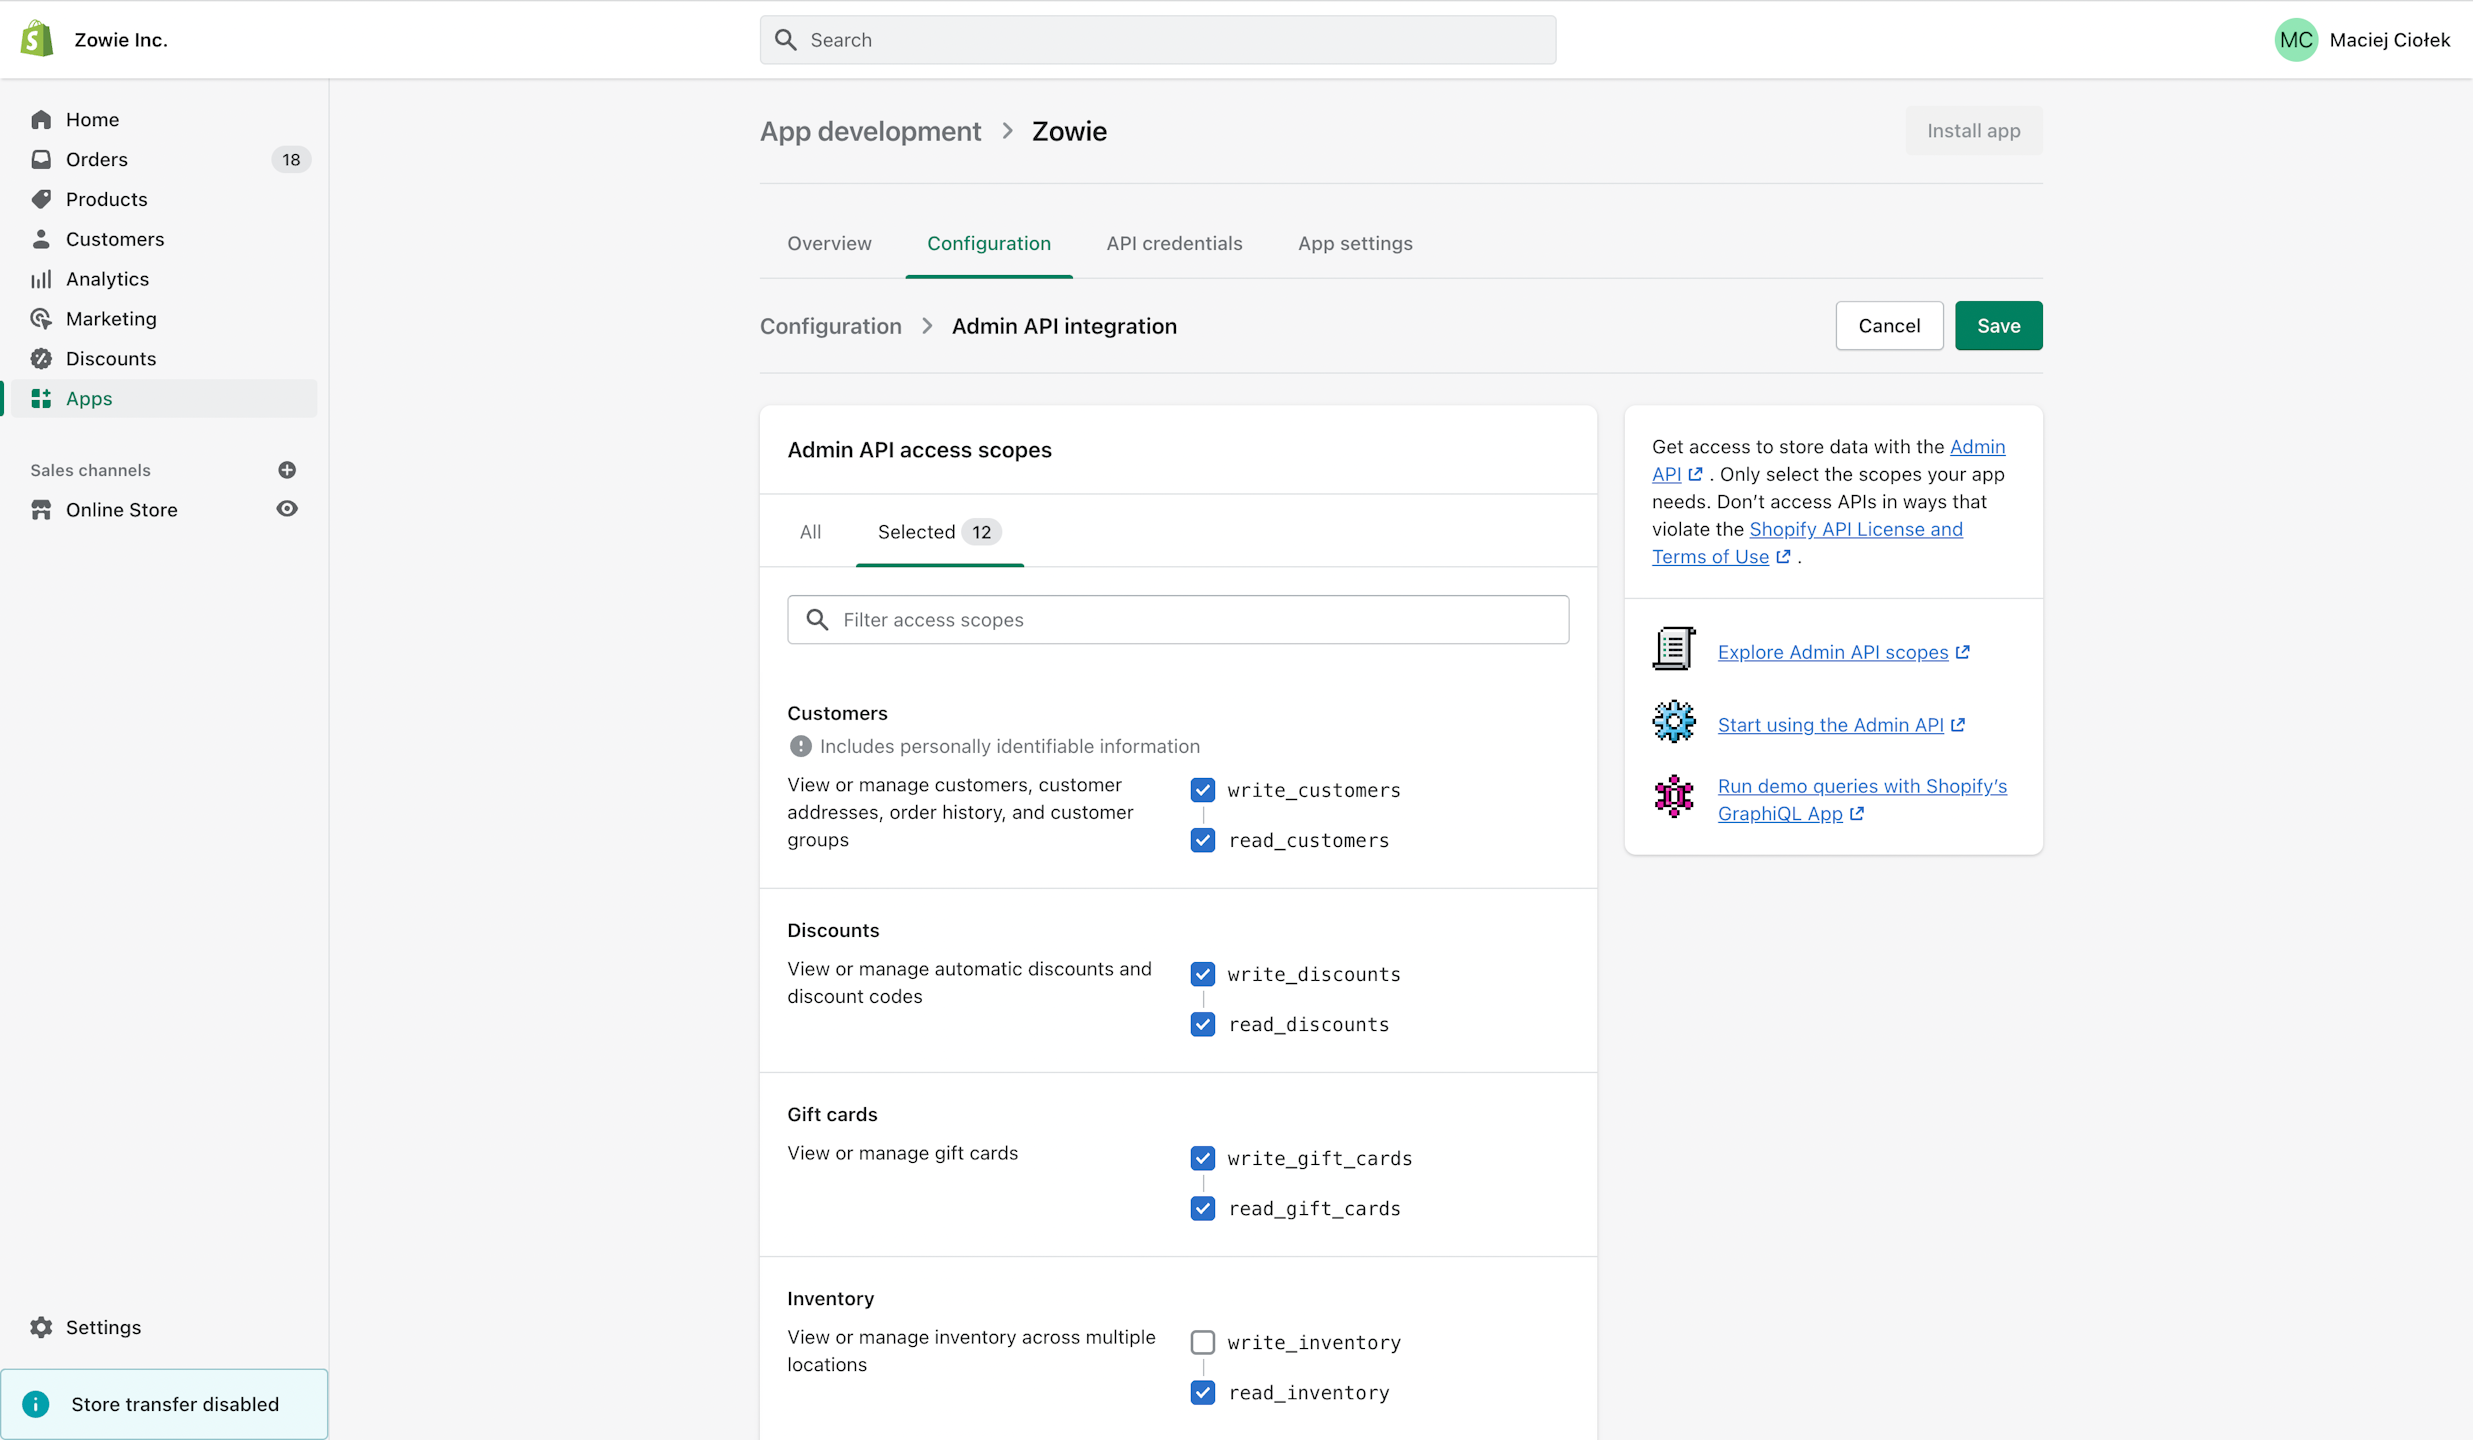
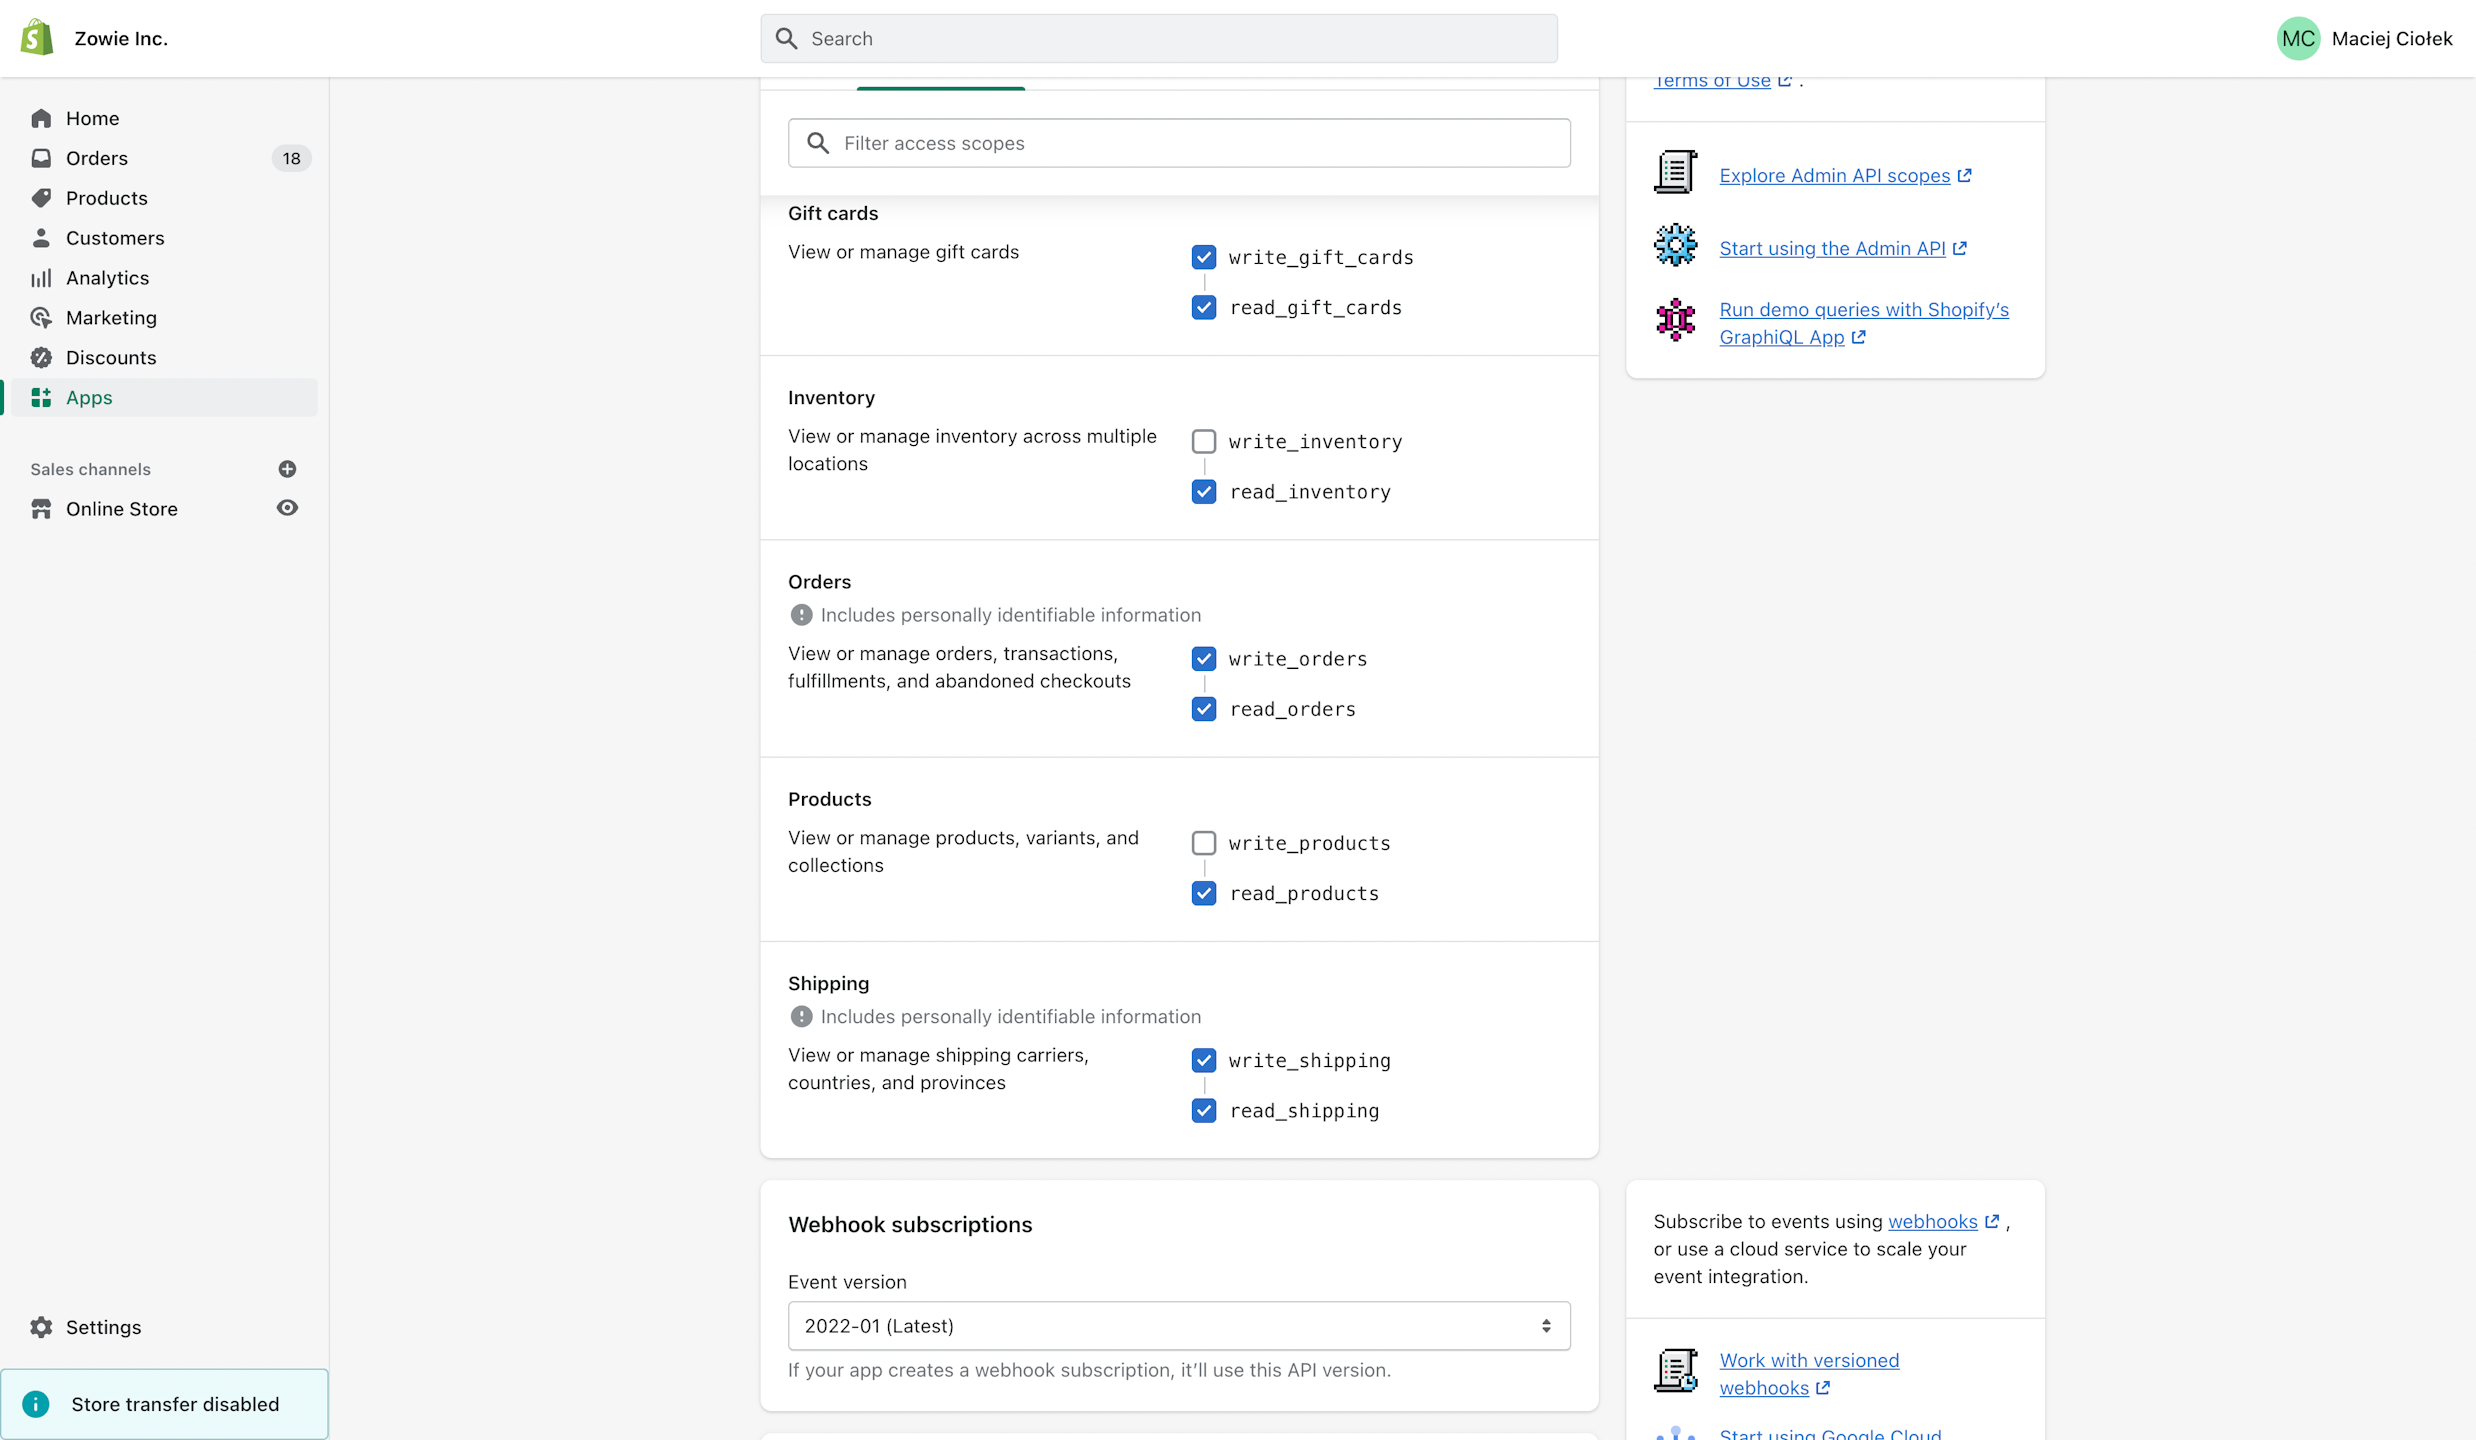
Once your app has been created, click Configure Admin API scopes and select the following scopes:
- write_customers;
- read_customers;
- write_discounts;
- read_discounts;
- write_gift_cards;
- read_gift_cards;
- write_shipping;
- read_shipping;
- write_orders;
- read_orders;
- read_products;
- read_inventory.
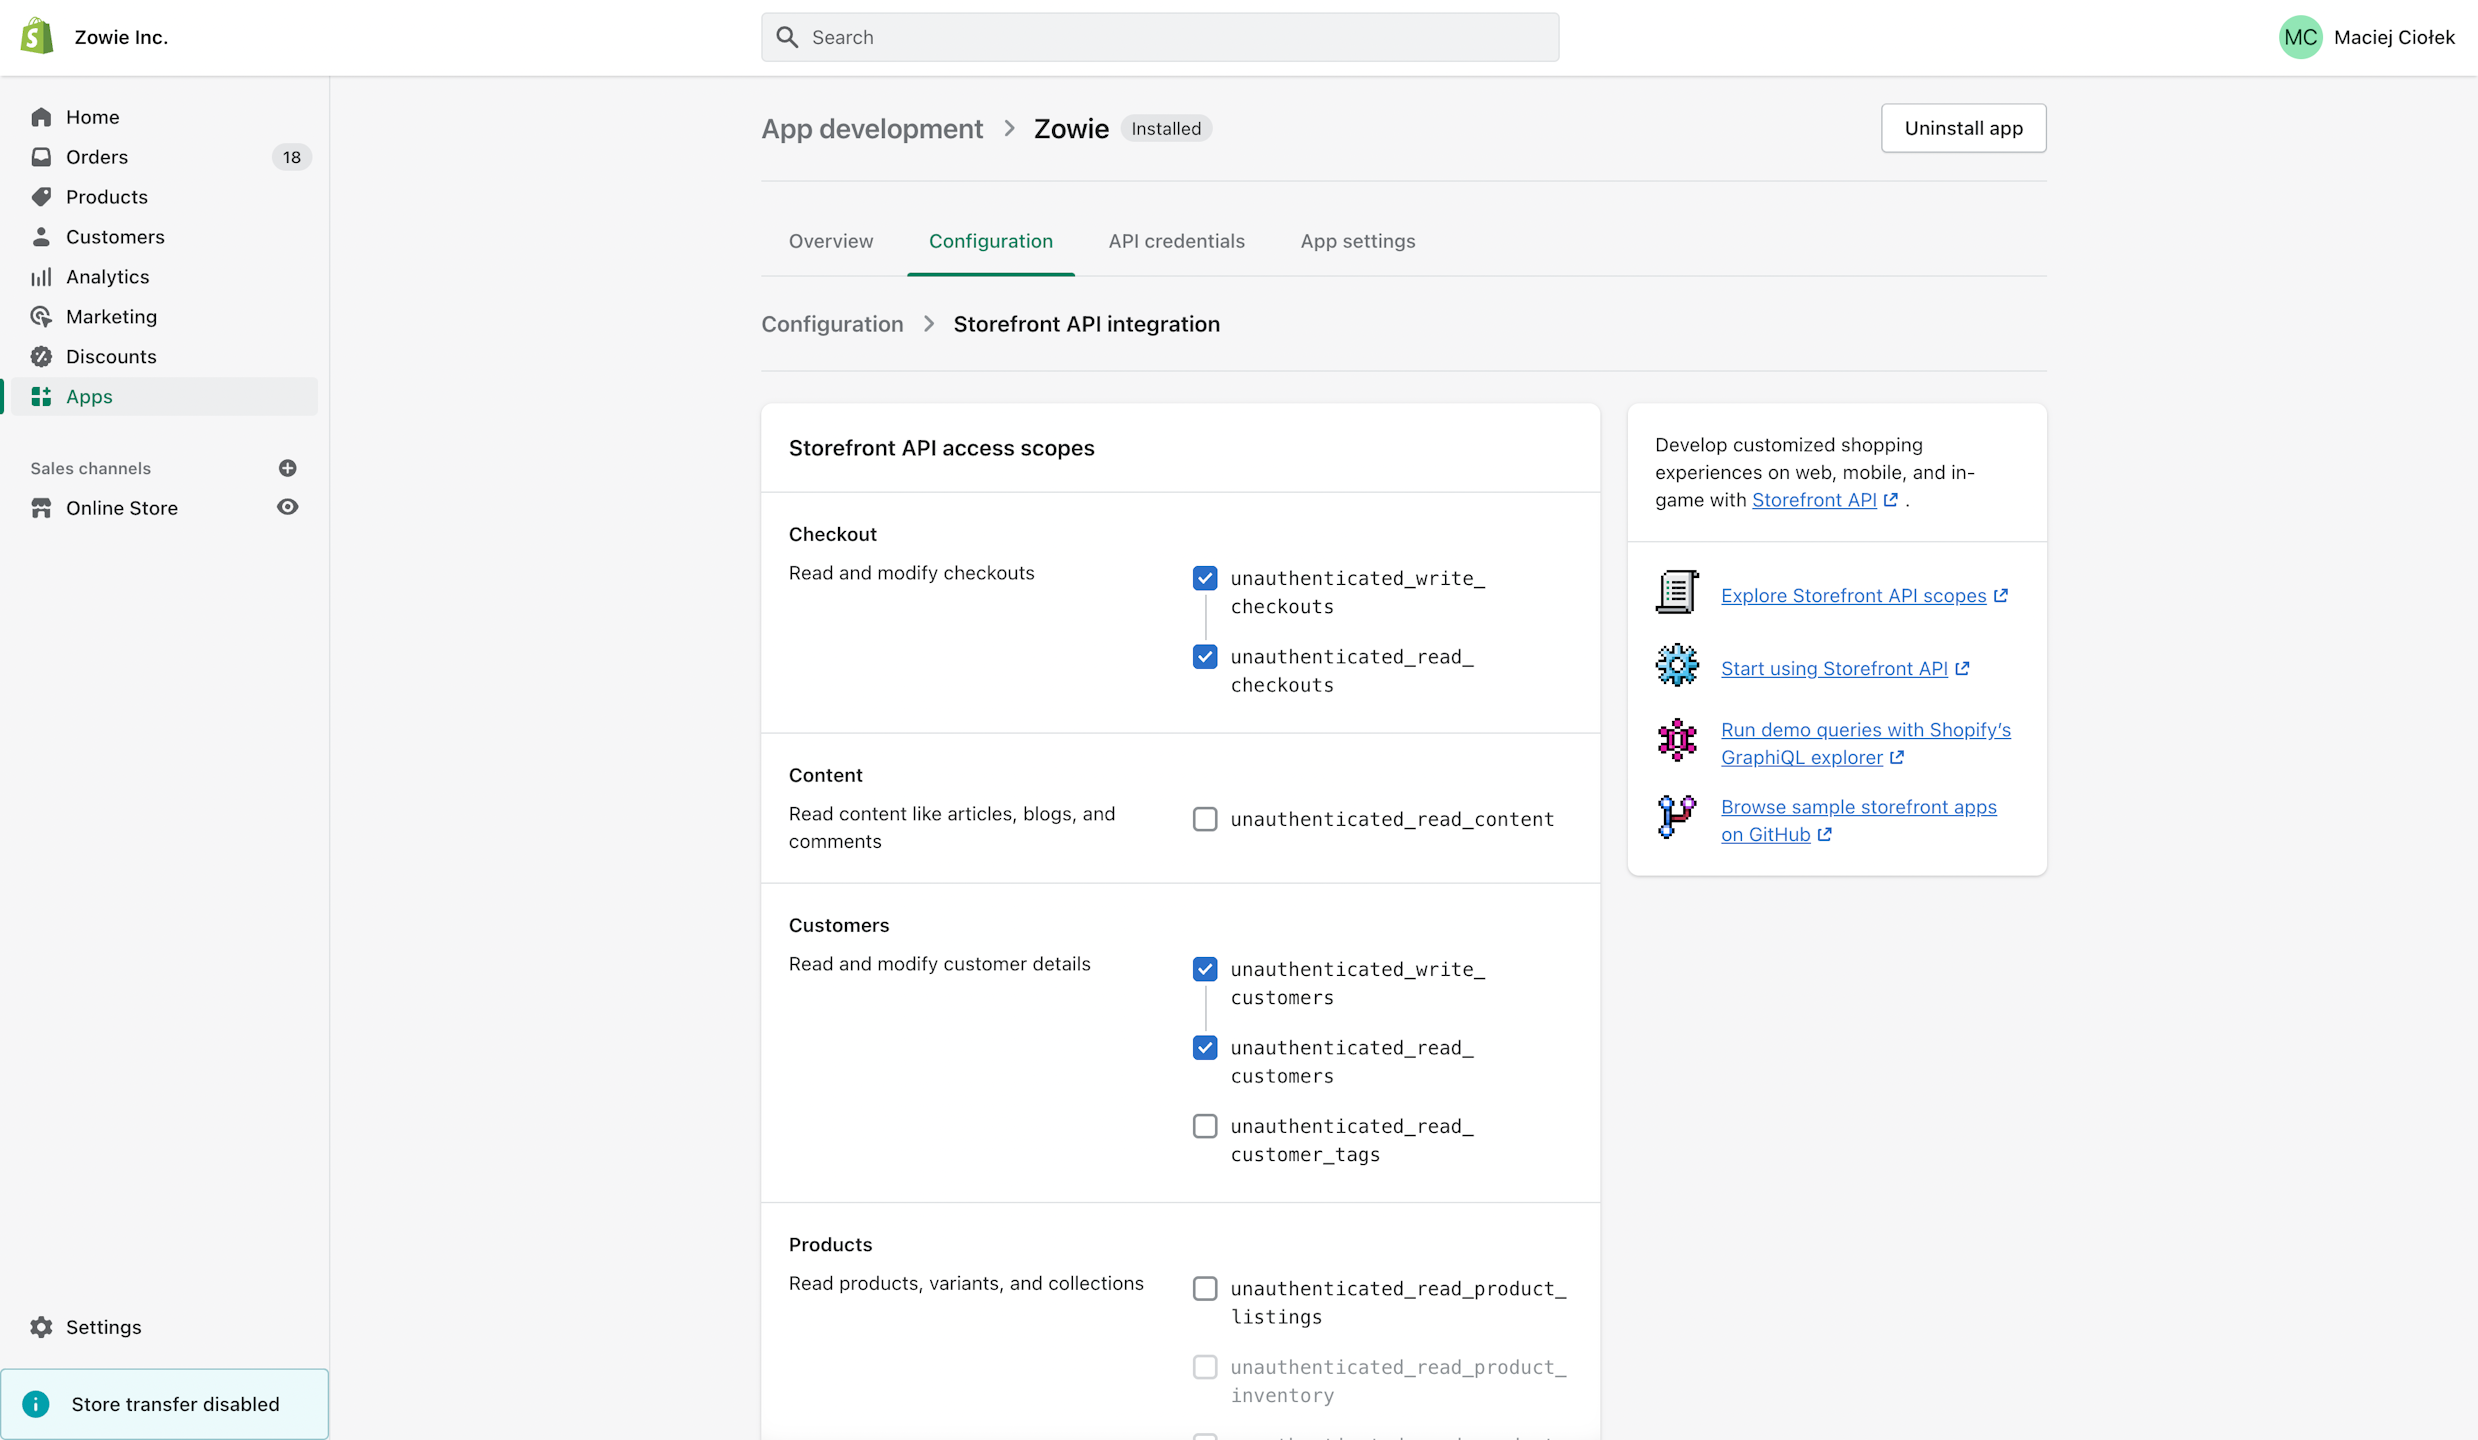
Step 4
Click Configure Storefront API scopes and select following scopes:
- unauthenticated_write_customers;
- unauthenticated_read_customers;
- unauthenticated_write_checkouts;
- unauthenticated_read_checkouts.
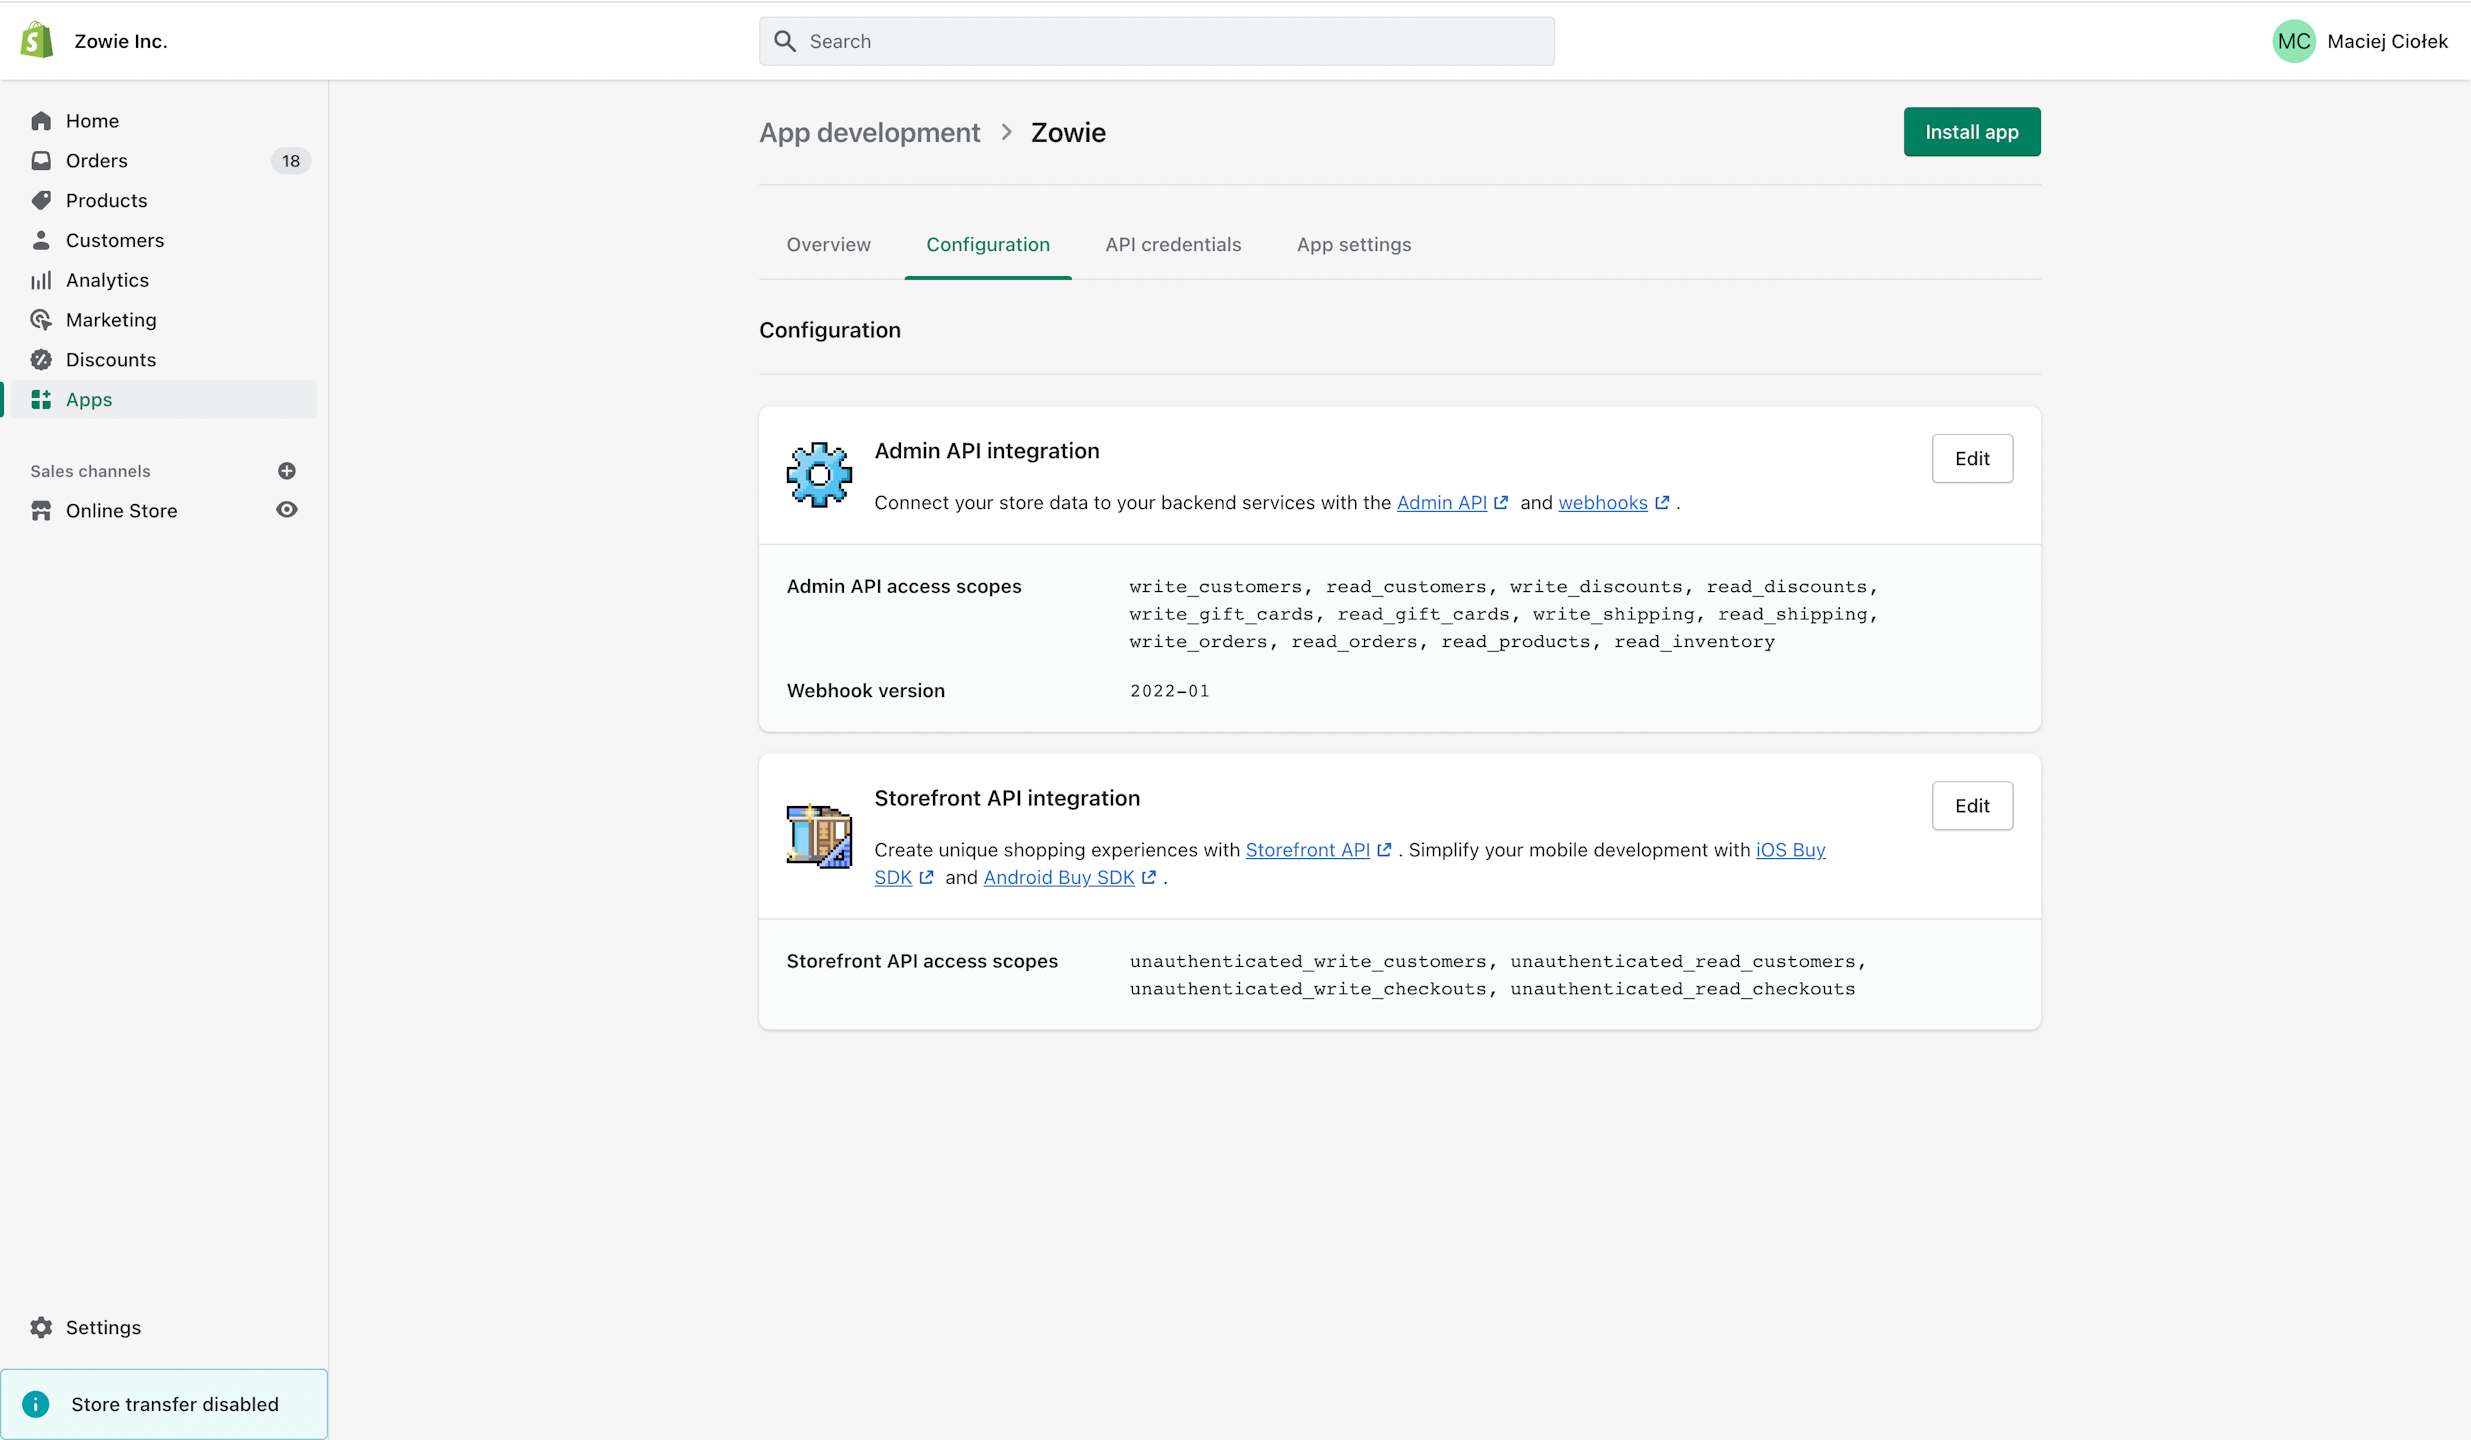
Step 5
After successful configuration, you should see the following scopes configuration screen.
Step 6
Click Install app to install the application within your Shopify store.
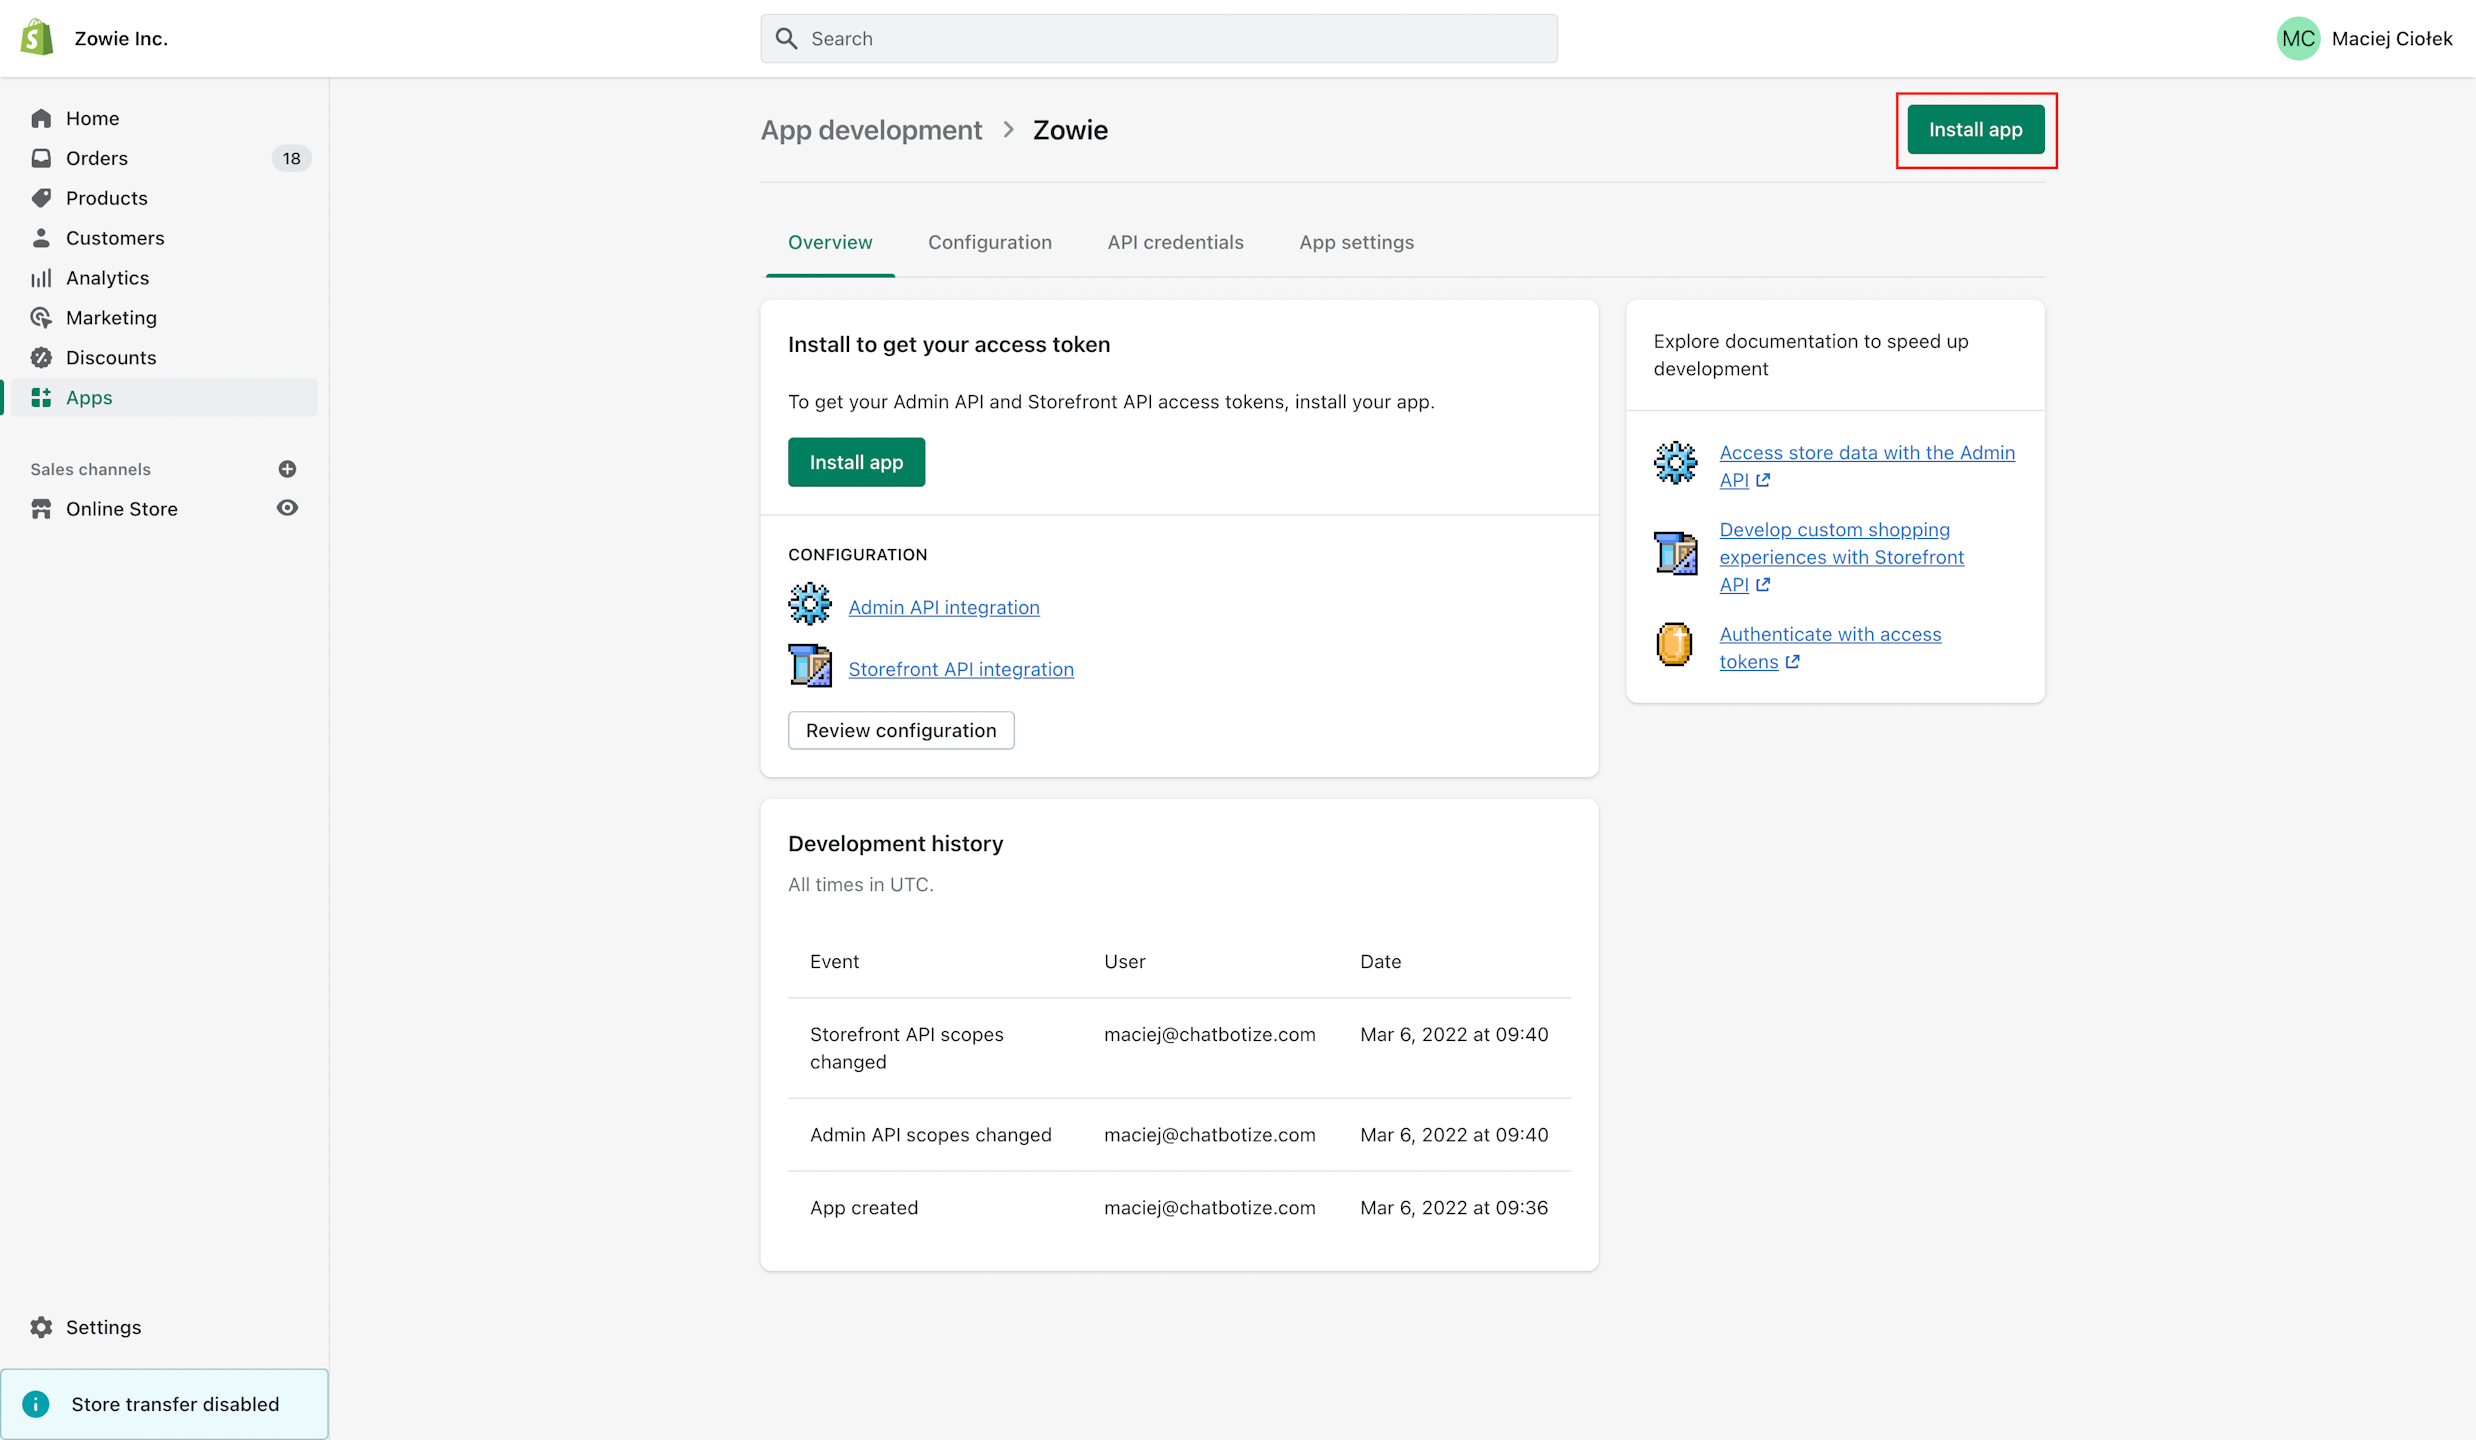
Step 7
Once app has been installed successful, you will get access to Admin API access token and Storefront API access token.

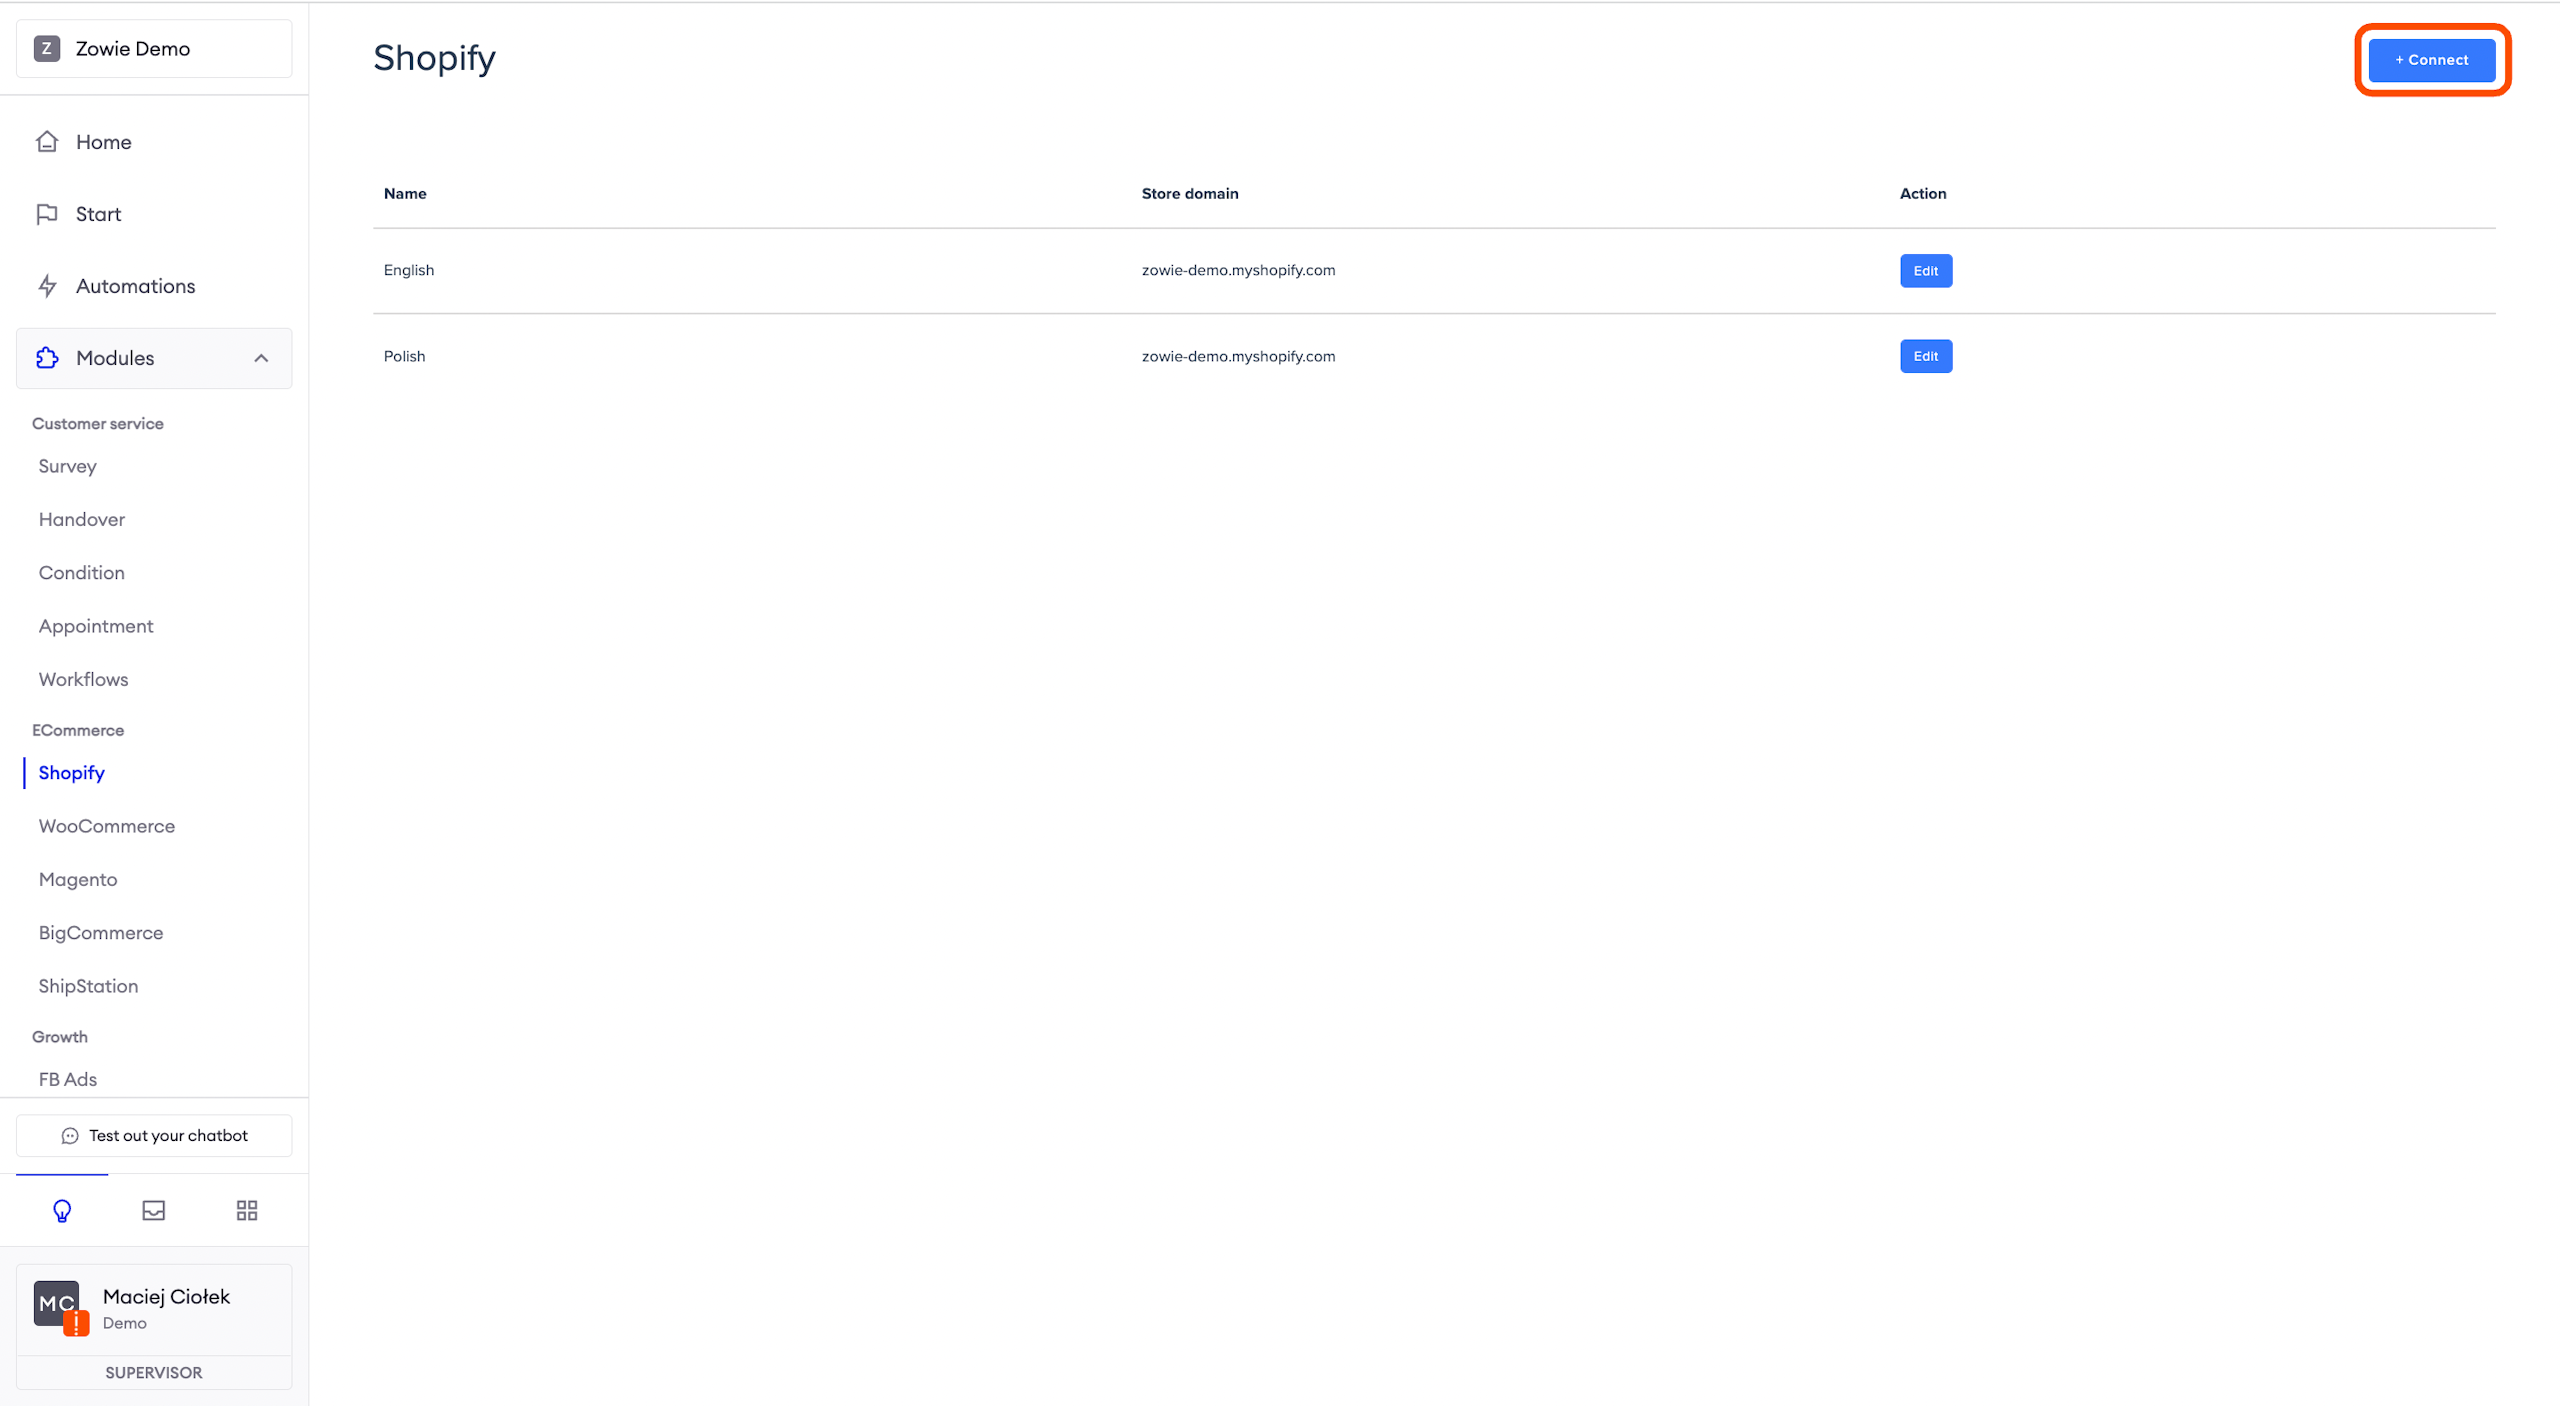
Finishing integration on Zowie platform
Login to the Zowie Platform, select Modules > Ecommerce > Shopify _on Zowie's main navigation panel and click**+ Connect button.**_
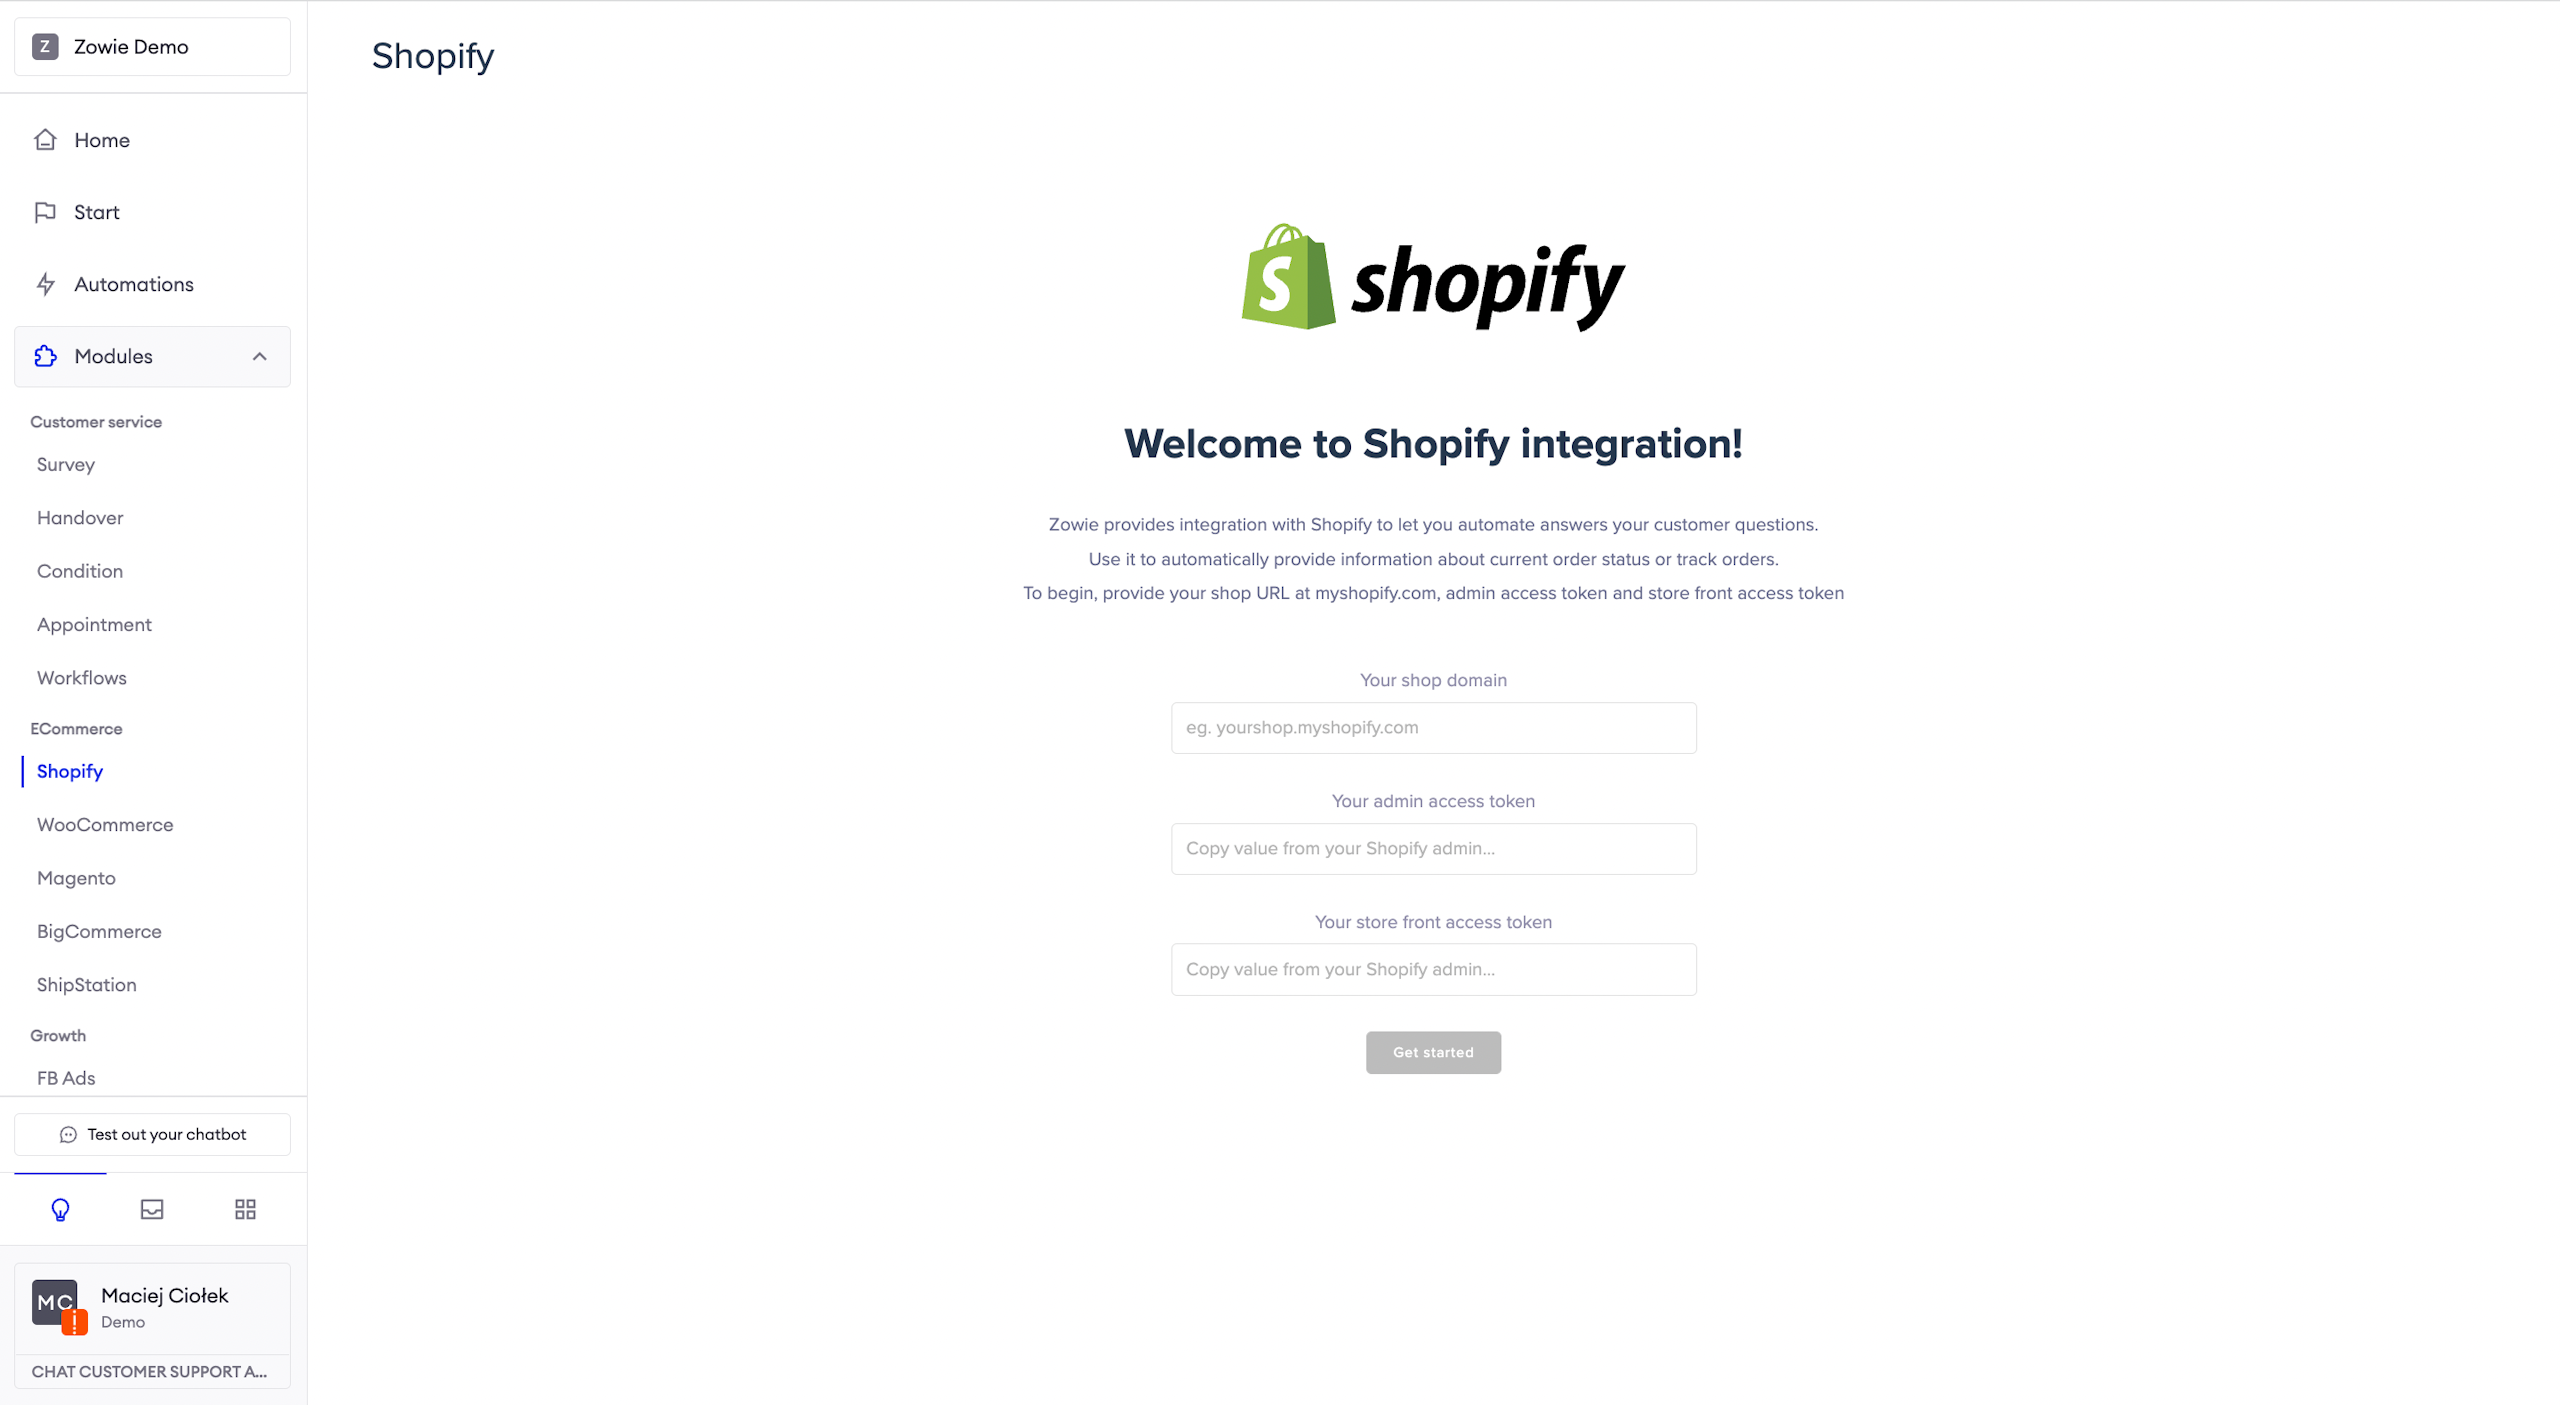
Completing the setup
Next, copy generated values and provide them at Zowie's setup screen.
When the setup is complete, enable the options you want to automate.
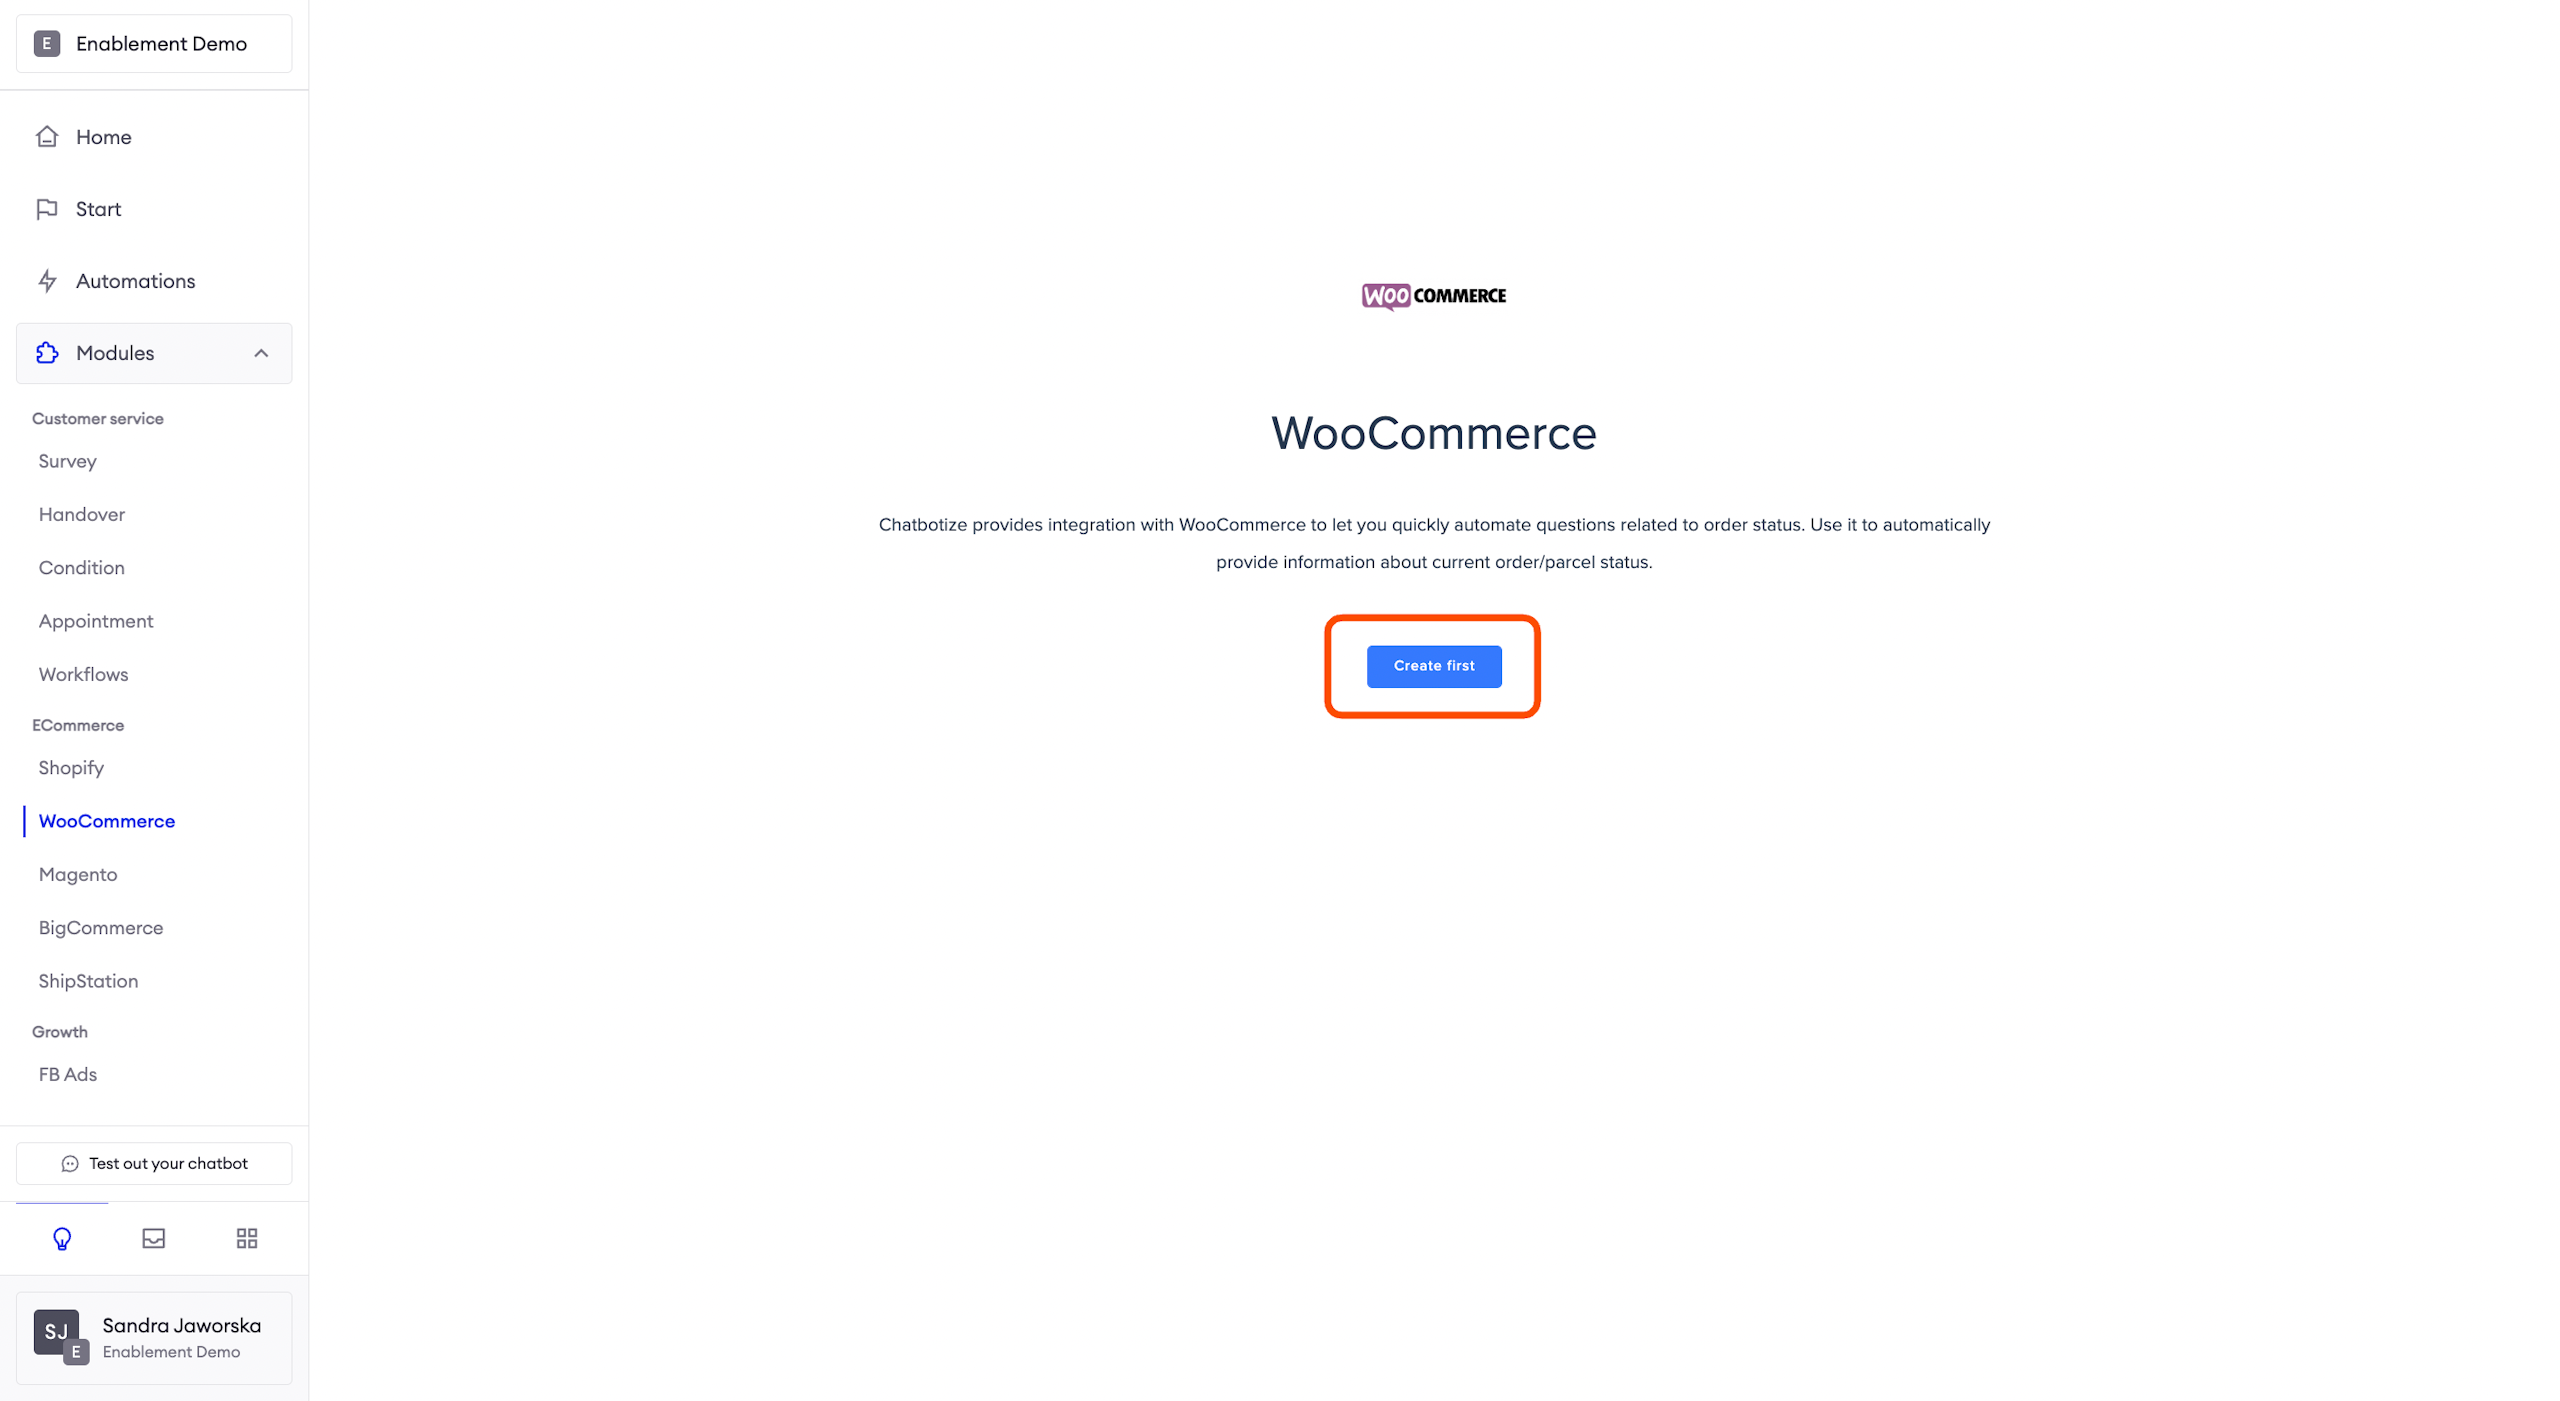
Integrating WooCommerce with Zowie
To set up the integration, log in to the Zowie Platform, select Modules > Ecommerce > WooCommerce on Zowie's main navigation panel, and click Create first button.
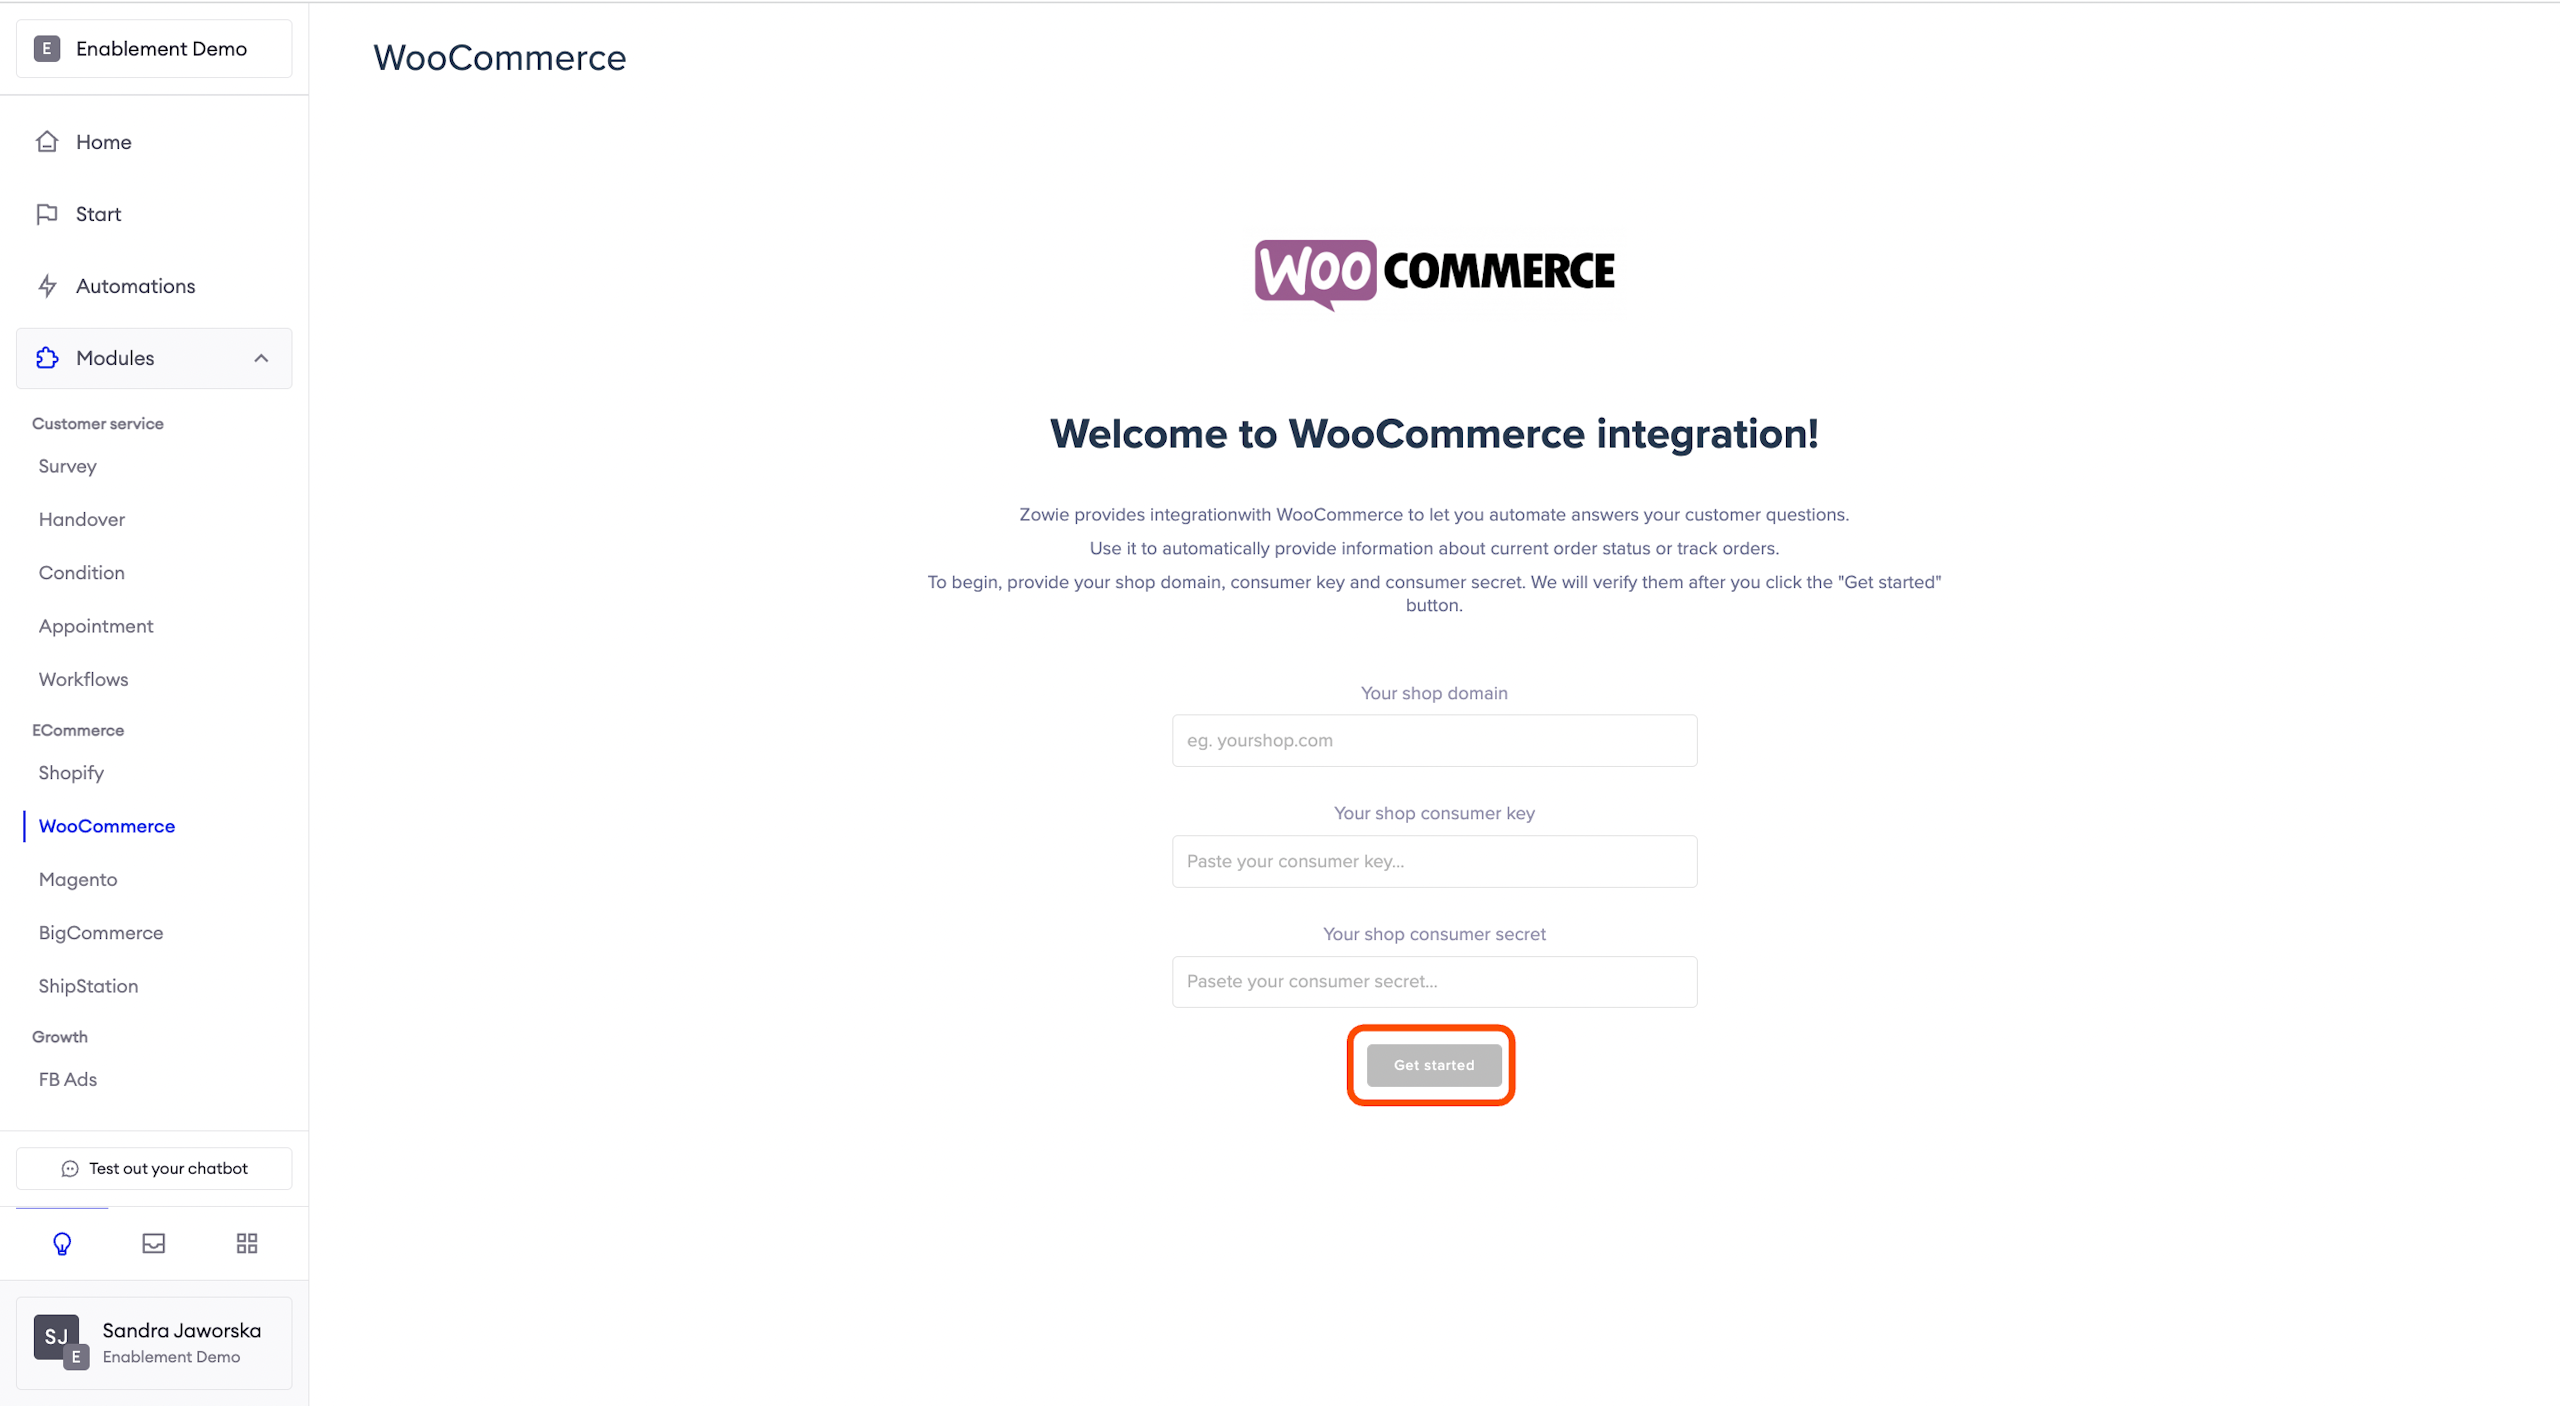
Completing the set up
On this page provide the following:
- Your shop domain;
- Your shop consumer key;
- Your shop consumer secret.
Then click Get Started button.
When the setup is complete, enable the options you want to automate.
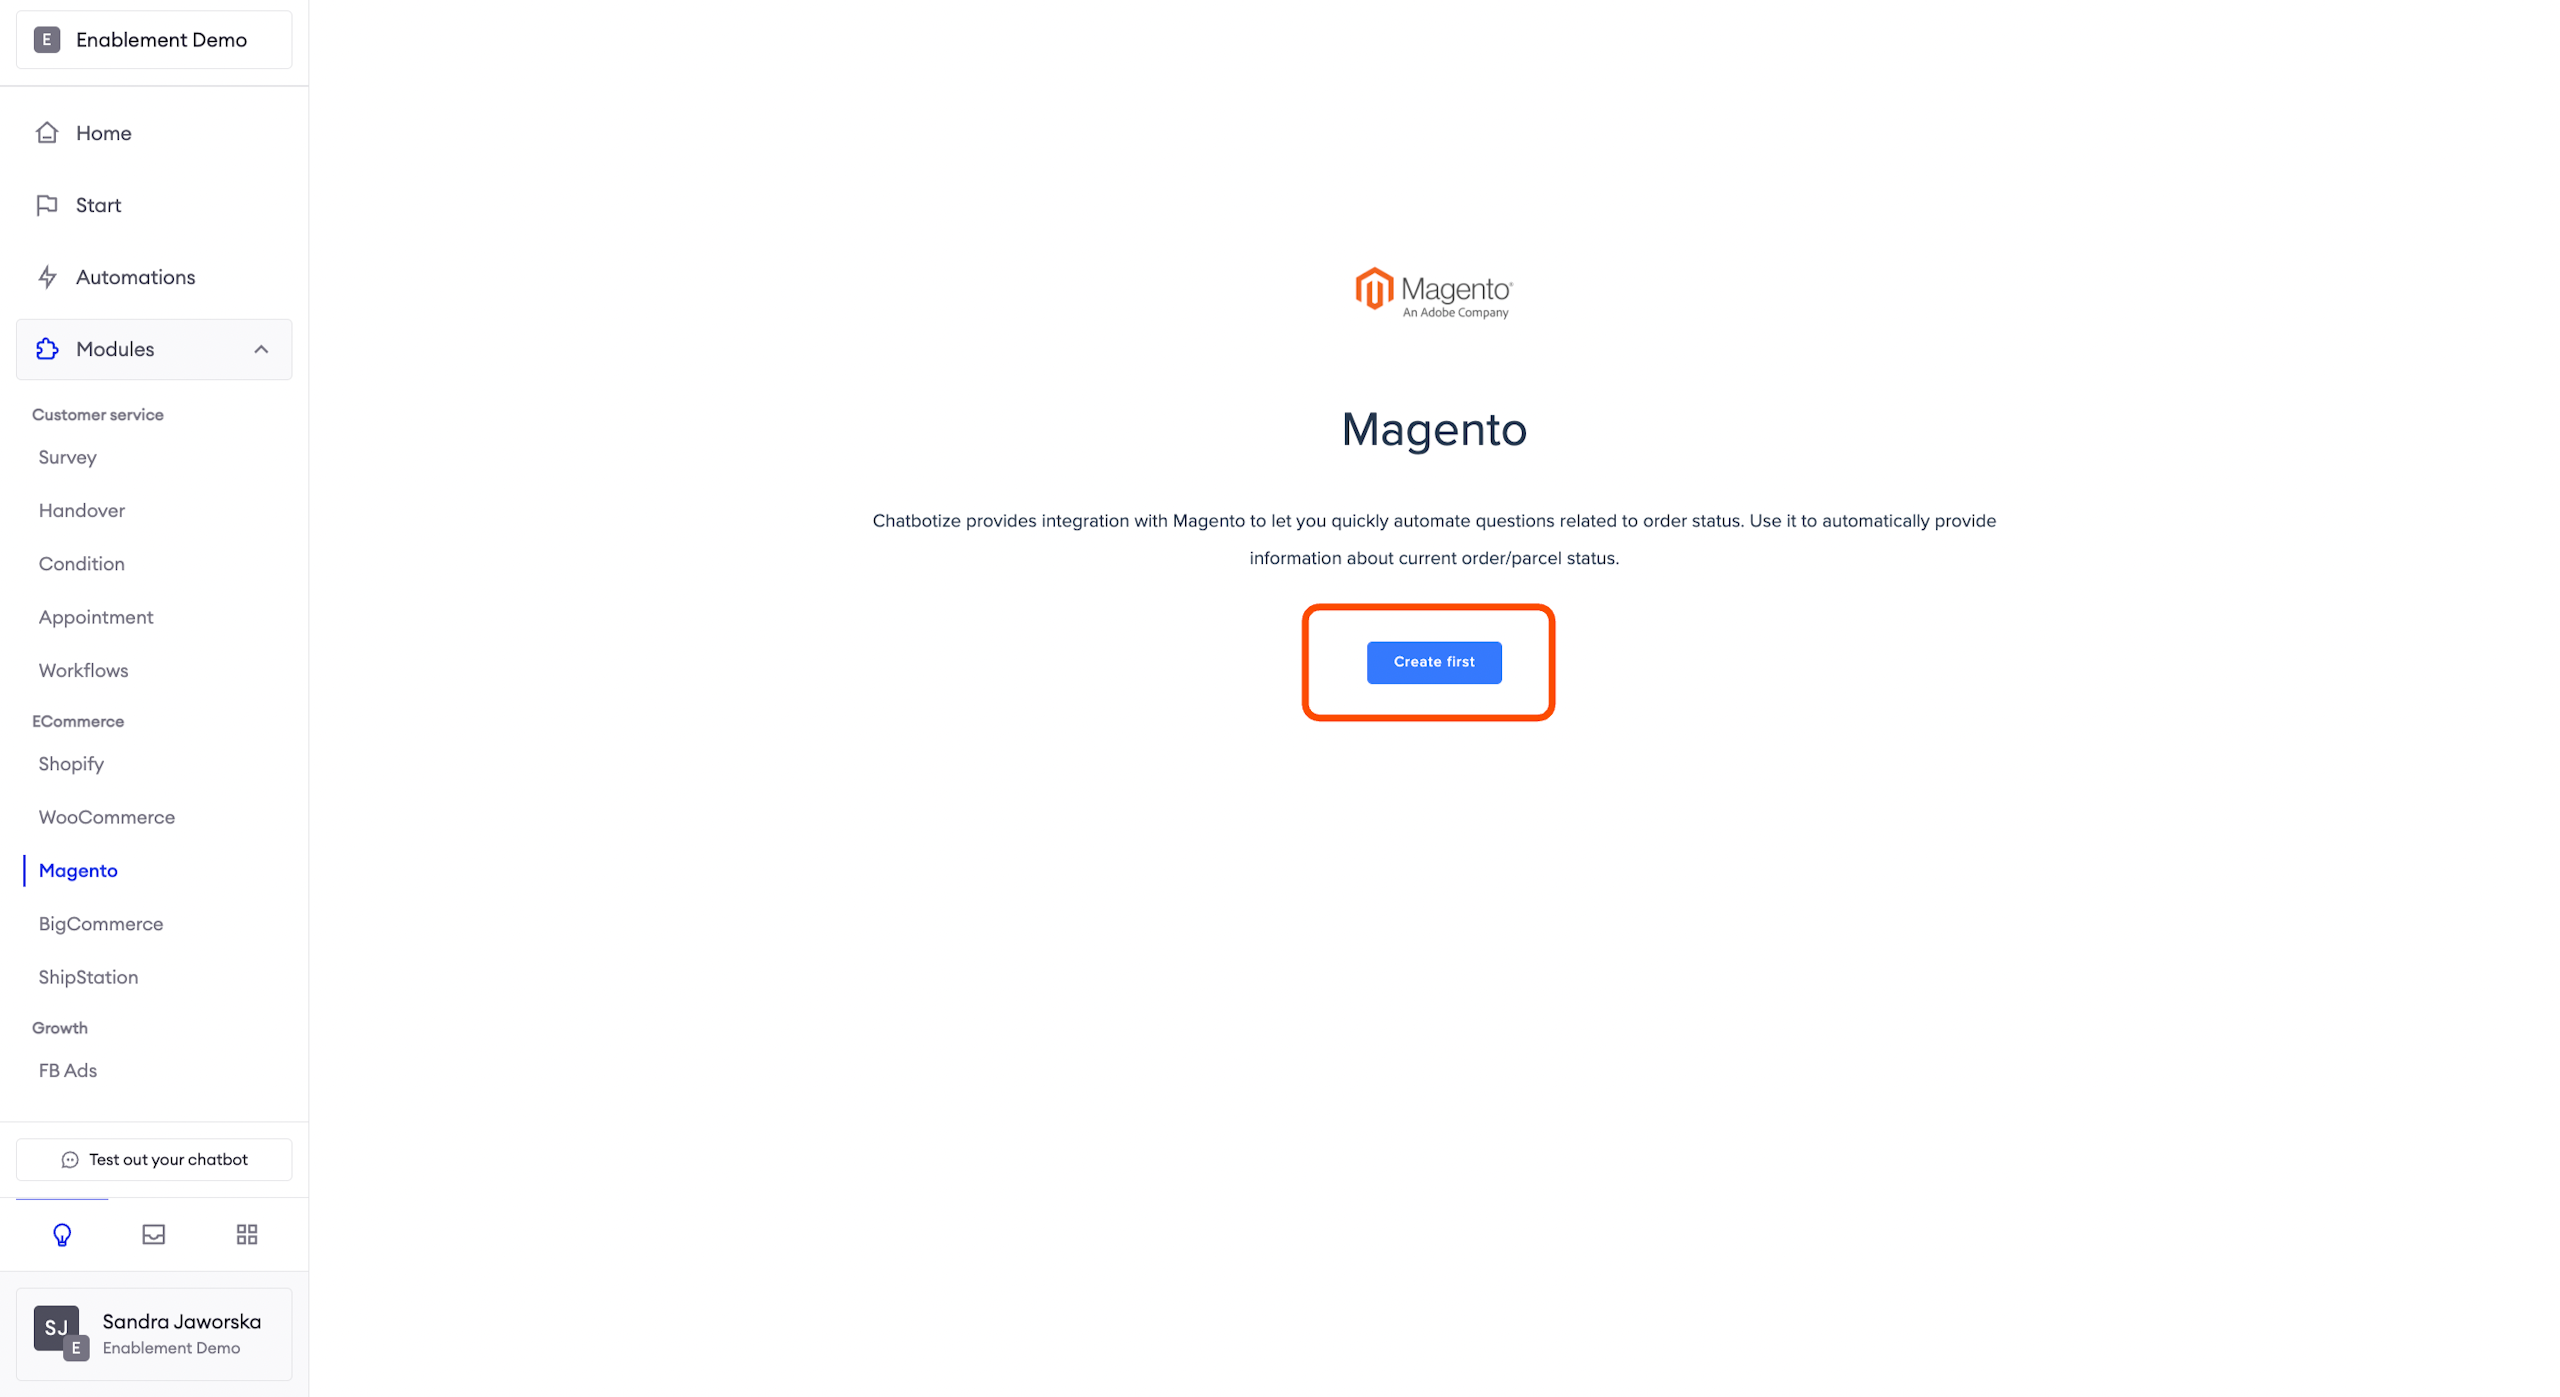
Integrating Magento with Zowie
Step 1
Login to your Magento Admin and go to System -> Extensions -> Integrations.
Step 2
Click Add New Integration at the top right corner.
- Enter "Zowie" in the Name field.
- Leave Email, Callback URL, Identity link URL empty.
- Provide your password to confirm the process.
- In the left panel, choose API section and in the tree-select choose:
- Products -> Fetch;
- Sales -> Fetch;
- Carts -> Fetch;
- Customers -> Fetch.
Step 3
Click Save to create the Integration. The created Integration will be visible on the list as Inactive.
Step 4
Click Activate link on the list and Allow button in the top right corner.
Step 5
After clicking Allow you will get a screen with values for Consumer Key, Consumer Secret, Access Token, and Access Token Secret.
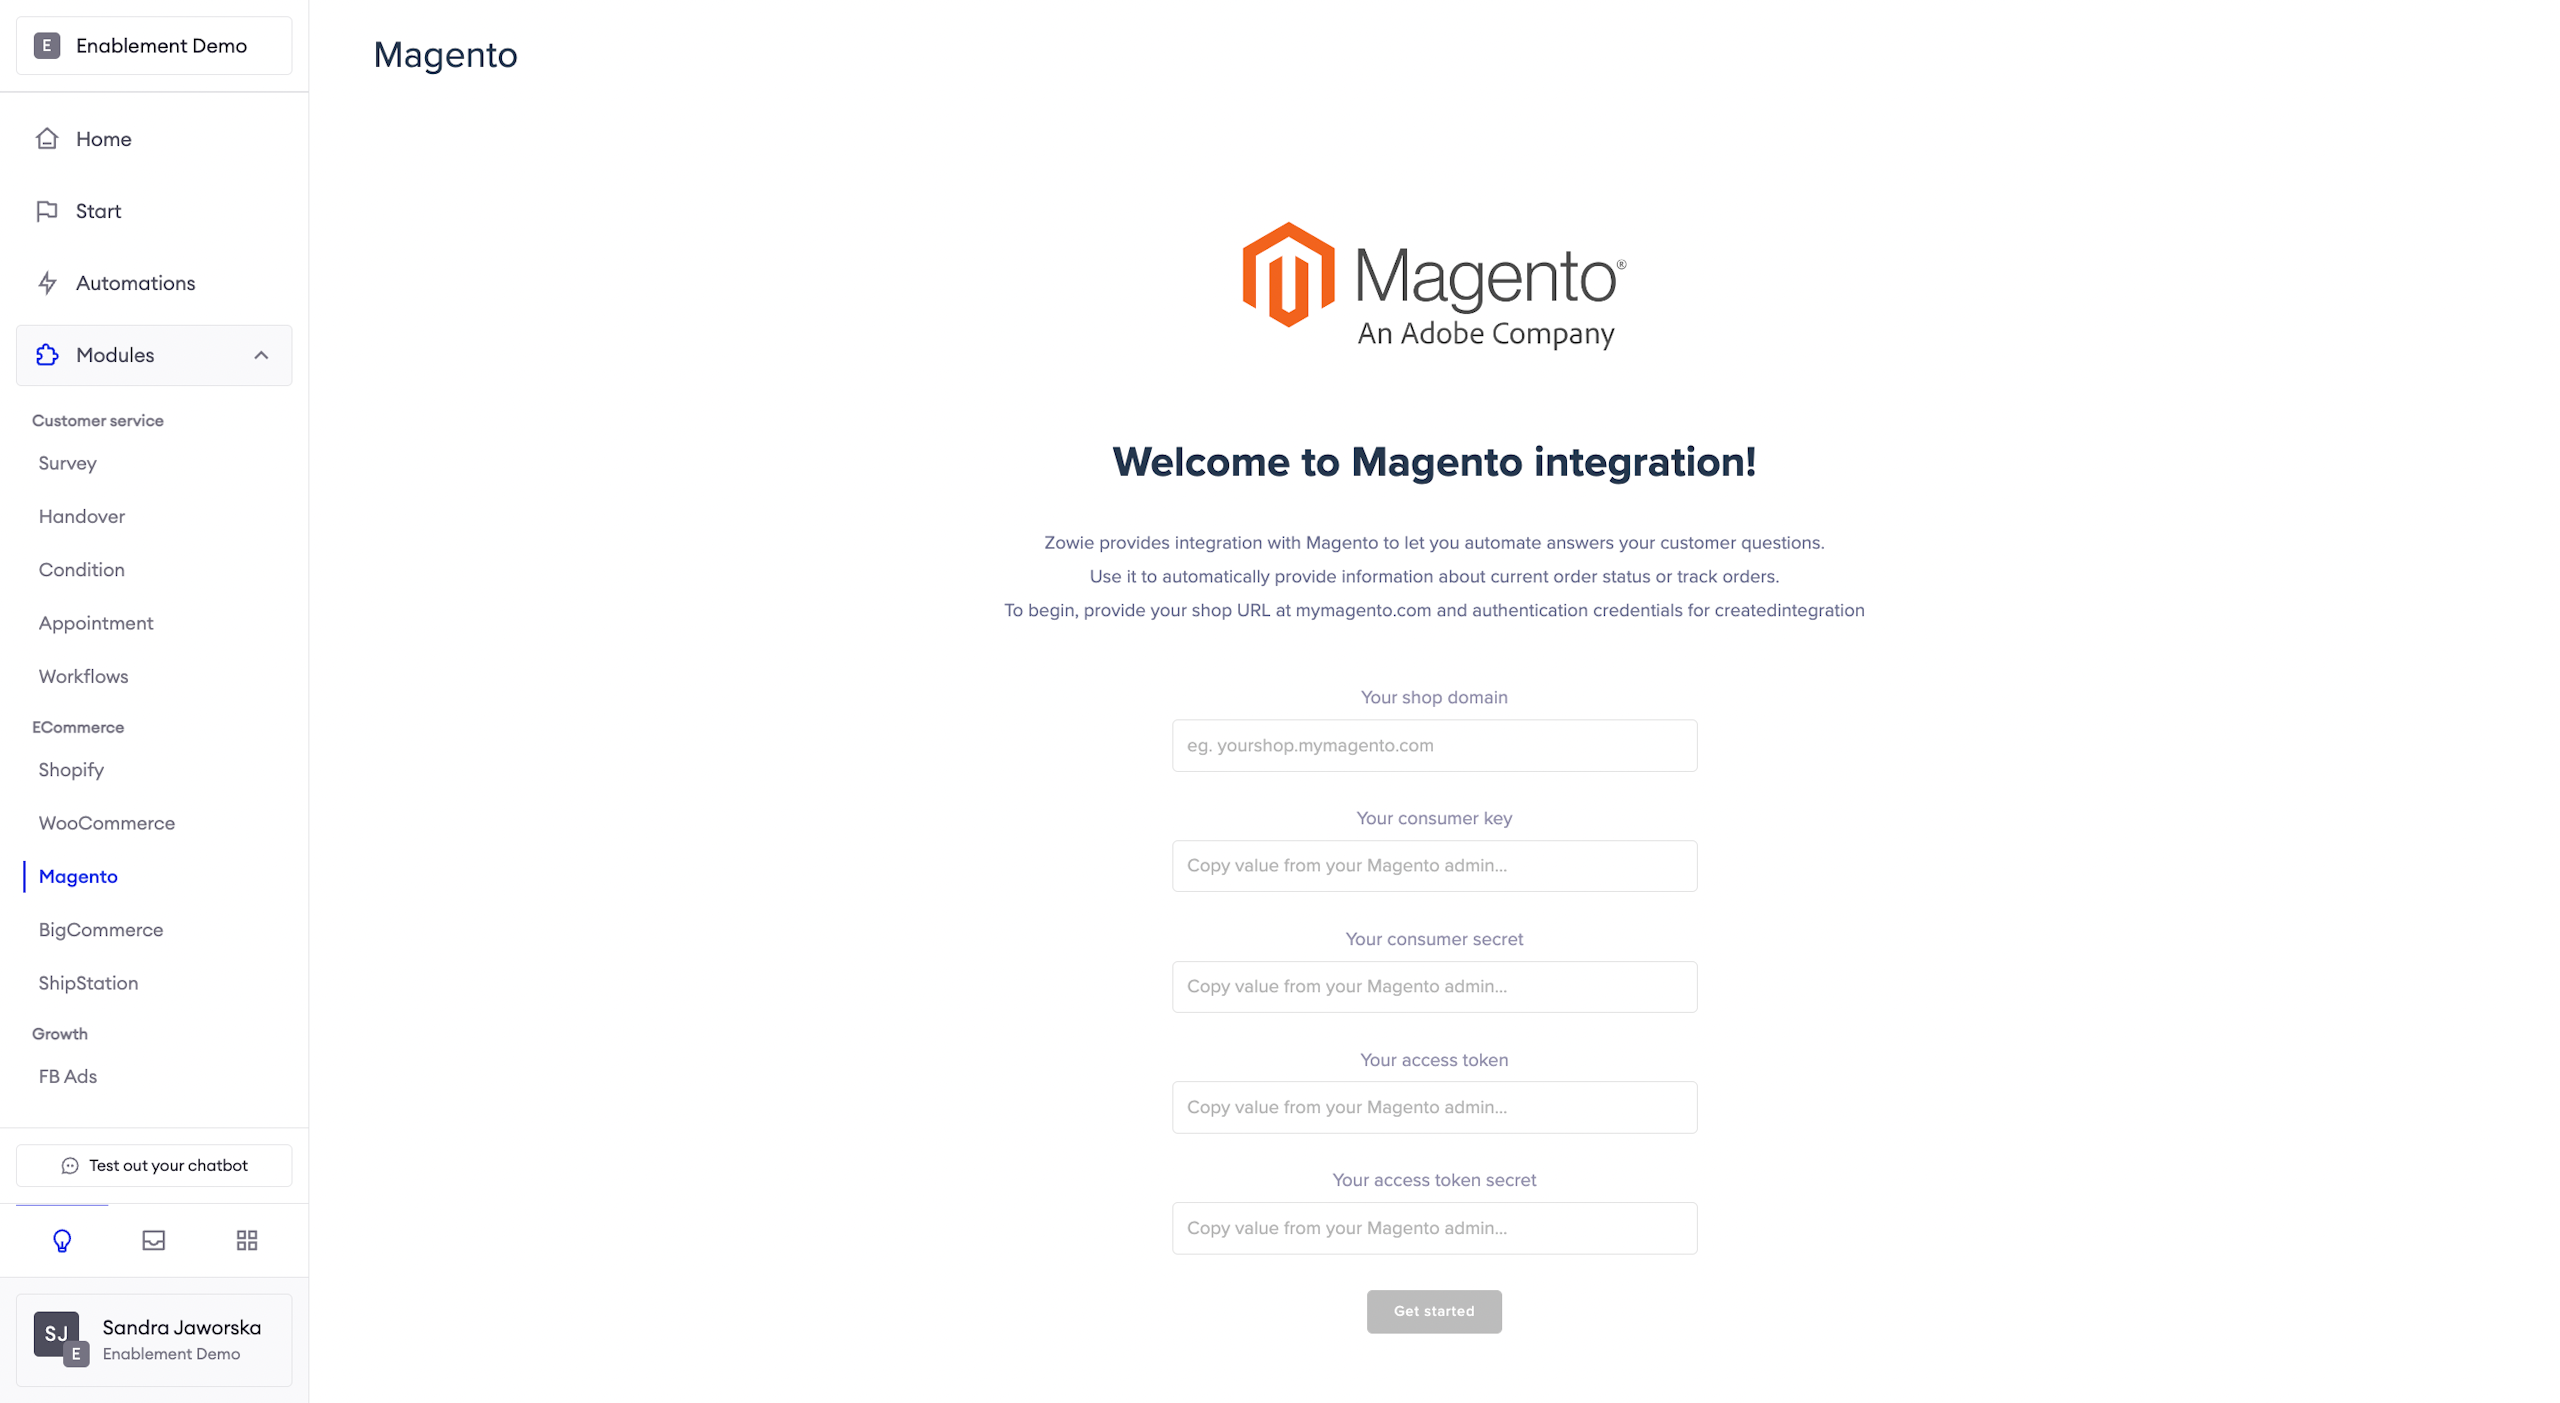
Finishing integration on Zowie platform
Login to the Zowie Platform, and select Modules > Ecommerce > Magento on Zowie's main navigation bar.
Click Create first and + Connect buttons.

Completing the setup
Copy generated values, provide them at Zowie's setup screen and click on Get started button.
When the setup is complete, enable the options you want to automate.
BigCommerce
Integrating BigCommerce with Zowie
In order to connect BigCommerce to your chatbot, please contact your Customer Success Manager.
You'll be asked to provide the following:
- Store hash;
- Access token with scopes (customers - read-only, orders - read-only).
AttentionTo learn how to generate an access token and find the store hash, please refer to BigCommerce documentation.
ShipStation
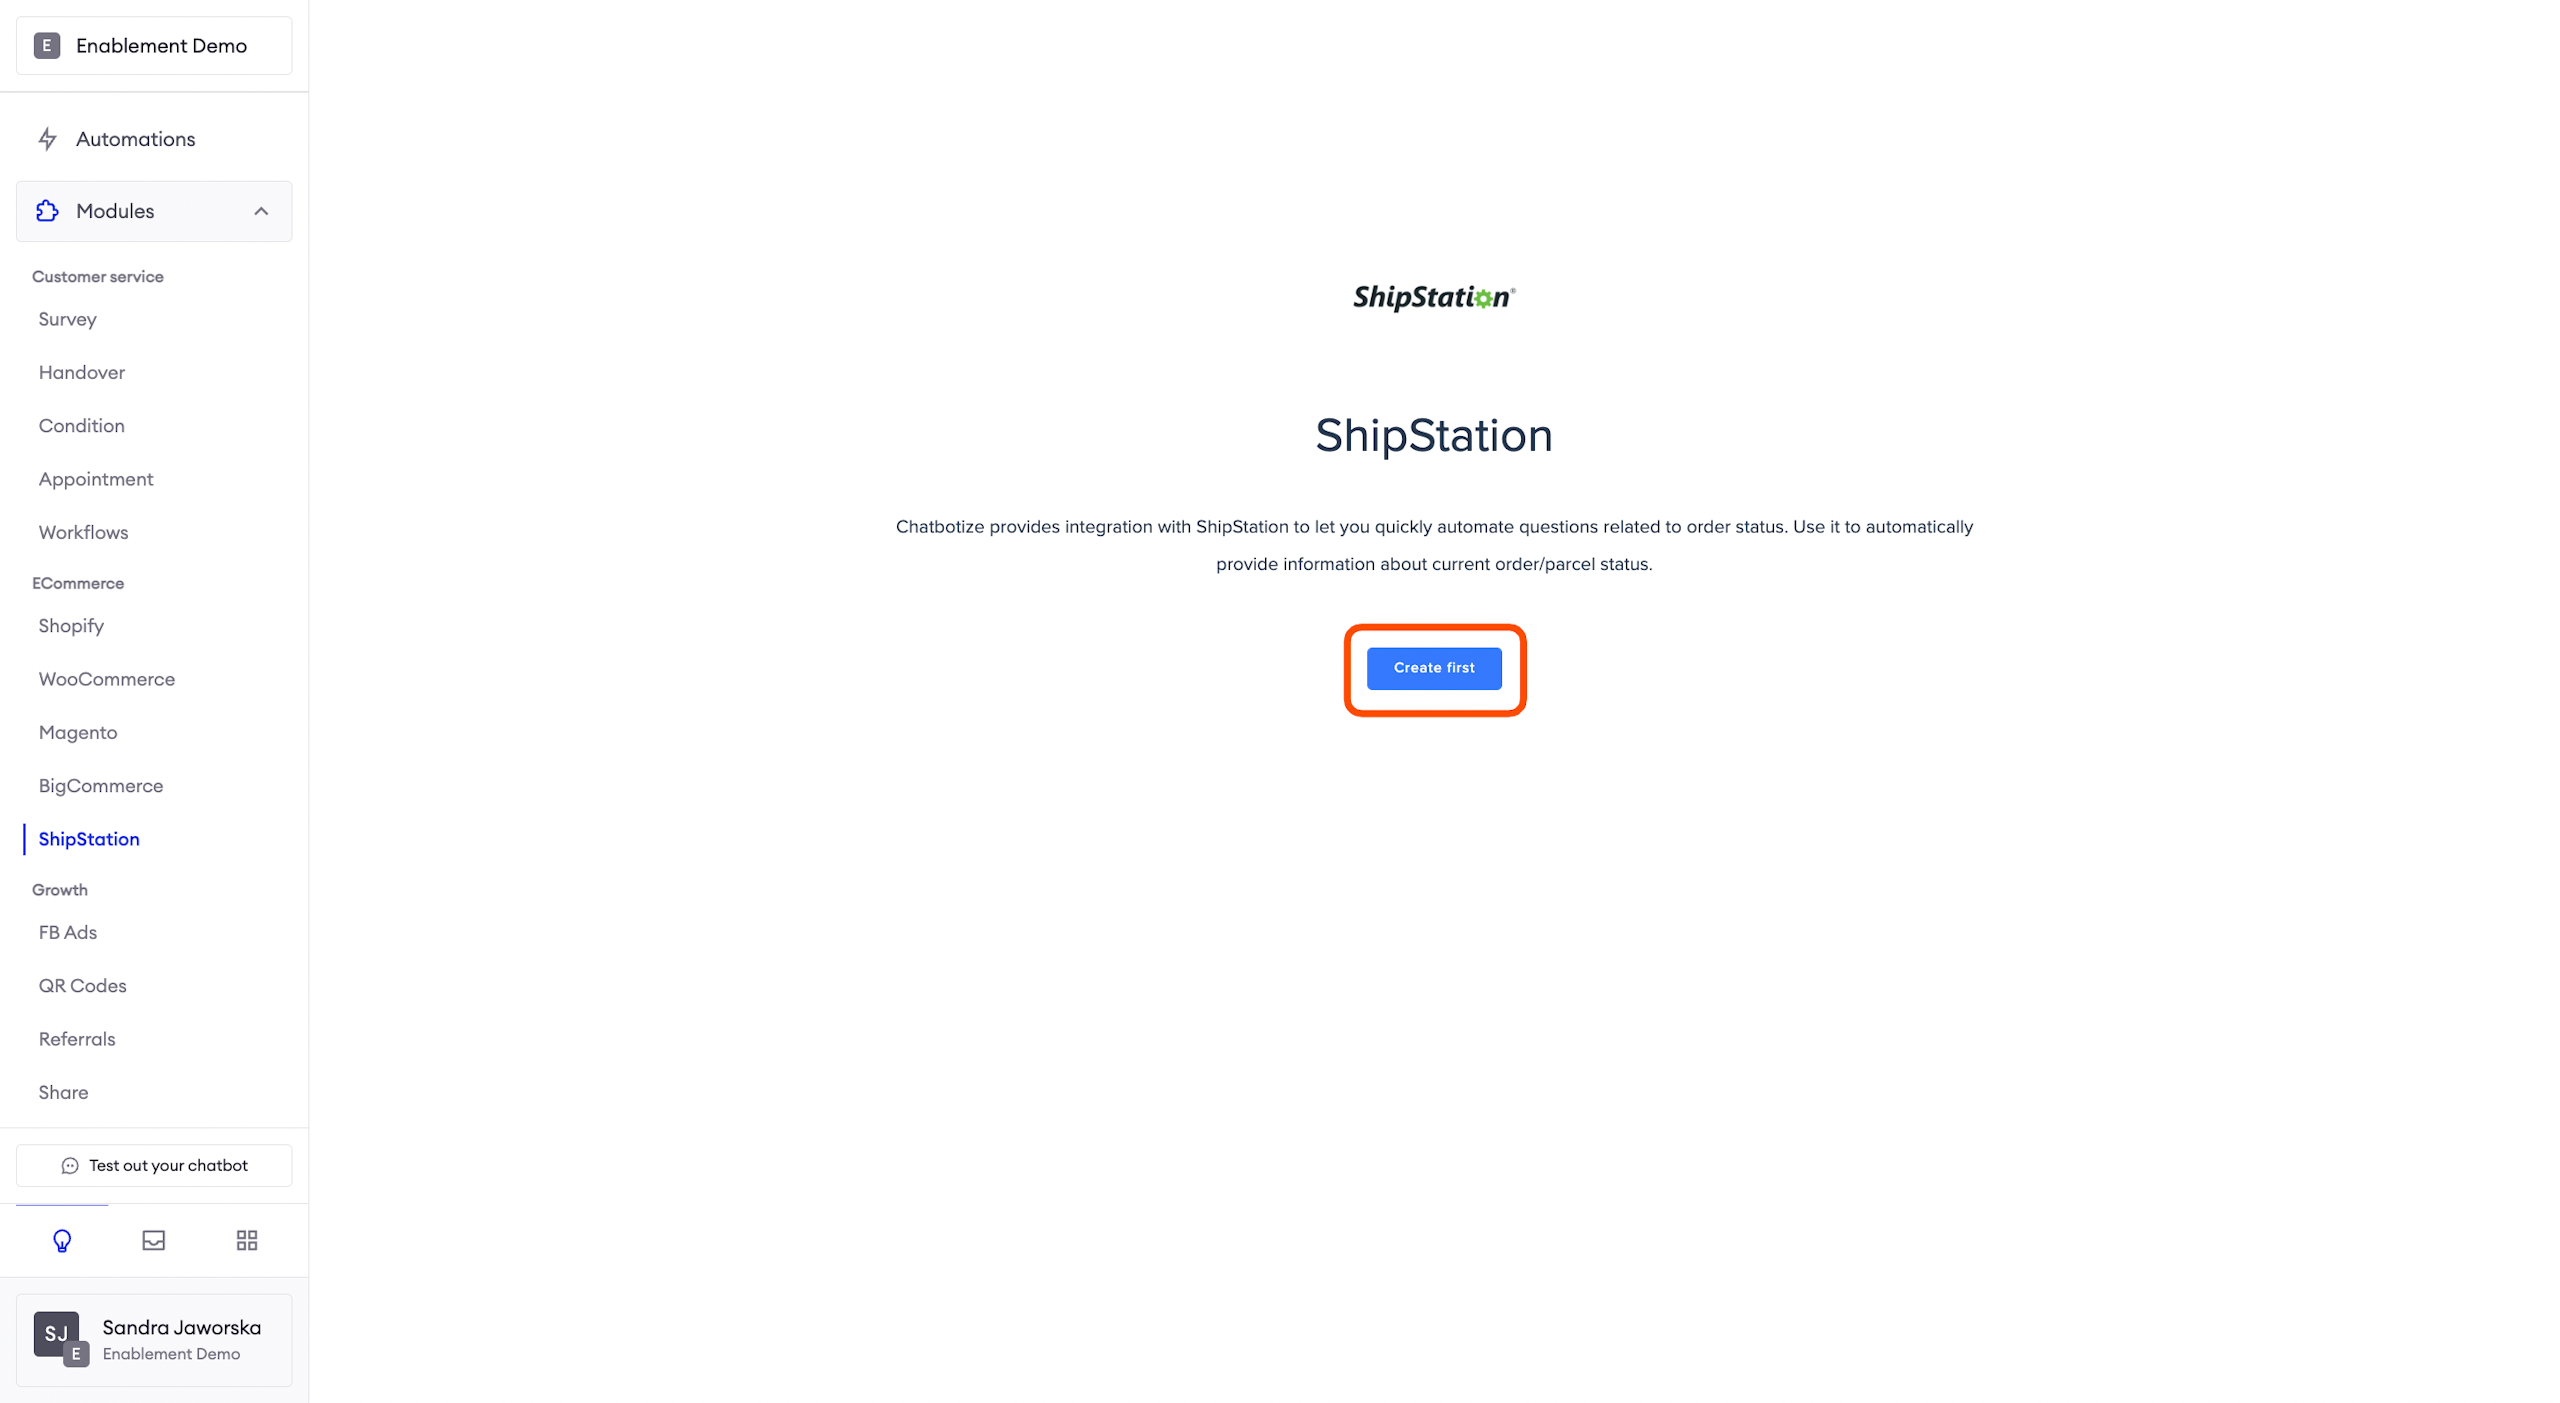
Integrating ShipStation with Zowie
To set up the integration, log in to the Zowie Platform, select Modules > Ecommerce > ShipStation on Zowie's main navigation panel, and click the "Create first" button.
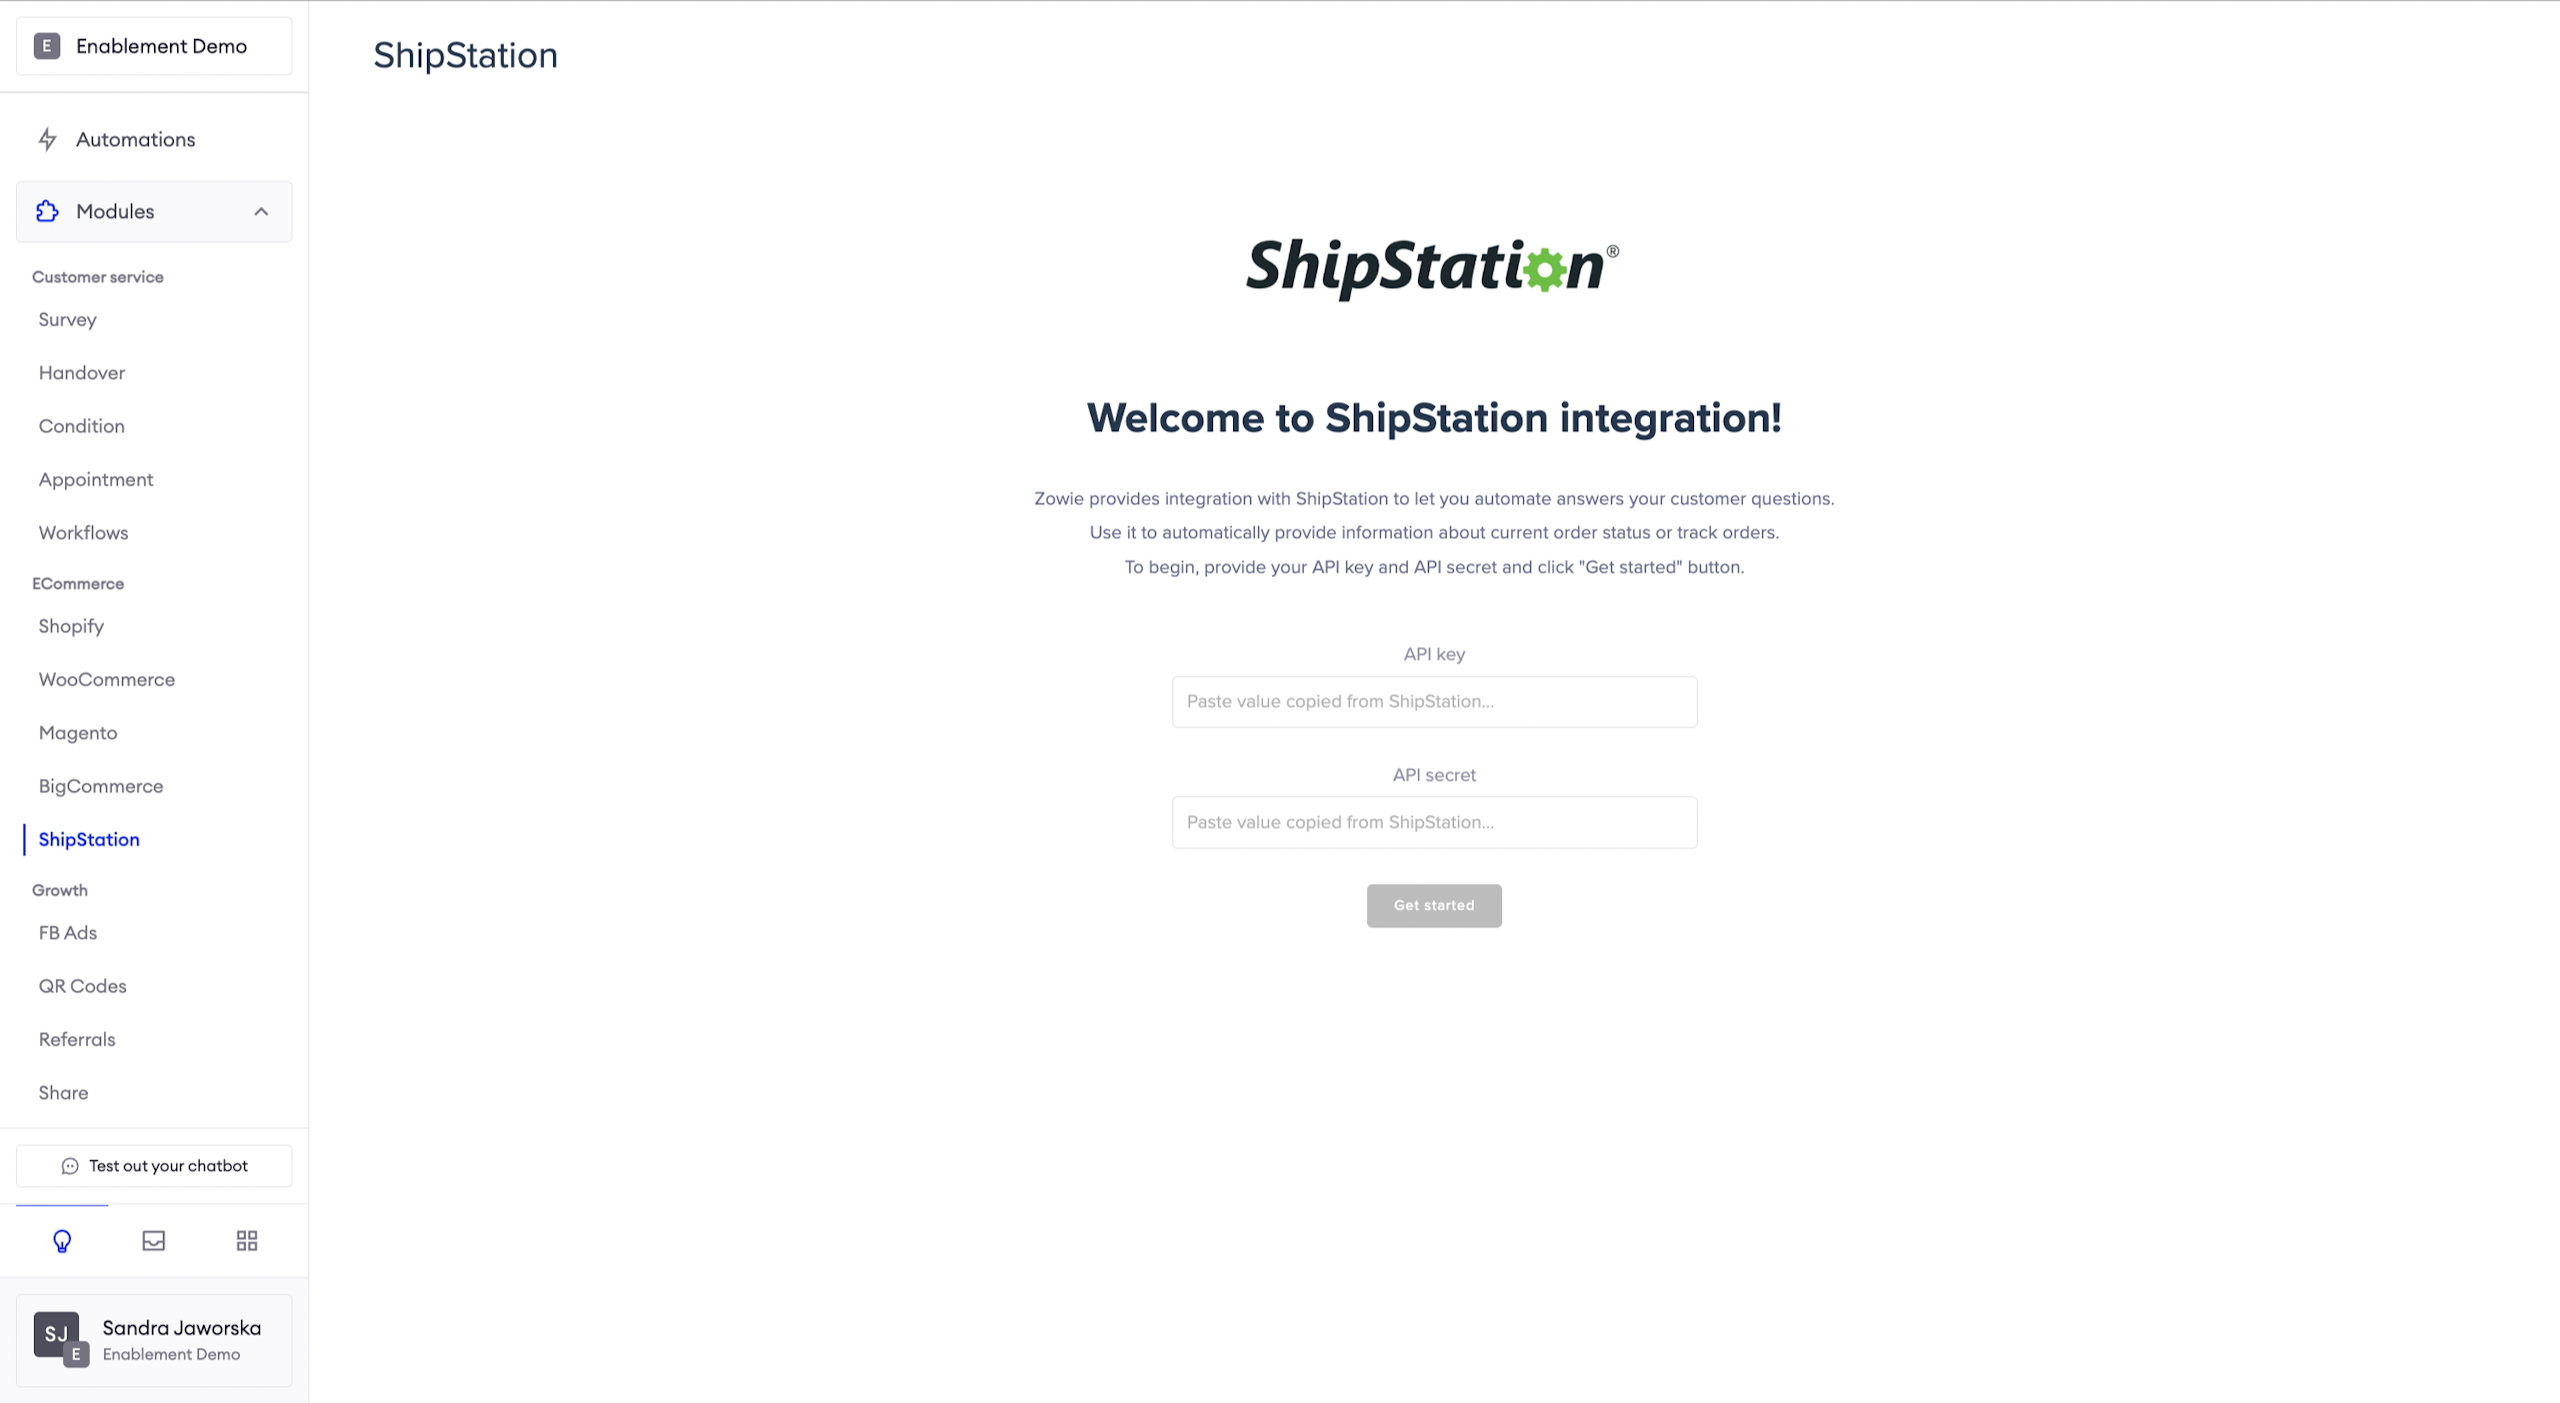
Completing the setup
On this page provide the following:
- API key
- API secret
Then click Get Started button.
When the setup is complete, enable the options you want to automate.
Salesforce
Granting access to Salesforce Commerce Cloud API
We need Client ID & _Client Secret _to get this please follow the instructions
- Log into Account Manager.
- Click API Client. -> The API Clients page opens, showing a list of API clients. For each client, the page shows the API client ID, the display name, and the status.
- Click Add API Client. -> The Add API Client page opens.
- In the Display Namefield, enter the display name of the client.
- In the Password field, enter the password. Minimum password requirements include:
- Must be at least 12 characters long. (You can configure the number on the organization level. The number must always be equal to or greater than 12).
- Minimum complexity must include three out of four - numbers, symbols, lower case, and upper case.
- Can't include part of your name or username or UUID.
- In the Confirm Password field, reenter the password. -> The Access Control section indicates the status of the API client.
- In the Organizations section, click Add. -> The Assign Organizations page opens.
- In the Assign Organizations page, do the following:
- Search for organizations.
- To add the API client to an organization, select the organization’s checkbox (each API client must belong to one or more organizations).
- Click Add.
- To allow the API client to access the Salesforce Commerce API, in the Roles section, click Add, and do the following:
- Search for the Salesforce Commerce API role and select the role.
- To assign the role to the API client, click Add.
- Select the filter icon to specify the role scope (the scope is required by the Salesforce Commerce API).
- In the Add Instance Filters tab, select an organization.
- Enter the names of the instances to which you want the API client to have access.
- Select the instances.
- Click Add.
- To use a JSON Web Token (JWT) to authenticate the API client instead of using a password, provide a Client JWT Bearer Public Key in the JWT field. The value you provide can be either a Base64-encoded X509 certificate containing the public key or the Base64-encoded public key itself. To use Access Token format, add a JWT.
- To access Commerce Cloud B2C resources using OAuth2 with an API client, provide values in the OpenID Connect section.
- Click Save. -> Account Manager creates the API client.