Segmentation
What is Segmentation?
Segmentation is a powerful tool that allows you to customize chatbot interactions based on user characteristics (called Properties). It can reflect your internal processes that aim to create crafted experiences. User properties are characteristics that group users which can be used to define your core user Segments. They’re also visible in Inbox during user conversations.
Why use Segmentation?
Segmentation allows you to define different responses or workflows when automations are triggered depending on user properties mentioned above.
ExampleIf your users want to find out how to place an order, you can adjust the instructions based on the platform they’re coming from. Another common use case is redirecting logged users to a different queue than unregistered users. You can even adjust the chatbot's product recommendations based on a user’s age. The possibilities are endless!
How to Access Segmentation
To access this section go to Workspace > Segmentation.
InformationNote that at this moment, Segmentation works with the content configured in the Start section and Automations. Regardless of the number of chatbots you use, Segmentation is shared across them all.
View the lists of Properties and Segments
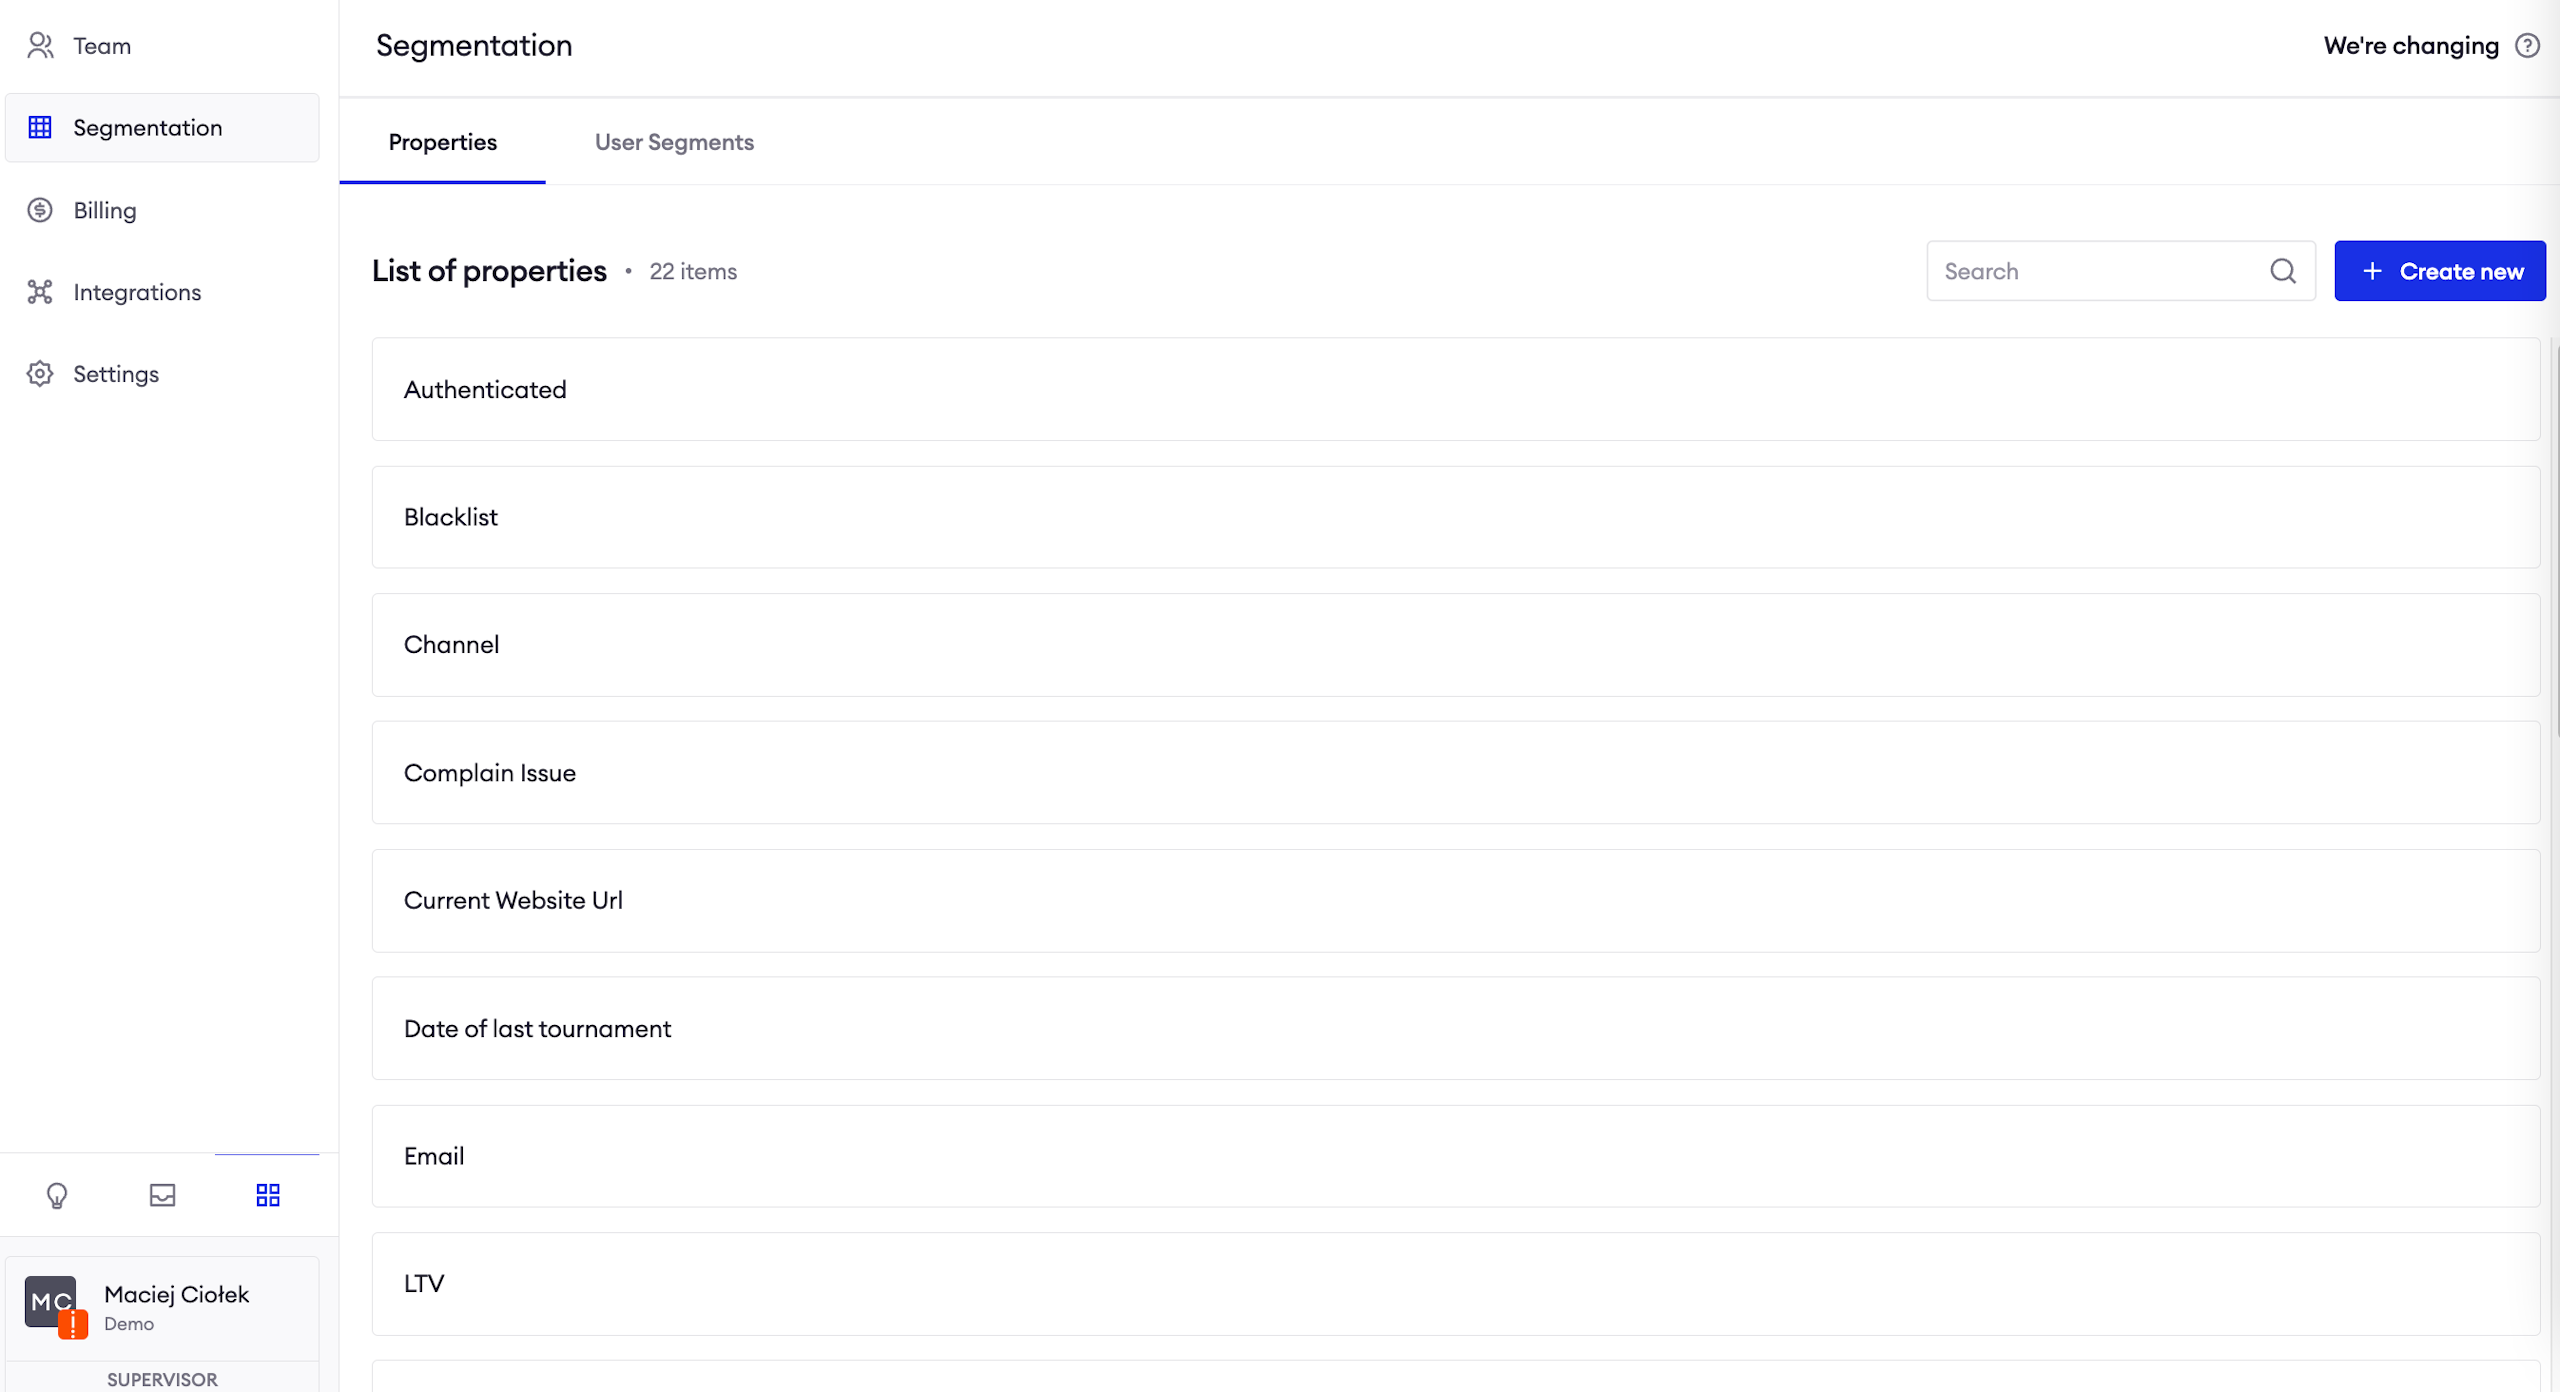
In the main view, you can see the list of all (default and custom) Properties and Segments. Feel free to click on any element on the list to view its details.
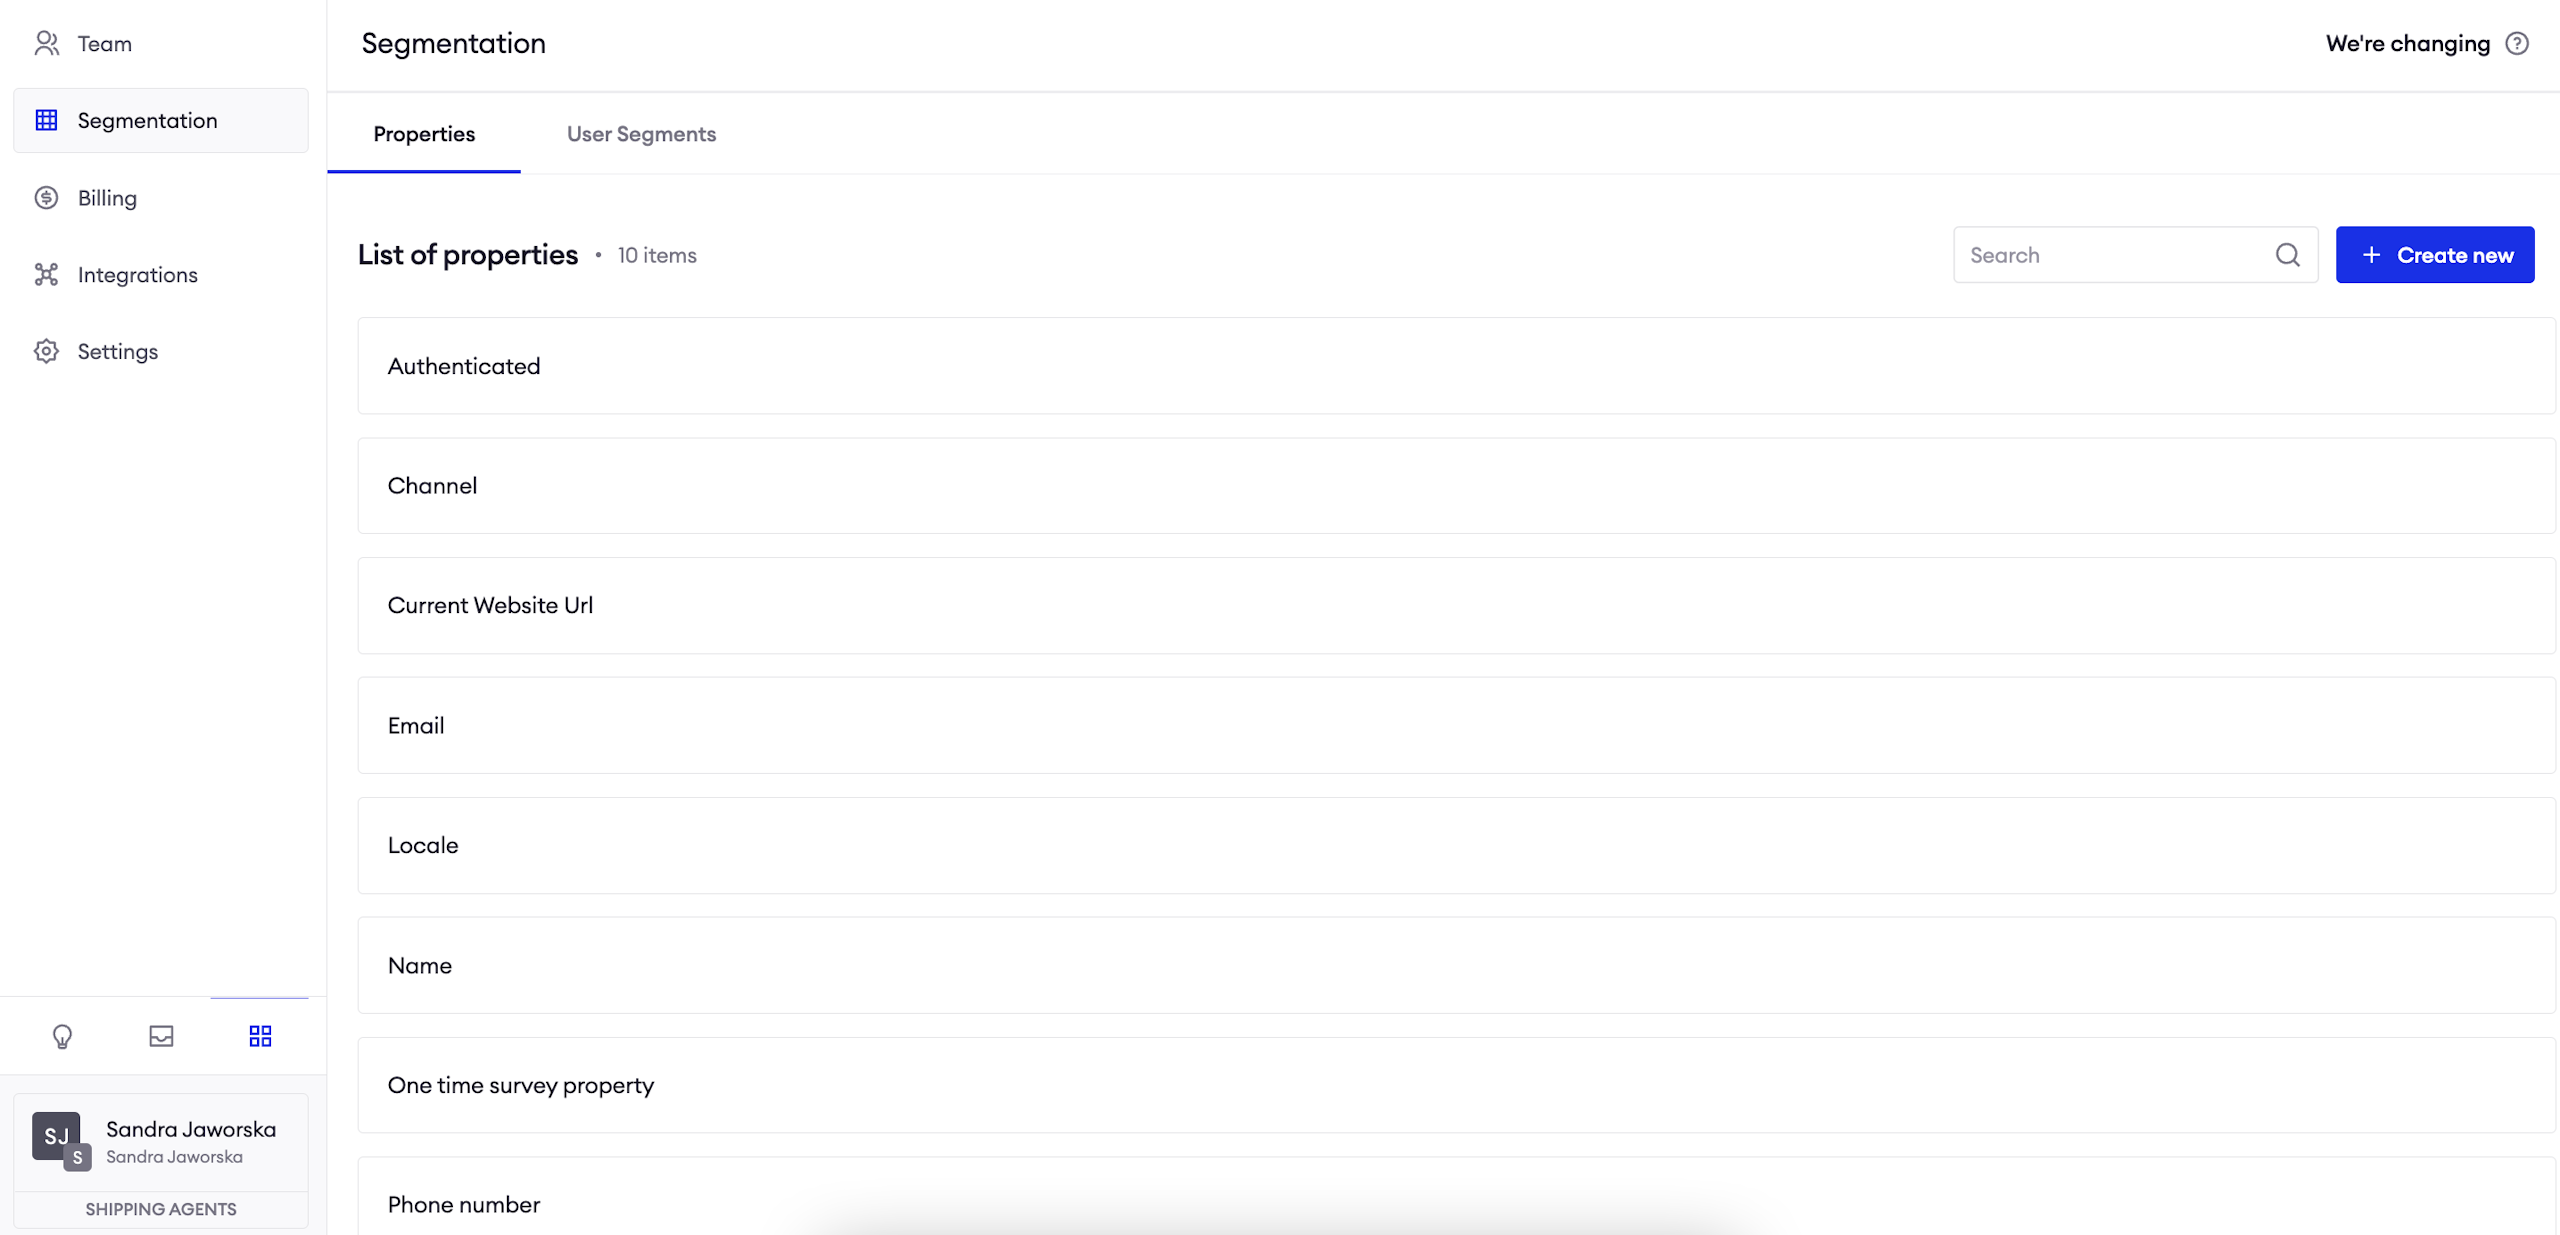
Default Properties
We’ve prepared several useful properties to start with. Feel free to use them before configuring your own.
- Authenticated: By default, it doesn’t assume any value. If you want to use JWT authentication, please contact your Customer Success Manager for further information.
- Channel: It recognizes the channel your users are coming from (like Messenger, website, mobile app).
- Current Website URL;
- Email;
- Locale: The user’s current country based on their browser information.
- Name;
- Phone number;
- Time zone.
Note:Predefined properties and segments cannot be removed.

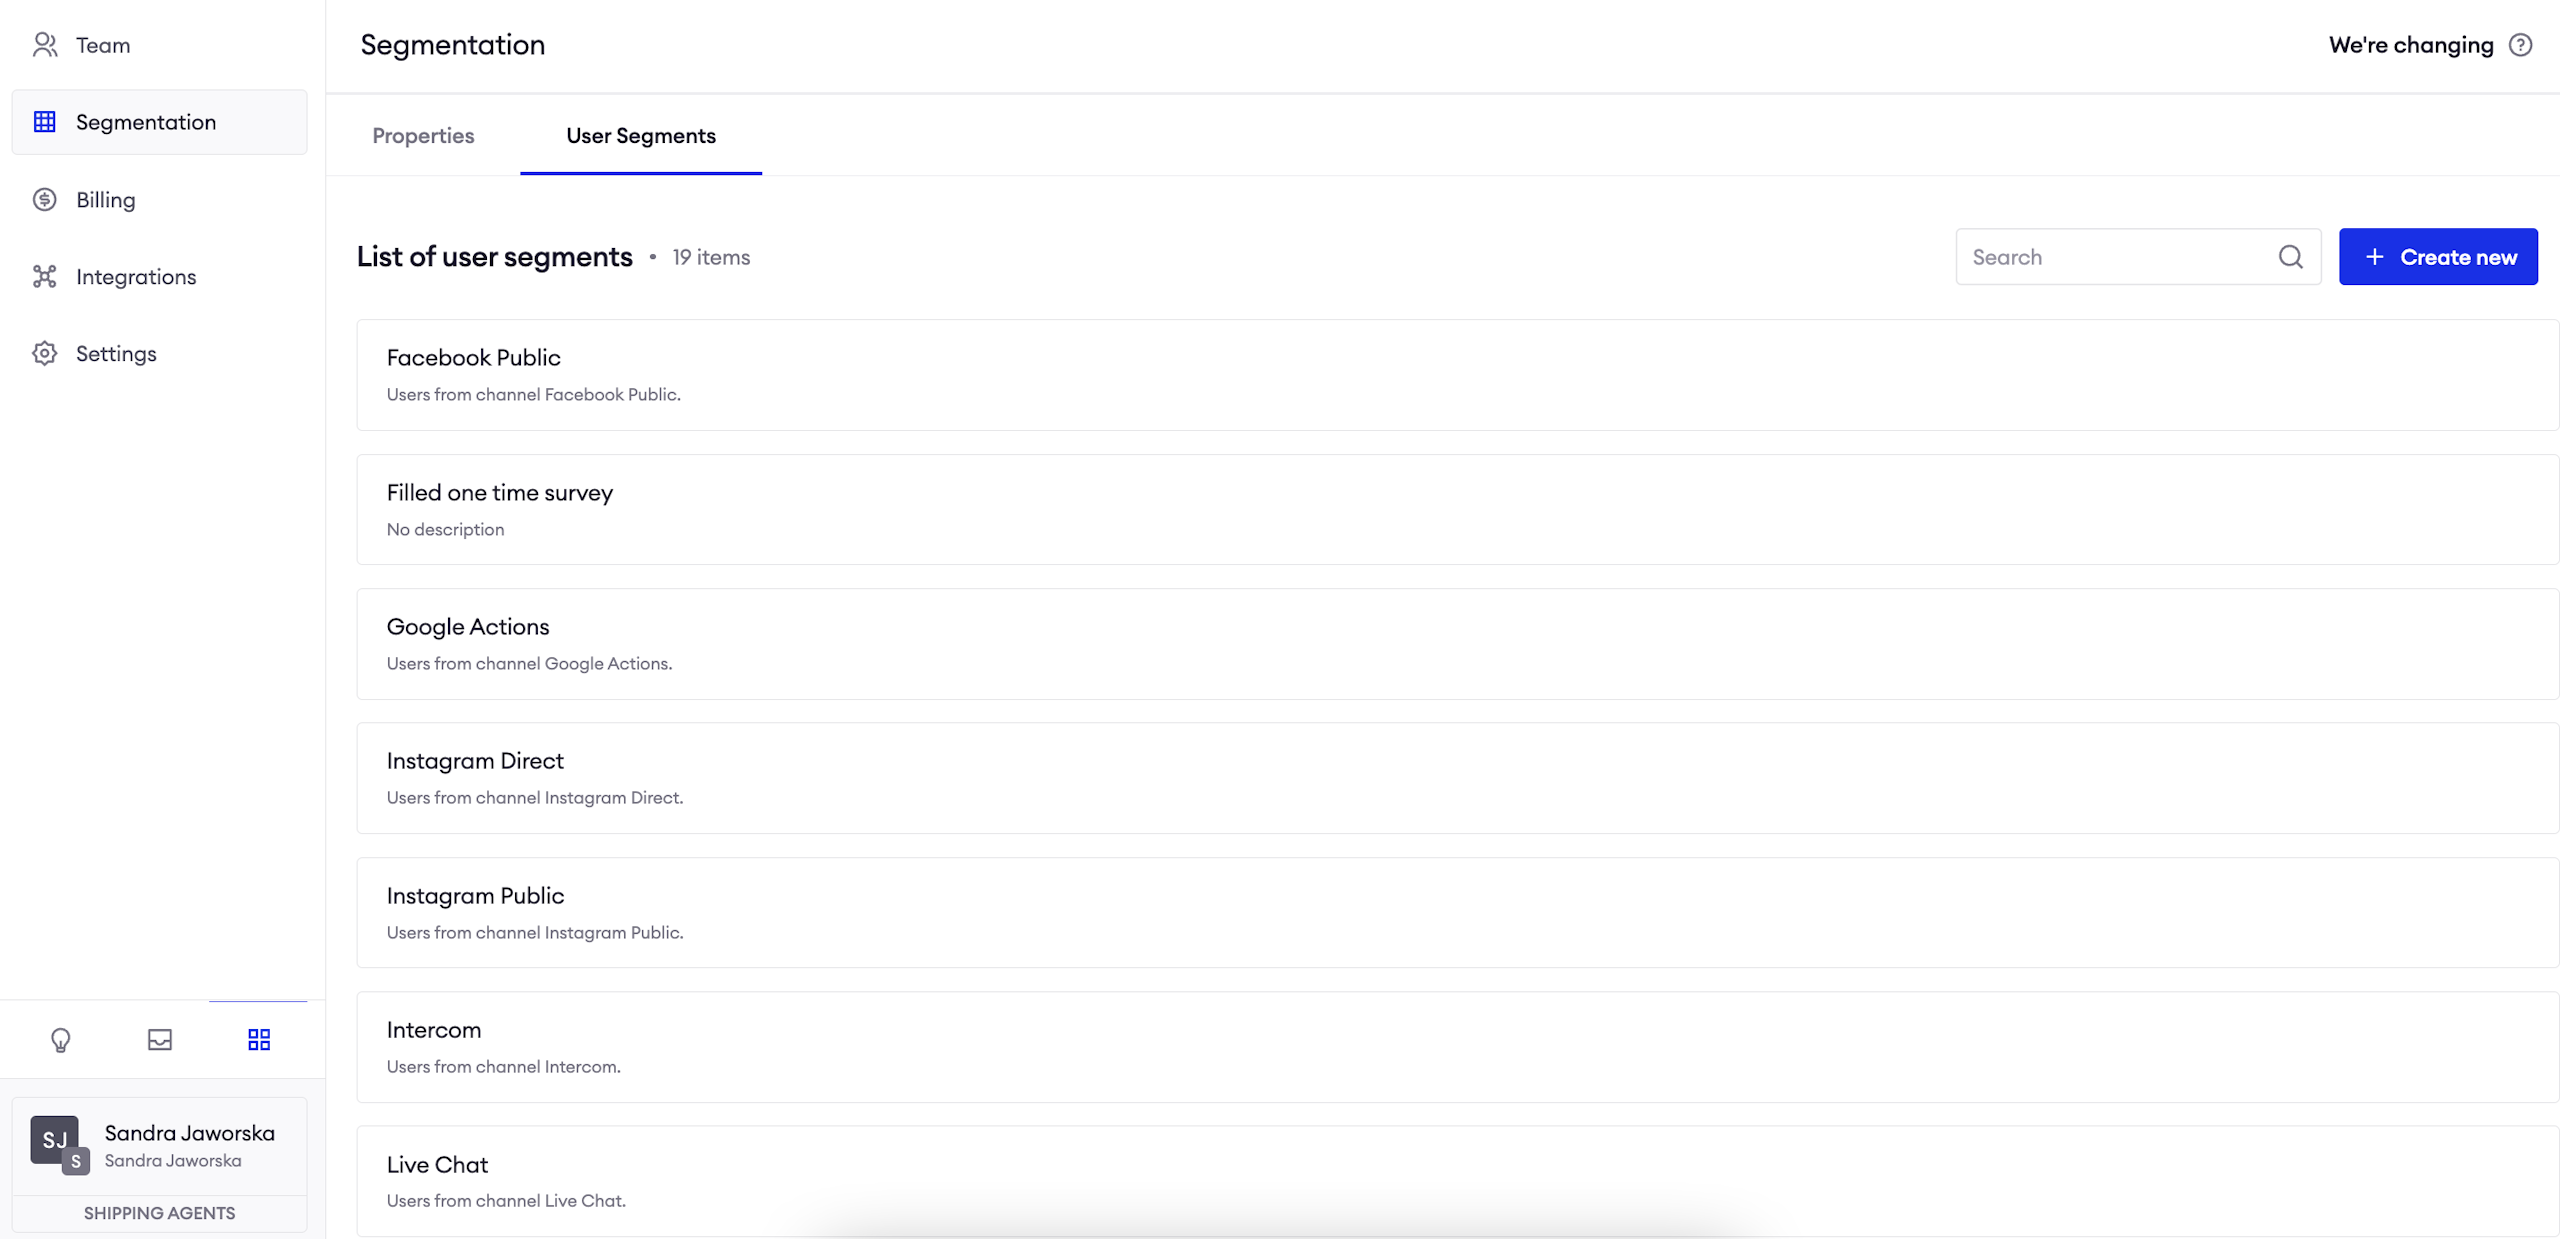
Default Segments
We created for you a segment for each channel we support (for example, a segment matching all users writing from Messenger).
Note:Predefined properties and segments cannot be removed.

Create a scenario based on Segmentation
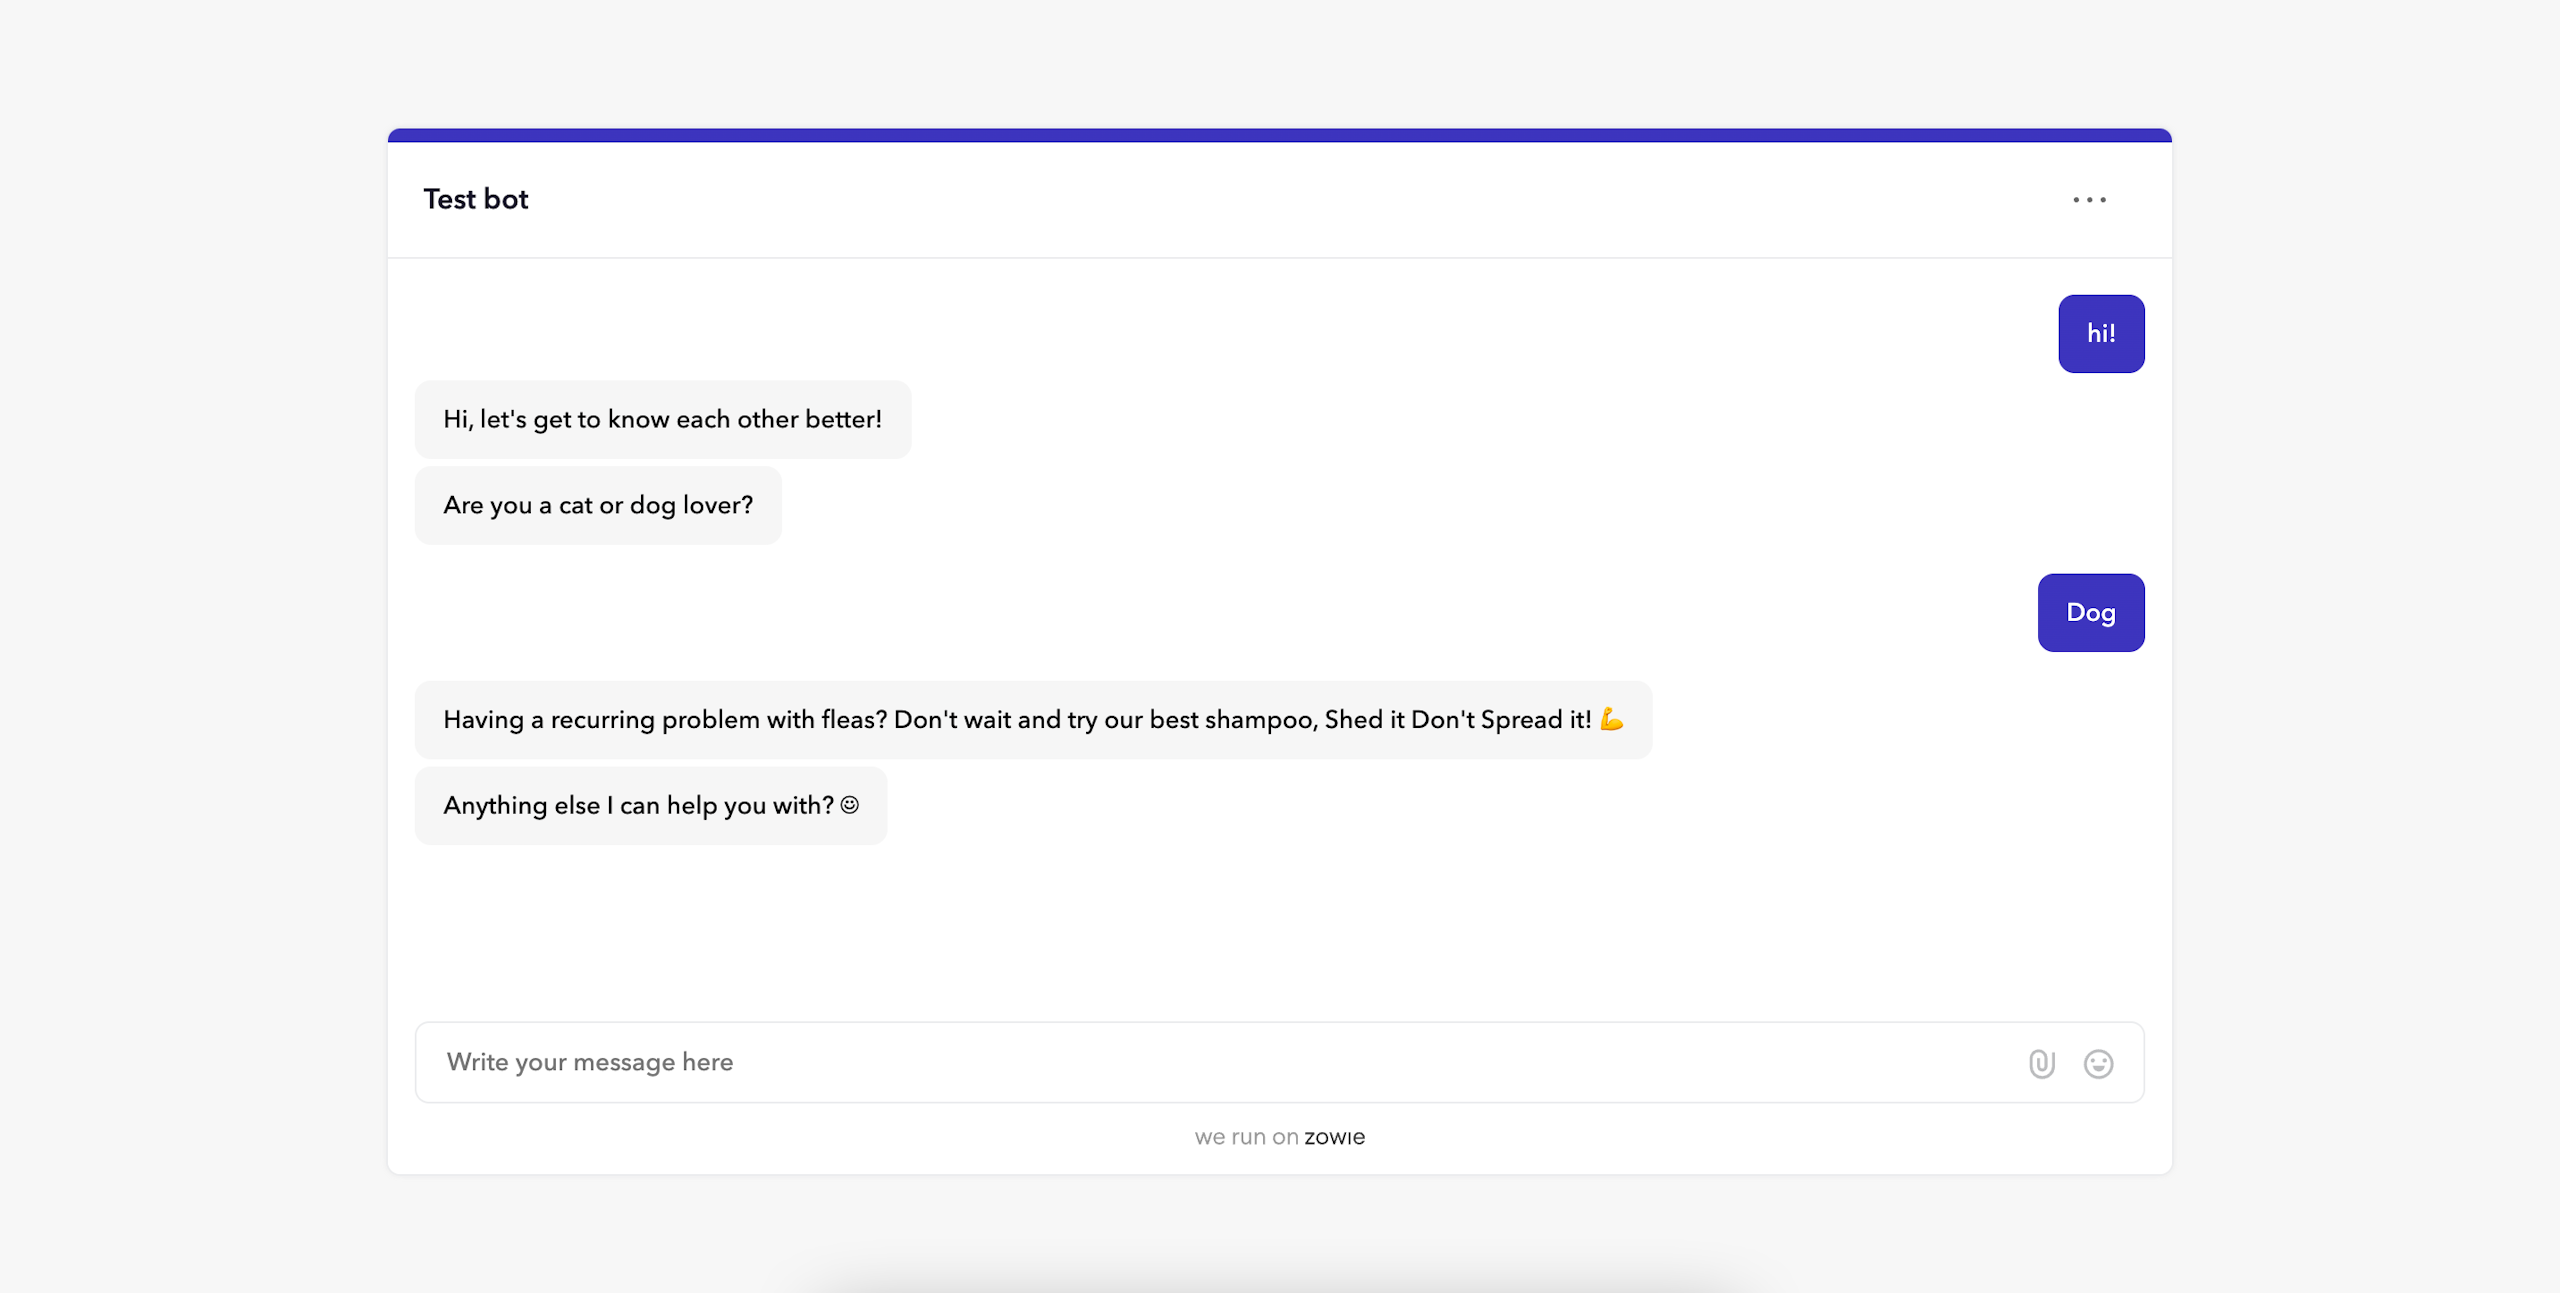
The usecase we are going to configure is this: you sell pet products online and you want to find out if a user interacting with the chatbot is a cat or dog lover to present them recommendations about fur care products which they are more likely to buy.
Just follow the steps below to configure this scenario:
Create a custom Property
Fill out the form
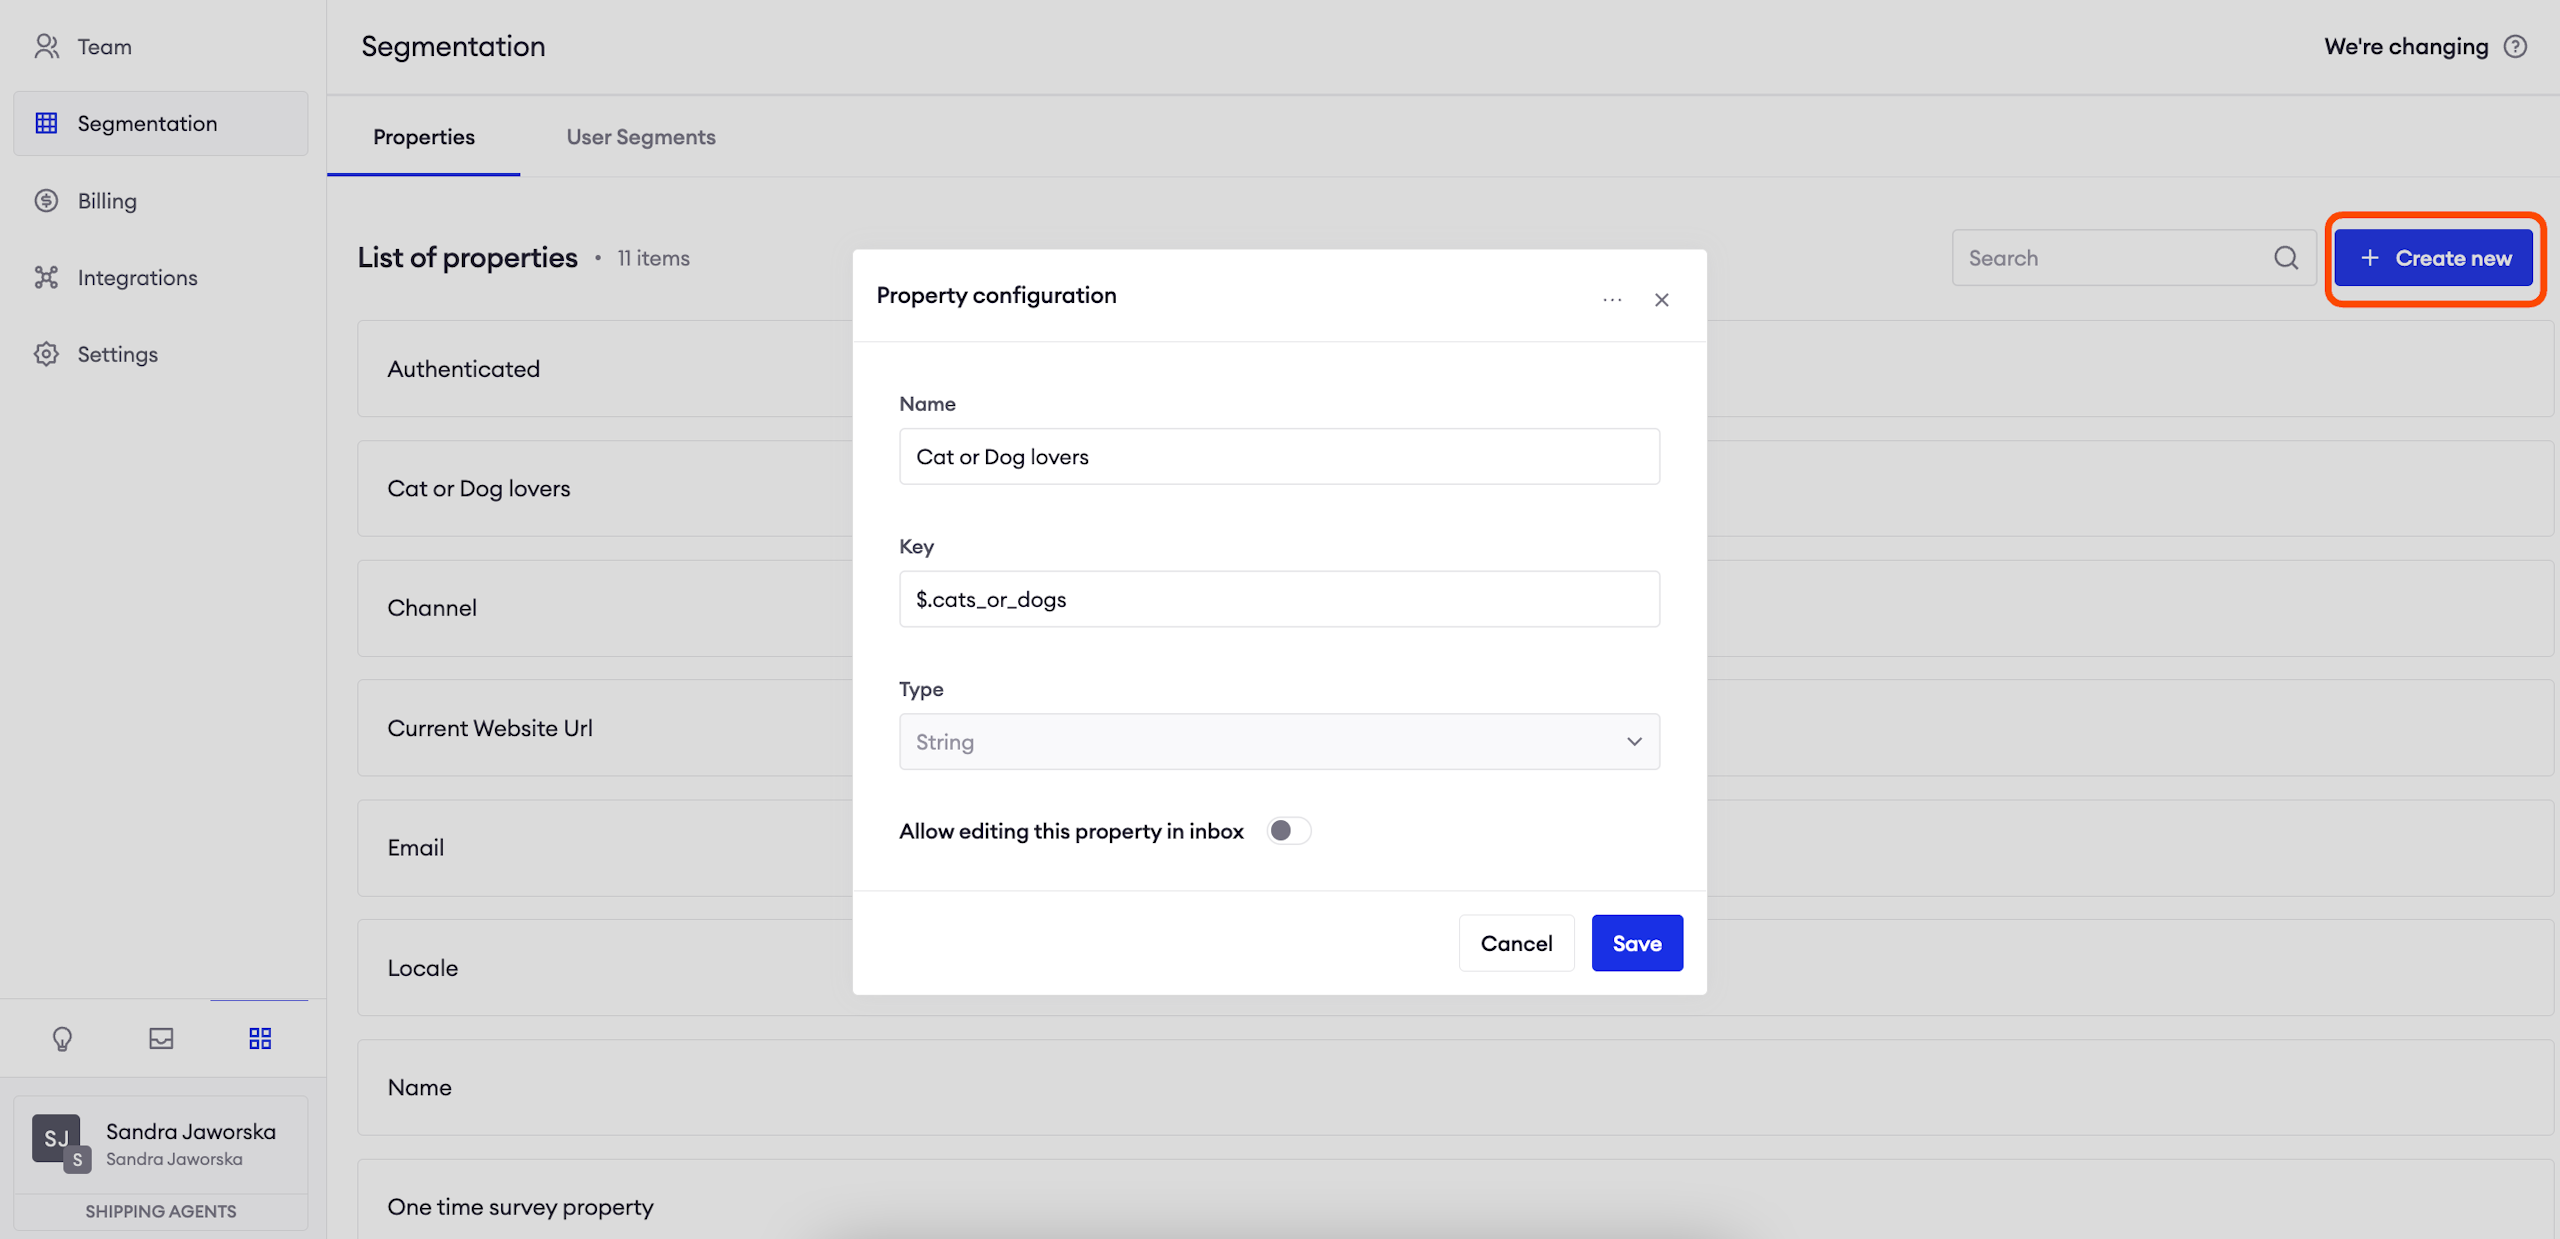
Click on the "Create new" button in the top right corner and fill out the form:
Name: it is displayed on the list of Properties;
Key: how this Property is connected to the data source (scroll down to see an example);
Type: select the type of input which will be provided by the data source;
Allow editing this property in Inbox: if you enable this option, your Agents will be able to overwrite the value provided by the user.
AttentionRemember about correct text format in the Key field.
Decide how you gather data
You can take values for user properties from the following places:
- Survey: you can configure it from the platform;
- Widget code: you can add your properties directly into the widget code, you may need a technical person to help you out;
- Zowie Chat collects basic information such as IP address, browser locale, and current website URL;
- For the Authenticated property, contact your Customer Success Manager about adding JWT authentication.
Cats or Dogs: custom Property example
During the previous steps, we created a user Property called "Cat or Dog lovers" to measure users against their pet affiliations.
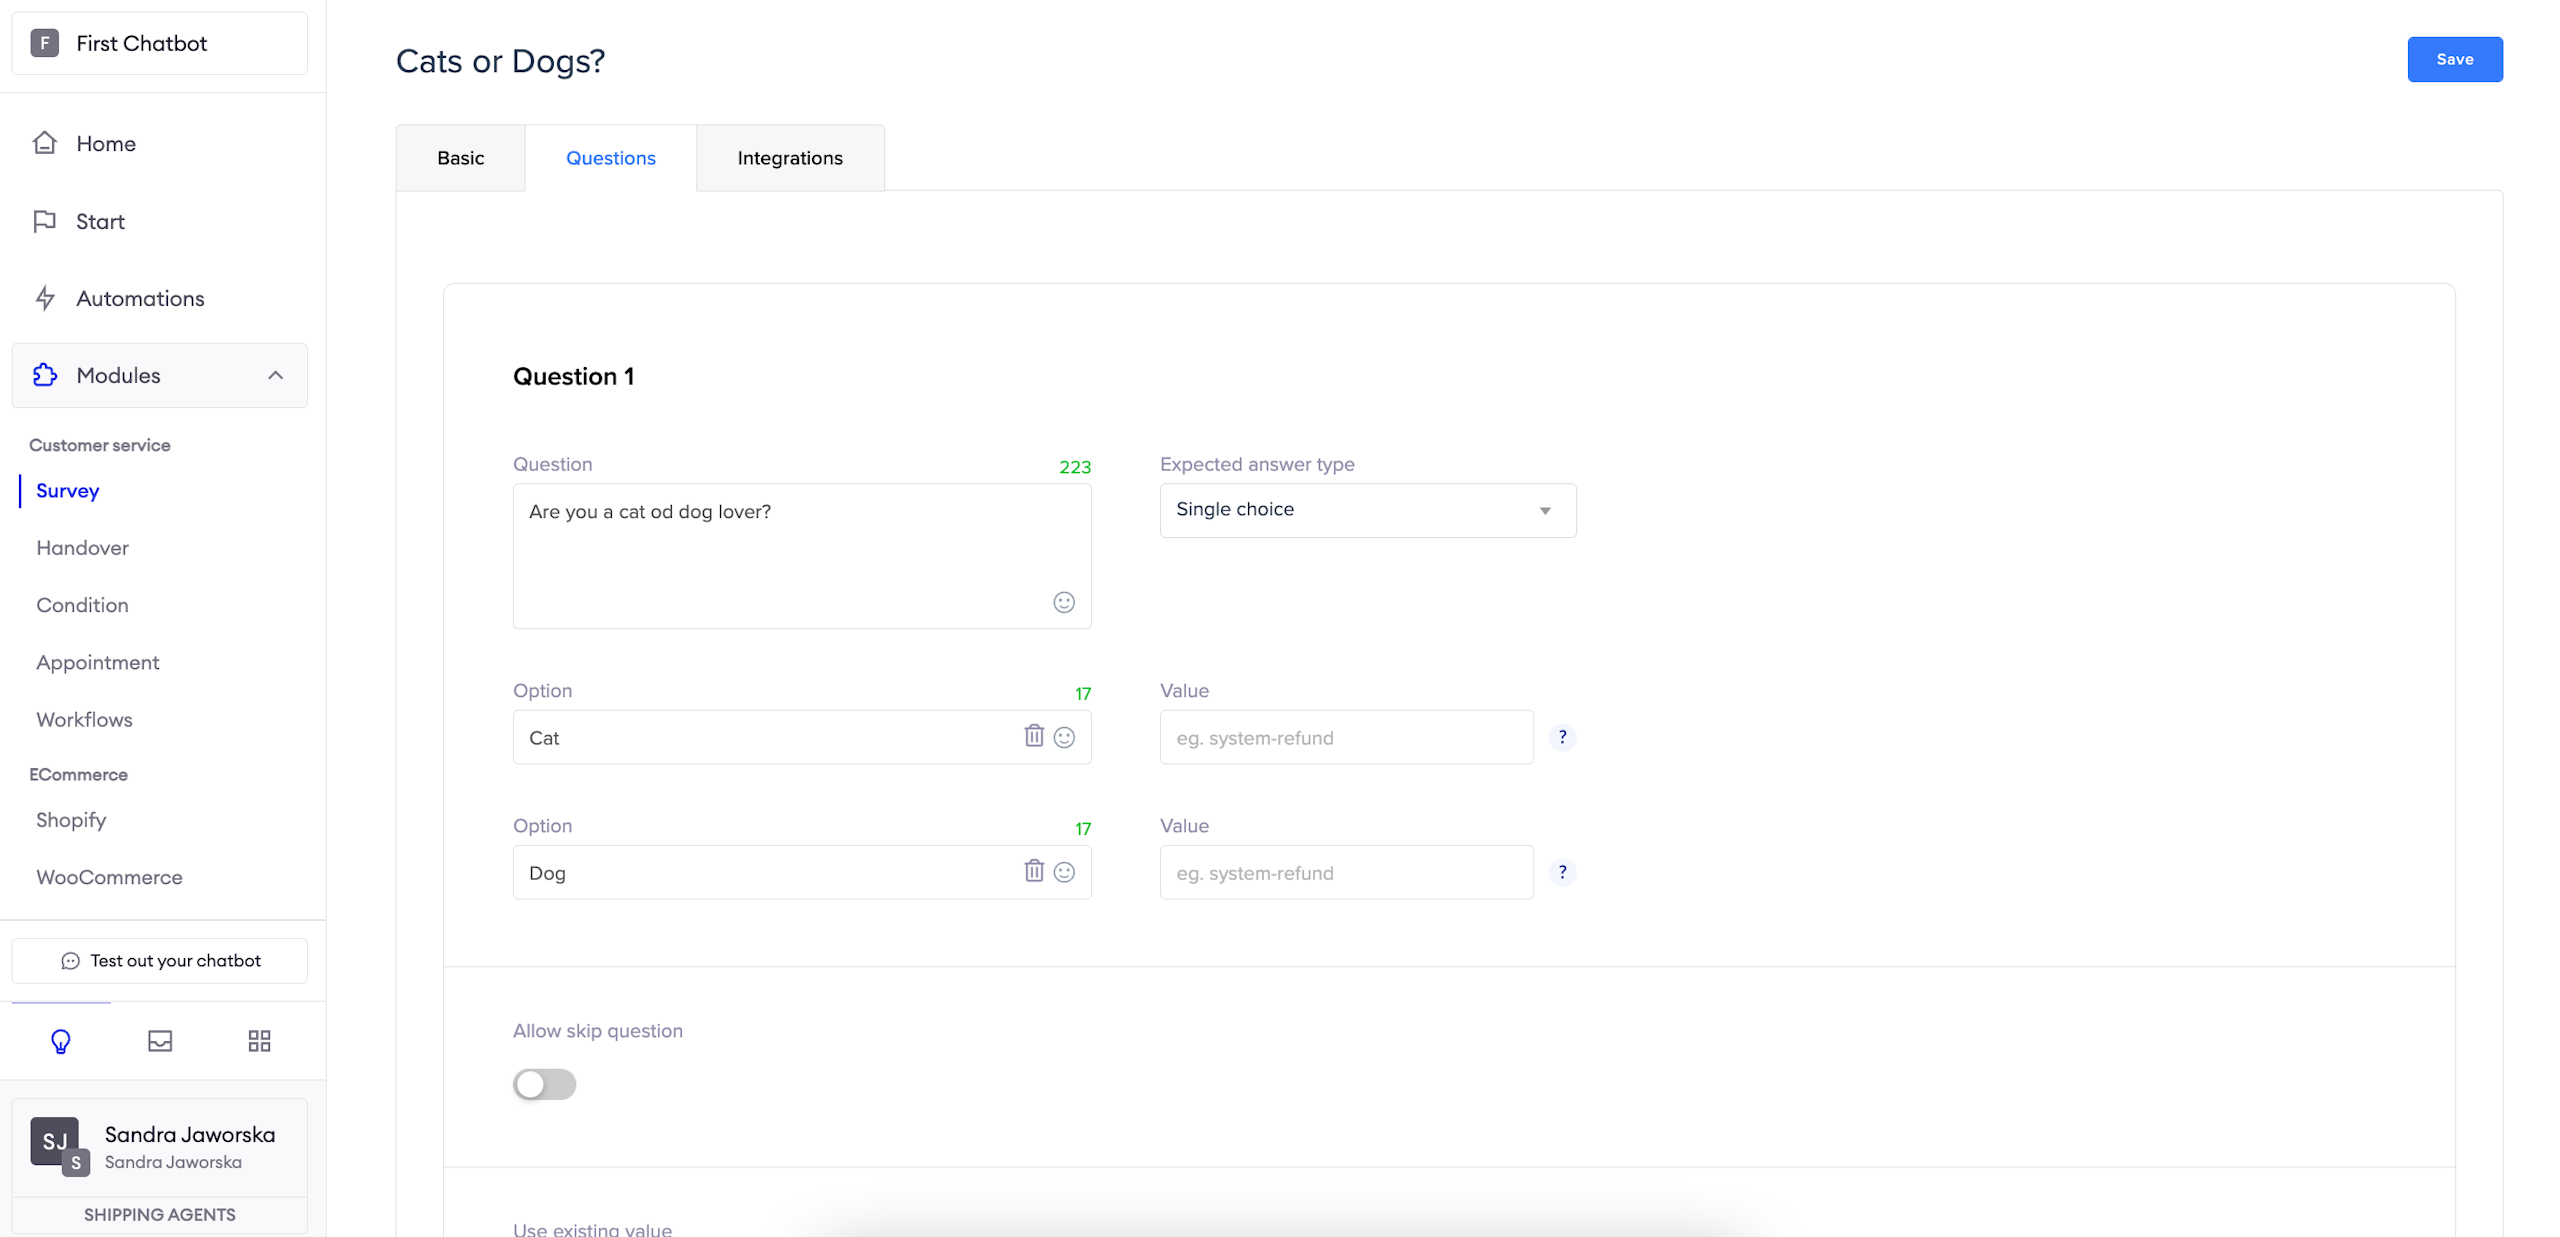
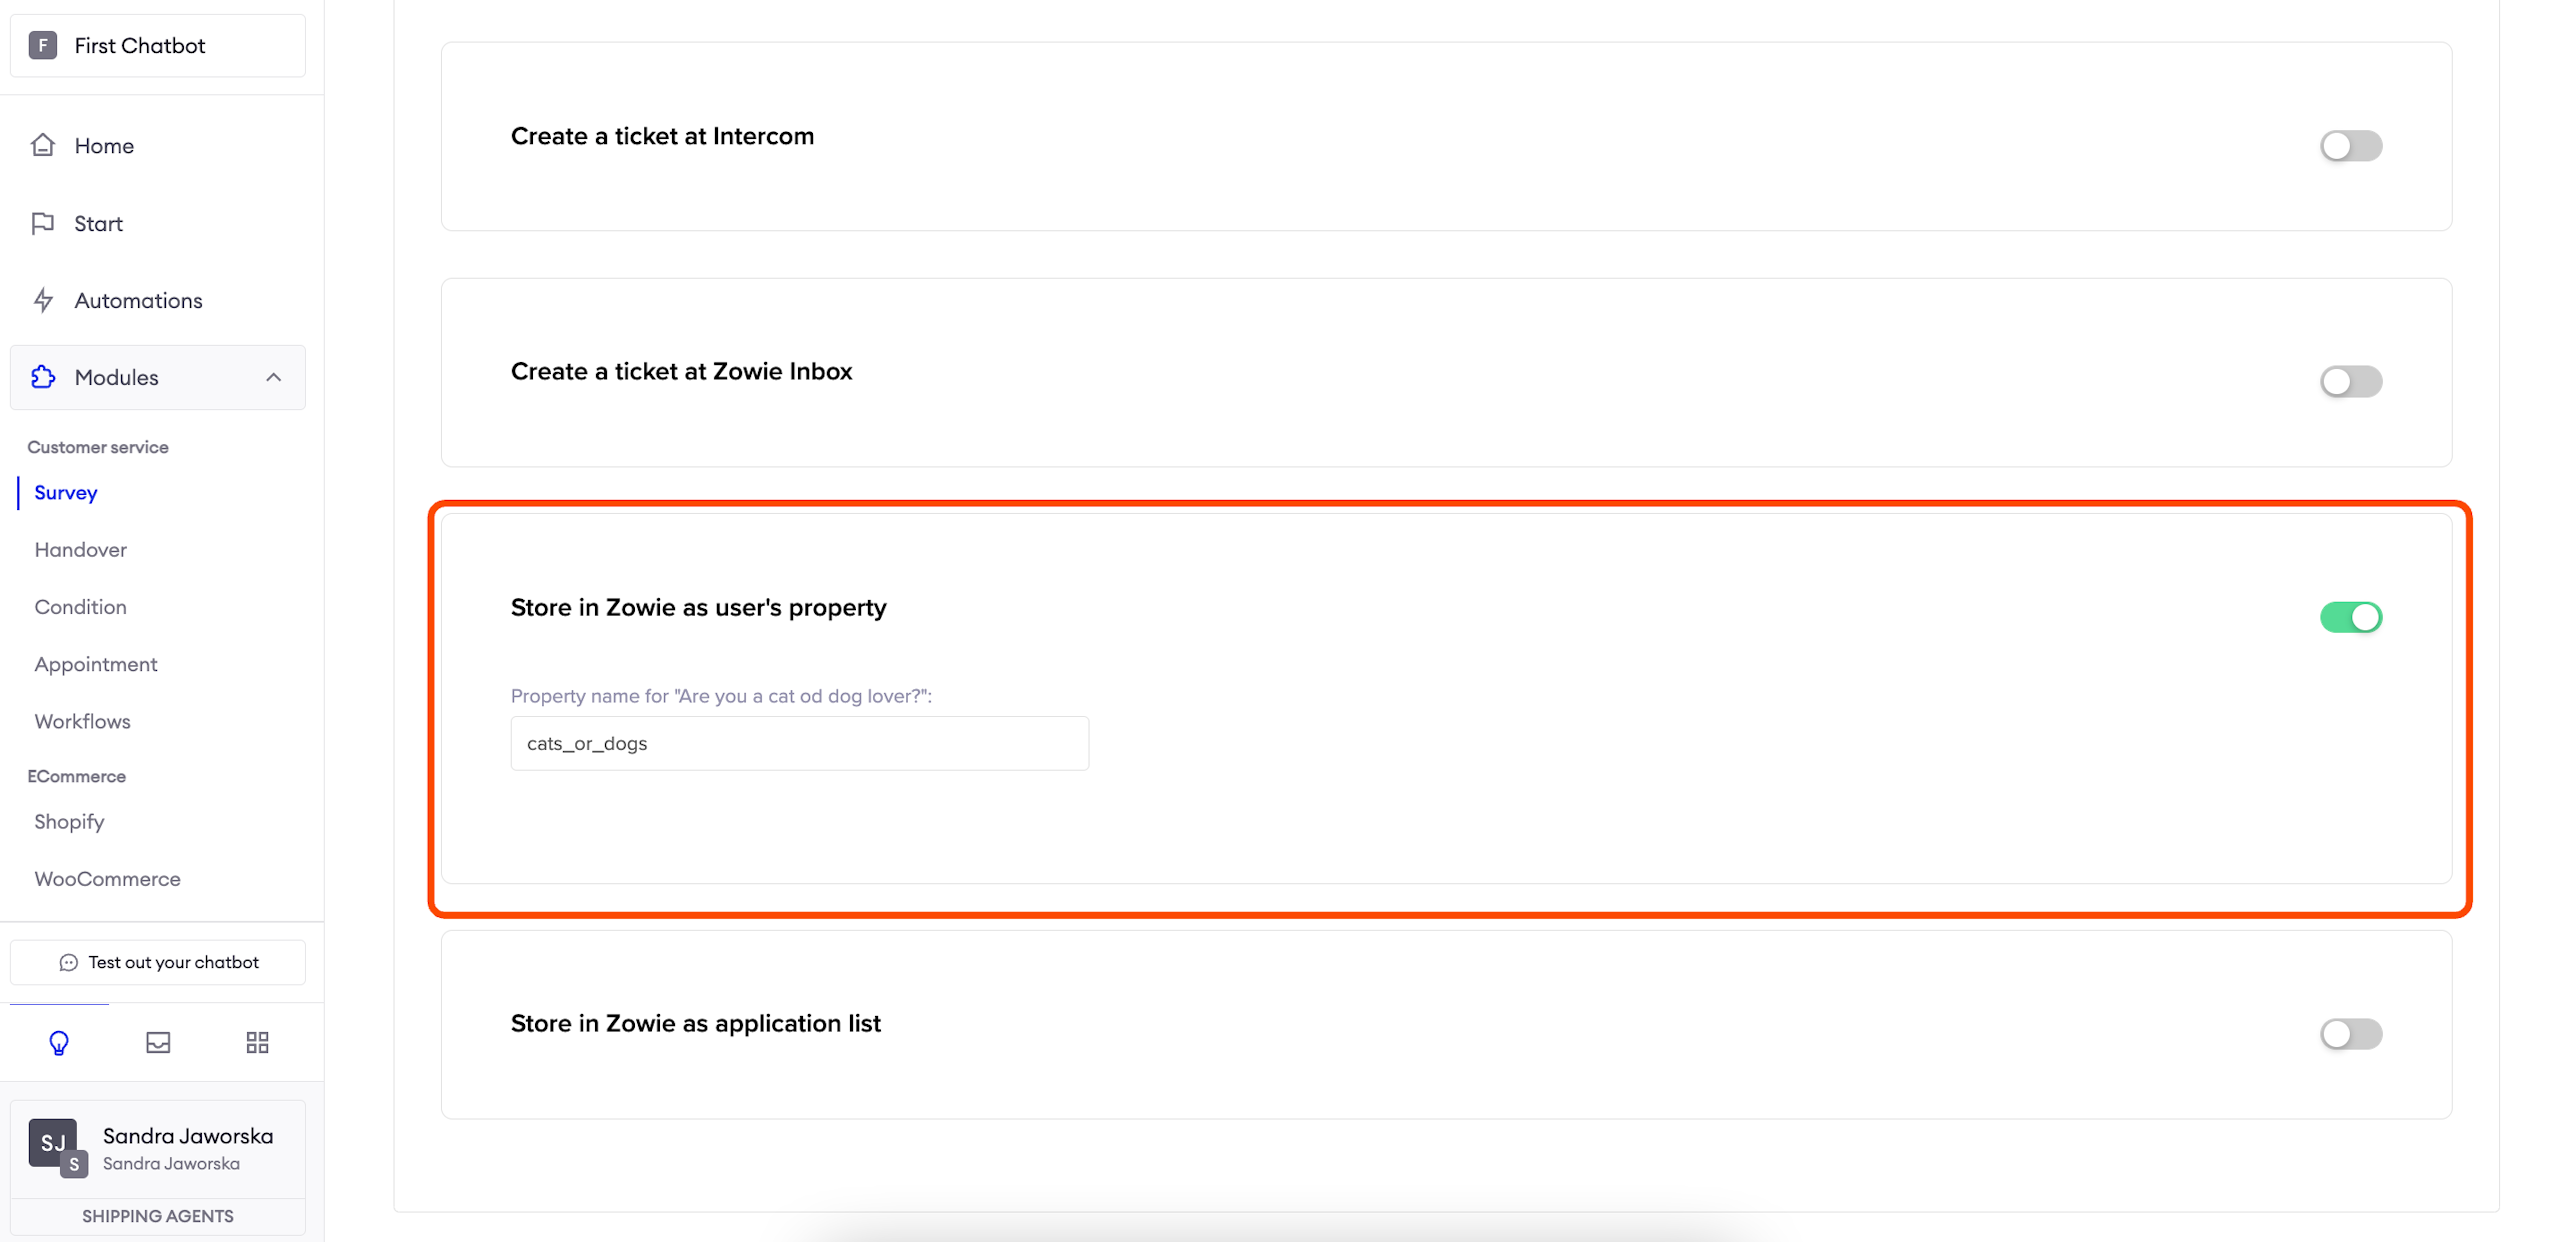
We decide to gather data via a Survey. We create a new survey, add a relevant question and toggle on Store in Zowie as user's property in the Integrations tab. Of course, we also remember to create an Automation which will present the survey to our users. For this scenario, we will show the product recommendation right after the survey.
AttentionRemember to always double-check if the property name in survey configuration matches the one in property configuration (minus special signs in the beginning).
InformationIf you need to understand better how to configure a survey, please follow this guide.
Create a custom Segment
Fill out the form
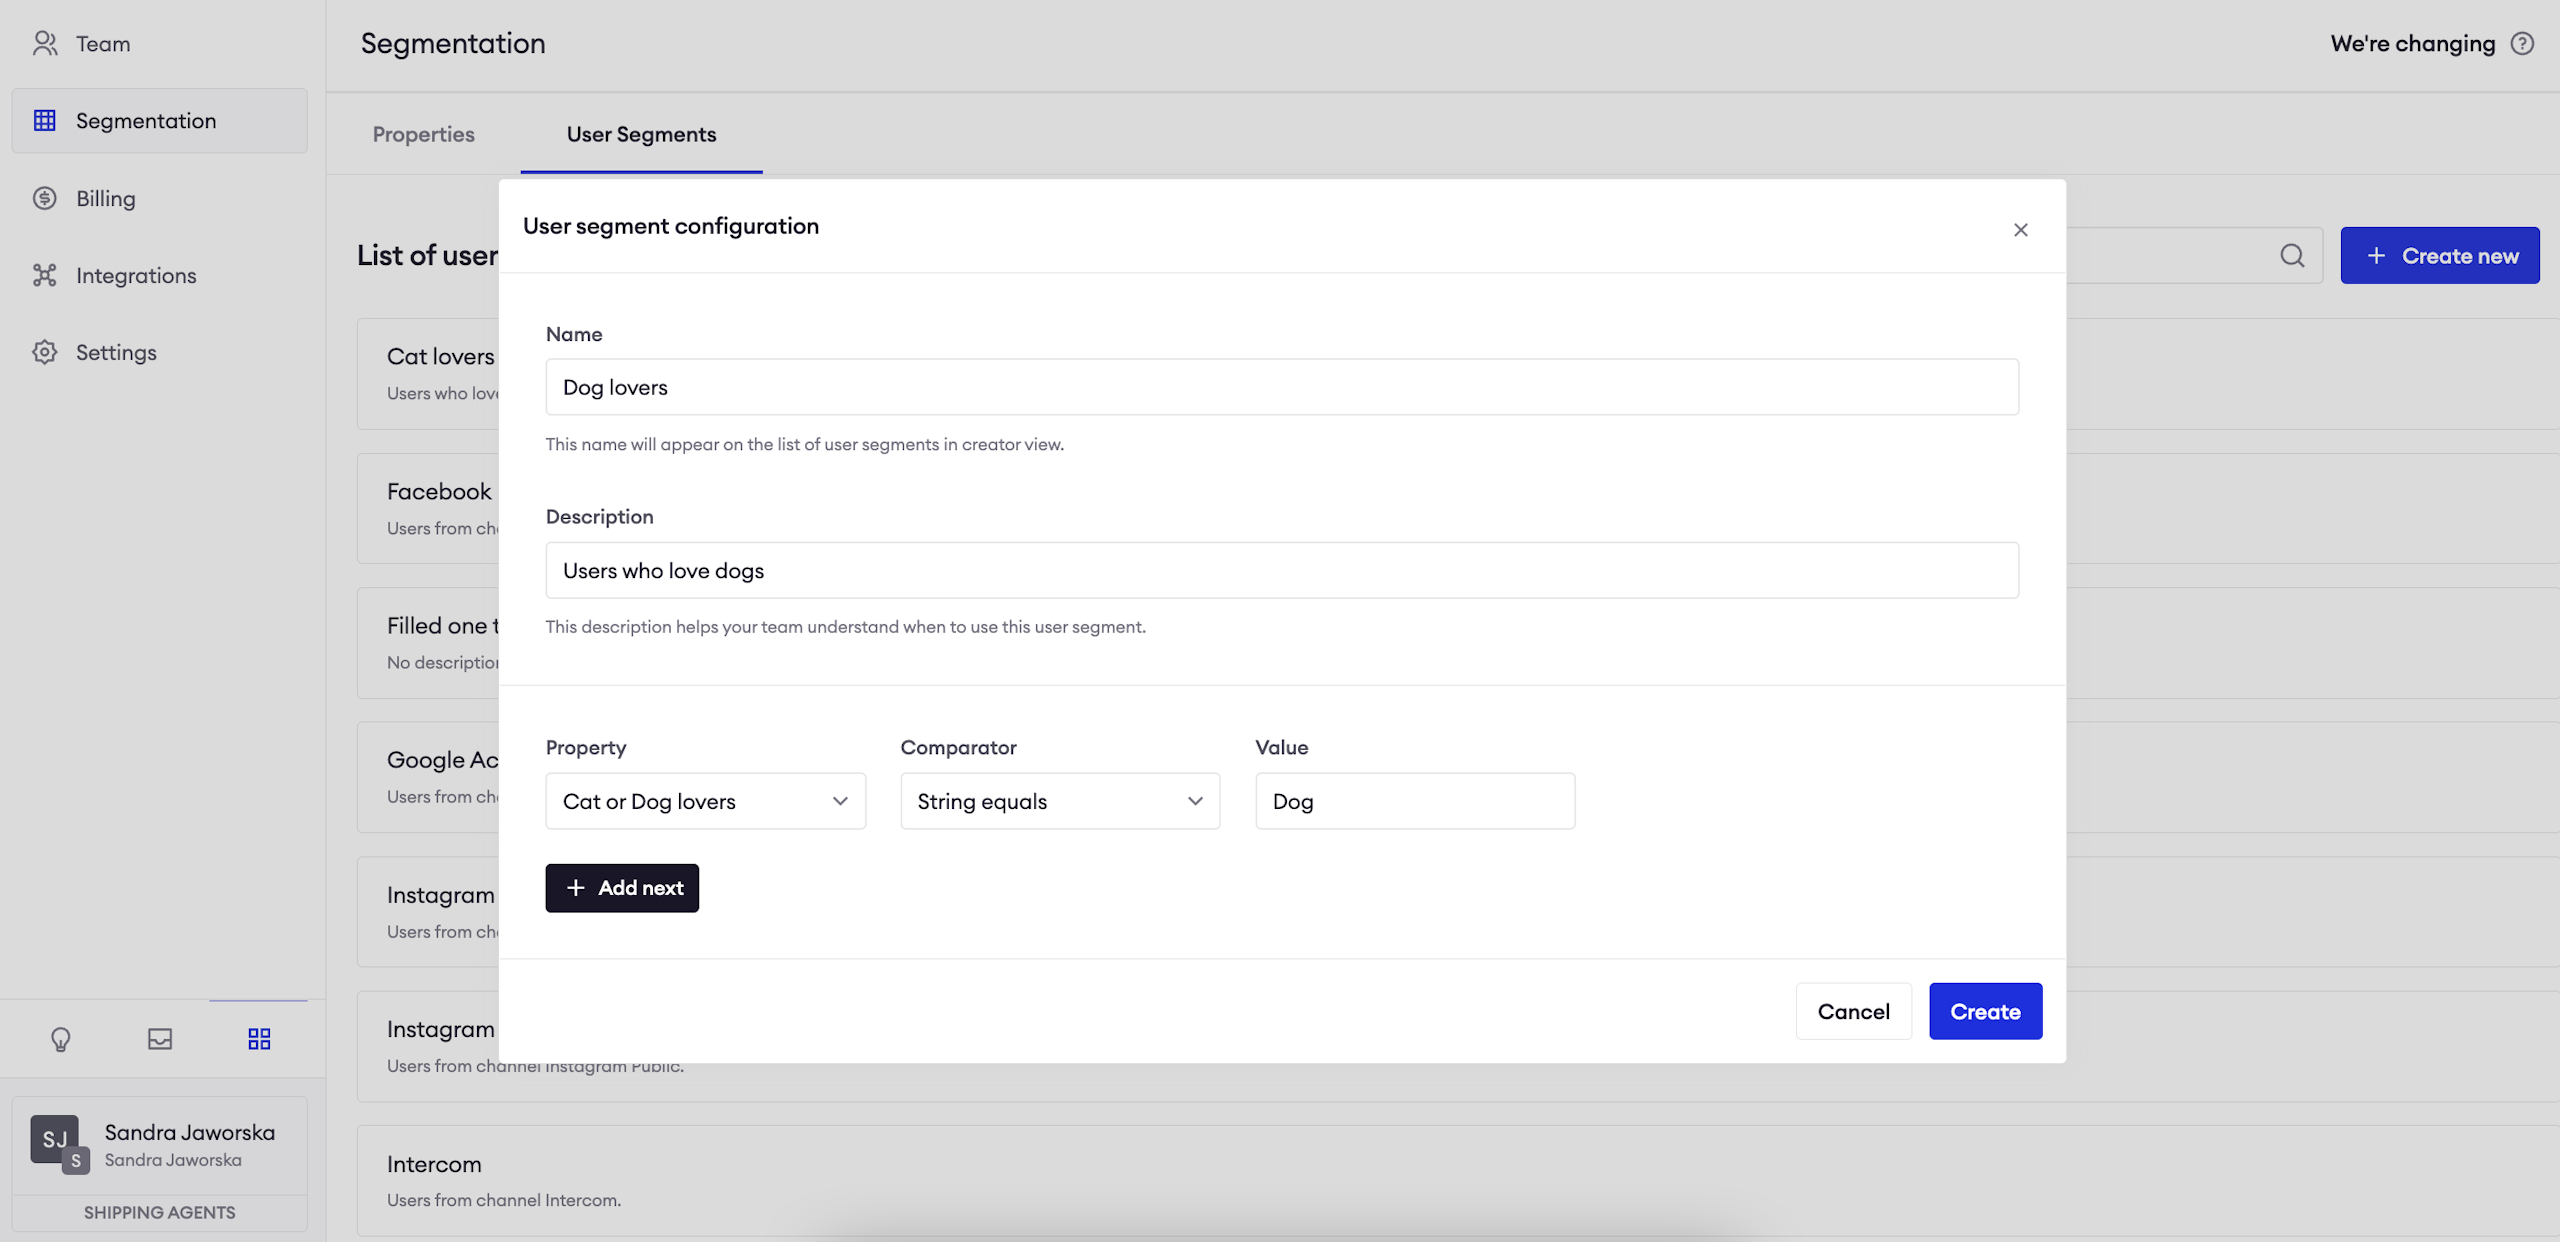
Click on the "Create new" button in the top right corner and fill out the form:
Name: it is displayed on the list of segments;
Description: it allows you to characterise the group;
Property: select an existing property which you will use to add users to this Segment. You can use multiple properies in various configurations.
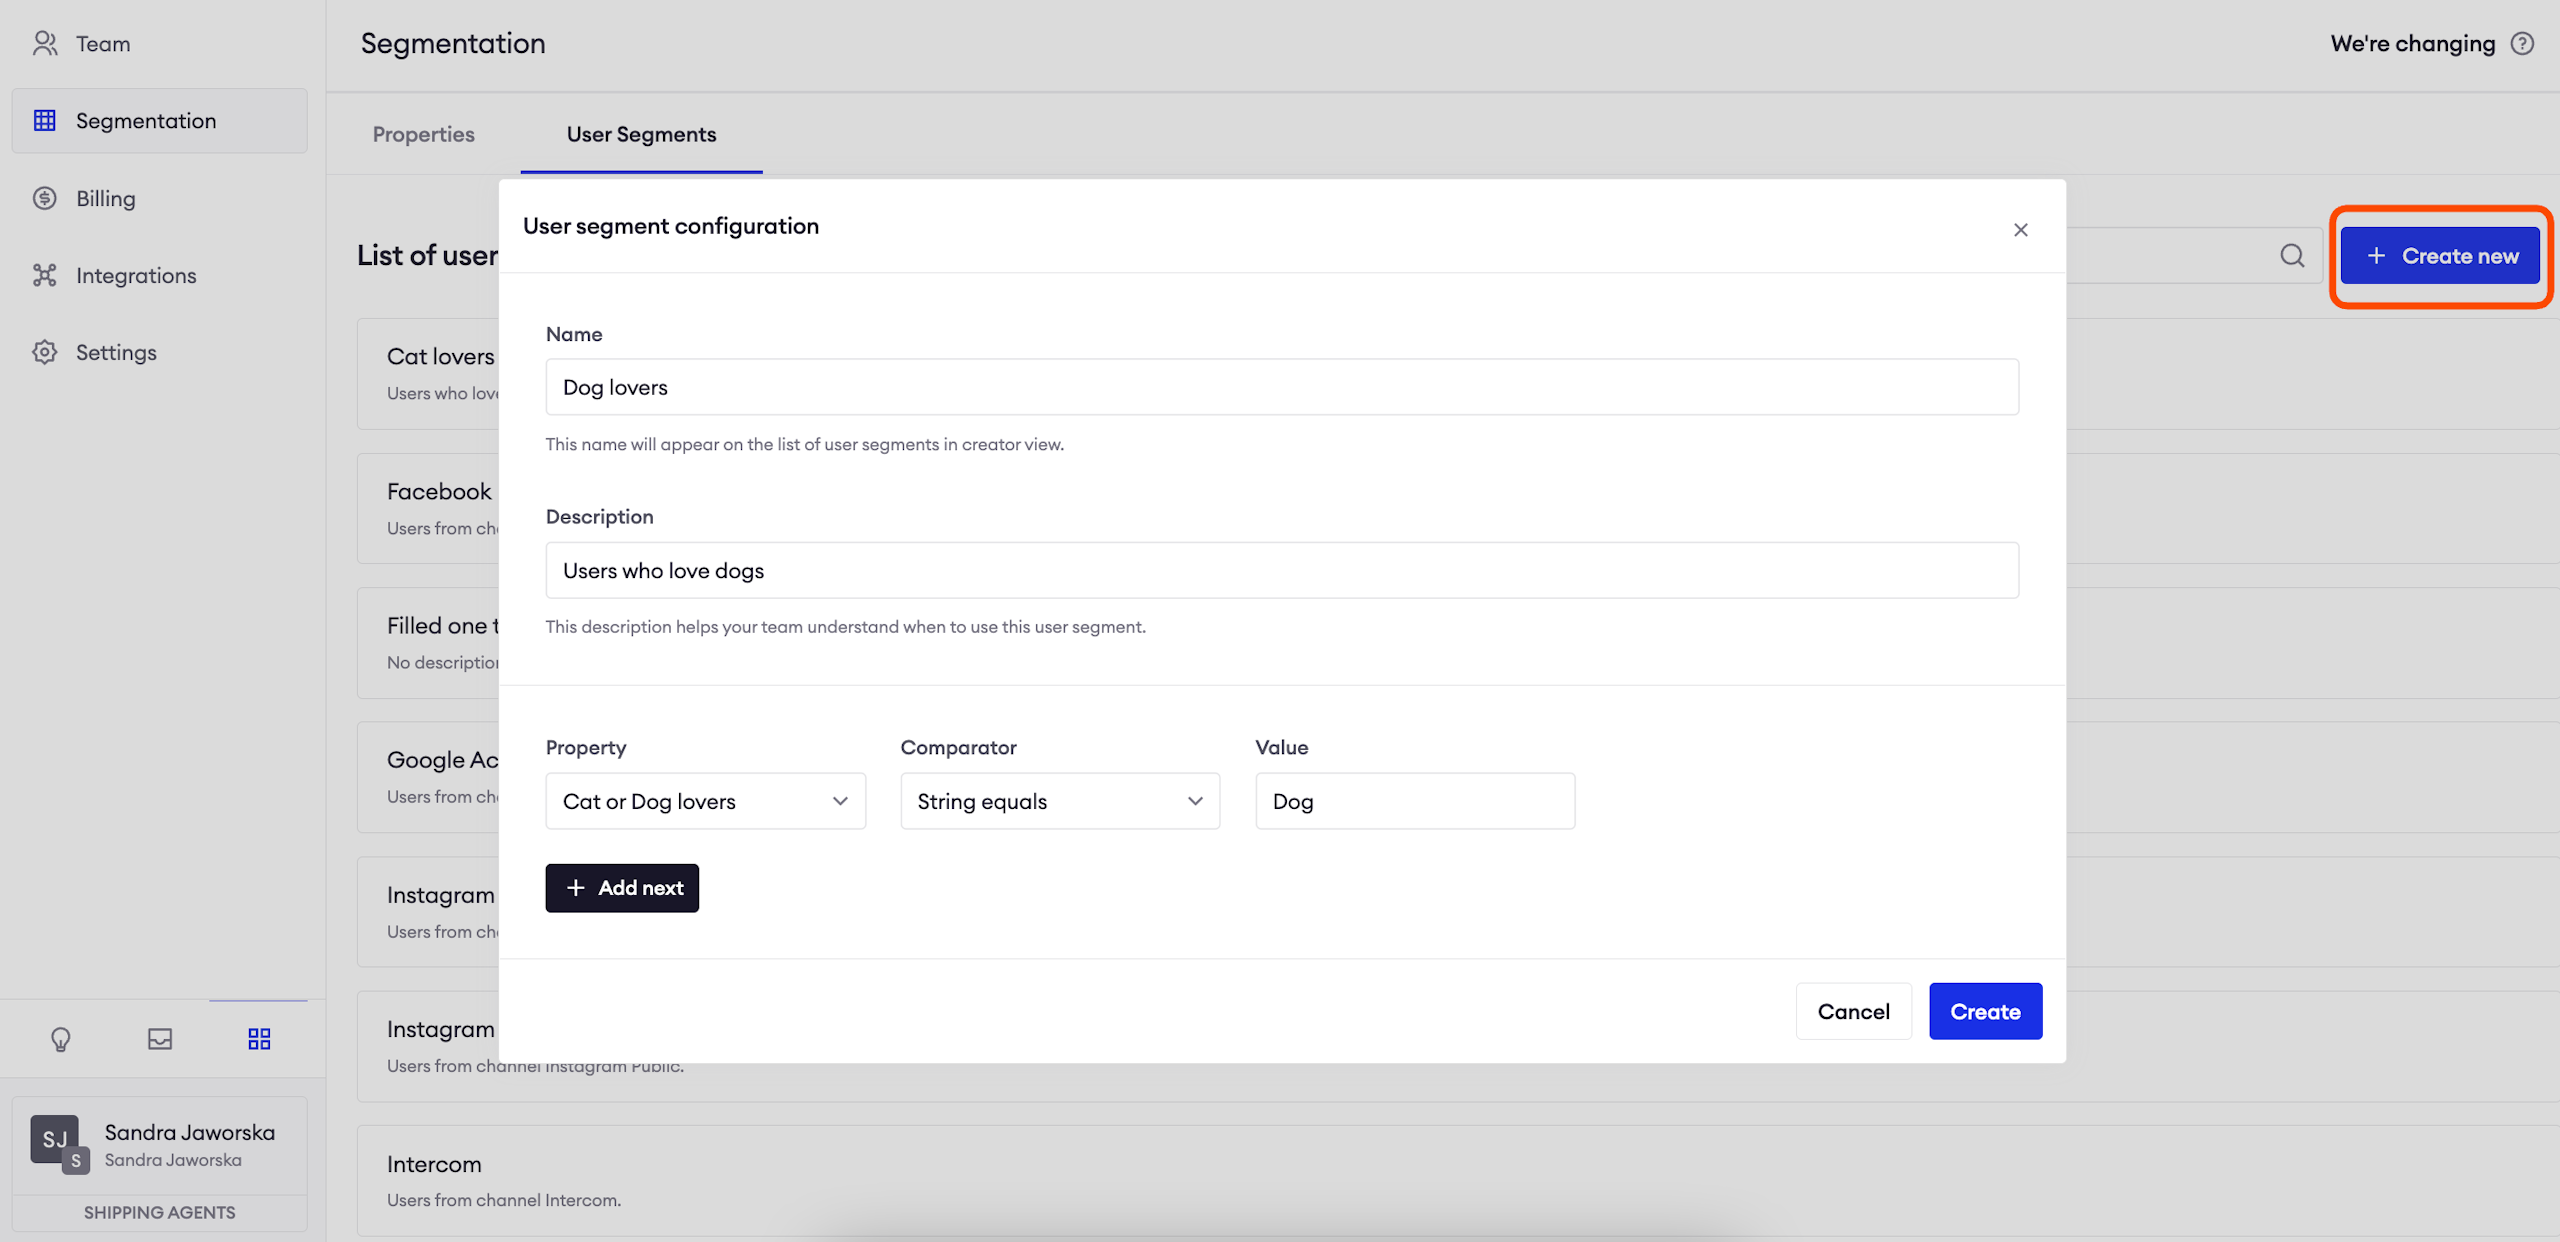
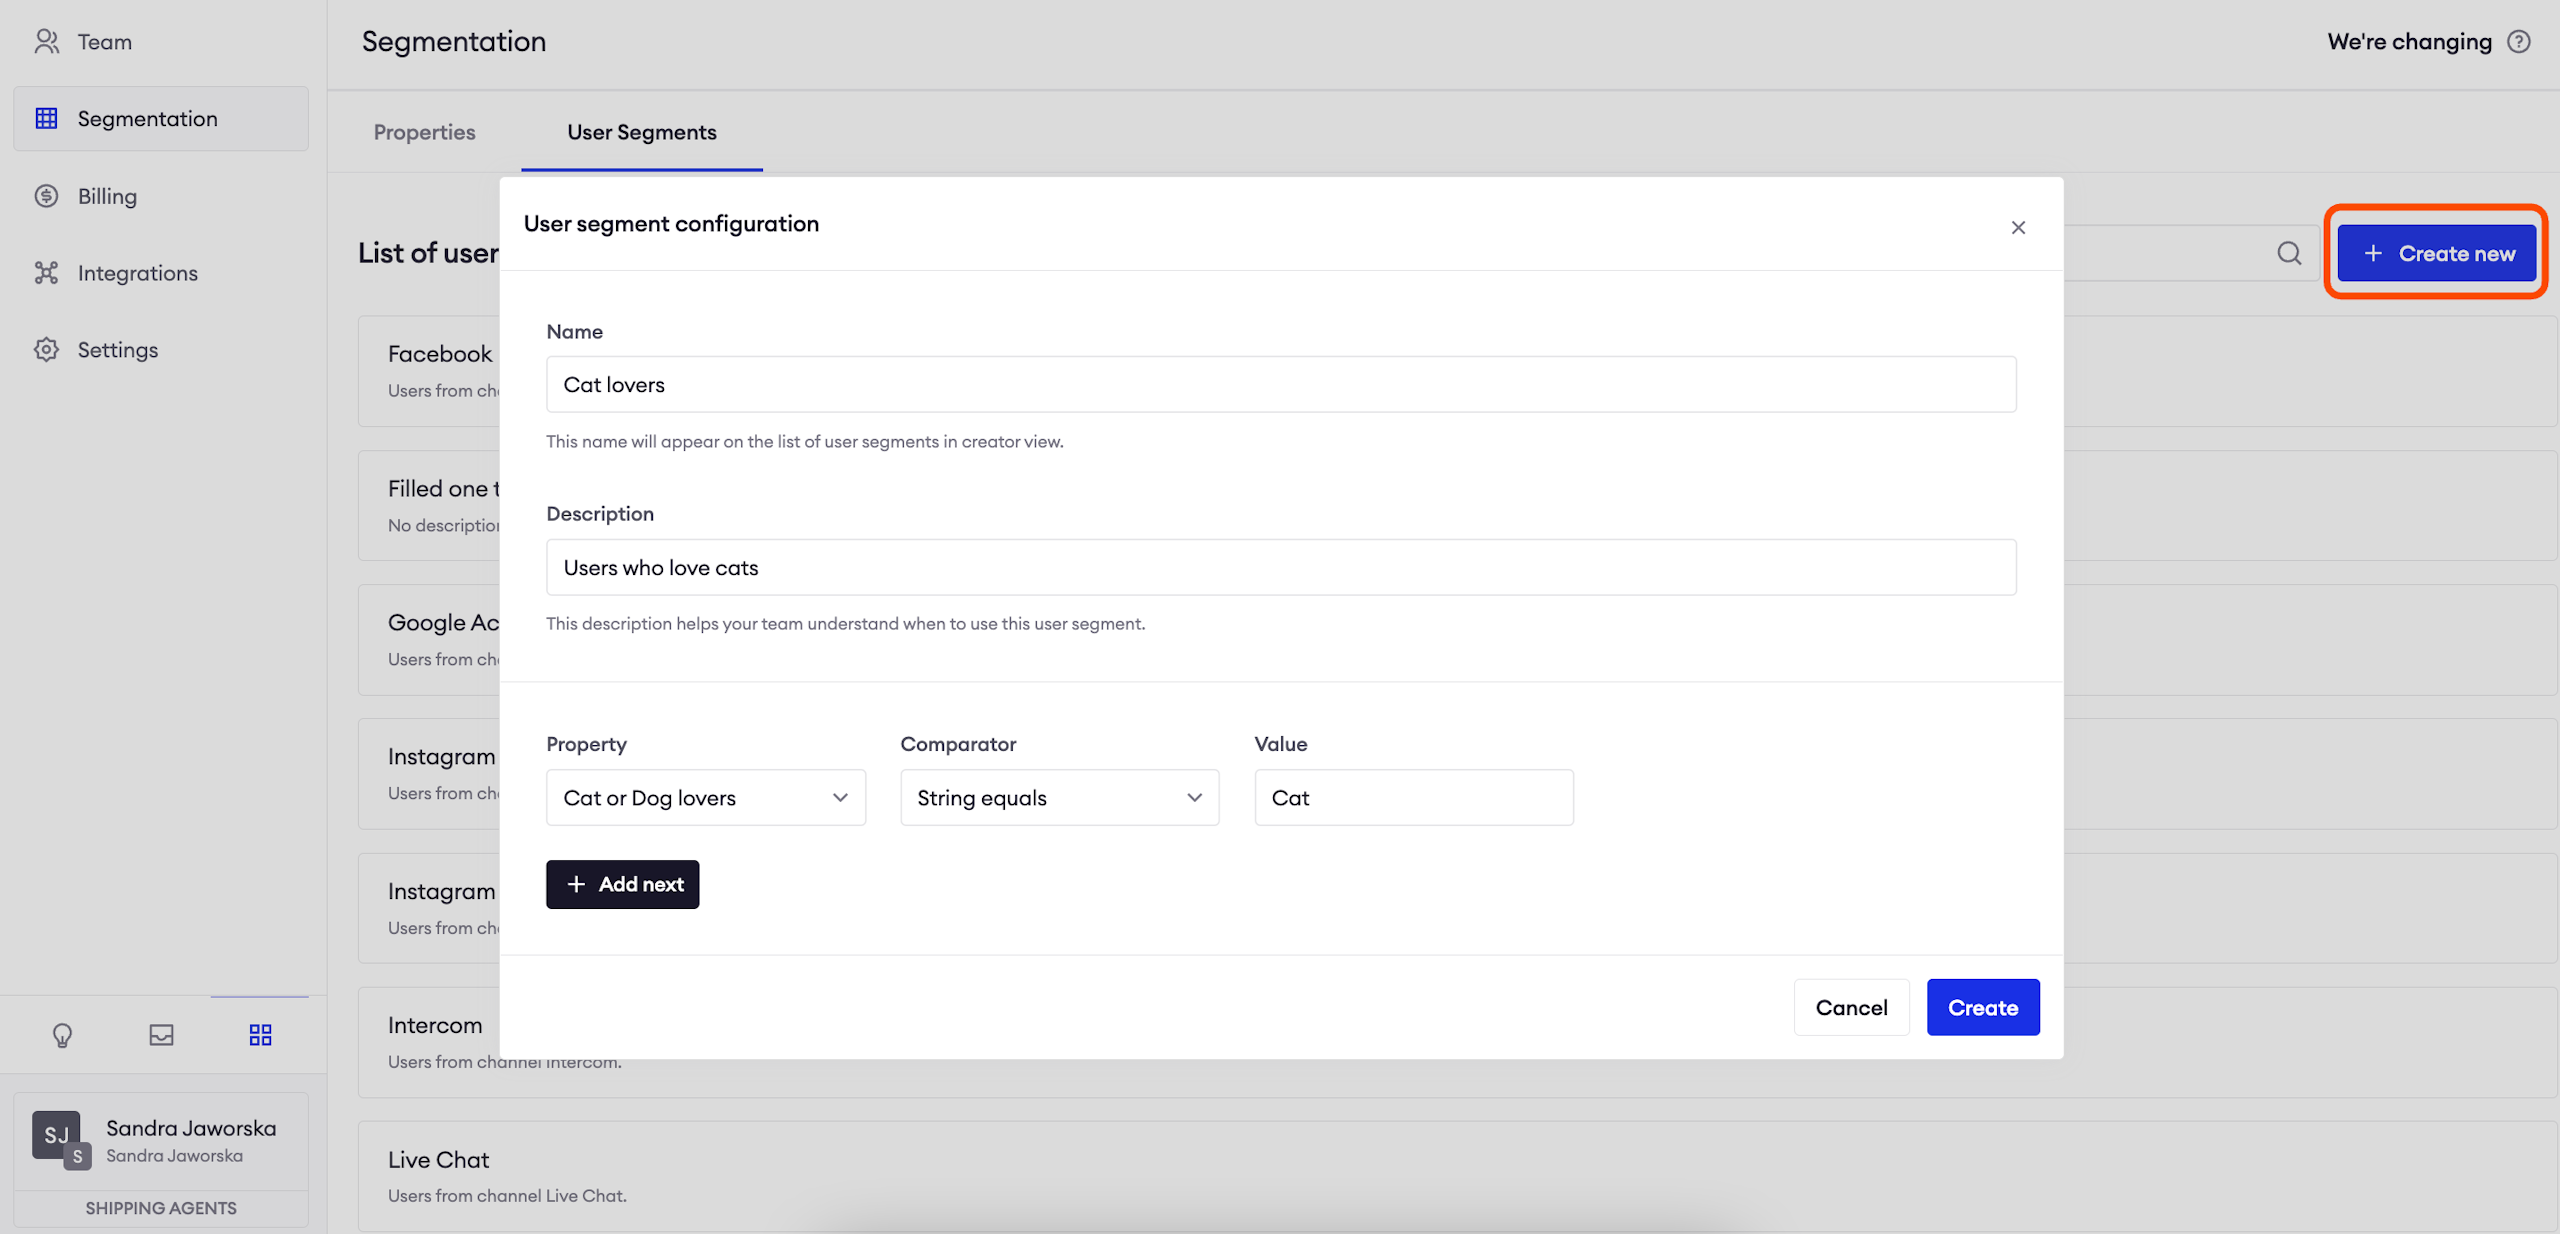
Cats or Dogs: custom Segment example
During the previous steps, we created a user property called "Cat or Dog lovers" to measure users against their pet affiliations and we created a survey to gather information from our users.
Now we create two segments which will help us create two separate paths when recommending a pet product.
One product will be for dogs and we will show it to dog lovers, meaning users who selected the option "Dog" in our survey. The other product will be for cat lovers, meaning users who selected the option "Cat" in our Survey.
Just to sum it up:
- the survey serves as a source of data - we use it to ask users about their preference and we save their reply;
- the custom property serves as a point of differentiation between our users;
- the segments are two different groups which will receive different replies.

Create a chatbot message based on Segments
AttentionIf you need to learn the basics of creating Automations, visit this guide.
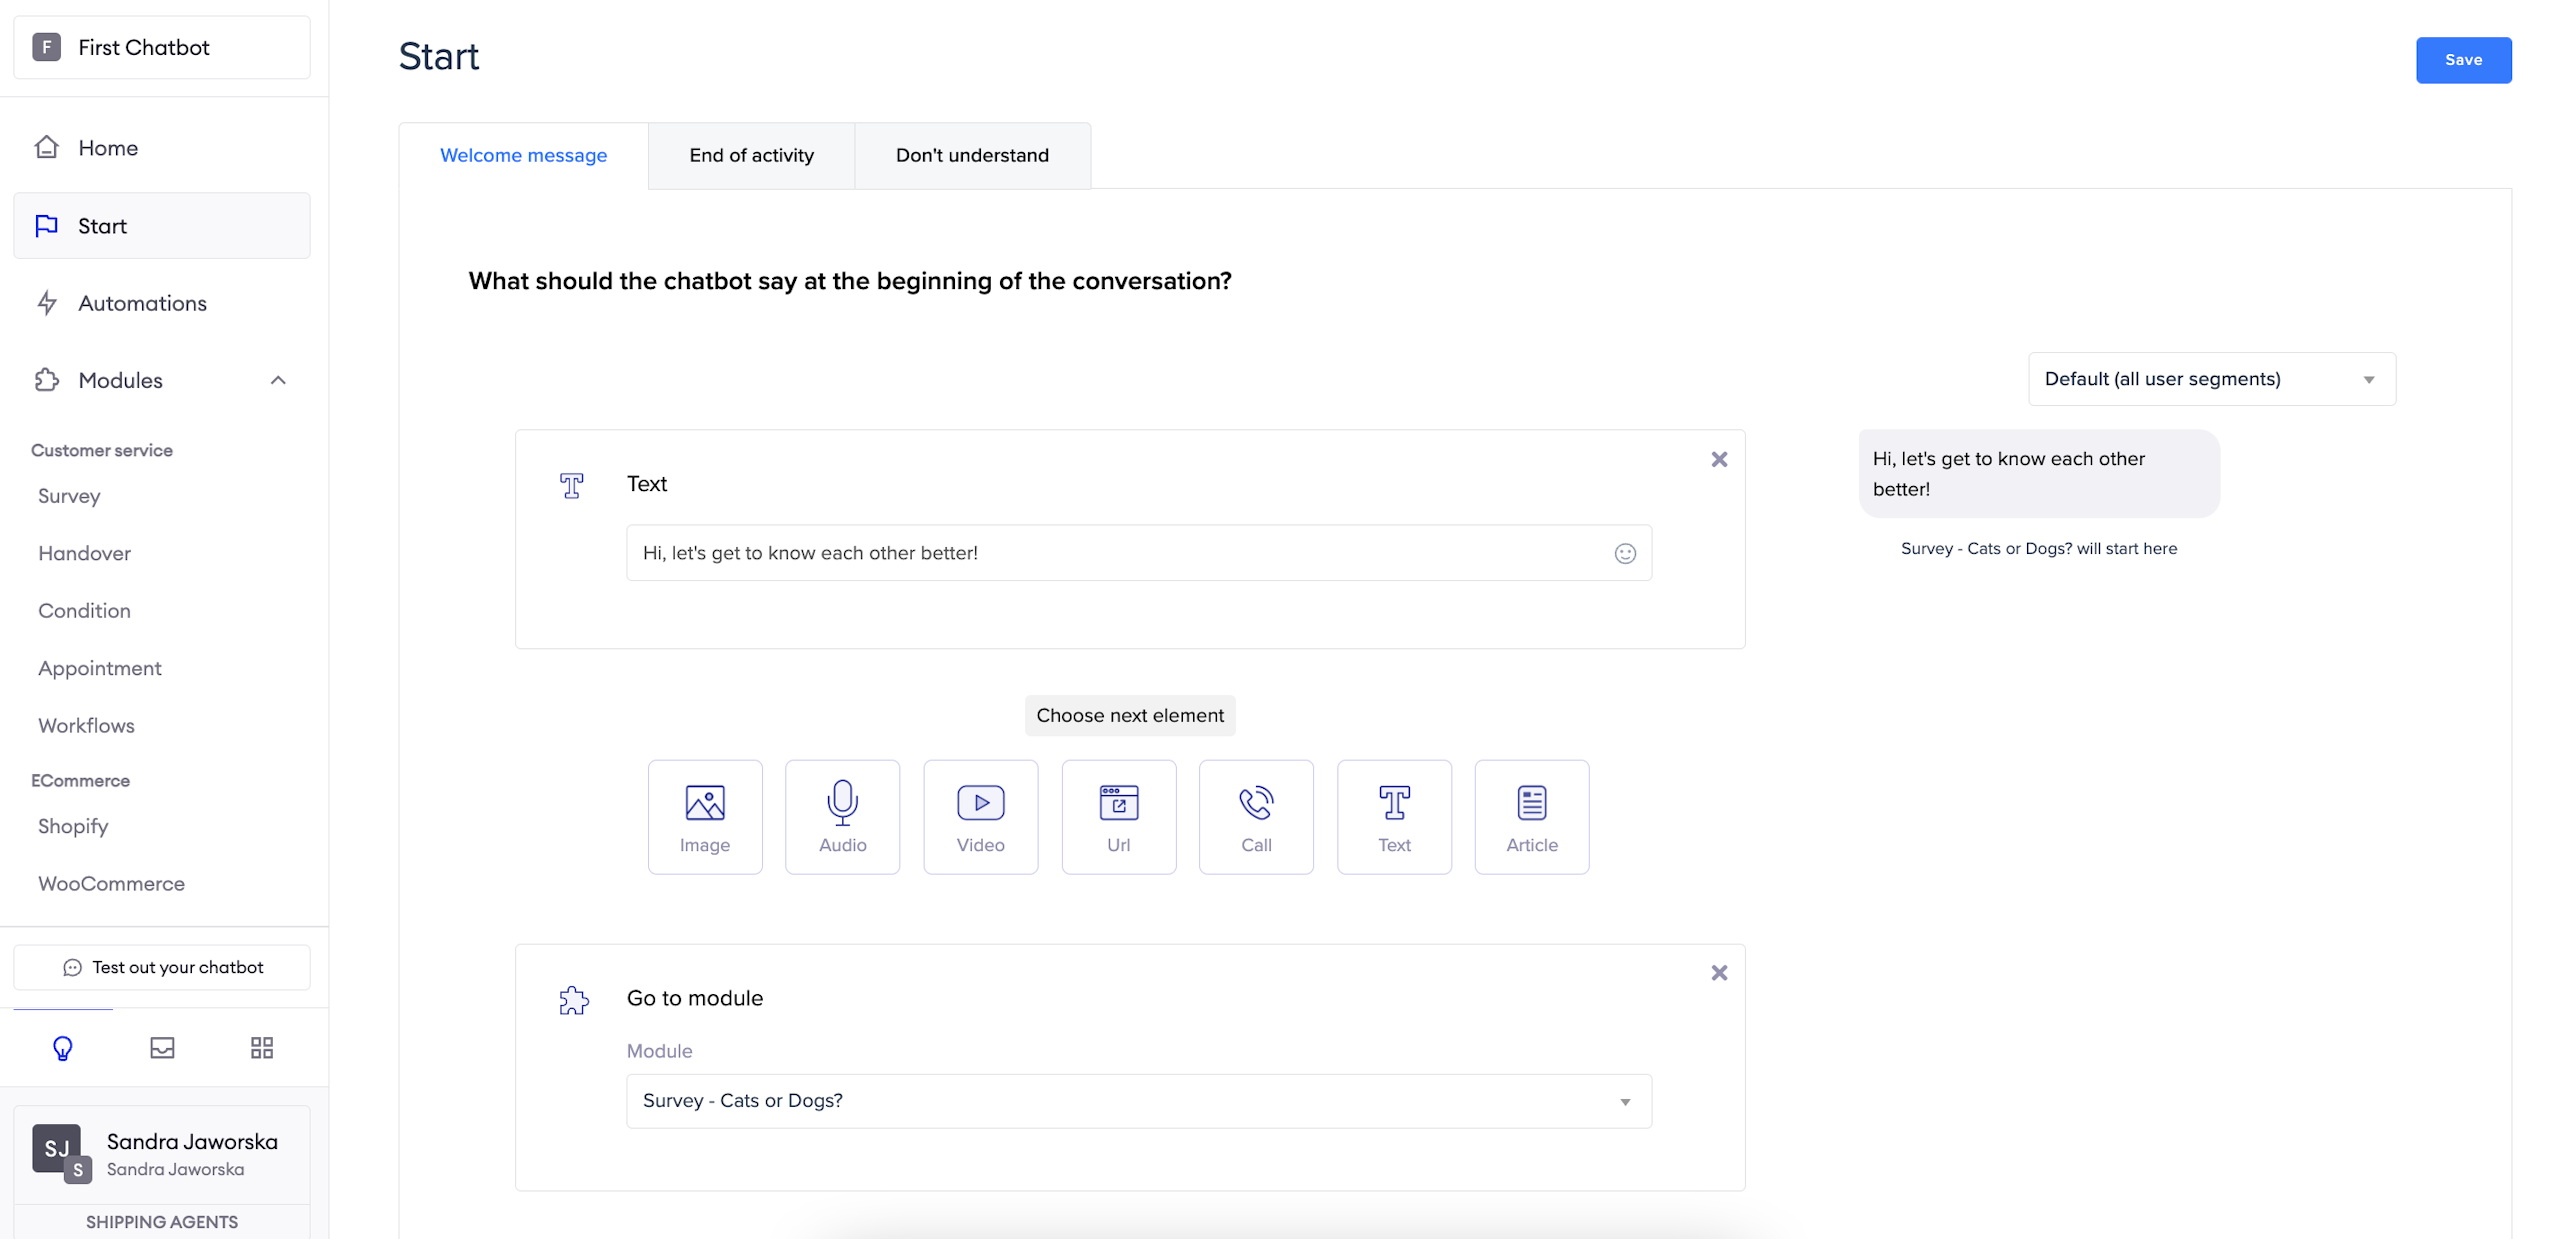
During this step, we need to create an Automation and define different responses based on user segments. In order to do that, use the selector on the right side of the creator view while editing an automation and prepare responses for segments of your choice.
AttentionRemember that you always have to define the default answer in order to save the changes.
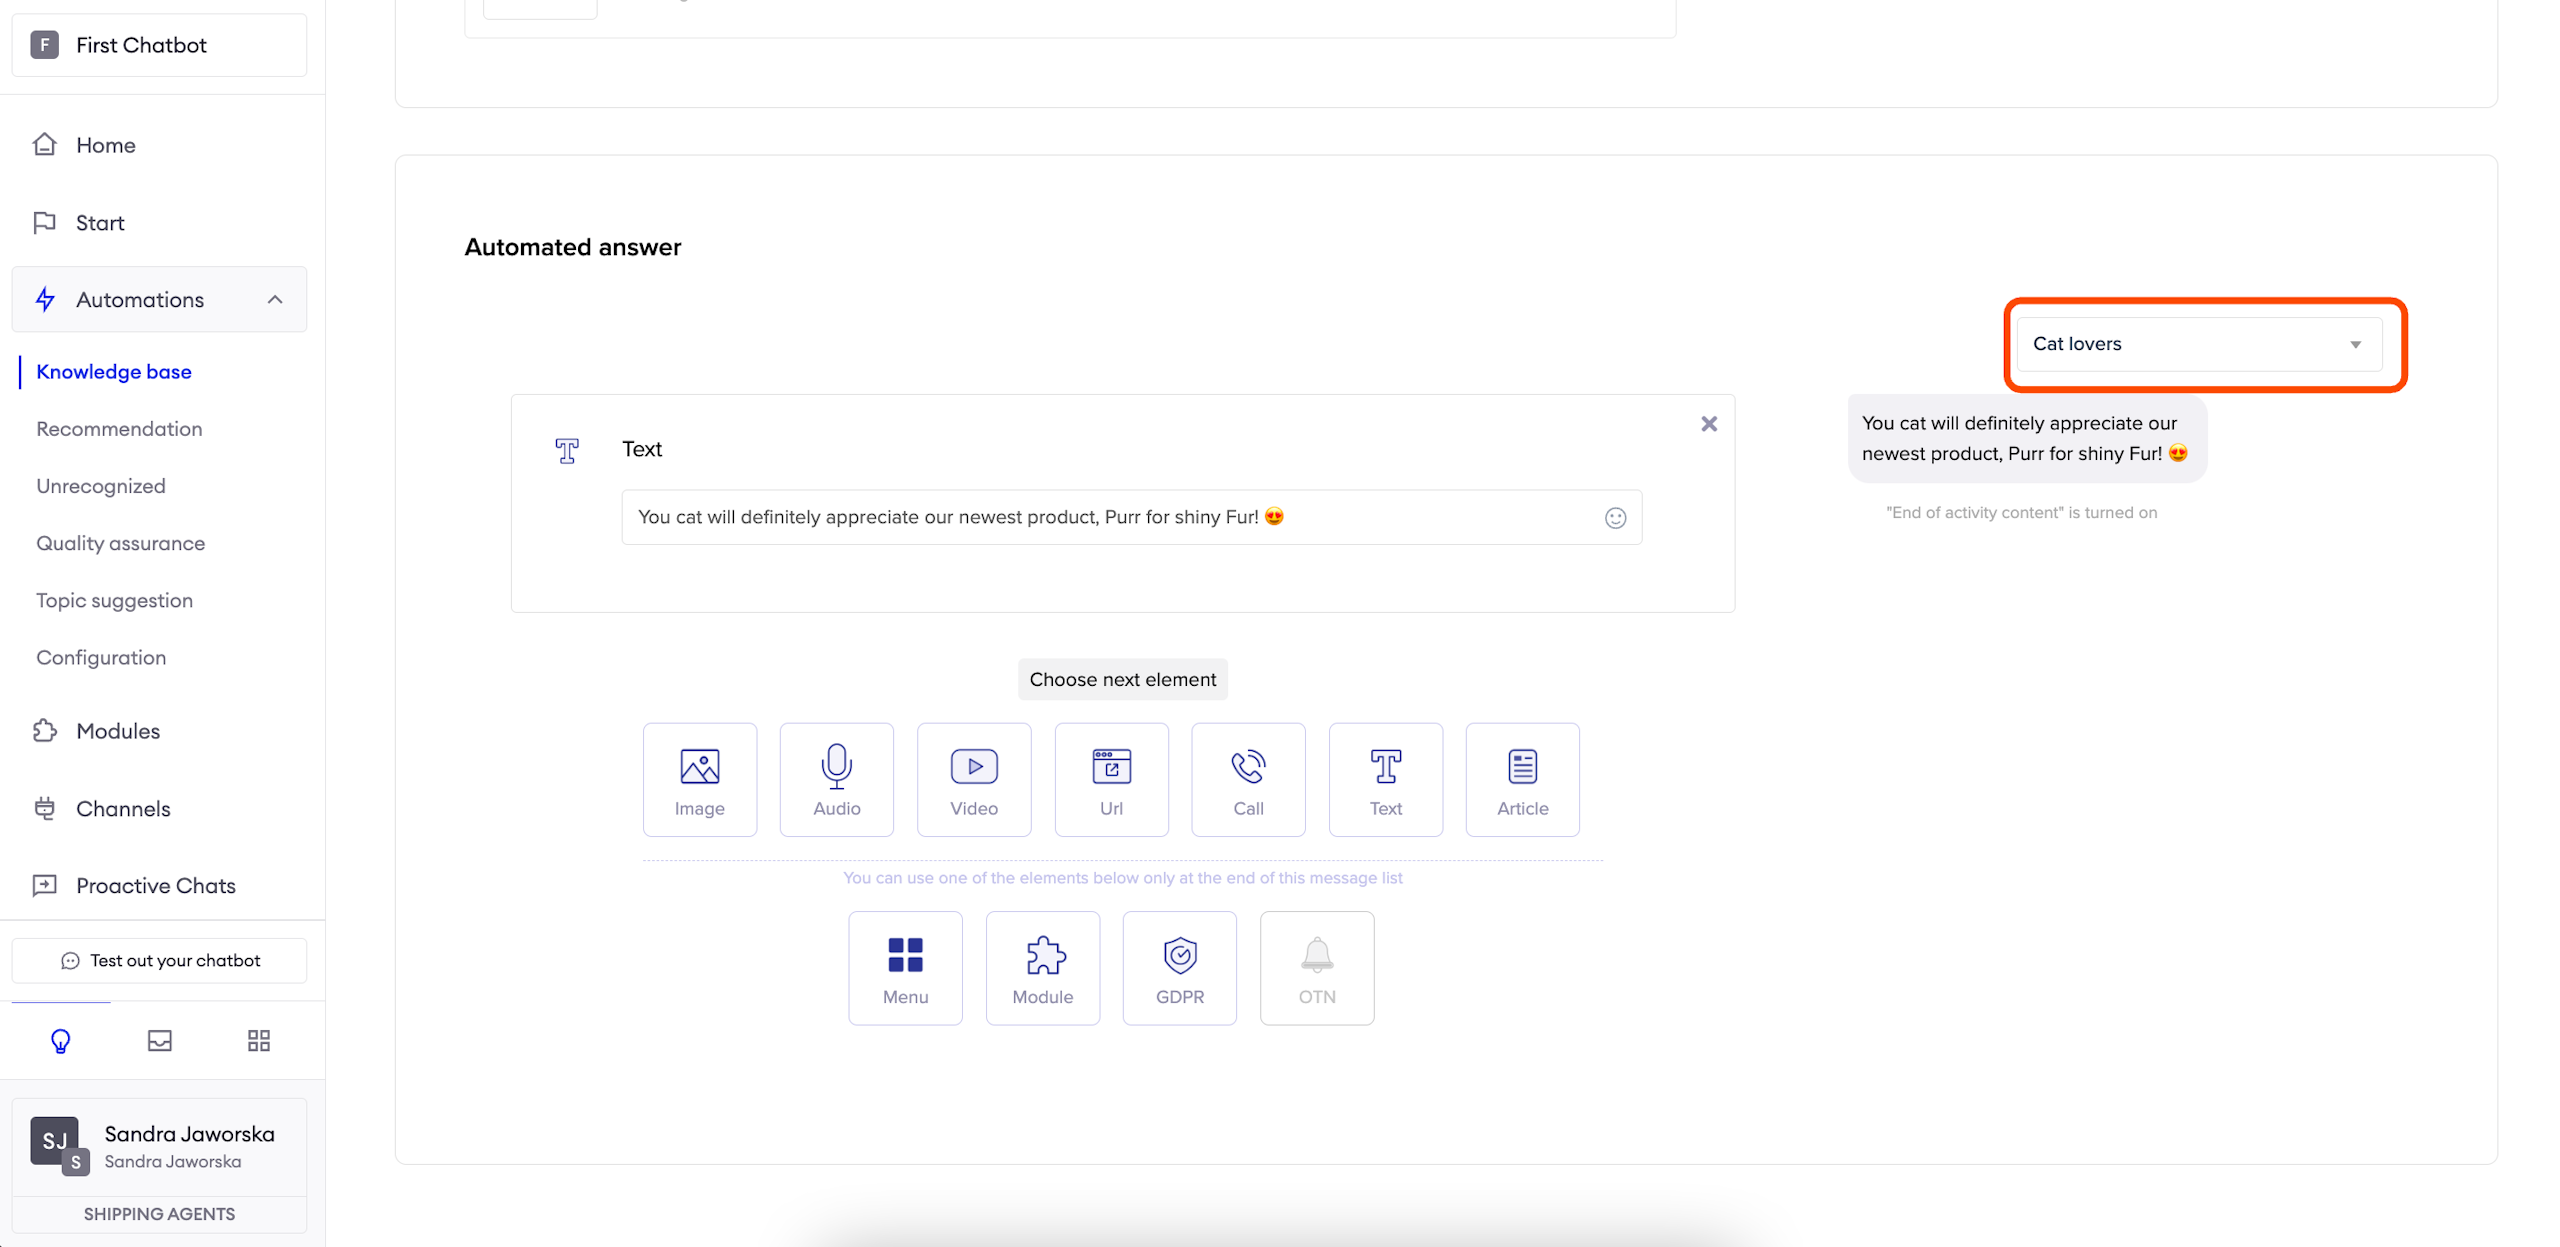

Cats or Dogs: testing the flow
Voilà! Now you can go to the Test out you chatbot and experience what your users will see when they interact with the chatbot.