Survey Module
What is the Survey Module?
The Survey module allows you to collect information from users through a variety of forms embedded directly in your chatbot.
Why use Surveys?
Surveys allow you to collect detailed information from customers at the right moments, which helps your agents to provide better, more efficient service. Through Surveys, customers can submit text and images to give your agents all the context they need.
Surveys also give you the ability to automatically create emails or support tickets at the end of bot interactions so your team can follow up with customers to resolve issues.
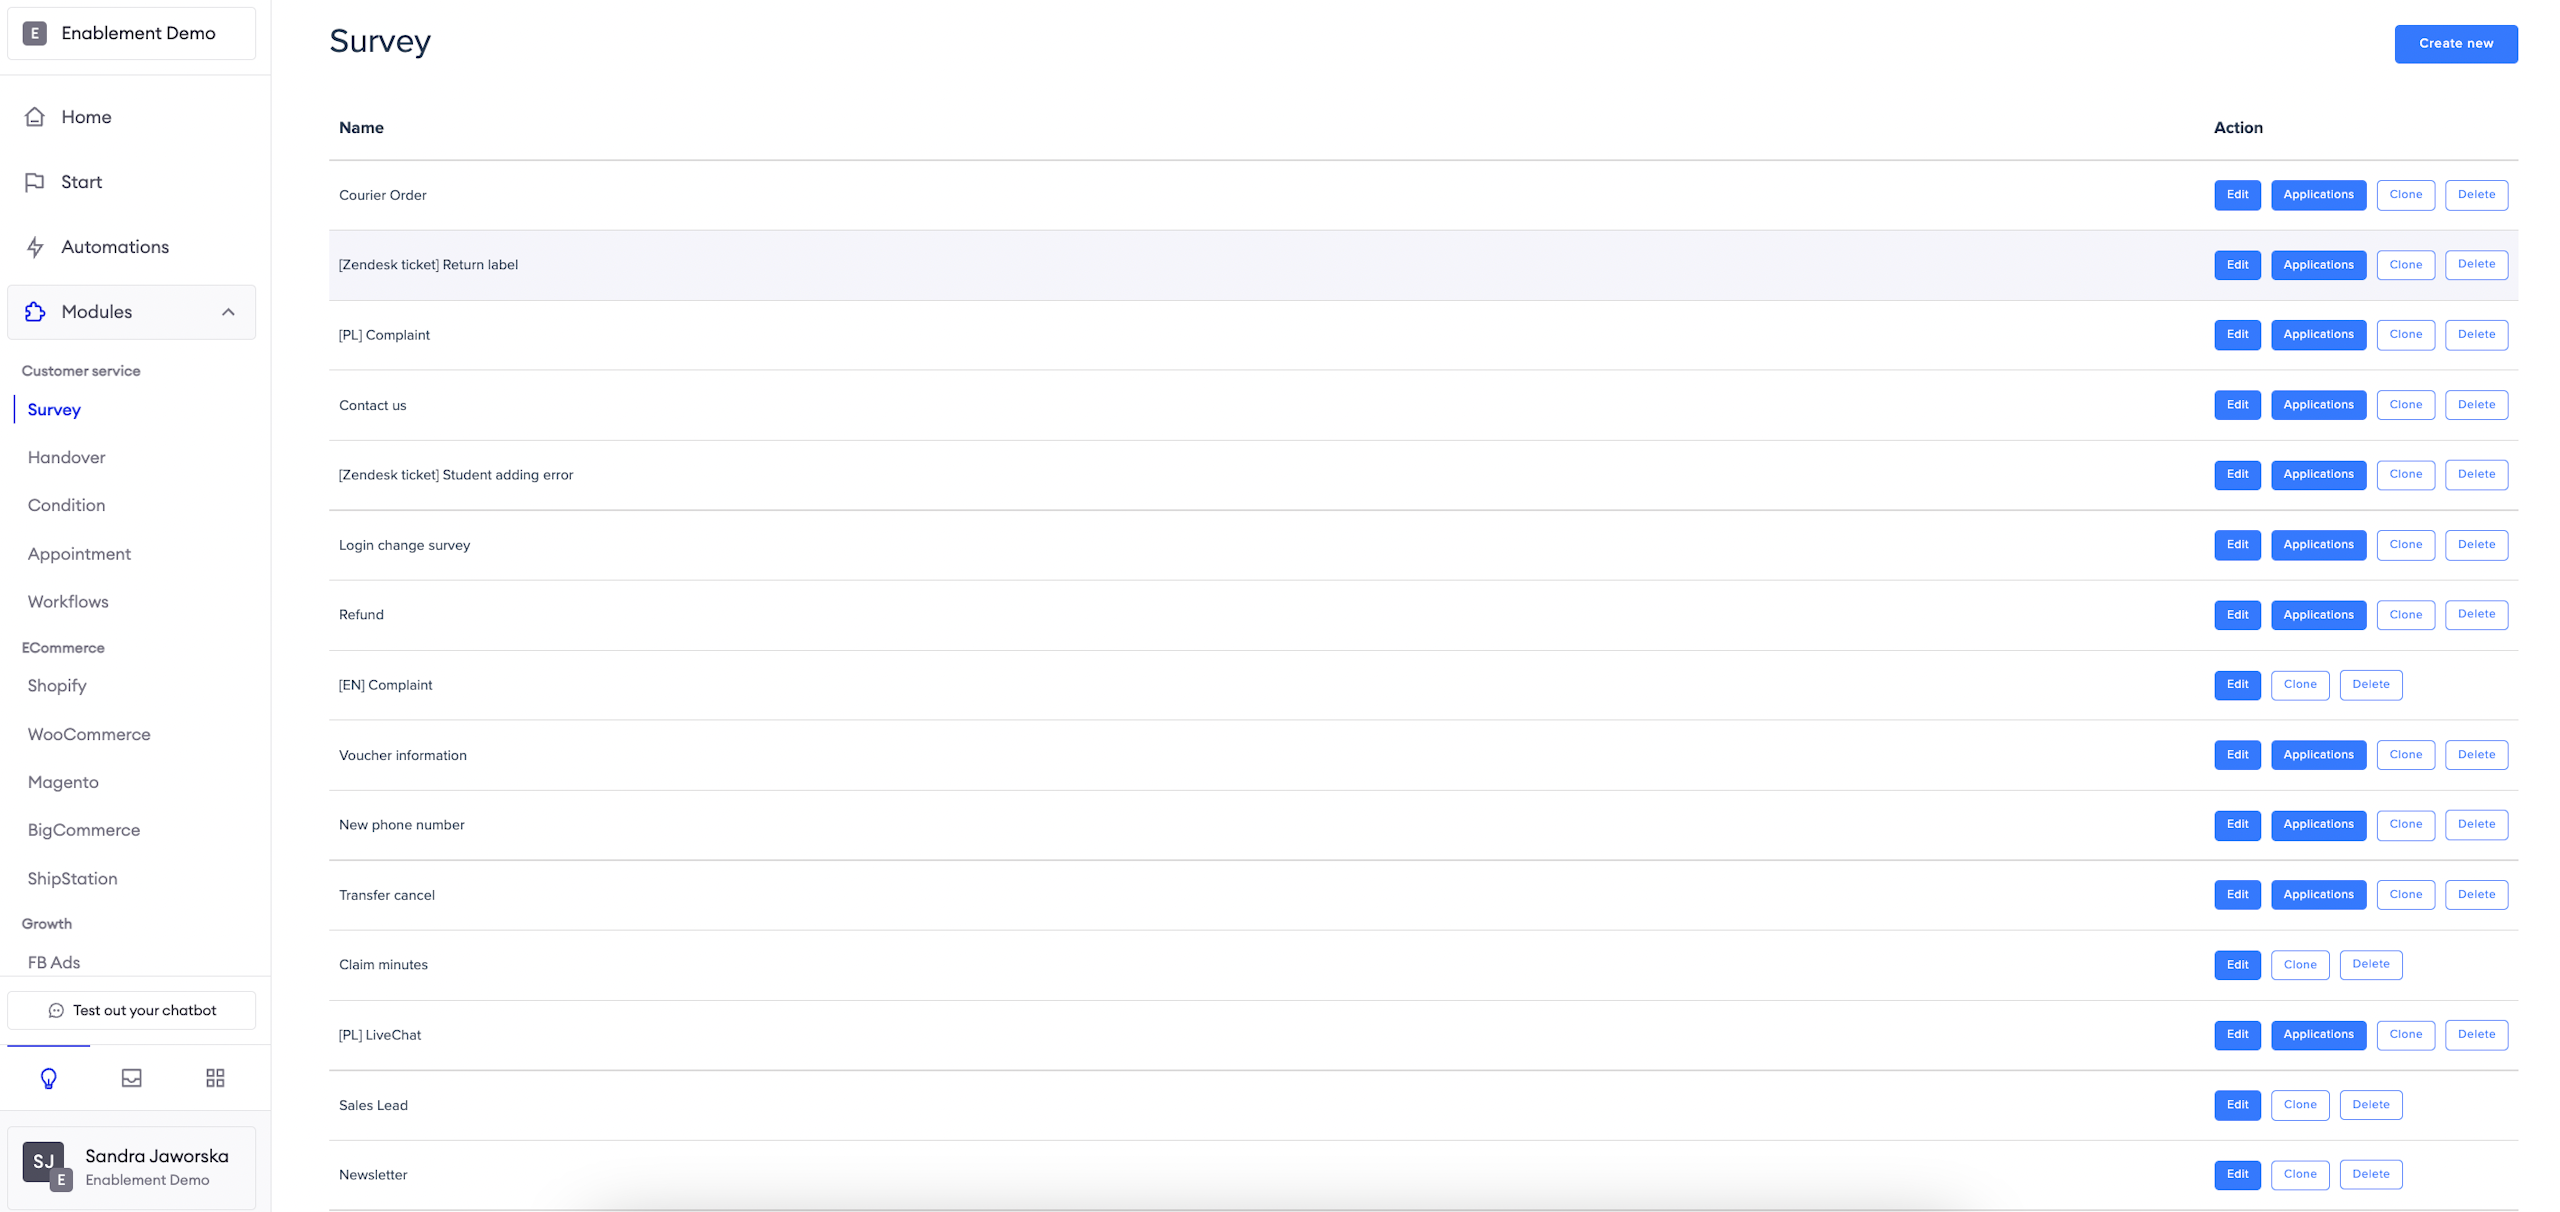
How to access Surveys?
To access the Survey Module, navigate to Modules > Survey from the navigation bar.
Basic
In this section you can configure basic rules for the survey.
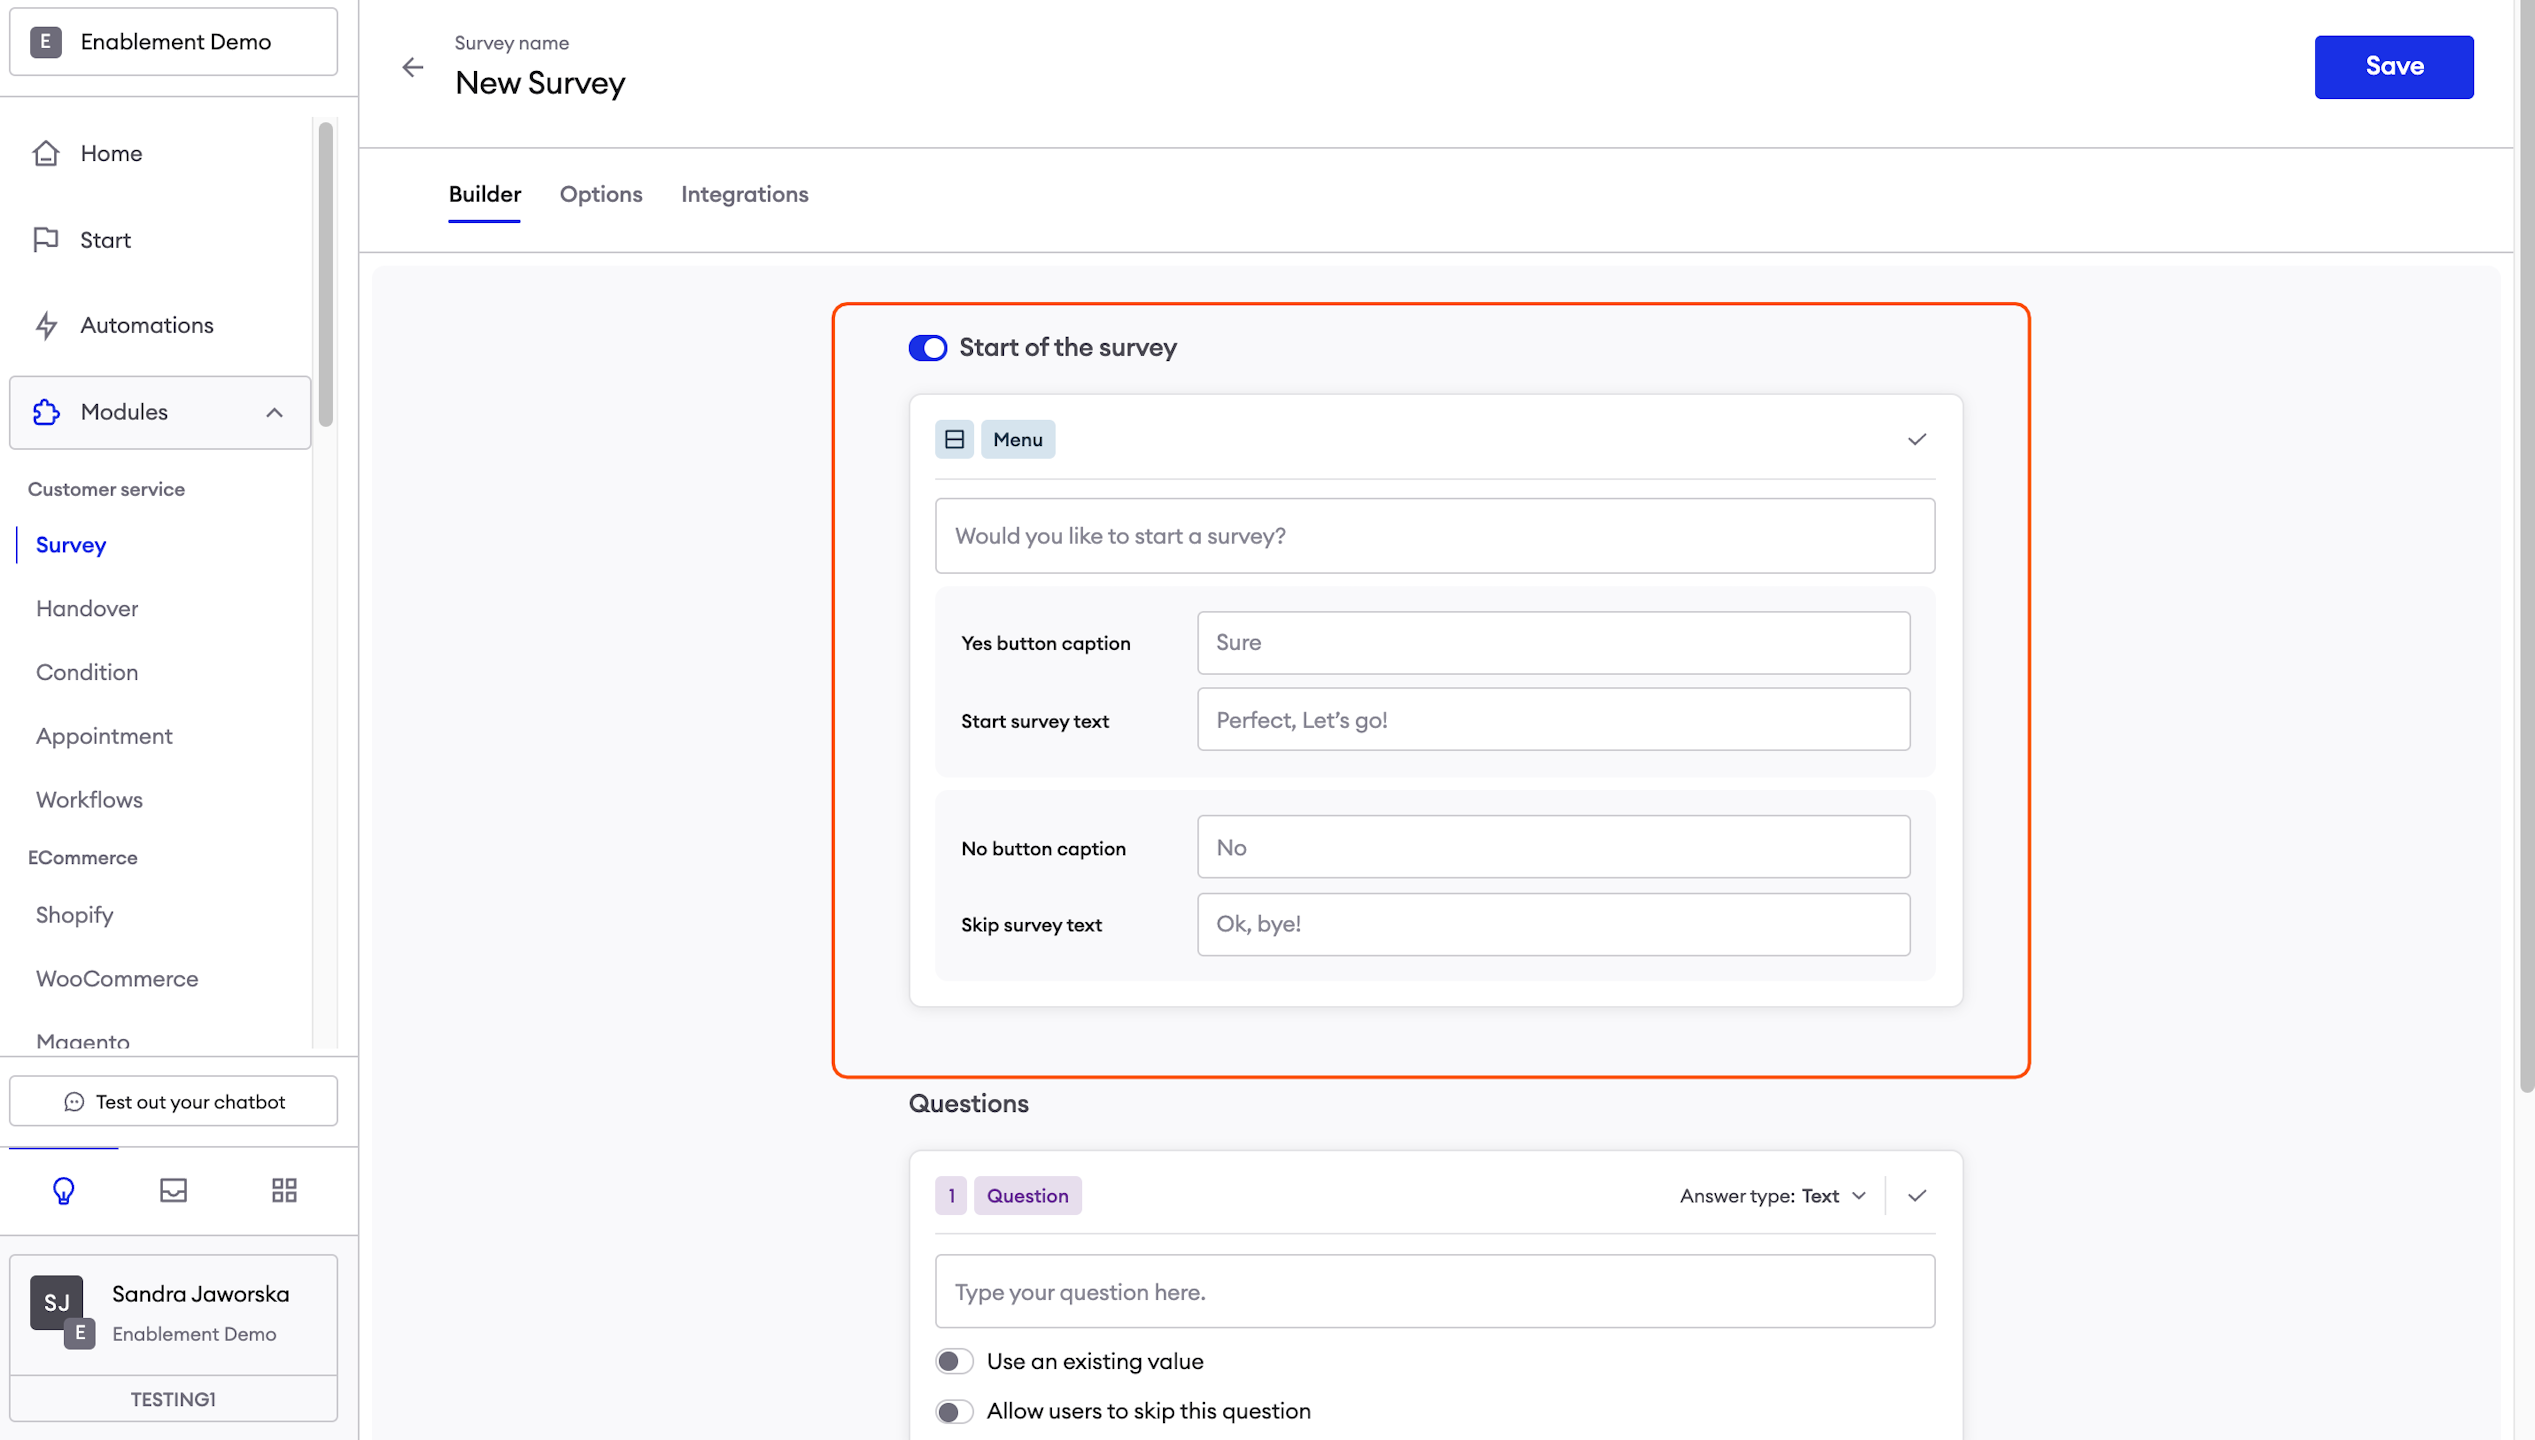
Confirm continuation of a survey
This section allows you to add an additional confirmation and make sure that they want to participate in the Survey.
CTA question message – it is the message engaging the user to start the survey, for example, "Hello, would you like to answer a few questions?"
Yes button caption and Start survey text – the first one is the caption on the button to start the Survey and the second one is the message sent to the user after he clicks the button;
No button caption and Omit survey text - the first one is the caption on the button to cancel the Survey and the second one is the message sent to the user after he clicks the button.
Here you can configure the content that will be sent to the user after they completed the Survey. This feature is optional. For example: “Thank you for your answers”.
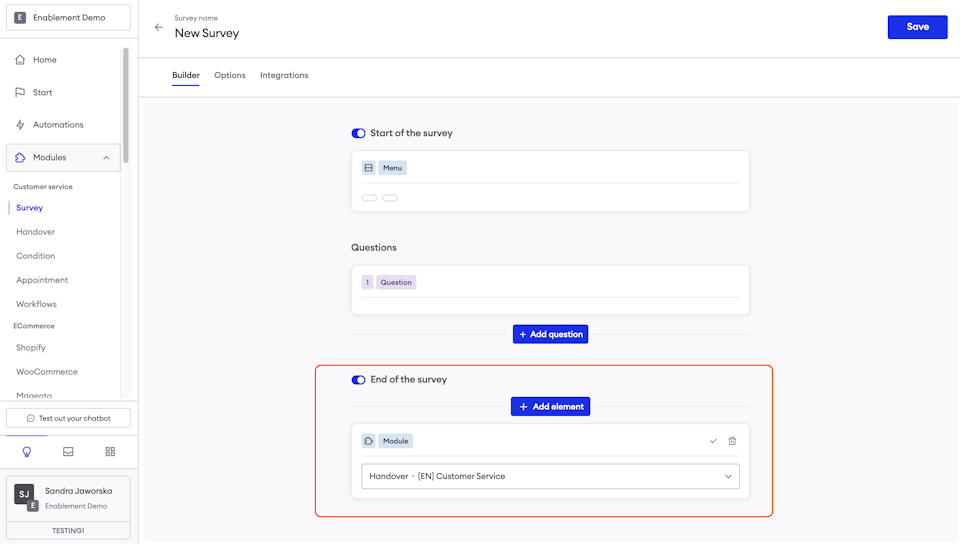
Initialize module after the survey
You can redirect the user straight to another module – just pick it from the list. Usually, in this case we will connect Survey with a Handover so the user will be directed to the support, after filling in all of the Survey’s questions.
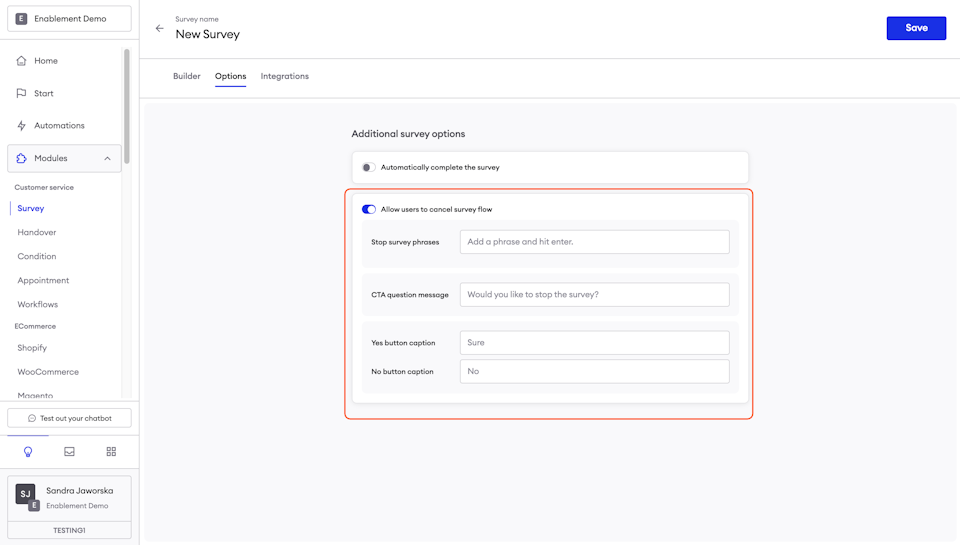
Allow to cancel survey flow
If you want to give your customer the ability to cancel the Survey flow, so stop answering the rest of the remaining questions, then type in the question that should be asked after the user types any of the phrases you provide in the Phrases to stop the survey field. Finally, provide the captions of both the Yes and No buttons.
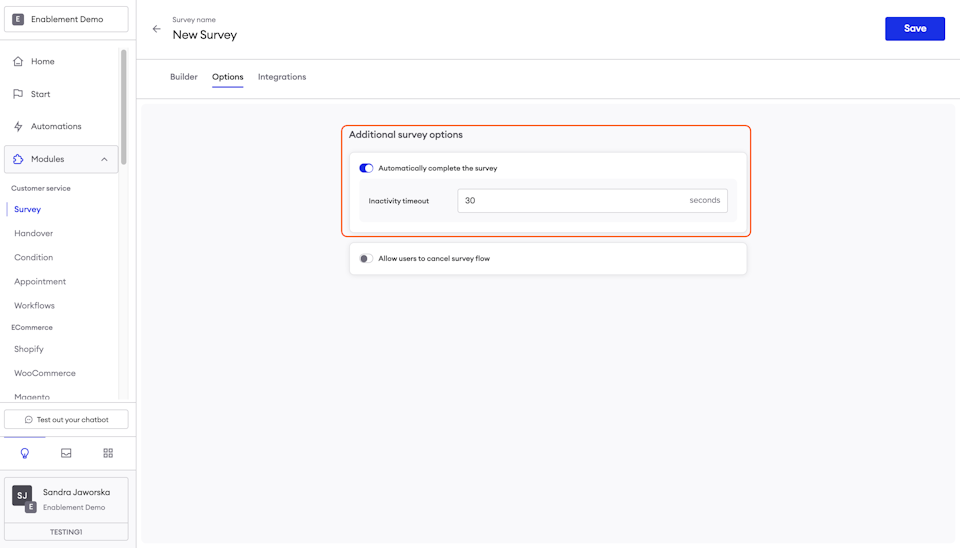
Allow to automatically complete the survey
If the user was answering the questions in the Survey, but then suddenly stopped responding and we want to keep them and hand them over to an agent - we can automatically direct them to the agent but without the answers that they didn’t manage to provide.
If we see no action from their side within eg. 30 s - they will be directed to the agent.
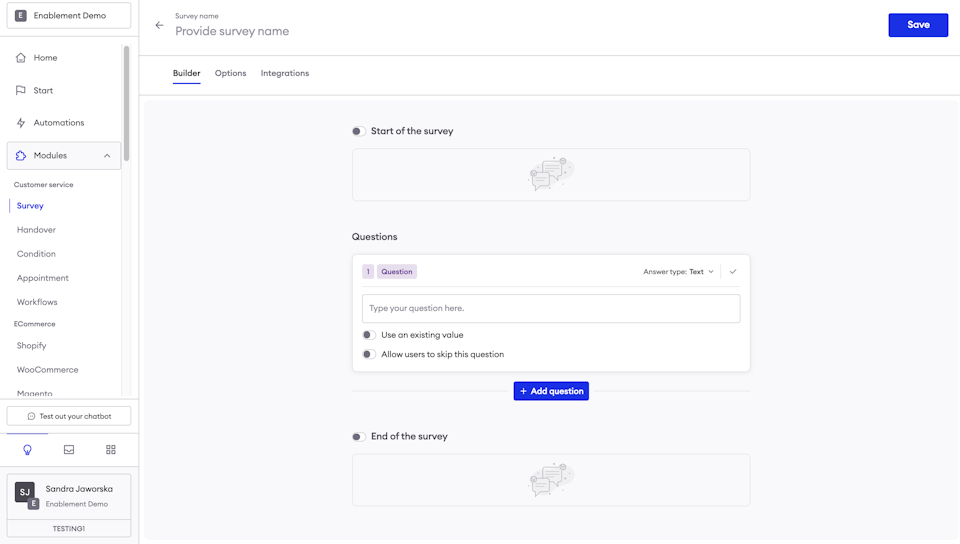
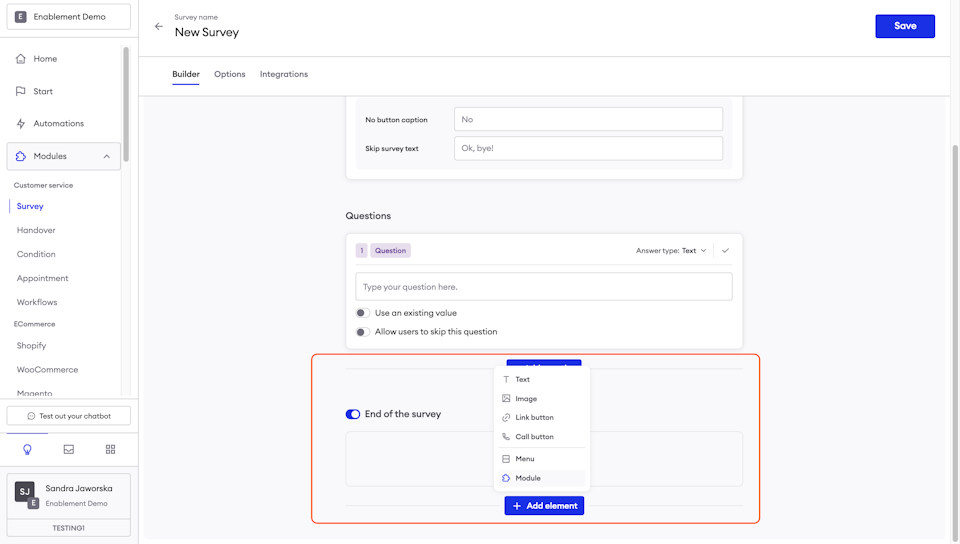
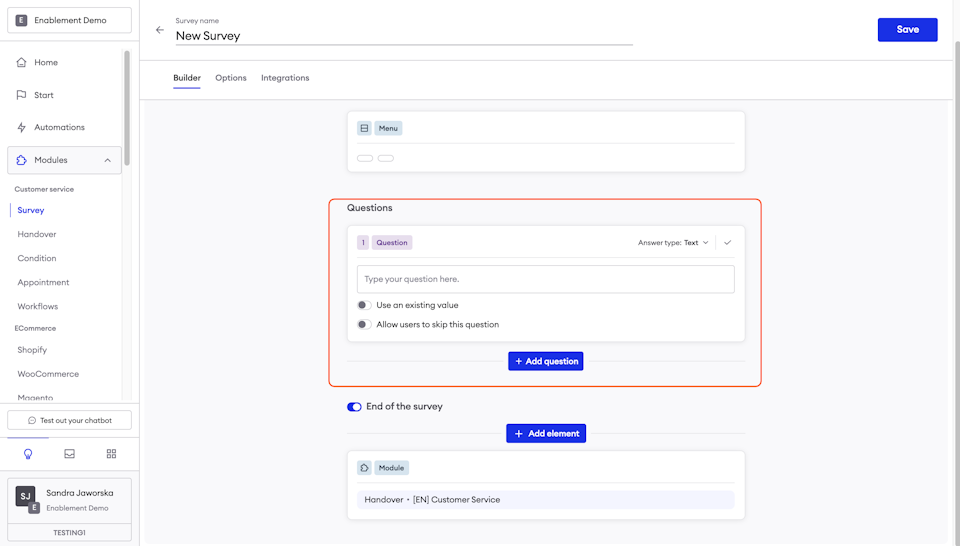
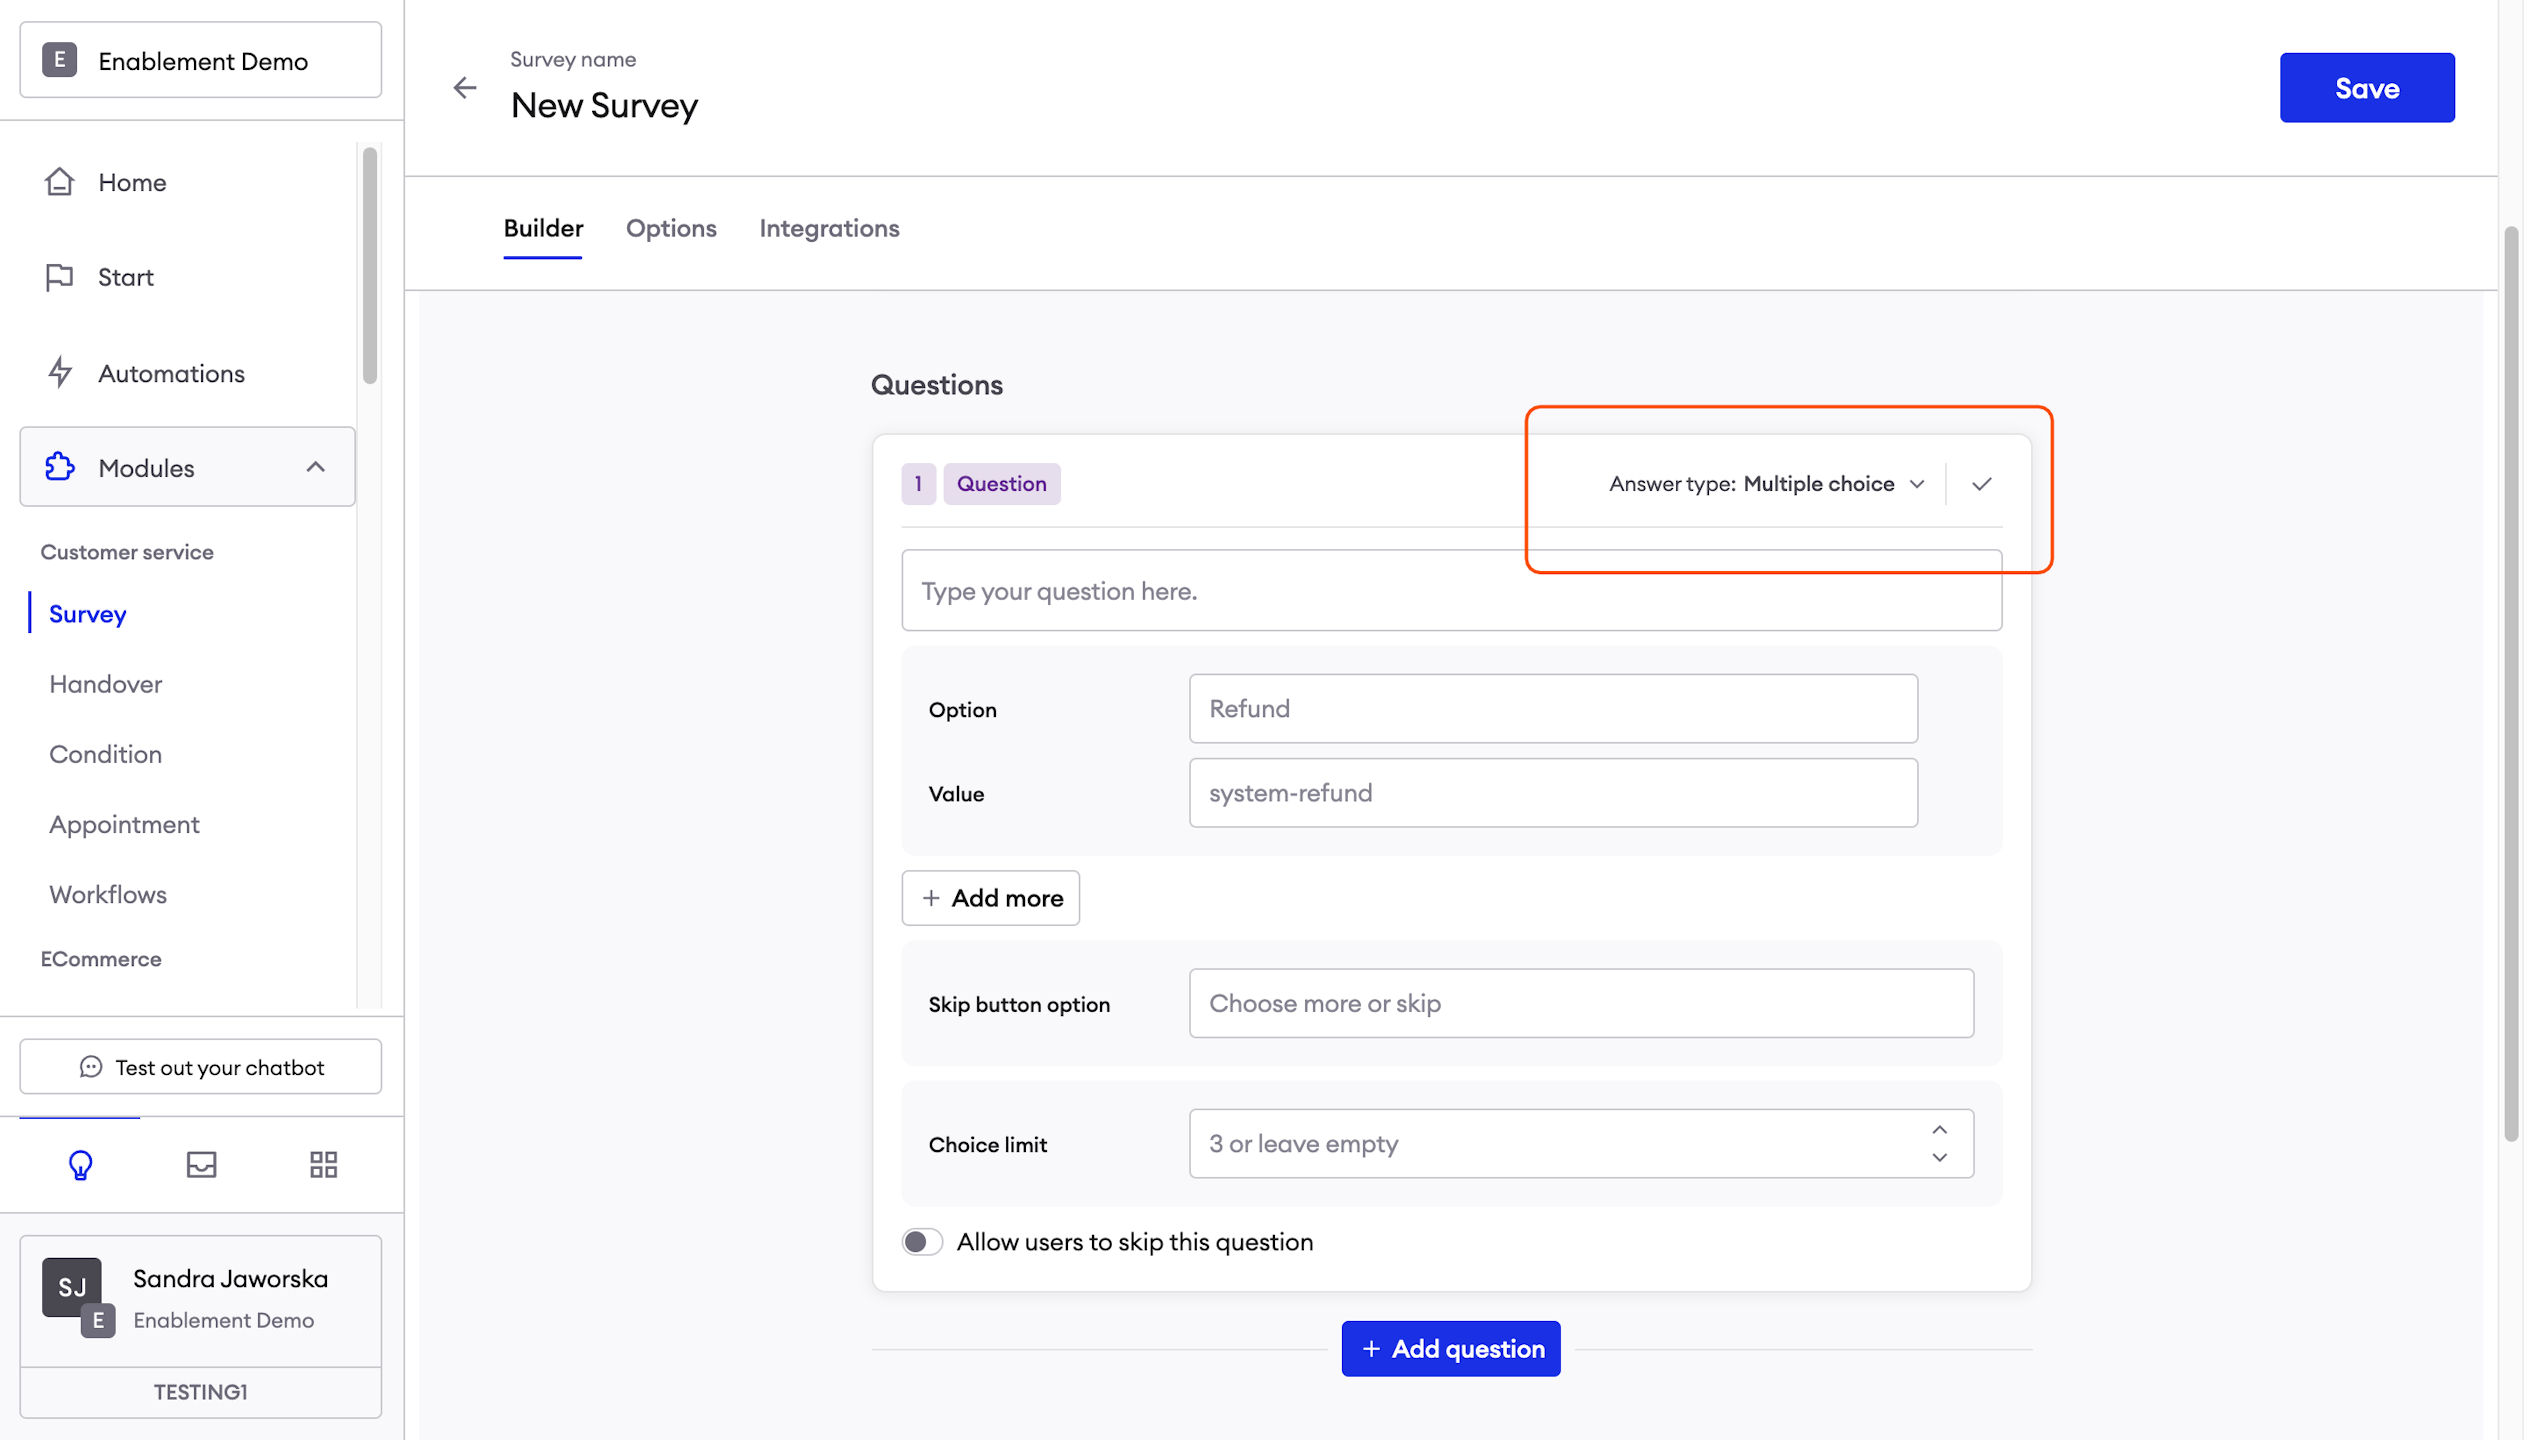
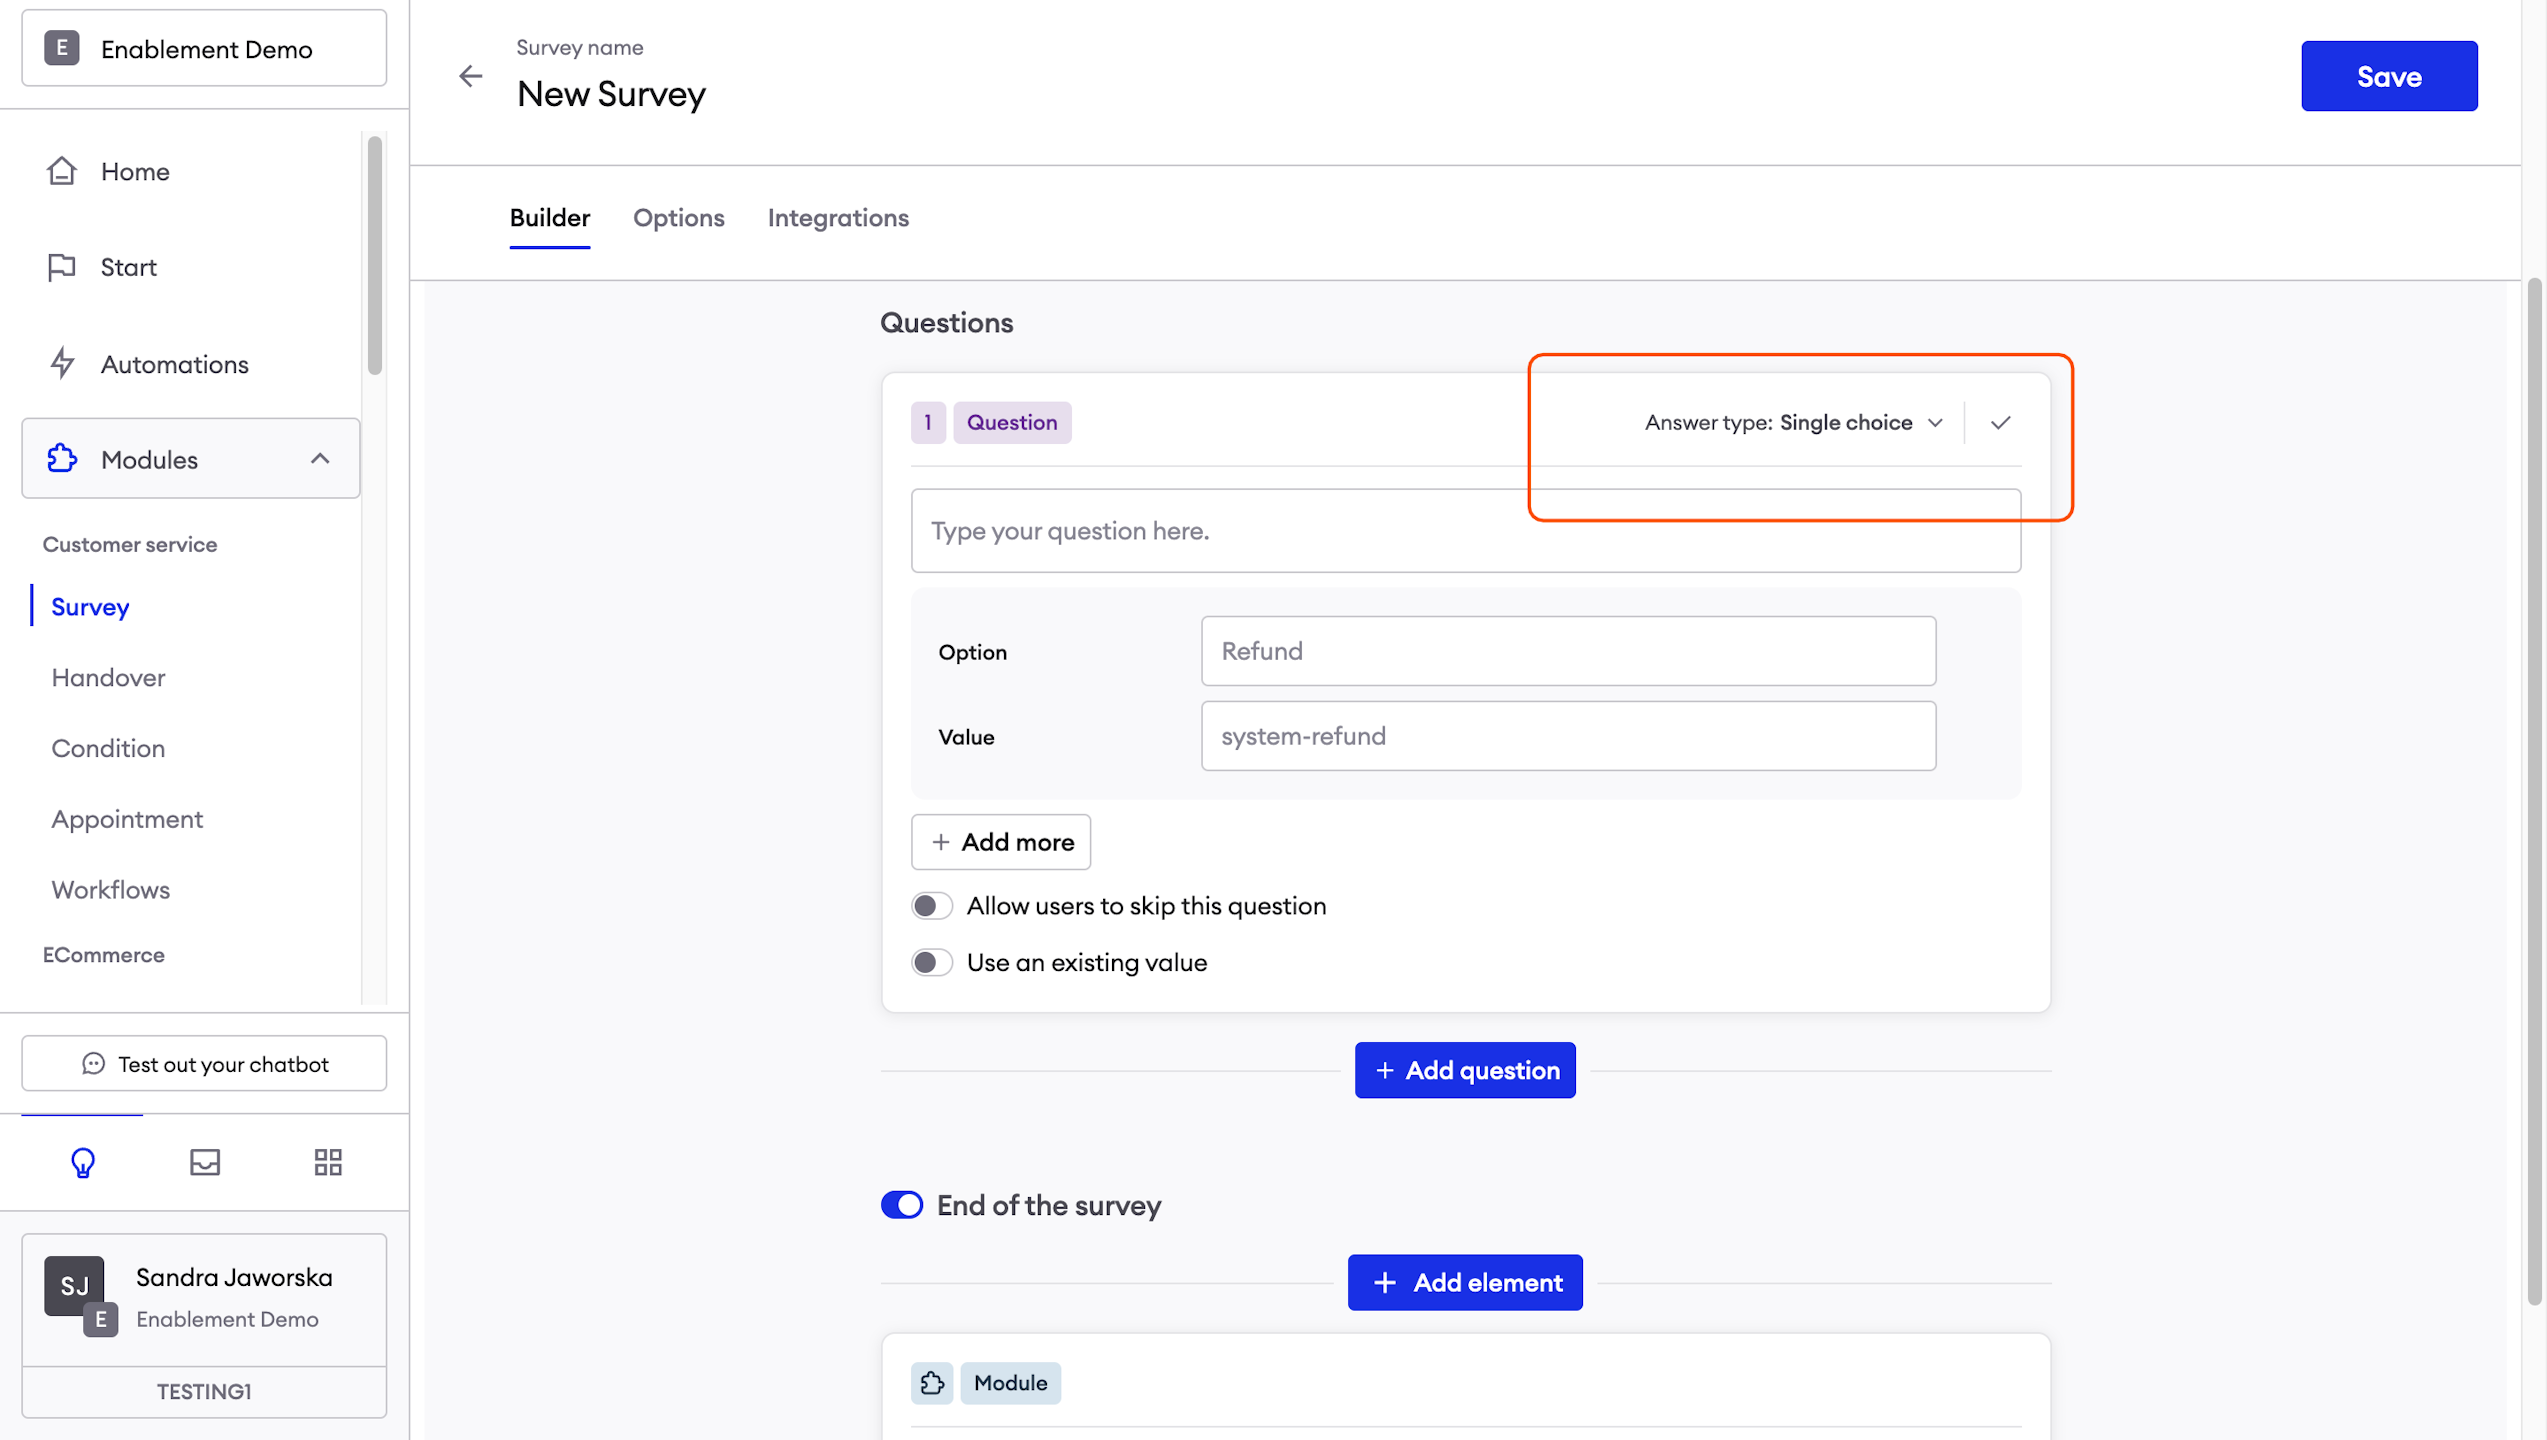
Questions
This is the first obligatory section of the module's configuration: the questions that you want to ask your user.
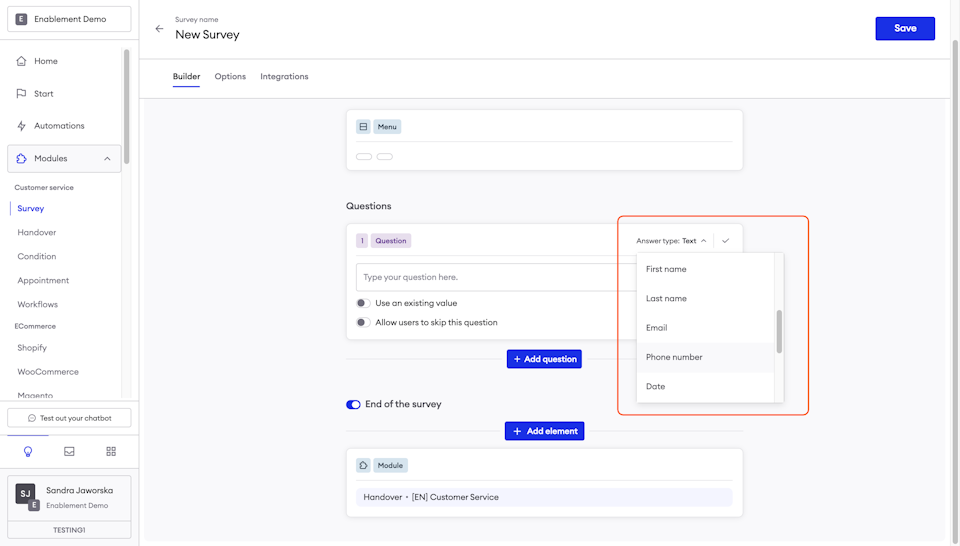
Expected answer types
Type in your question in the Question field and select the expected answer type. The possible answer types are:
- Text – the user is supposed to enter their answer as plain text;
- Image – the user is supposed to upload an image as their answer;
- Location – the user is supposed to share their location as their answer;
- File – the user is supposed to upload a file as their answer;
- Single choice – the user is supposed to choose one answer from a predefined set of answers;
- Multiple choice – the user is supposed to choose one or more answers from a predefined set of answers;
- First name – the user is supposed to enter their first name; the user's first name in Inbox will be updated accordingly;
- Last name – the user is supposed to enter their last name; the user's last name in Inbox will be updated accordingly;
- E-mail – the user is supposed to enter their email address; the user's email address in Inbox will be updated accordingly;
- Phone number – the user is supposed to enter their email address; the user's email address in Inbox will be updated accordingly;
- Birth date.
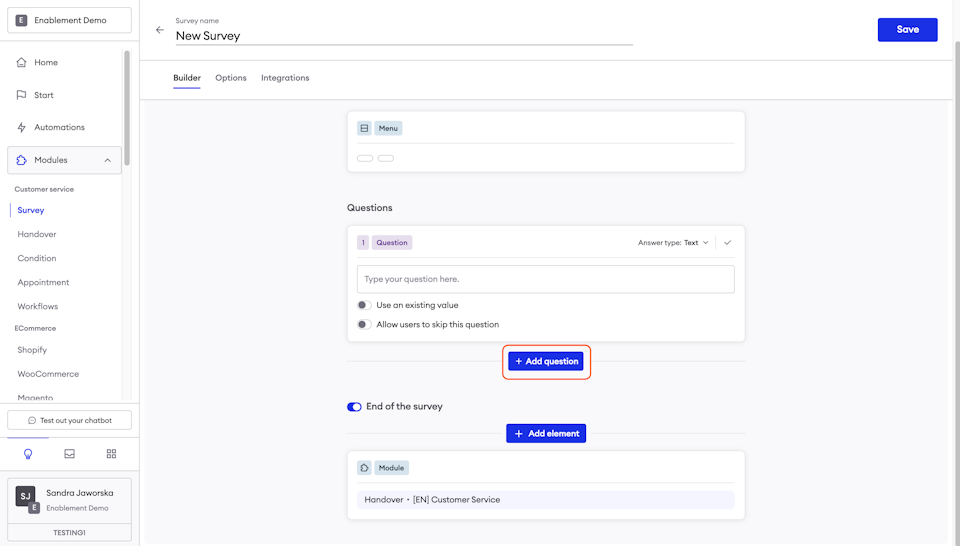
Removing and adding questions
You can also remove a question by clicking on the Remove button and add another question by clicking on the Add next question button.
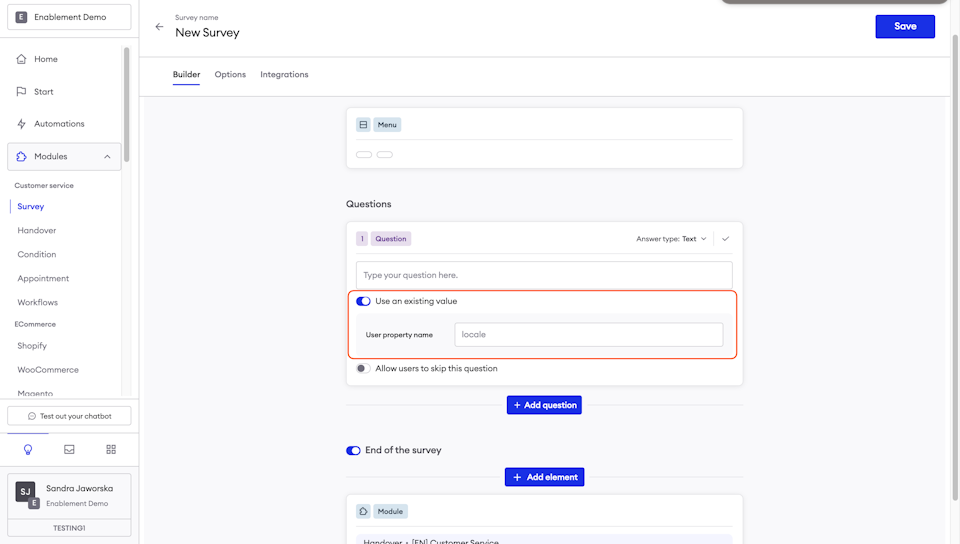
Using existing value
Please notice that some of the expected answer types gives us the option to use existing value.
This allows the chatbot to use a value that was already provided by the user in a previous Survey, for example: when a customer has already provided their email we don’t want to ask for it again, not to give a bad user experience. Instead while enabling this option and providing the correct user’s property name, the bot will remember that value and not ask for it again.
Very helpful in questions about name (use value: firstName) and email (use value: email). Not recommended for questions about order numbers as this may change frequently.
Single and multiple choice answers
Single choice - if you set the answer type to Single choice, then you will have to enter available answers. Just start typing the answer and an additional field will appear automatically.
Multiple choice answers - should you set the expected answer type to Multiple choice, the configuration is nearly identical, except that you are asked to provide text for two additional fields: Skip buttons text, Skip button caption and Choice limit:
The Skip buttons text is the message sent to the user after each choice they make, the Skip button caption is the caption on the button that will take them to the next question and the Choice limit is amount of choices the user has.
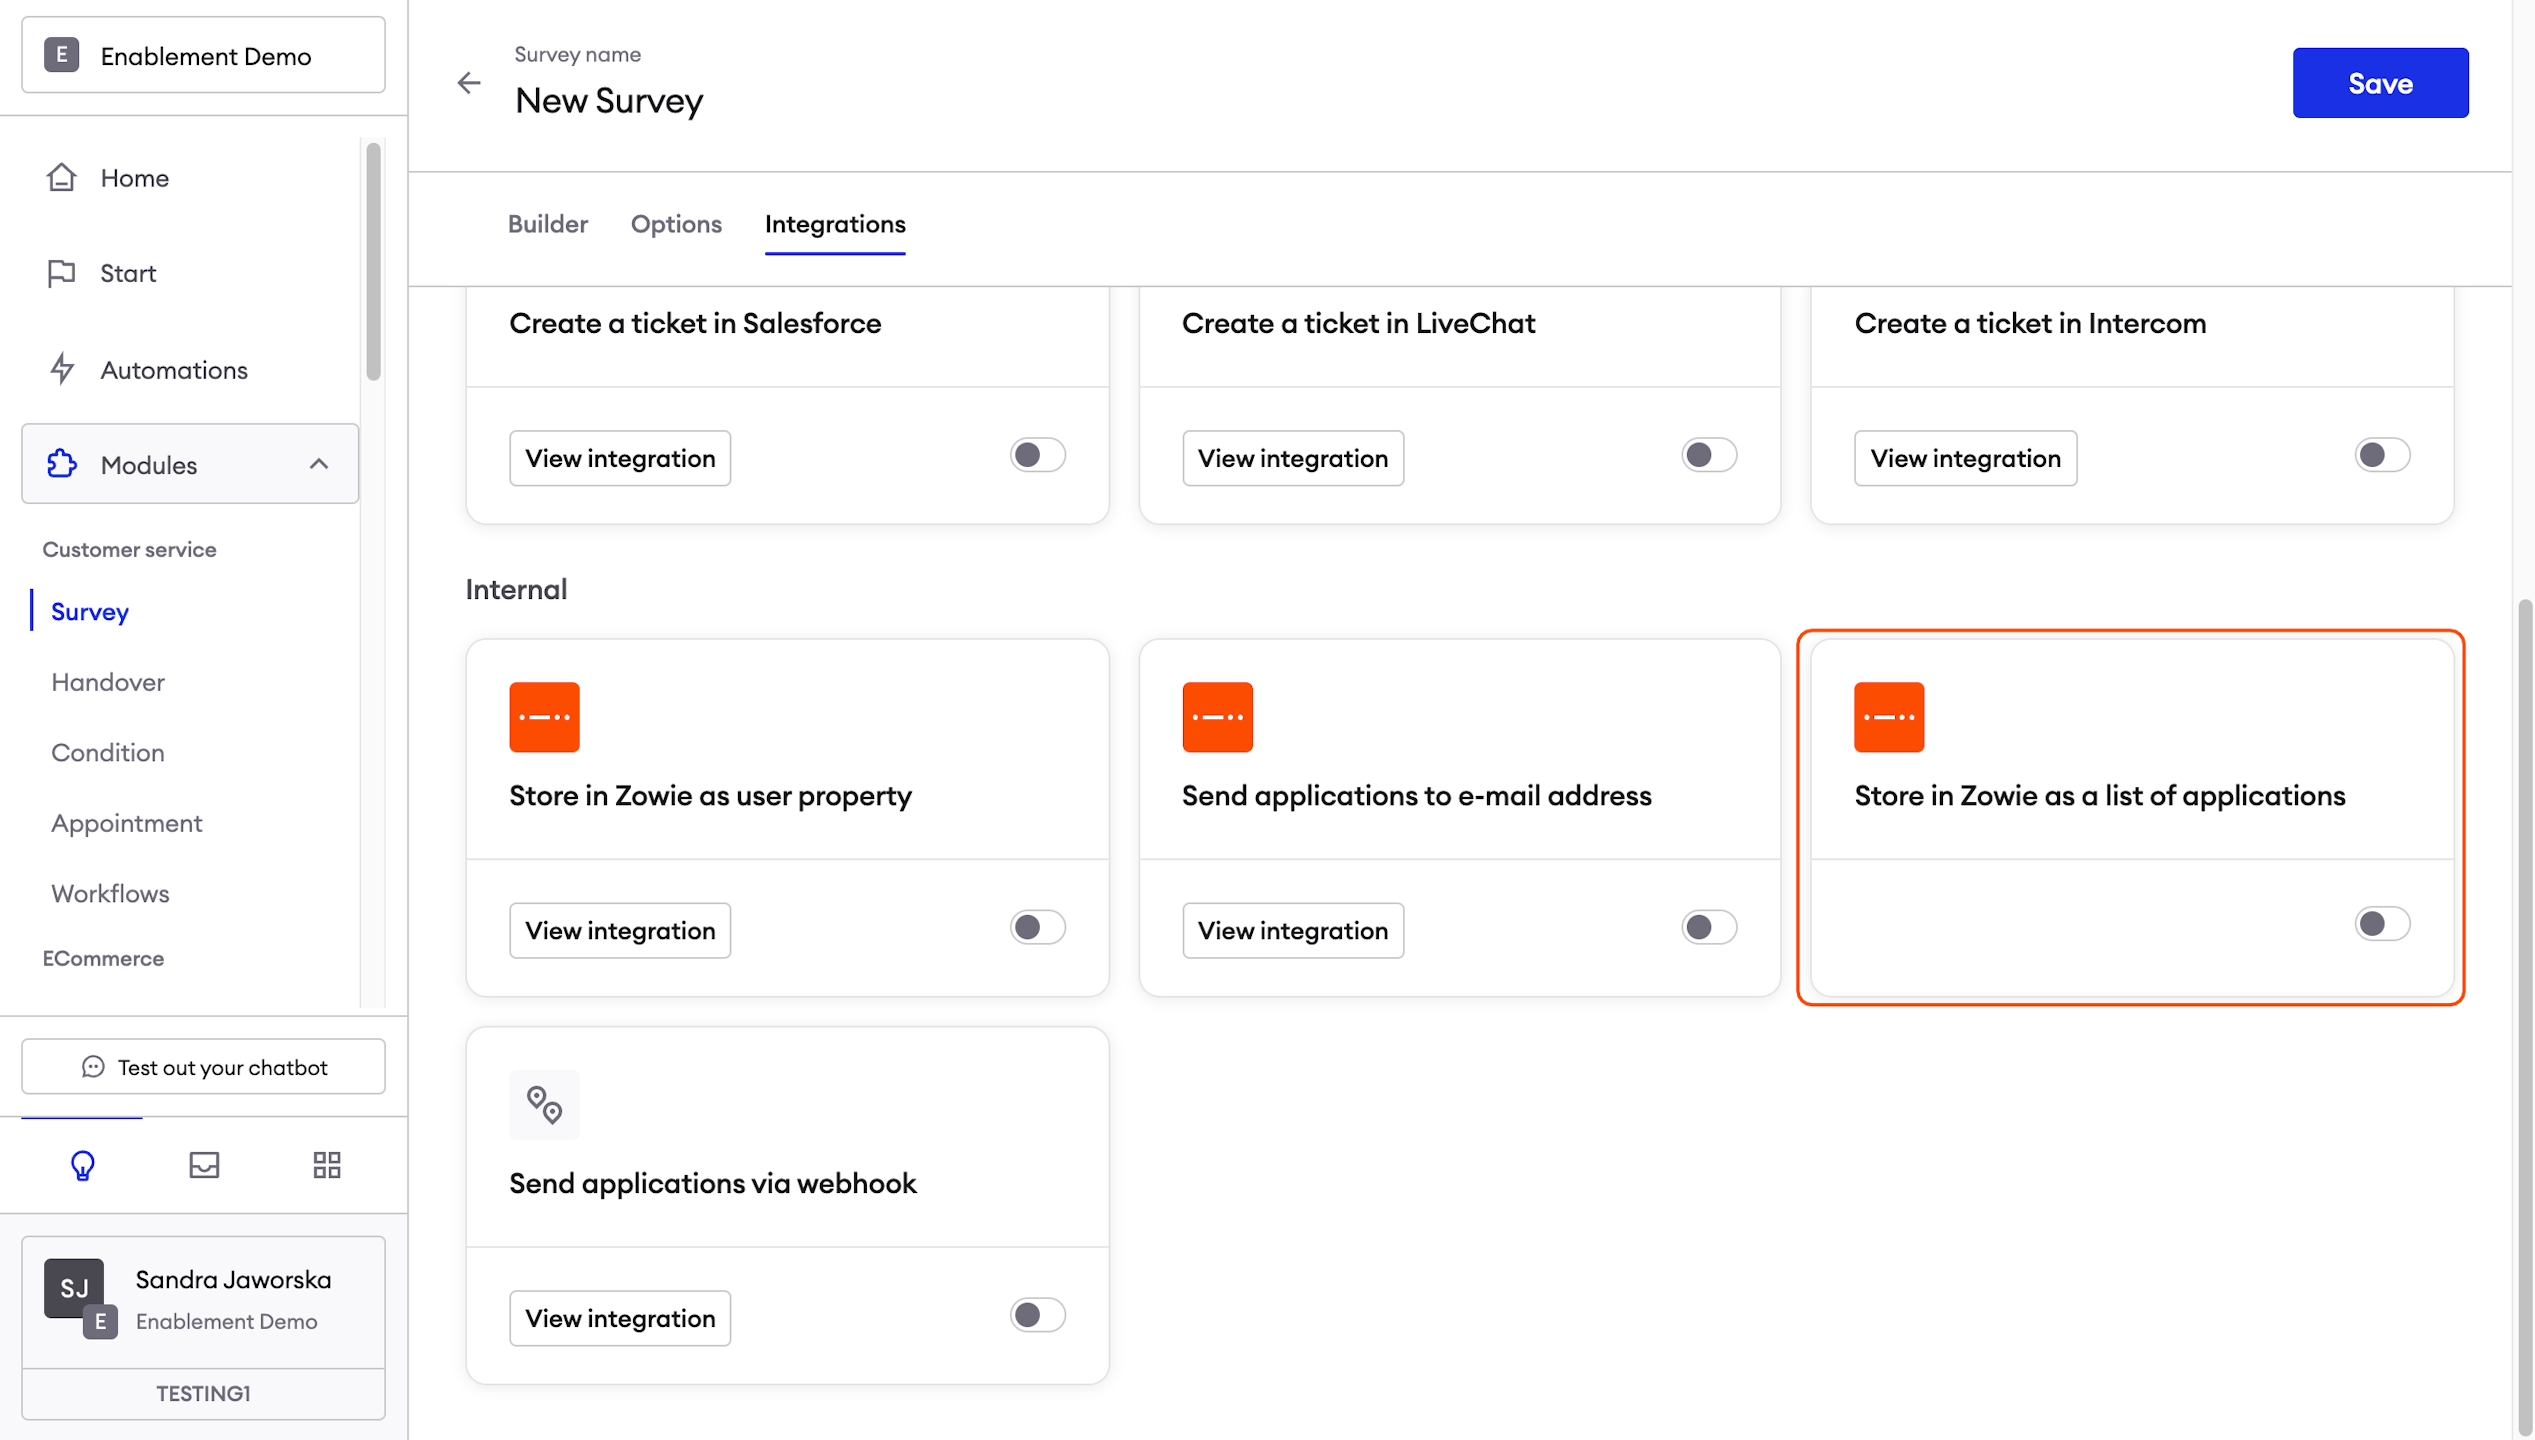
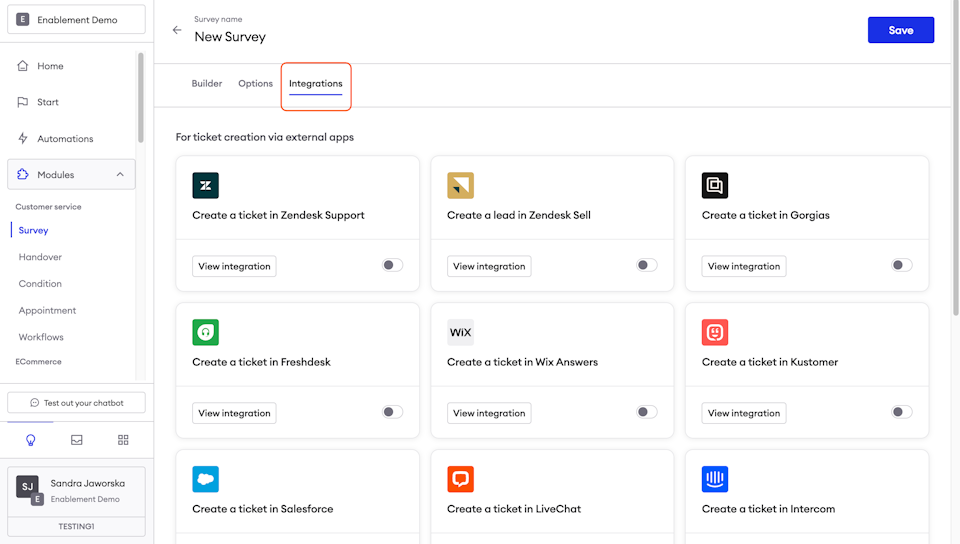
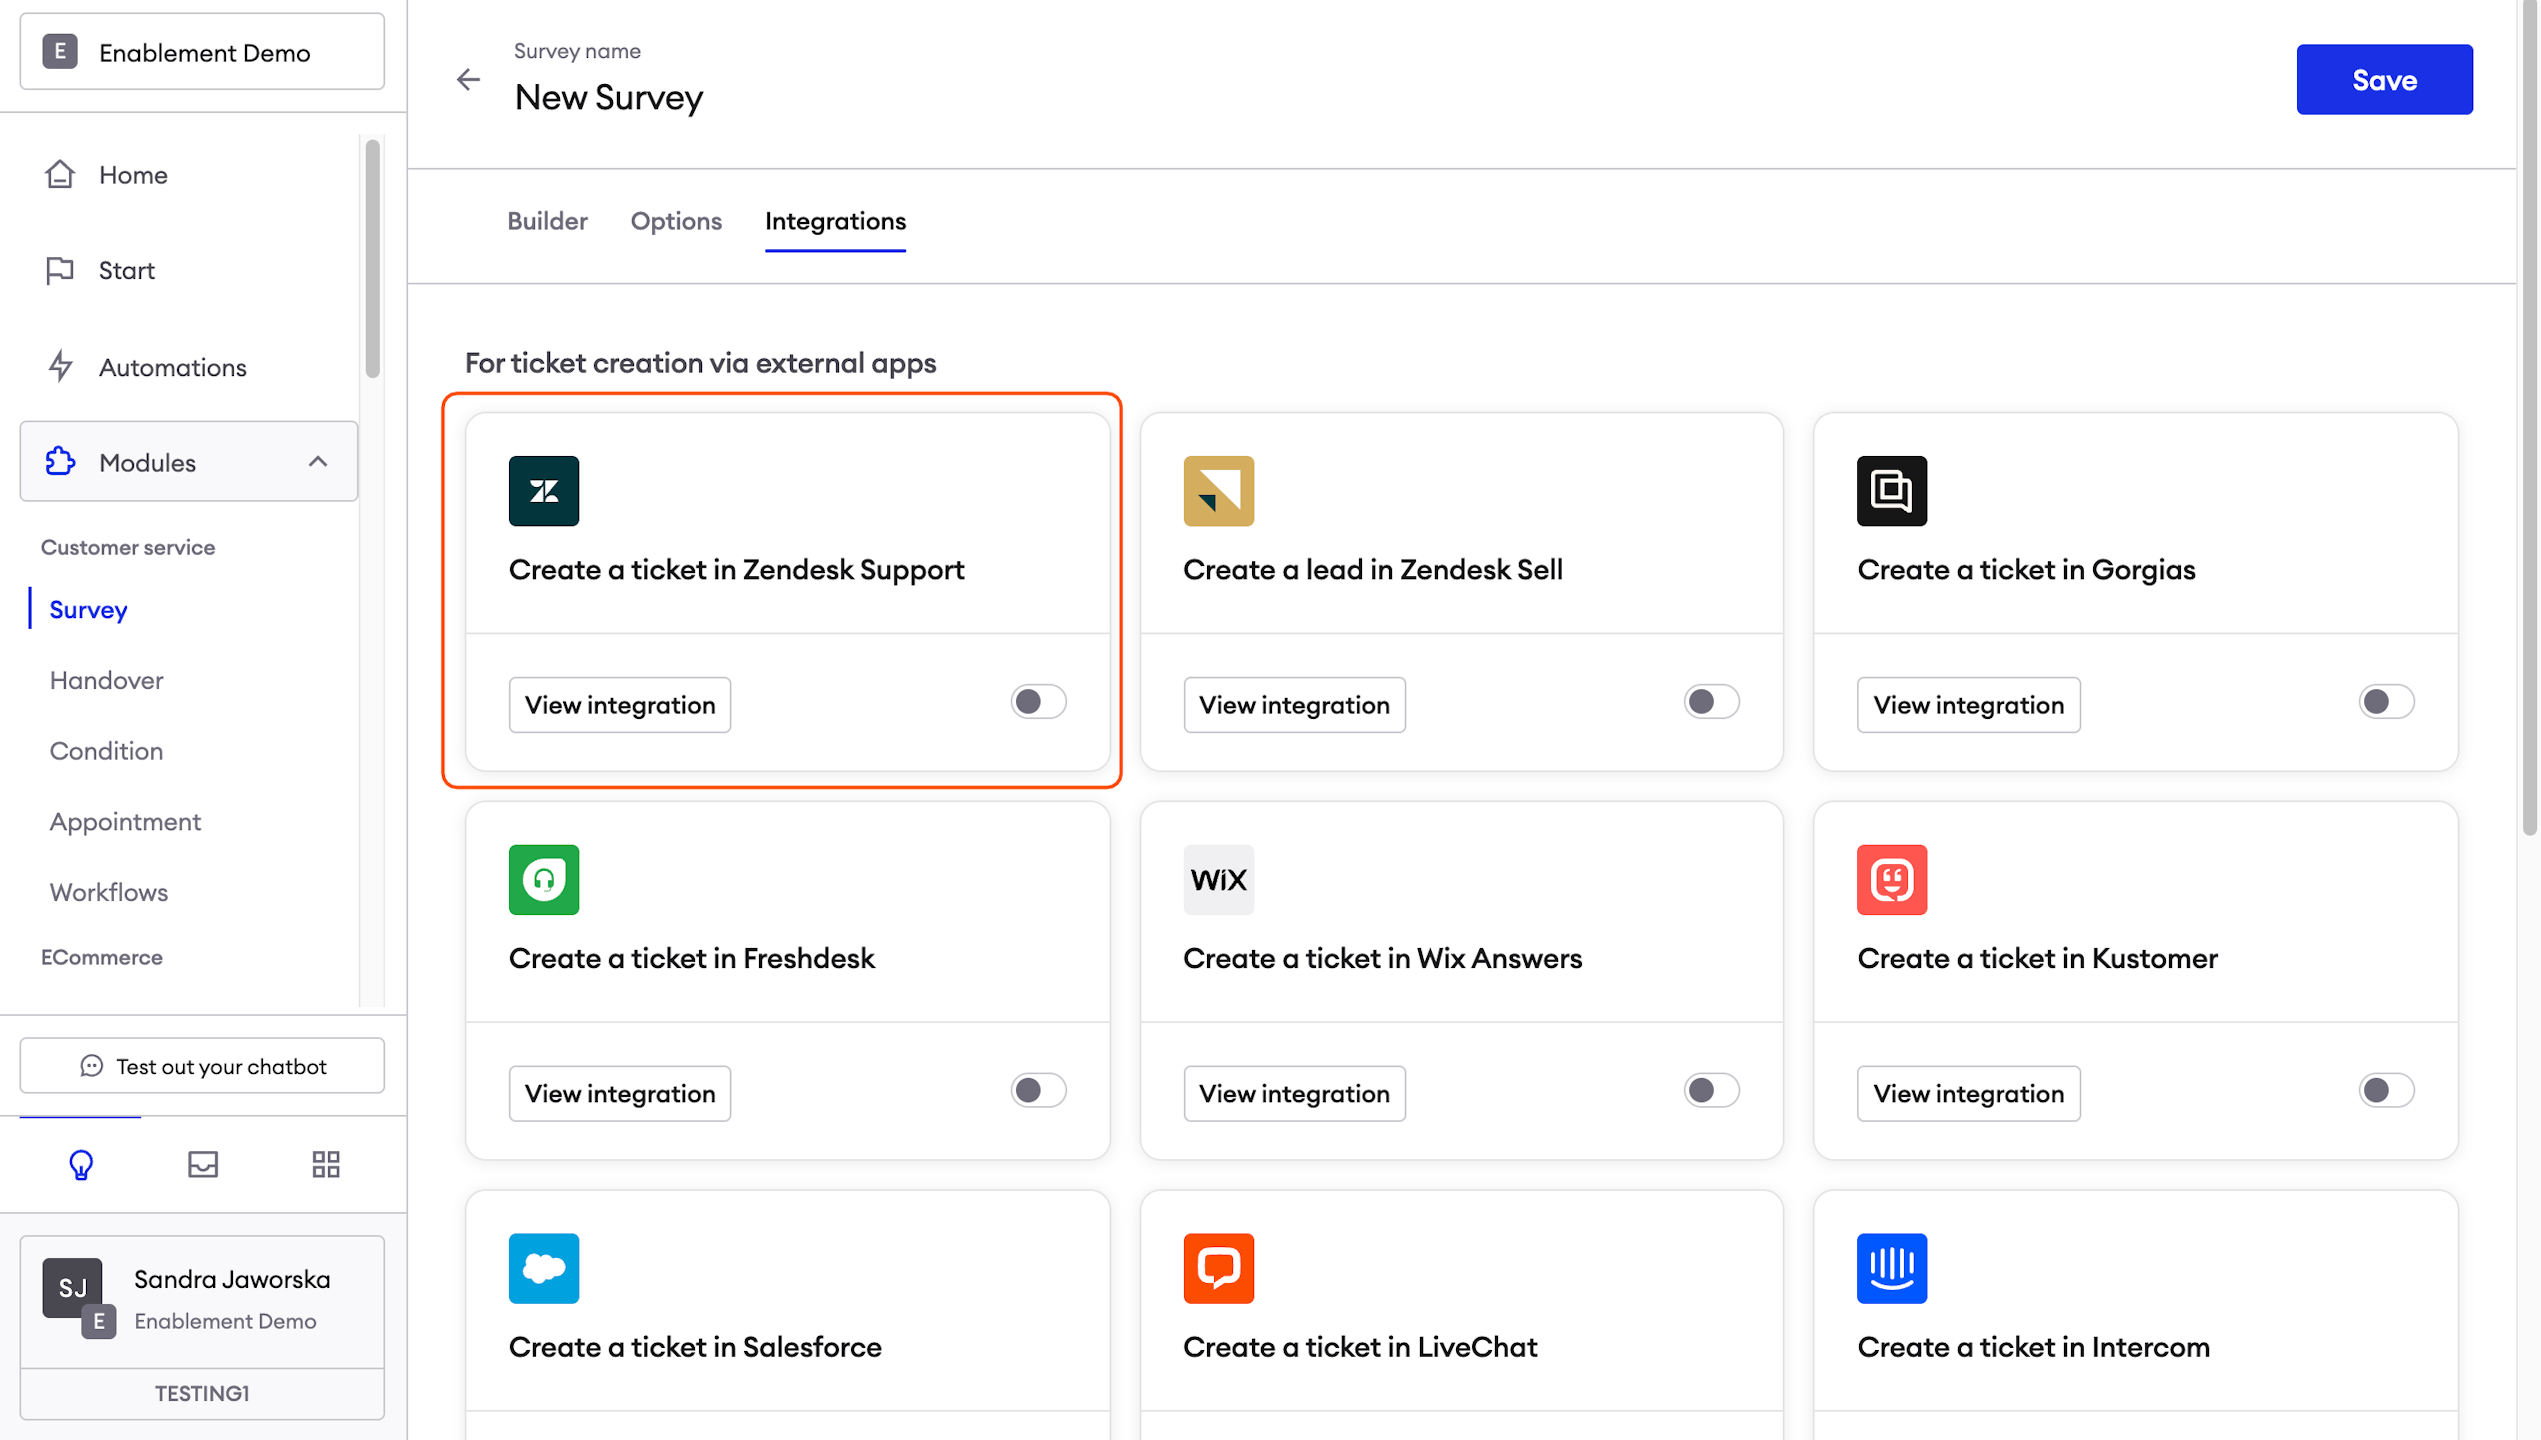
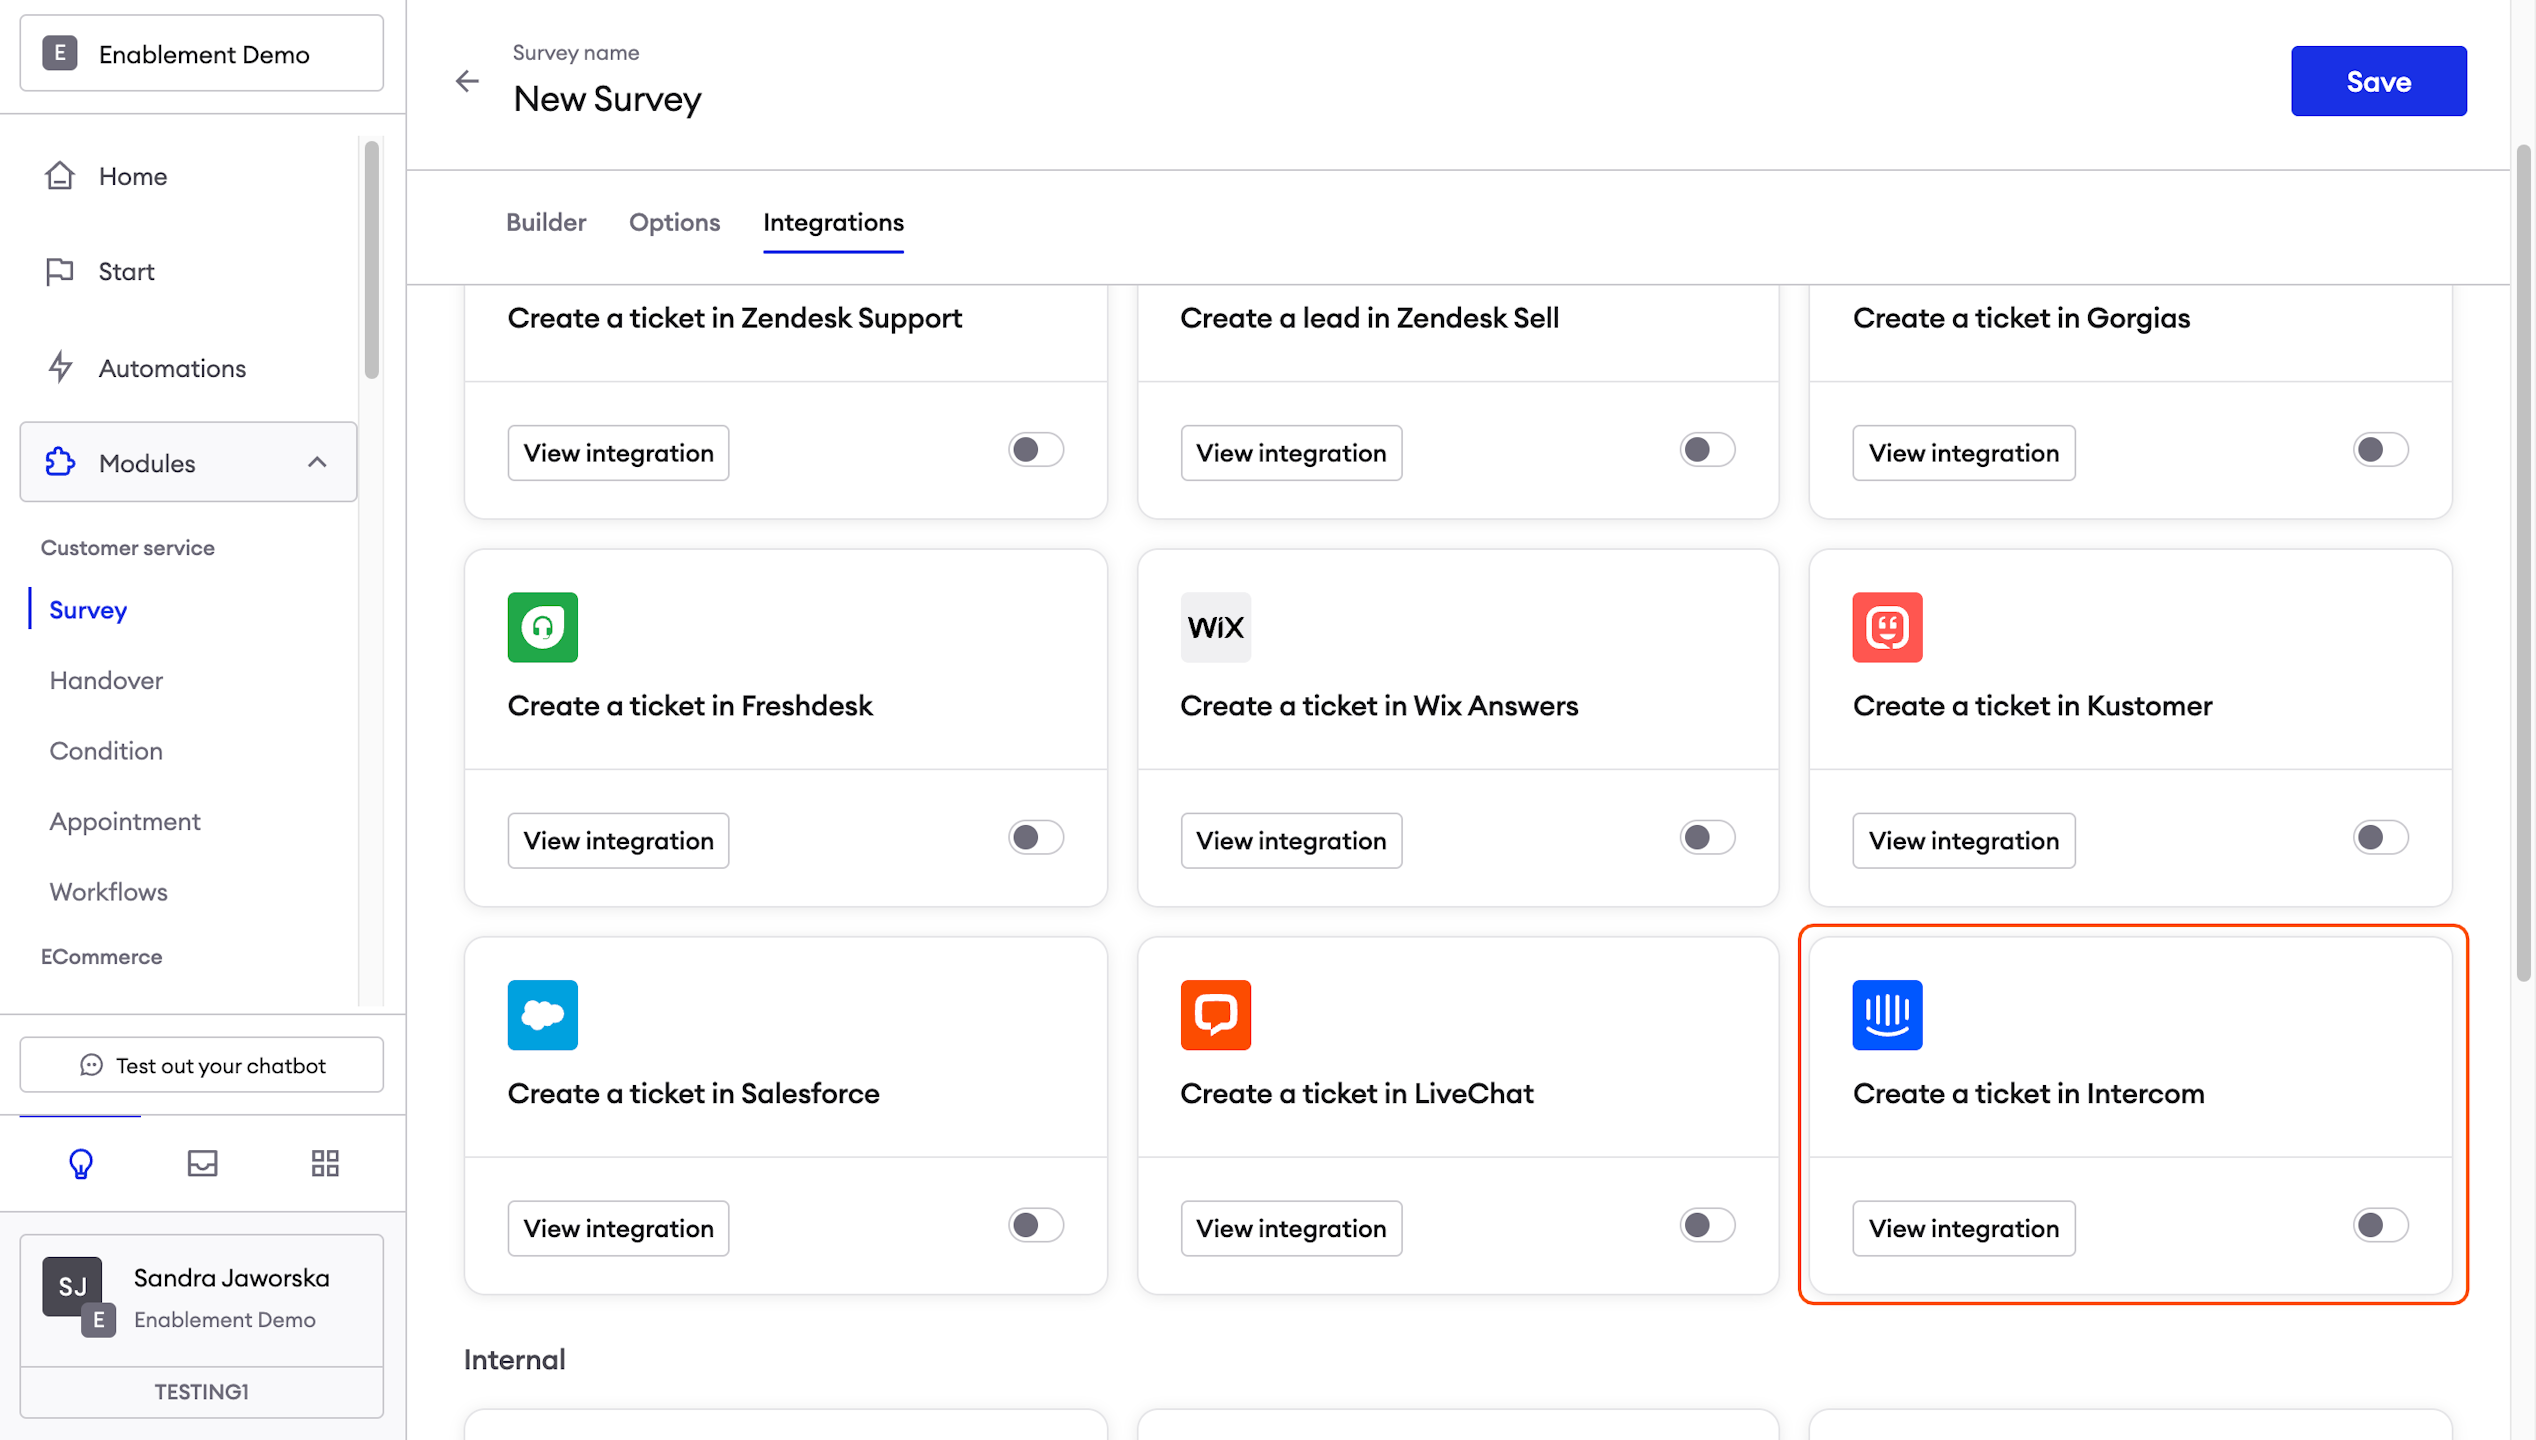
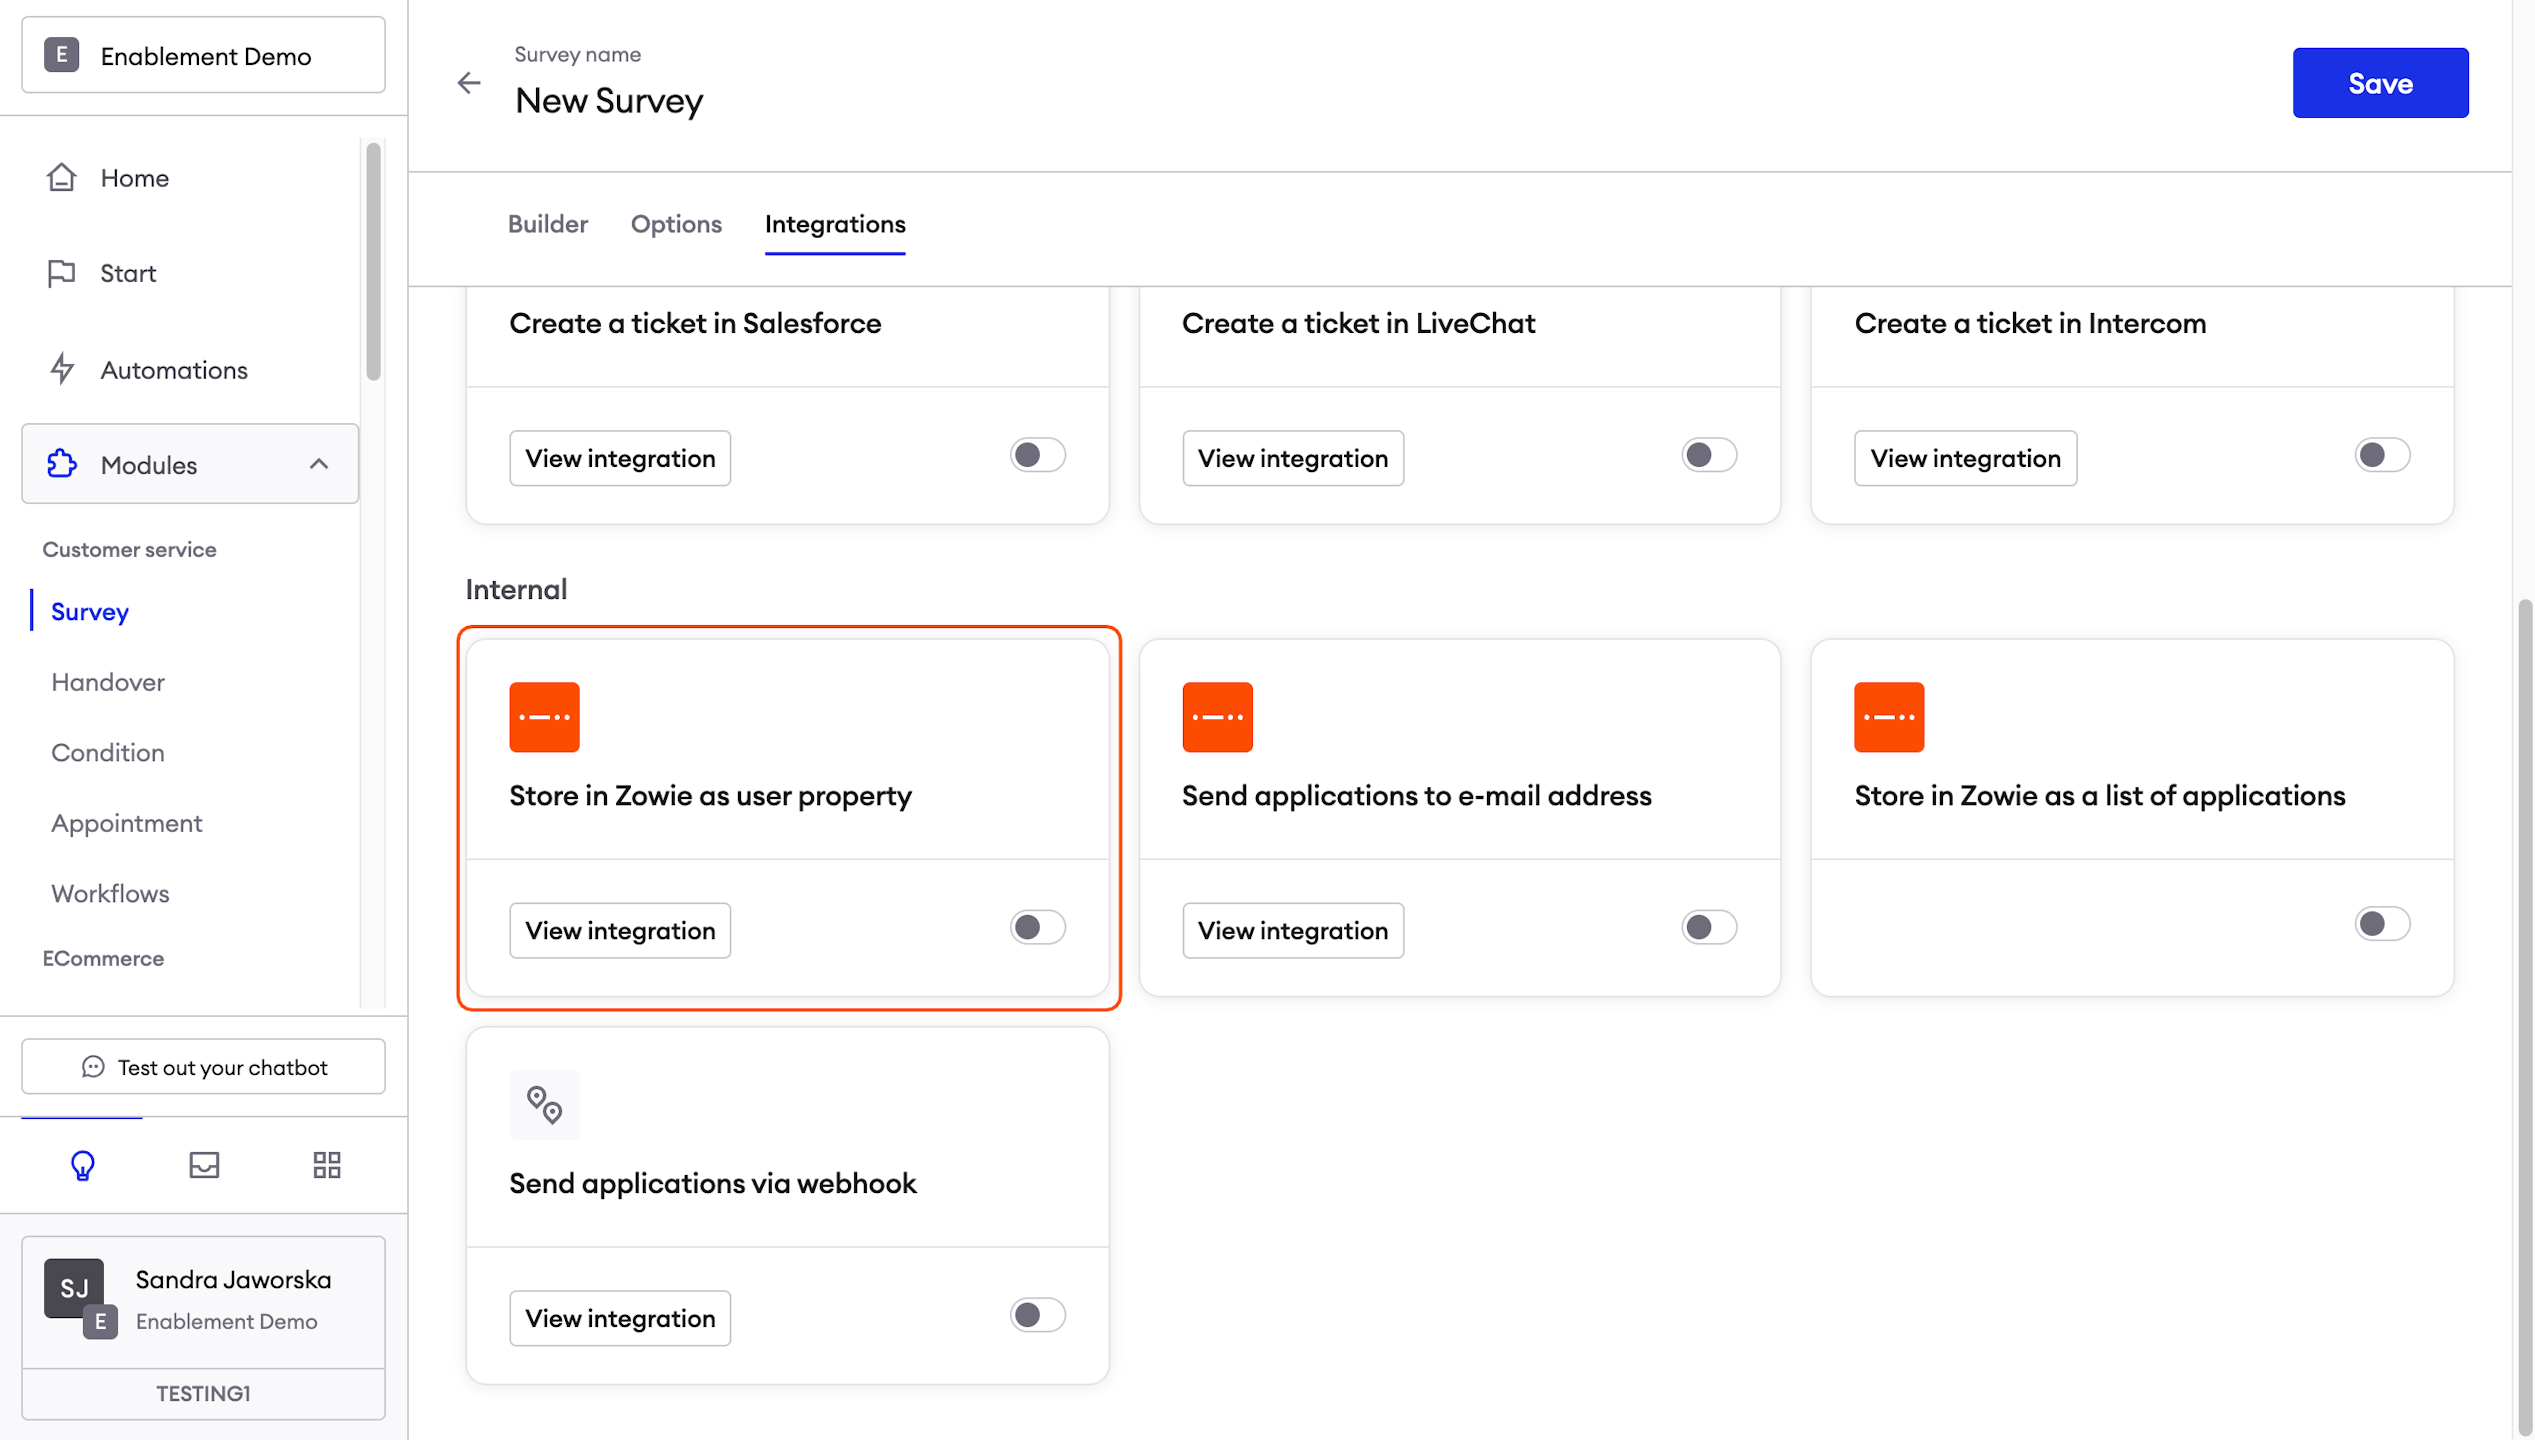
Integrations
AttentionThese sections of the Survey are optional. You may configure it, but it is not necessary.
If you would like to receive filled Surveys, you can use this section to send them for example to your email address or external customer service system.
Send applications to email address
It is possible to send the received applications to one or more e-mail addresses. Just type them in the Emails field and hit Enter.
You can also attach the whole transcript from the conversation and add a title to the email.
Send applications via webhook
It is possible to send the received applications to a preconfigured webhook. Type in the URL of the webhook in the URL which handles POST method _field and click the blue **_TEST** button to make sure everything works. Below you will see a list of fields corresponding to the questions you defined in the survey. Just enter the name of each field as they are expected in JSON and the webhook is ready.

Create a ticket in Zendesk Support
This is probably one of the most used Survey integrations and It allows us to create ticket in Zendesk Support, very useful for offline hours.
Please make sure you provide all the correct information and after that ensure the customer is receiving tickets in their Zendesk Support platform.
Subdomain: usually it can also be found on your URL: https://subdomain.zendesk.com. More information here.
Zendesk`s user email: it must be an email address with agent’s permission in order to receive and manage tickets on Zendesk support.
API Token: if you don't have one yet, please use the following guideline.
Attach customer's transcript: should be enabled, to see the context.
Applying this info:
- Go to Integrations and enable Create ticket in Zendesk Support.
- Provide your workspace subdomain. Do not use https or any other additions, just subdomain. Then fill in the user email and API Token.
- You can choose whether the transcript of the conversation should be attached into the ticket.
- After that, the integration will be working.
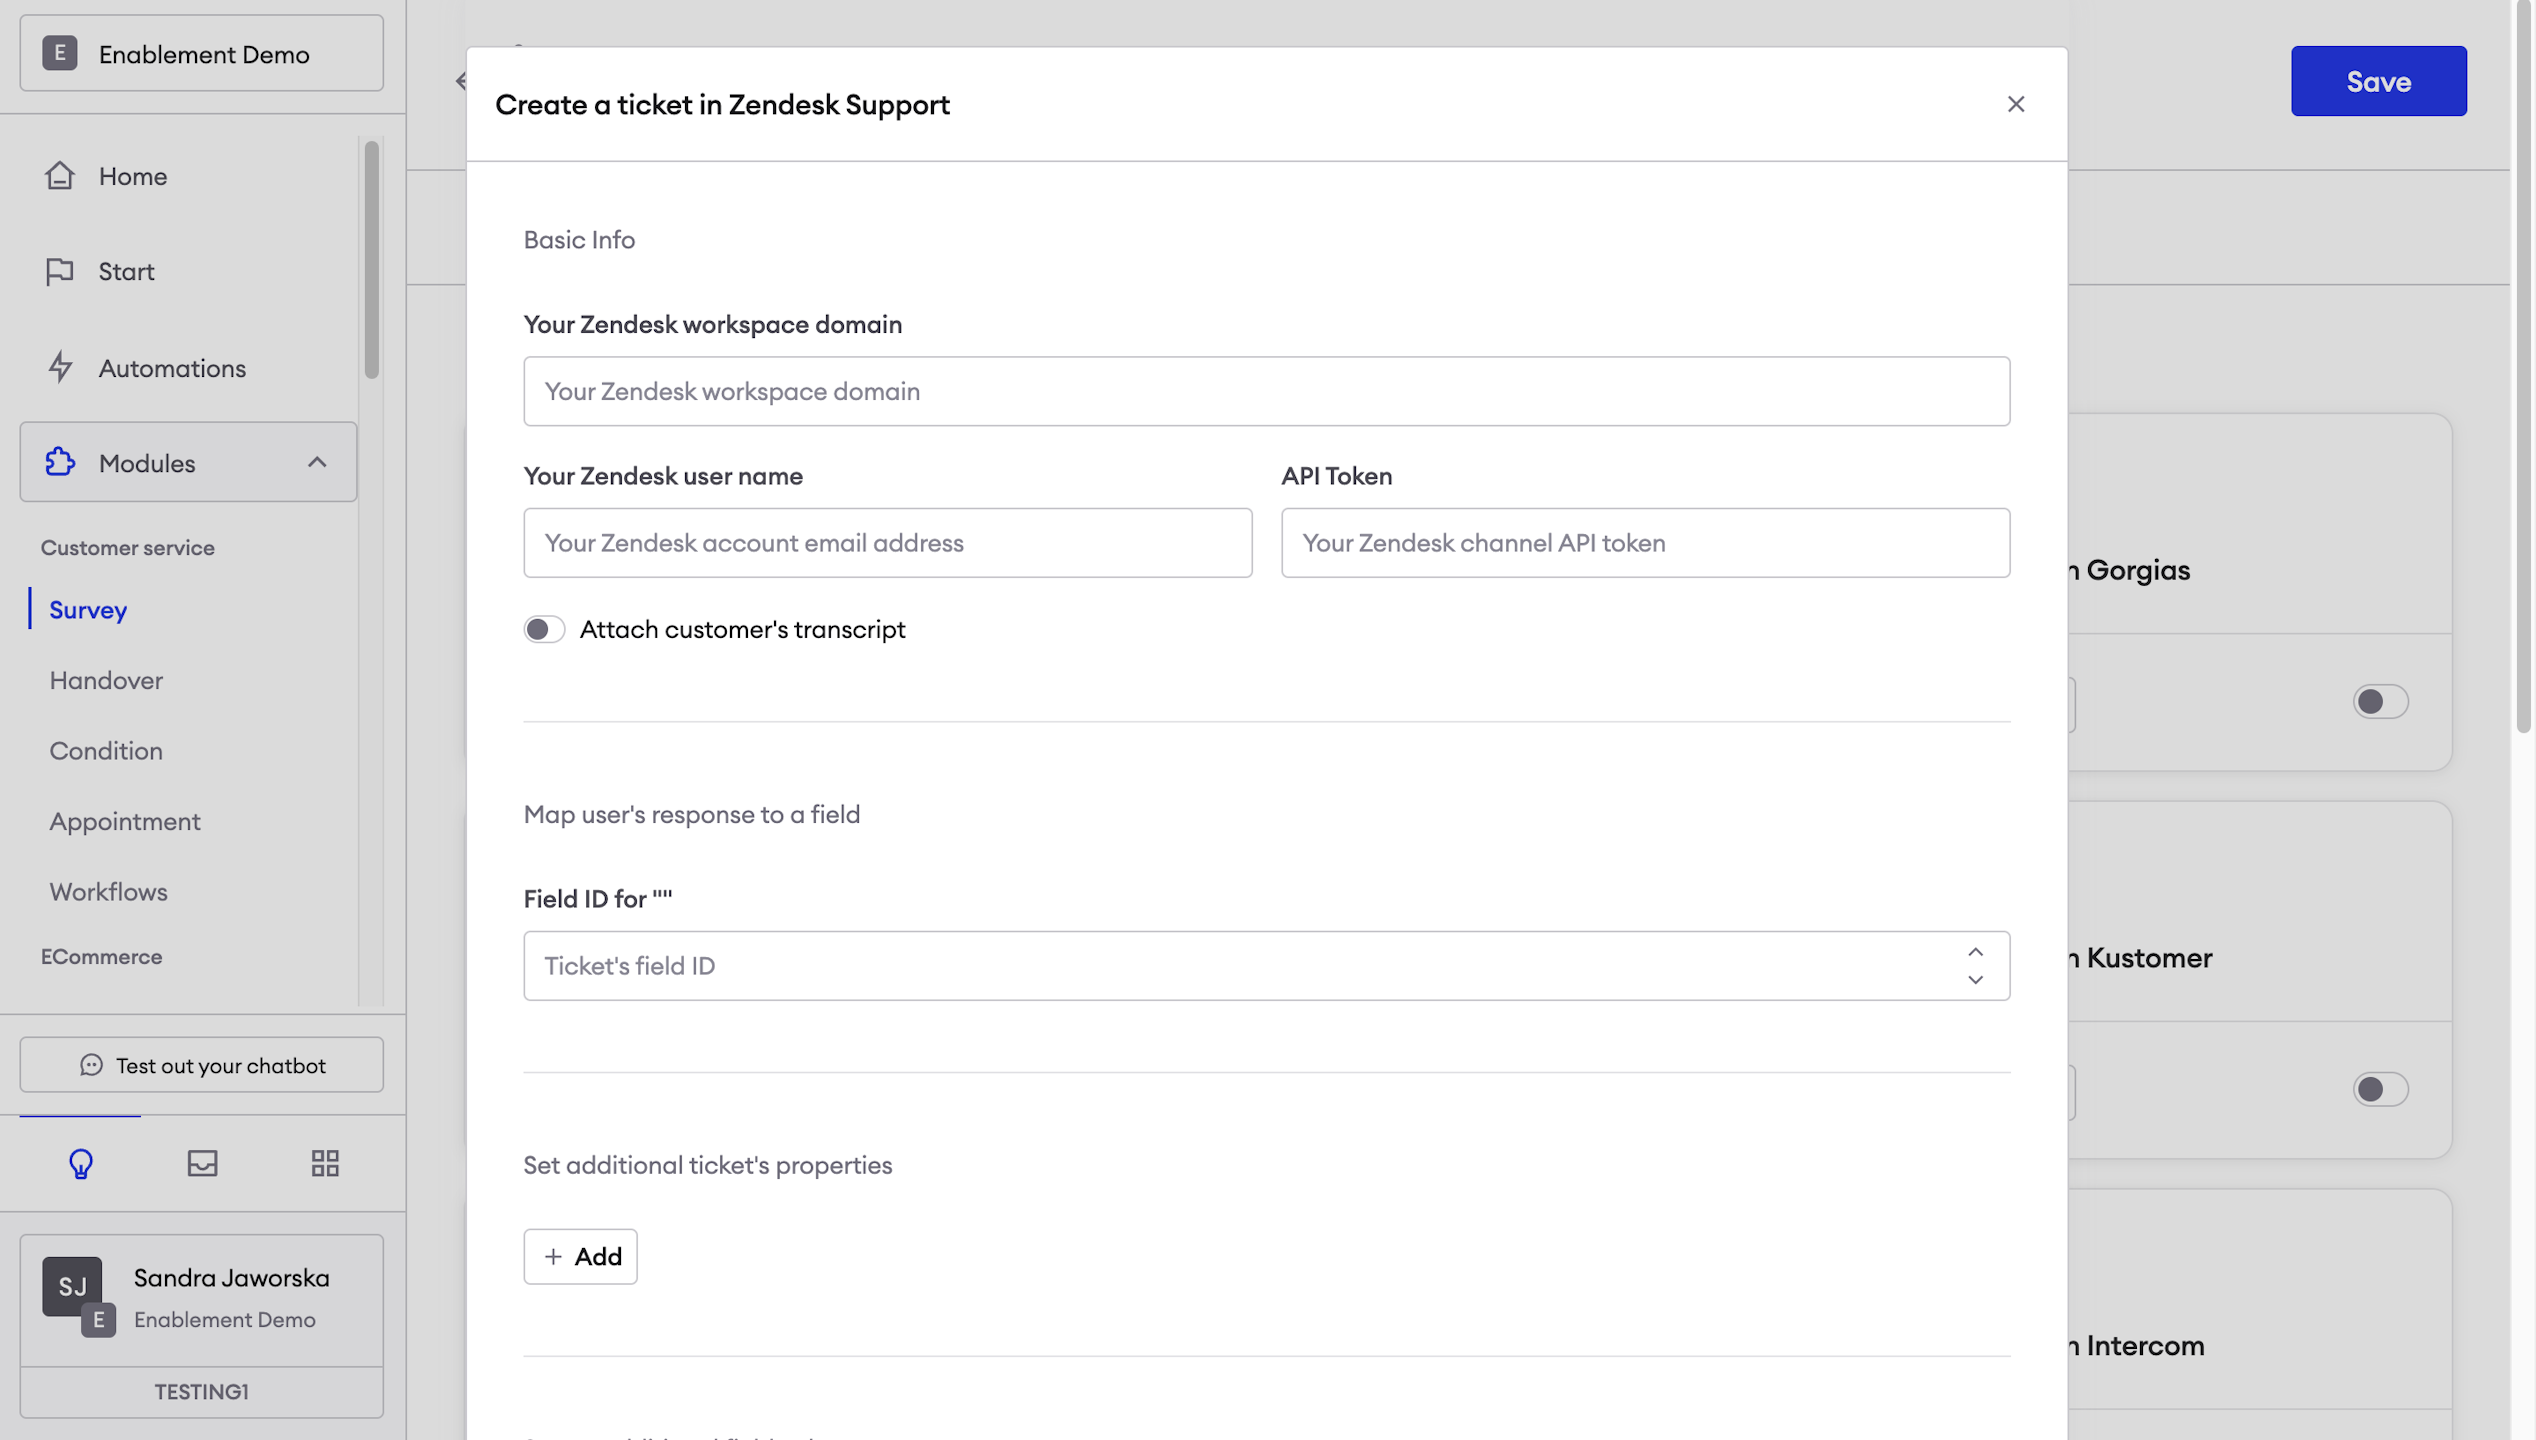
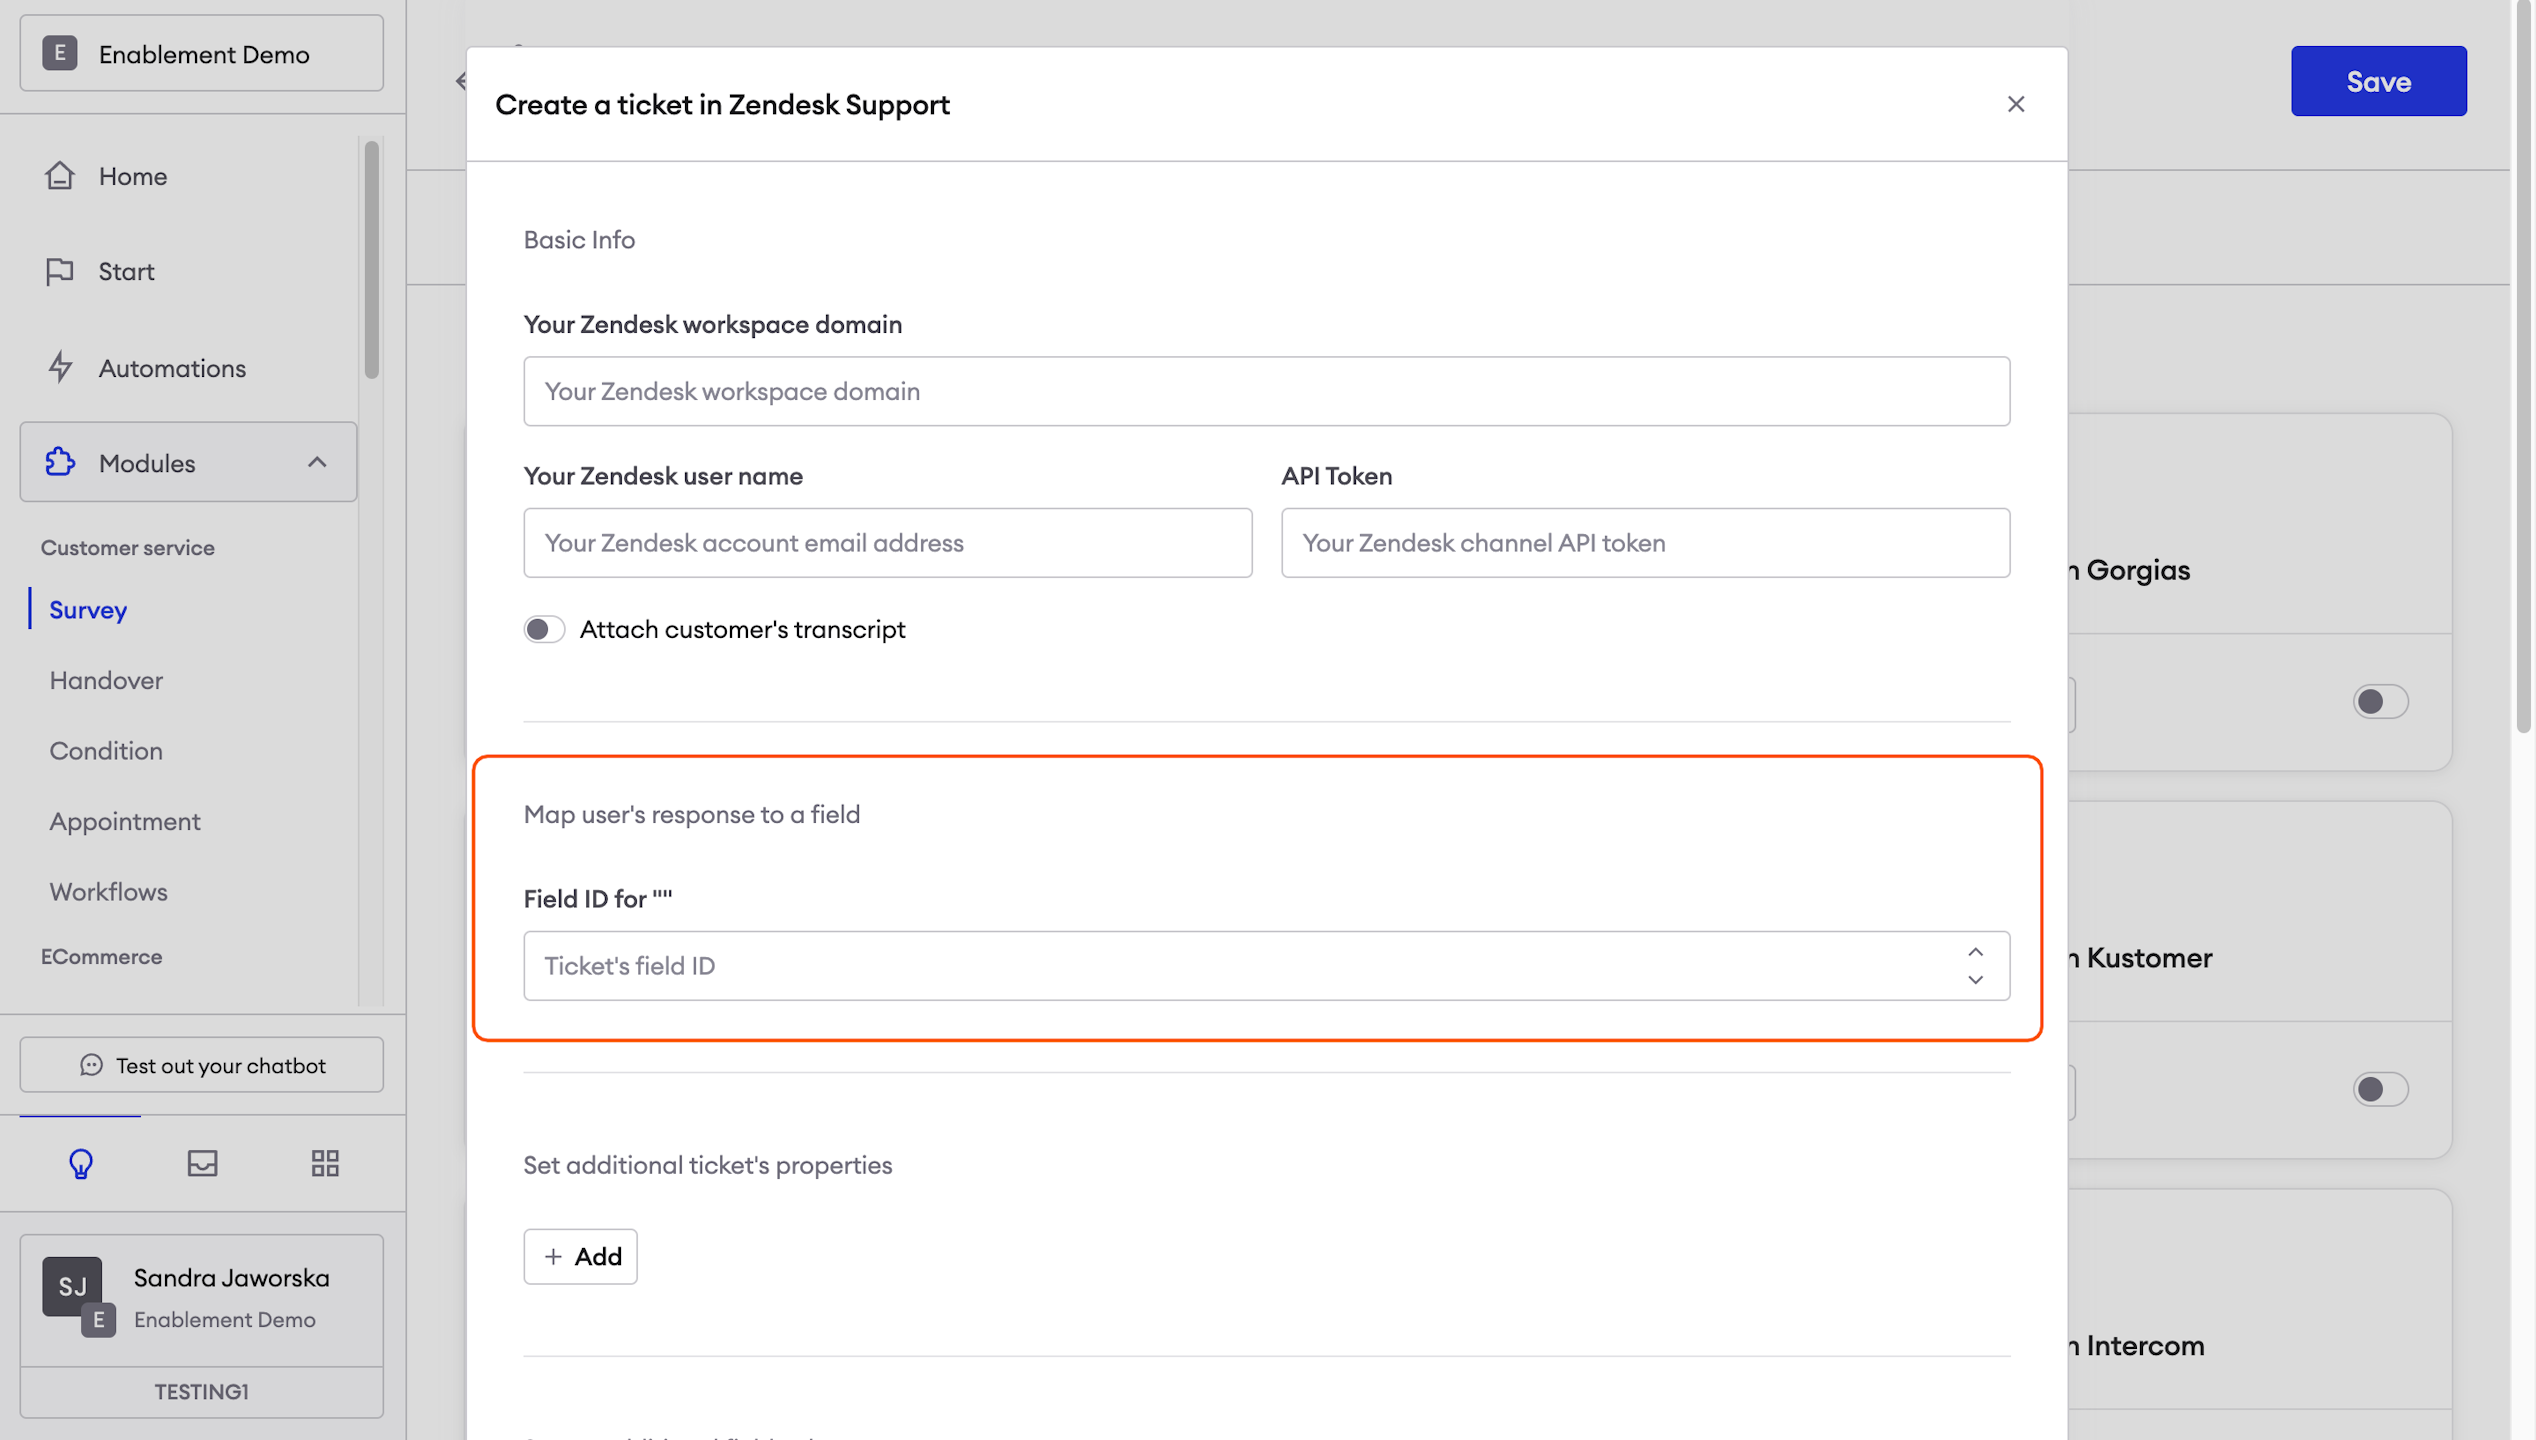
Zendesk - map user's response to a field
This allows you to map user's responses to a specific field in Zendesk using field IDs.
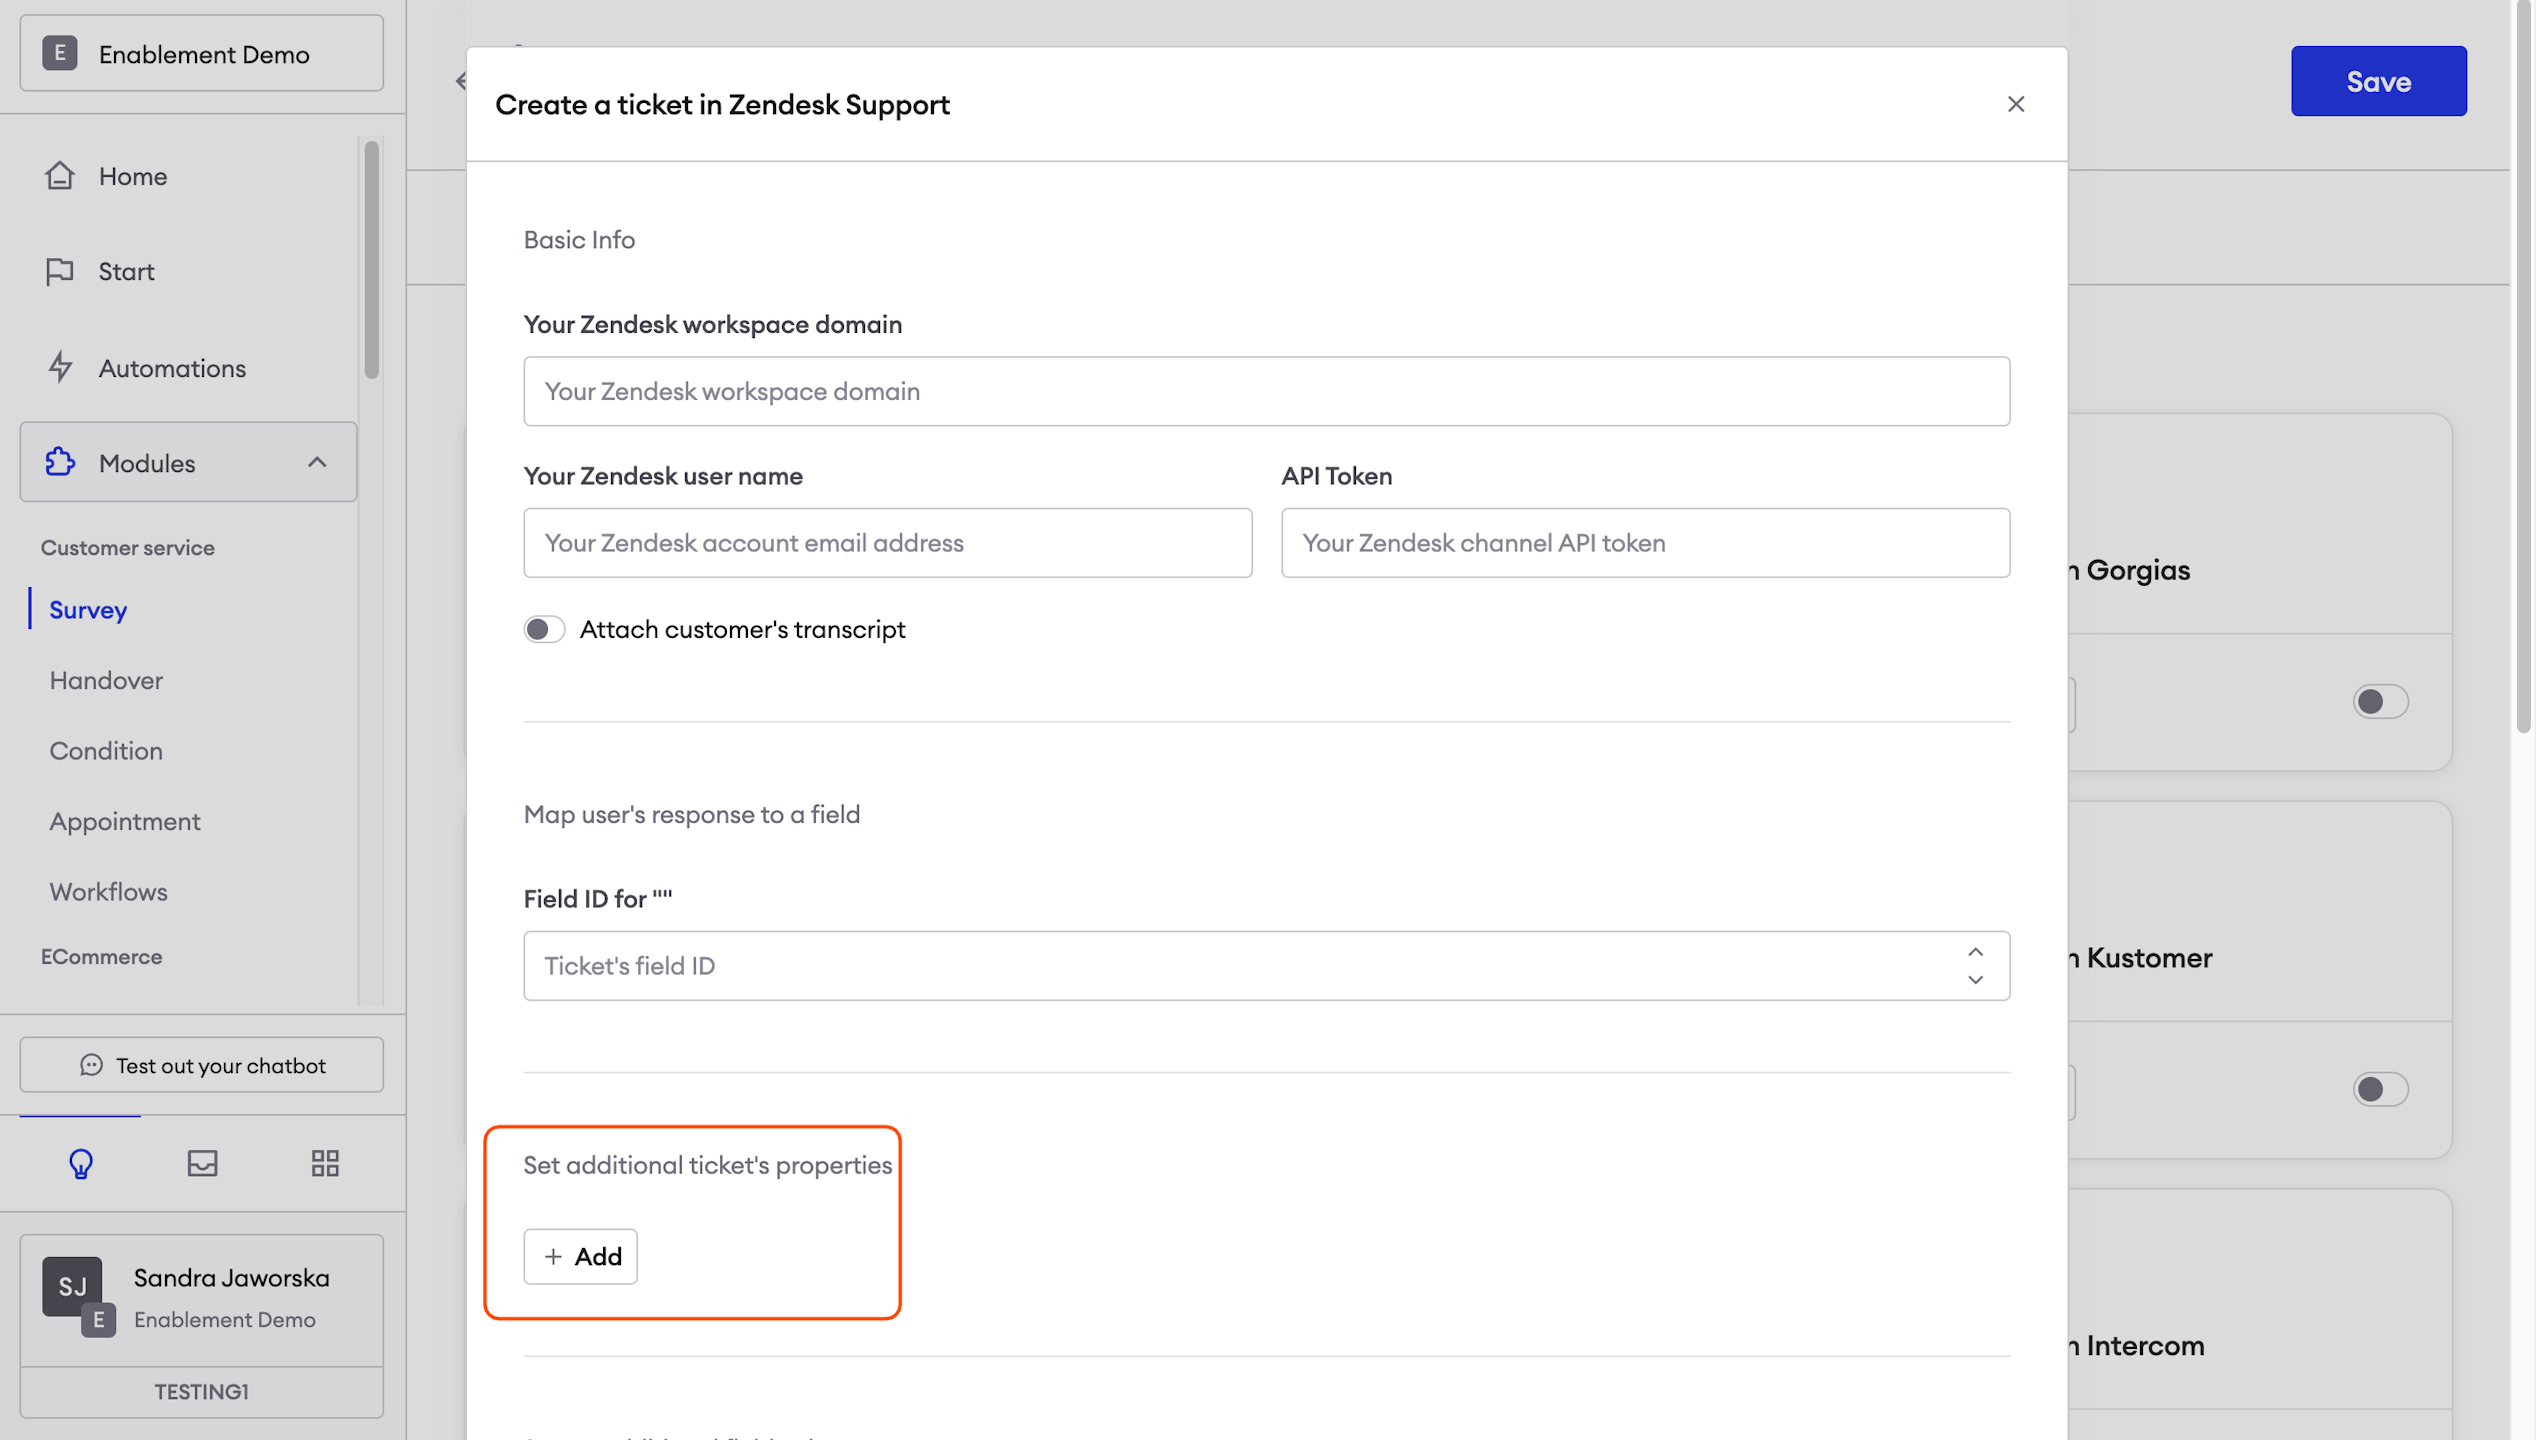
Zendesk - set additional ticket's properties
If you want to set additional ticket properties, simply click the blue button "Add" and provide the Field ID in the first box and the ticket's field ID value in the If you want to set additional ticket properties, simply click the blue button "Add" and provide the Field ID in the first box and the ticket's field ID value in the second box. box.
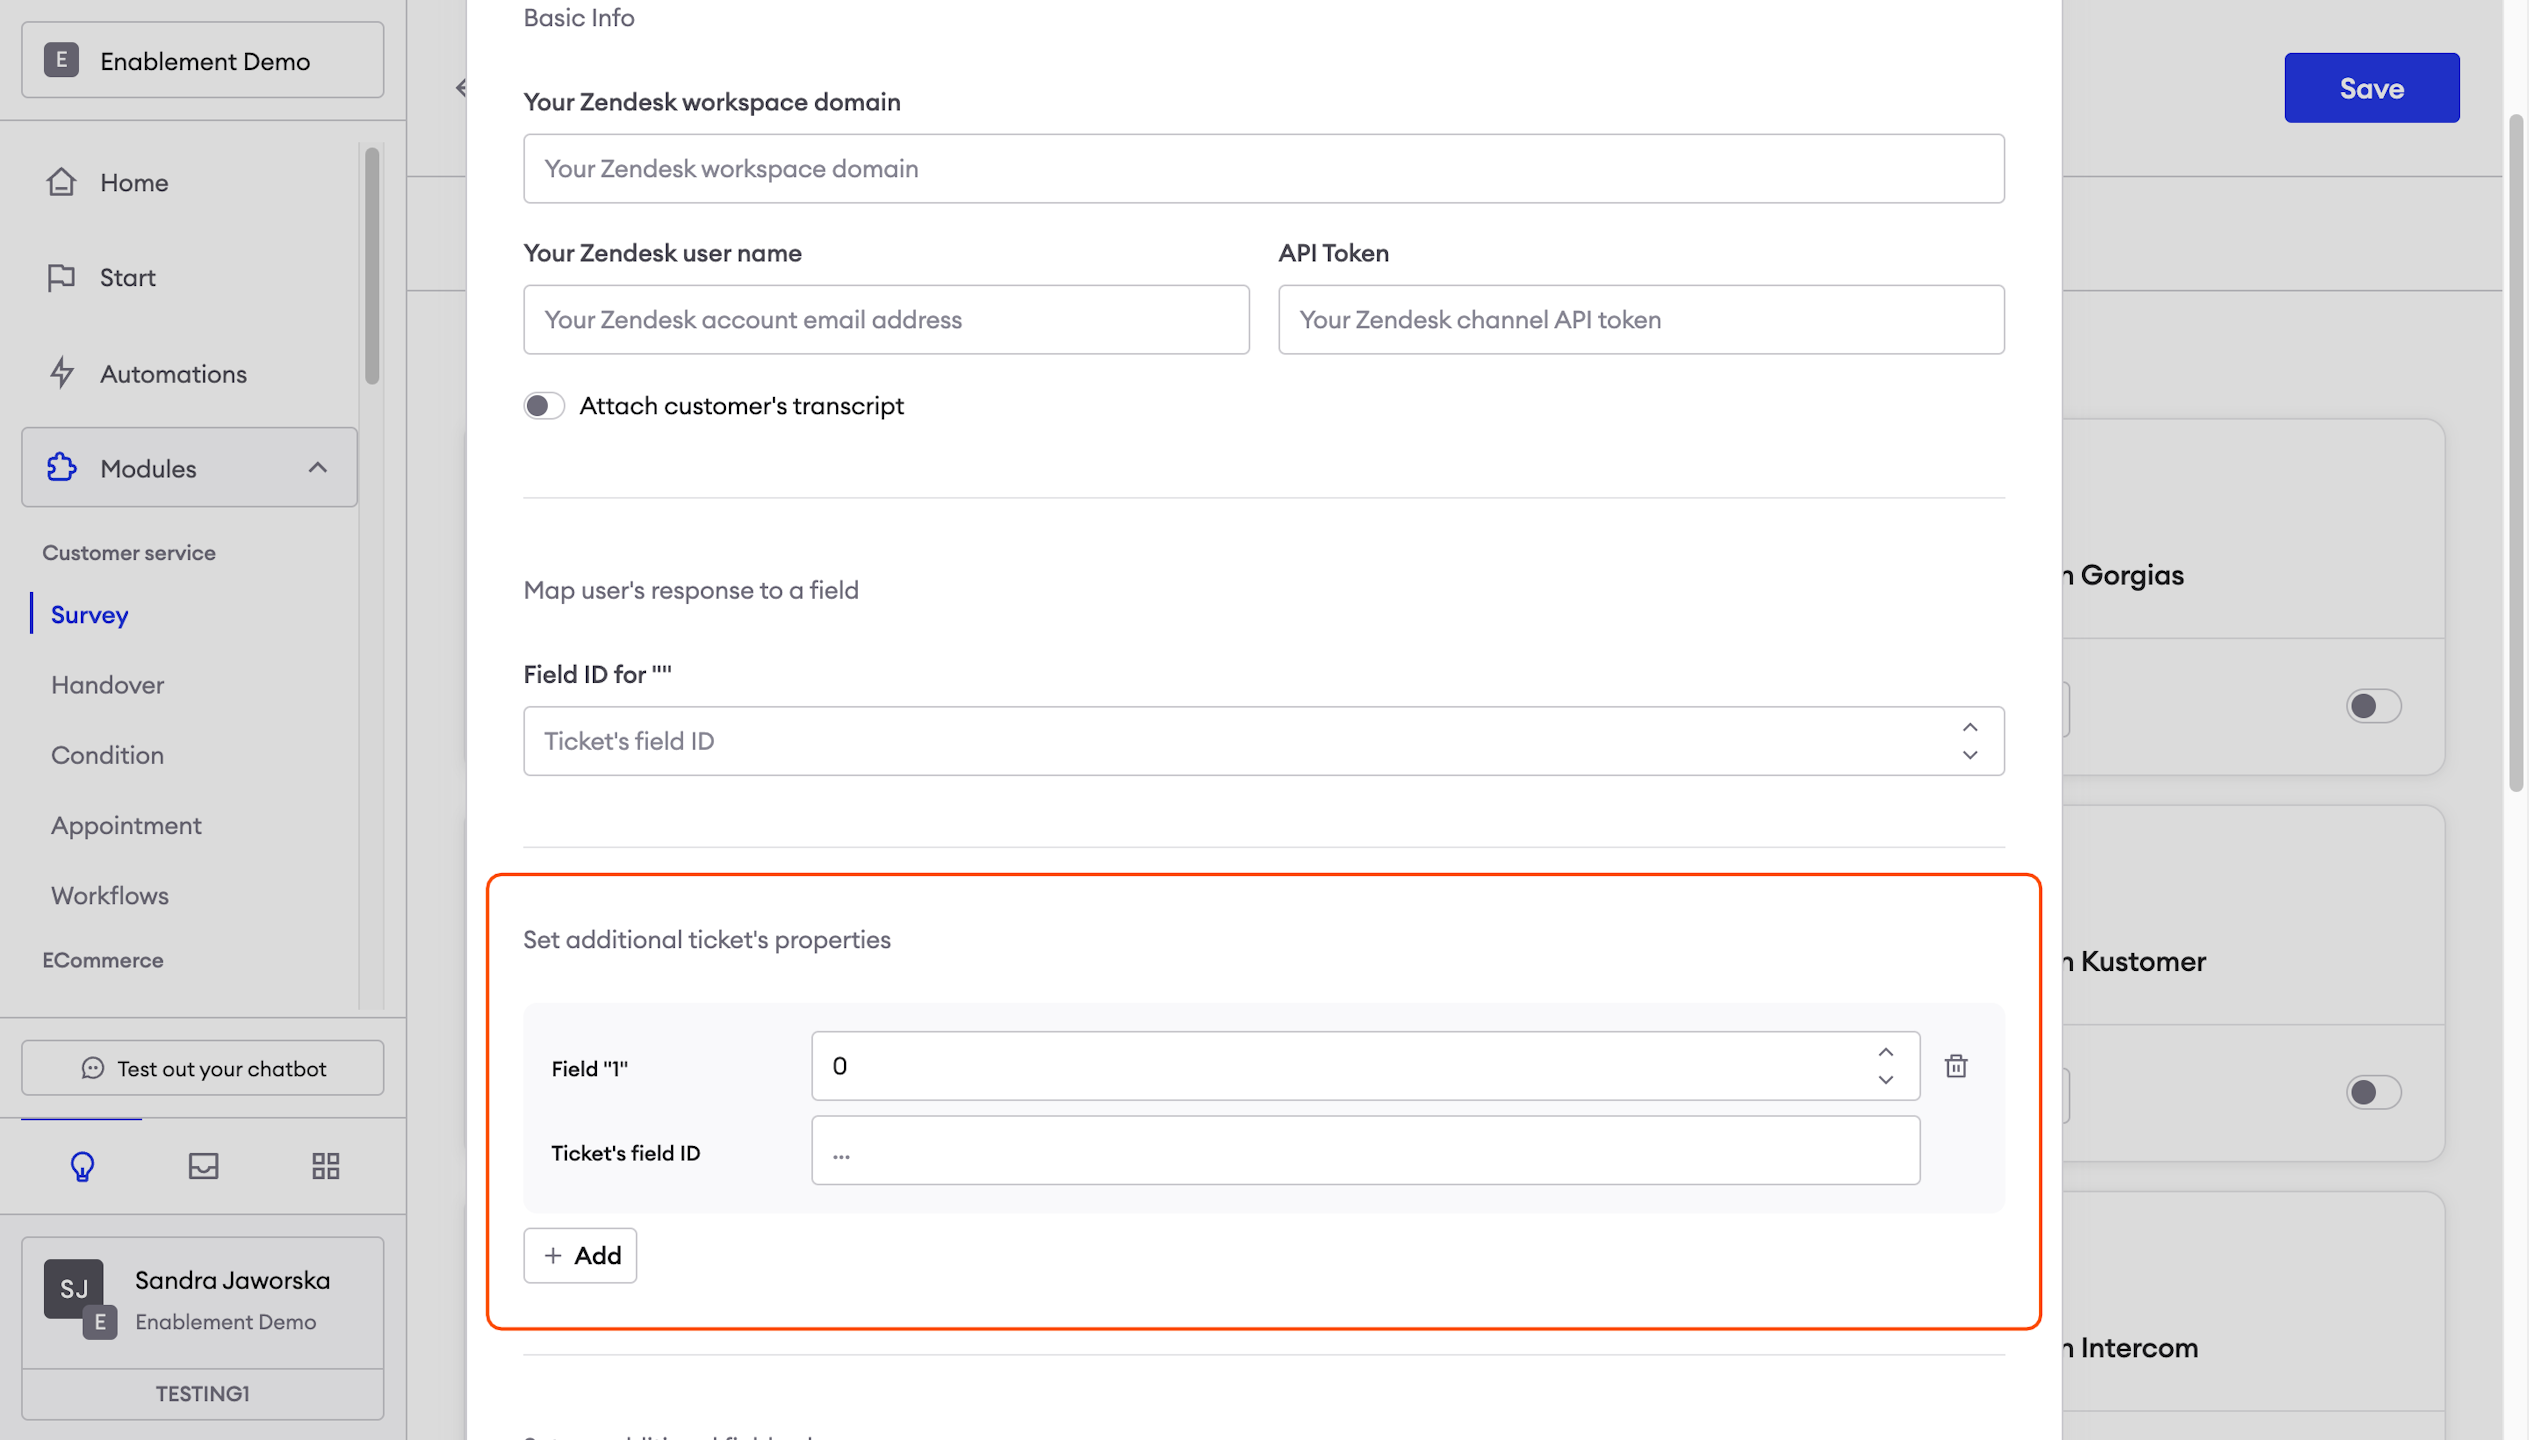
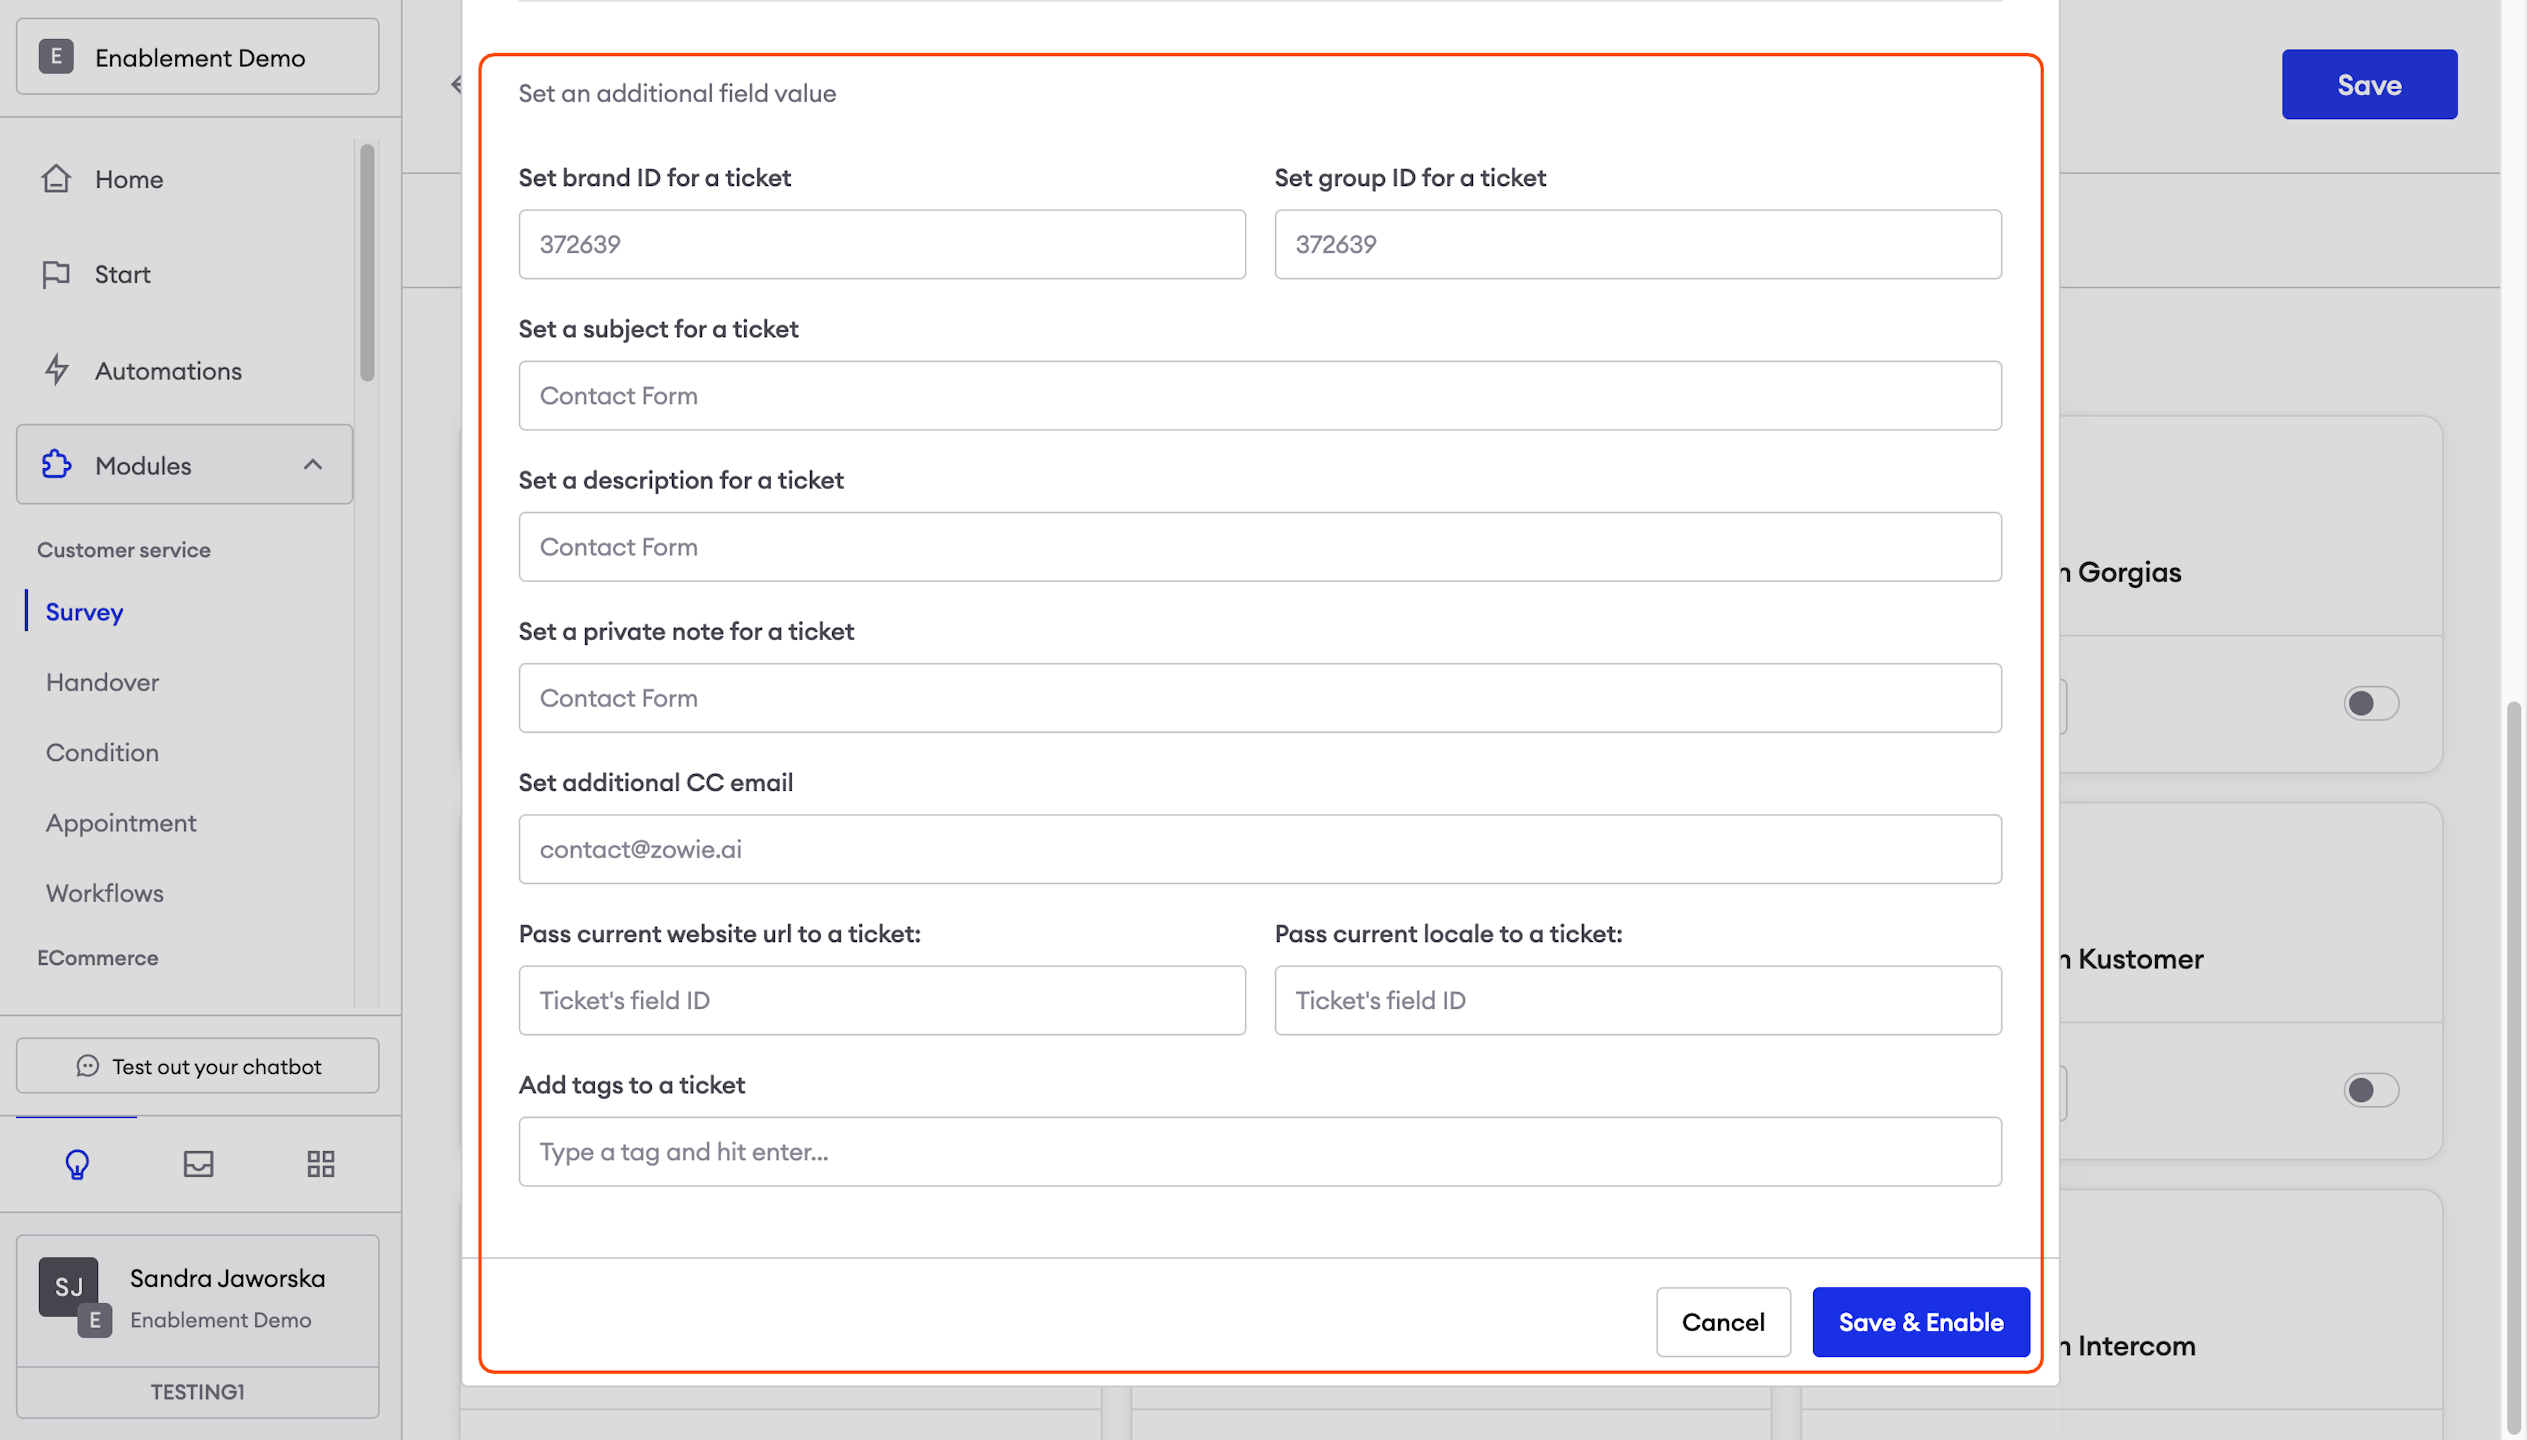
Zendesk - set an additional field value
It helps you to identify the created ticket in Zendesk by adding different values such as brand ID, group ID, subject, description, private note, additional CC email, and tags. You can also pass the current website URL and locale to a ticket by providing a ticket's field ID.
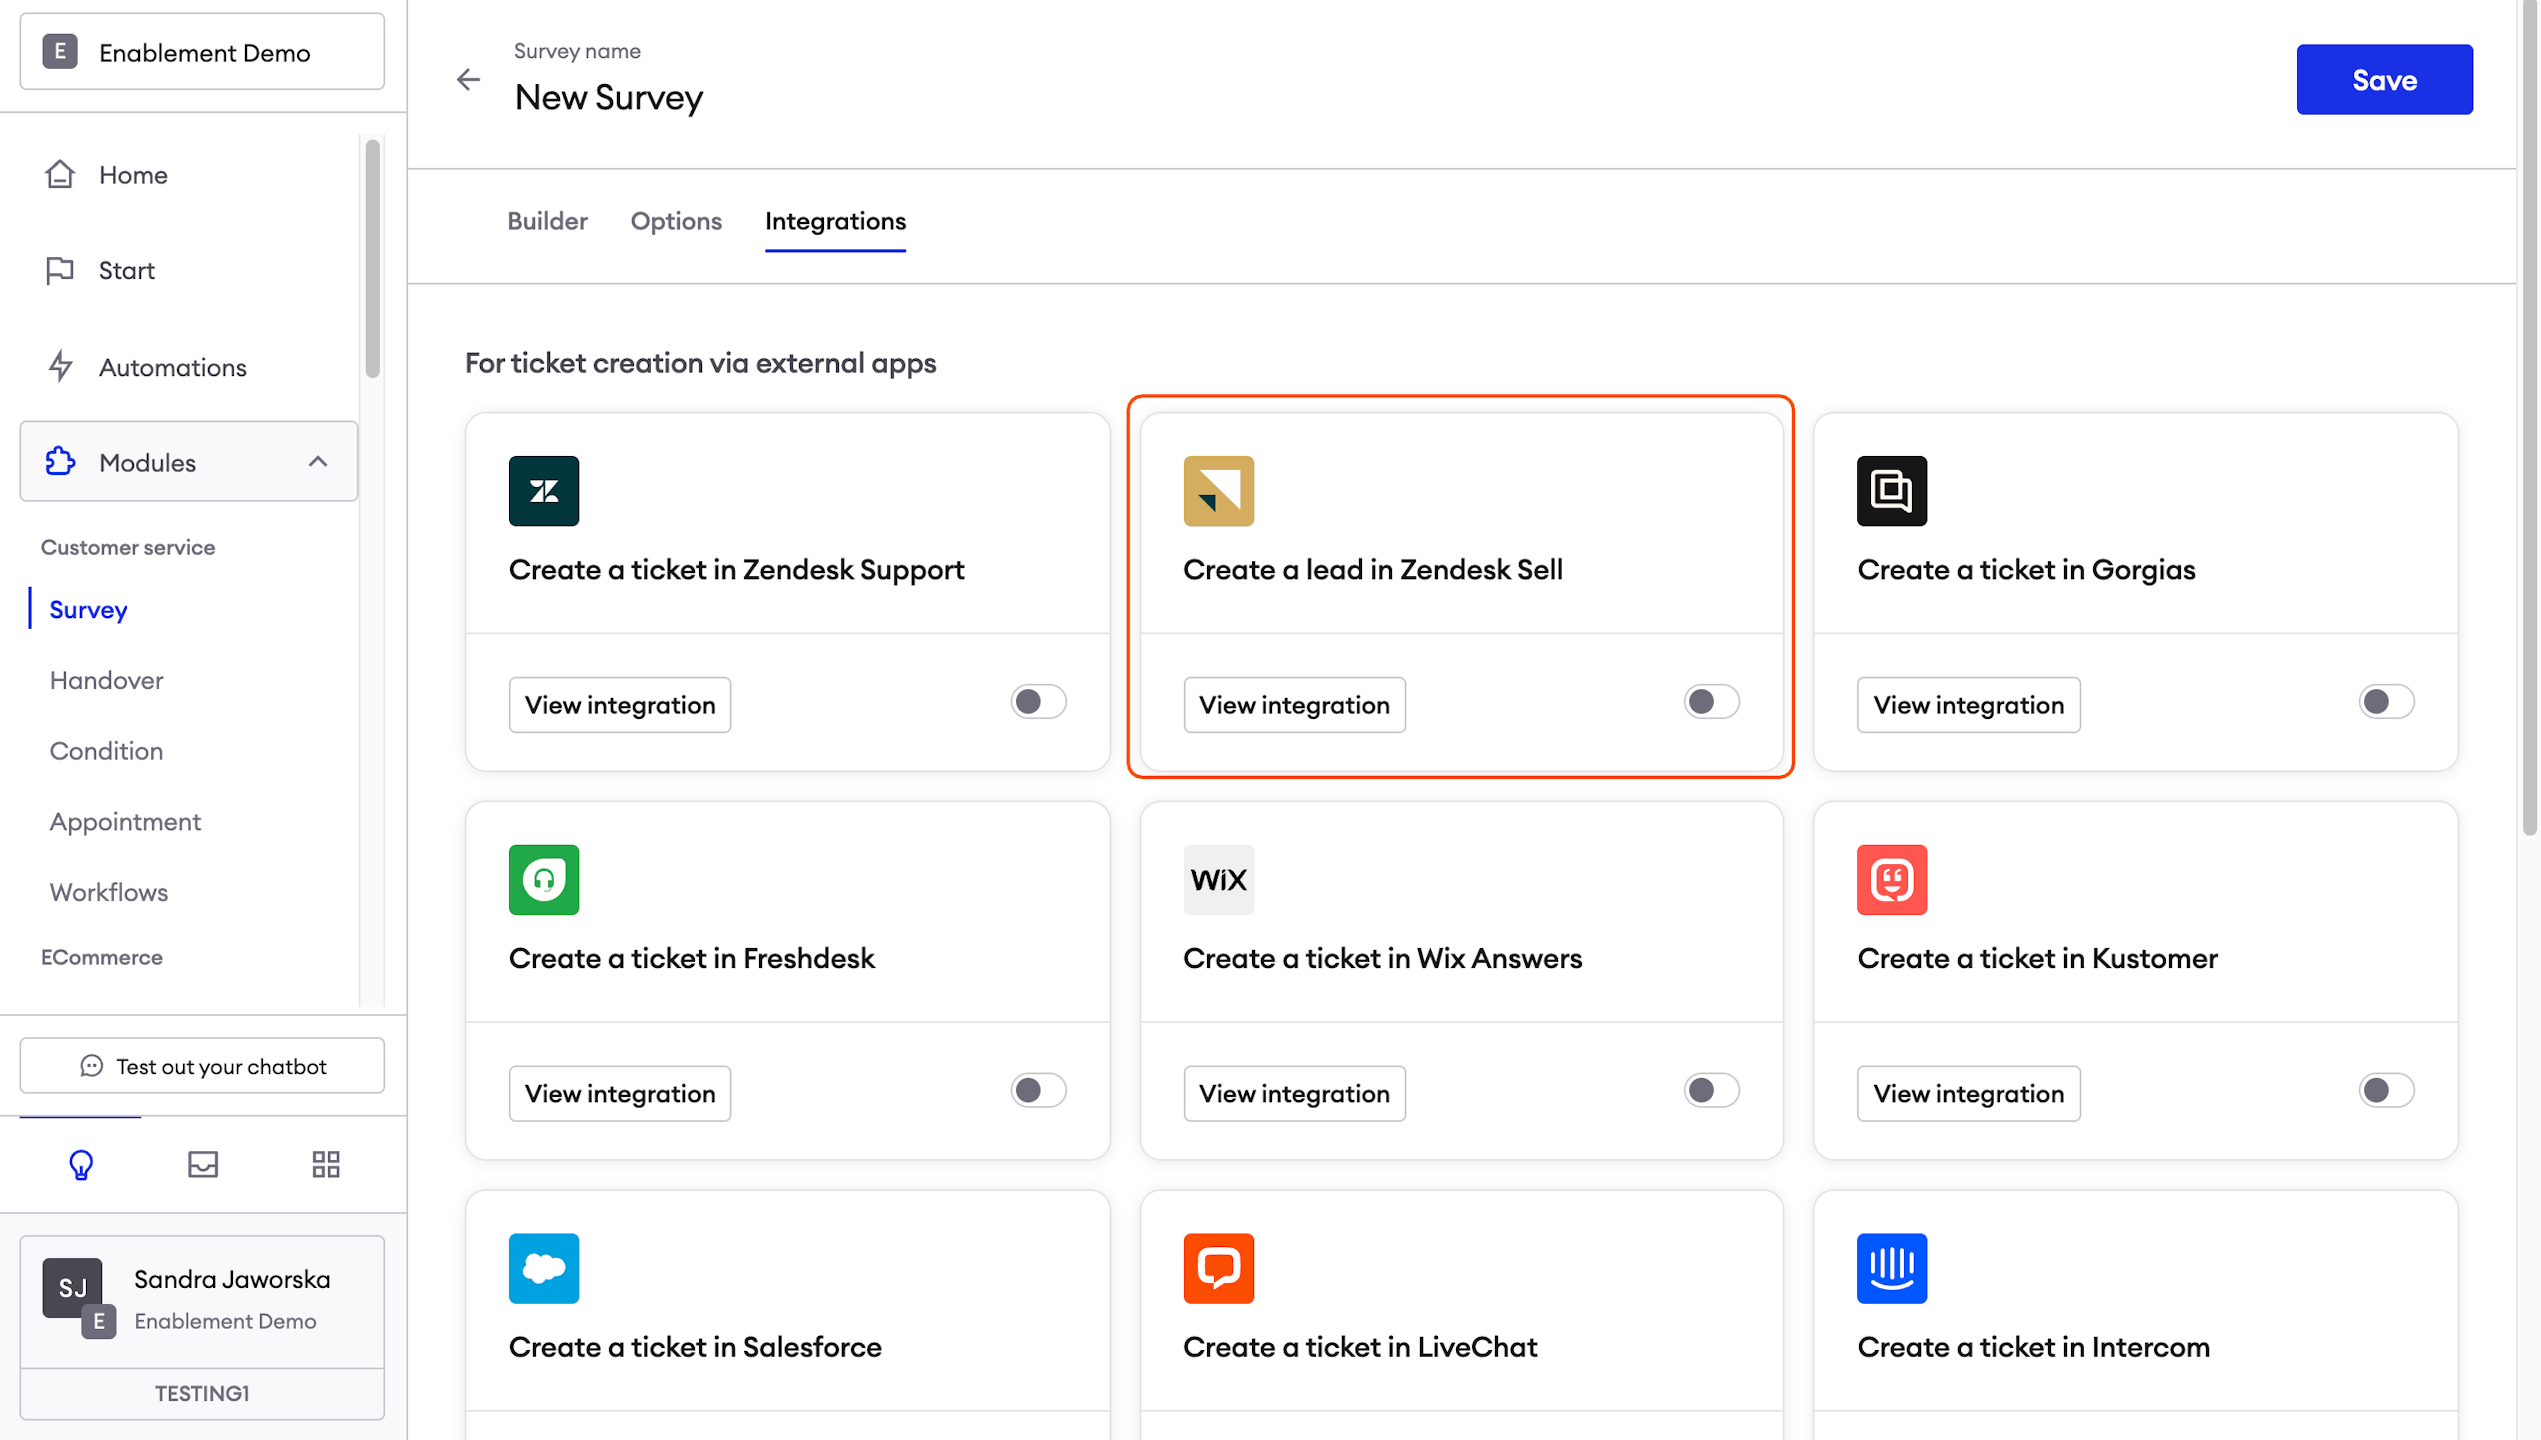
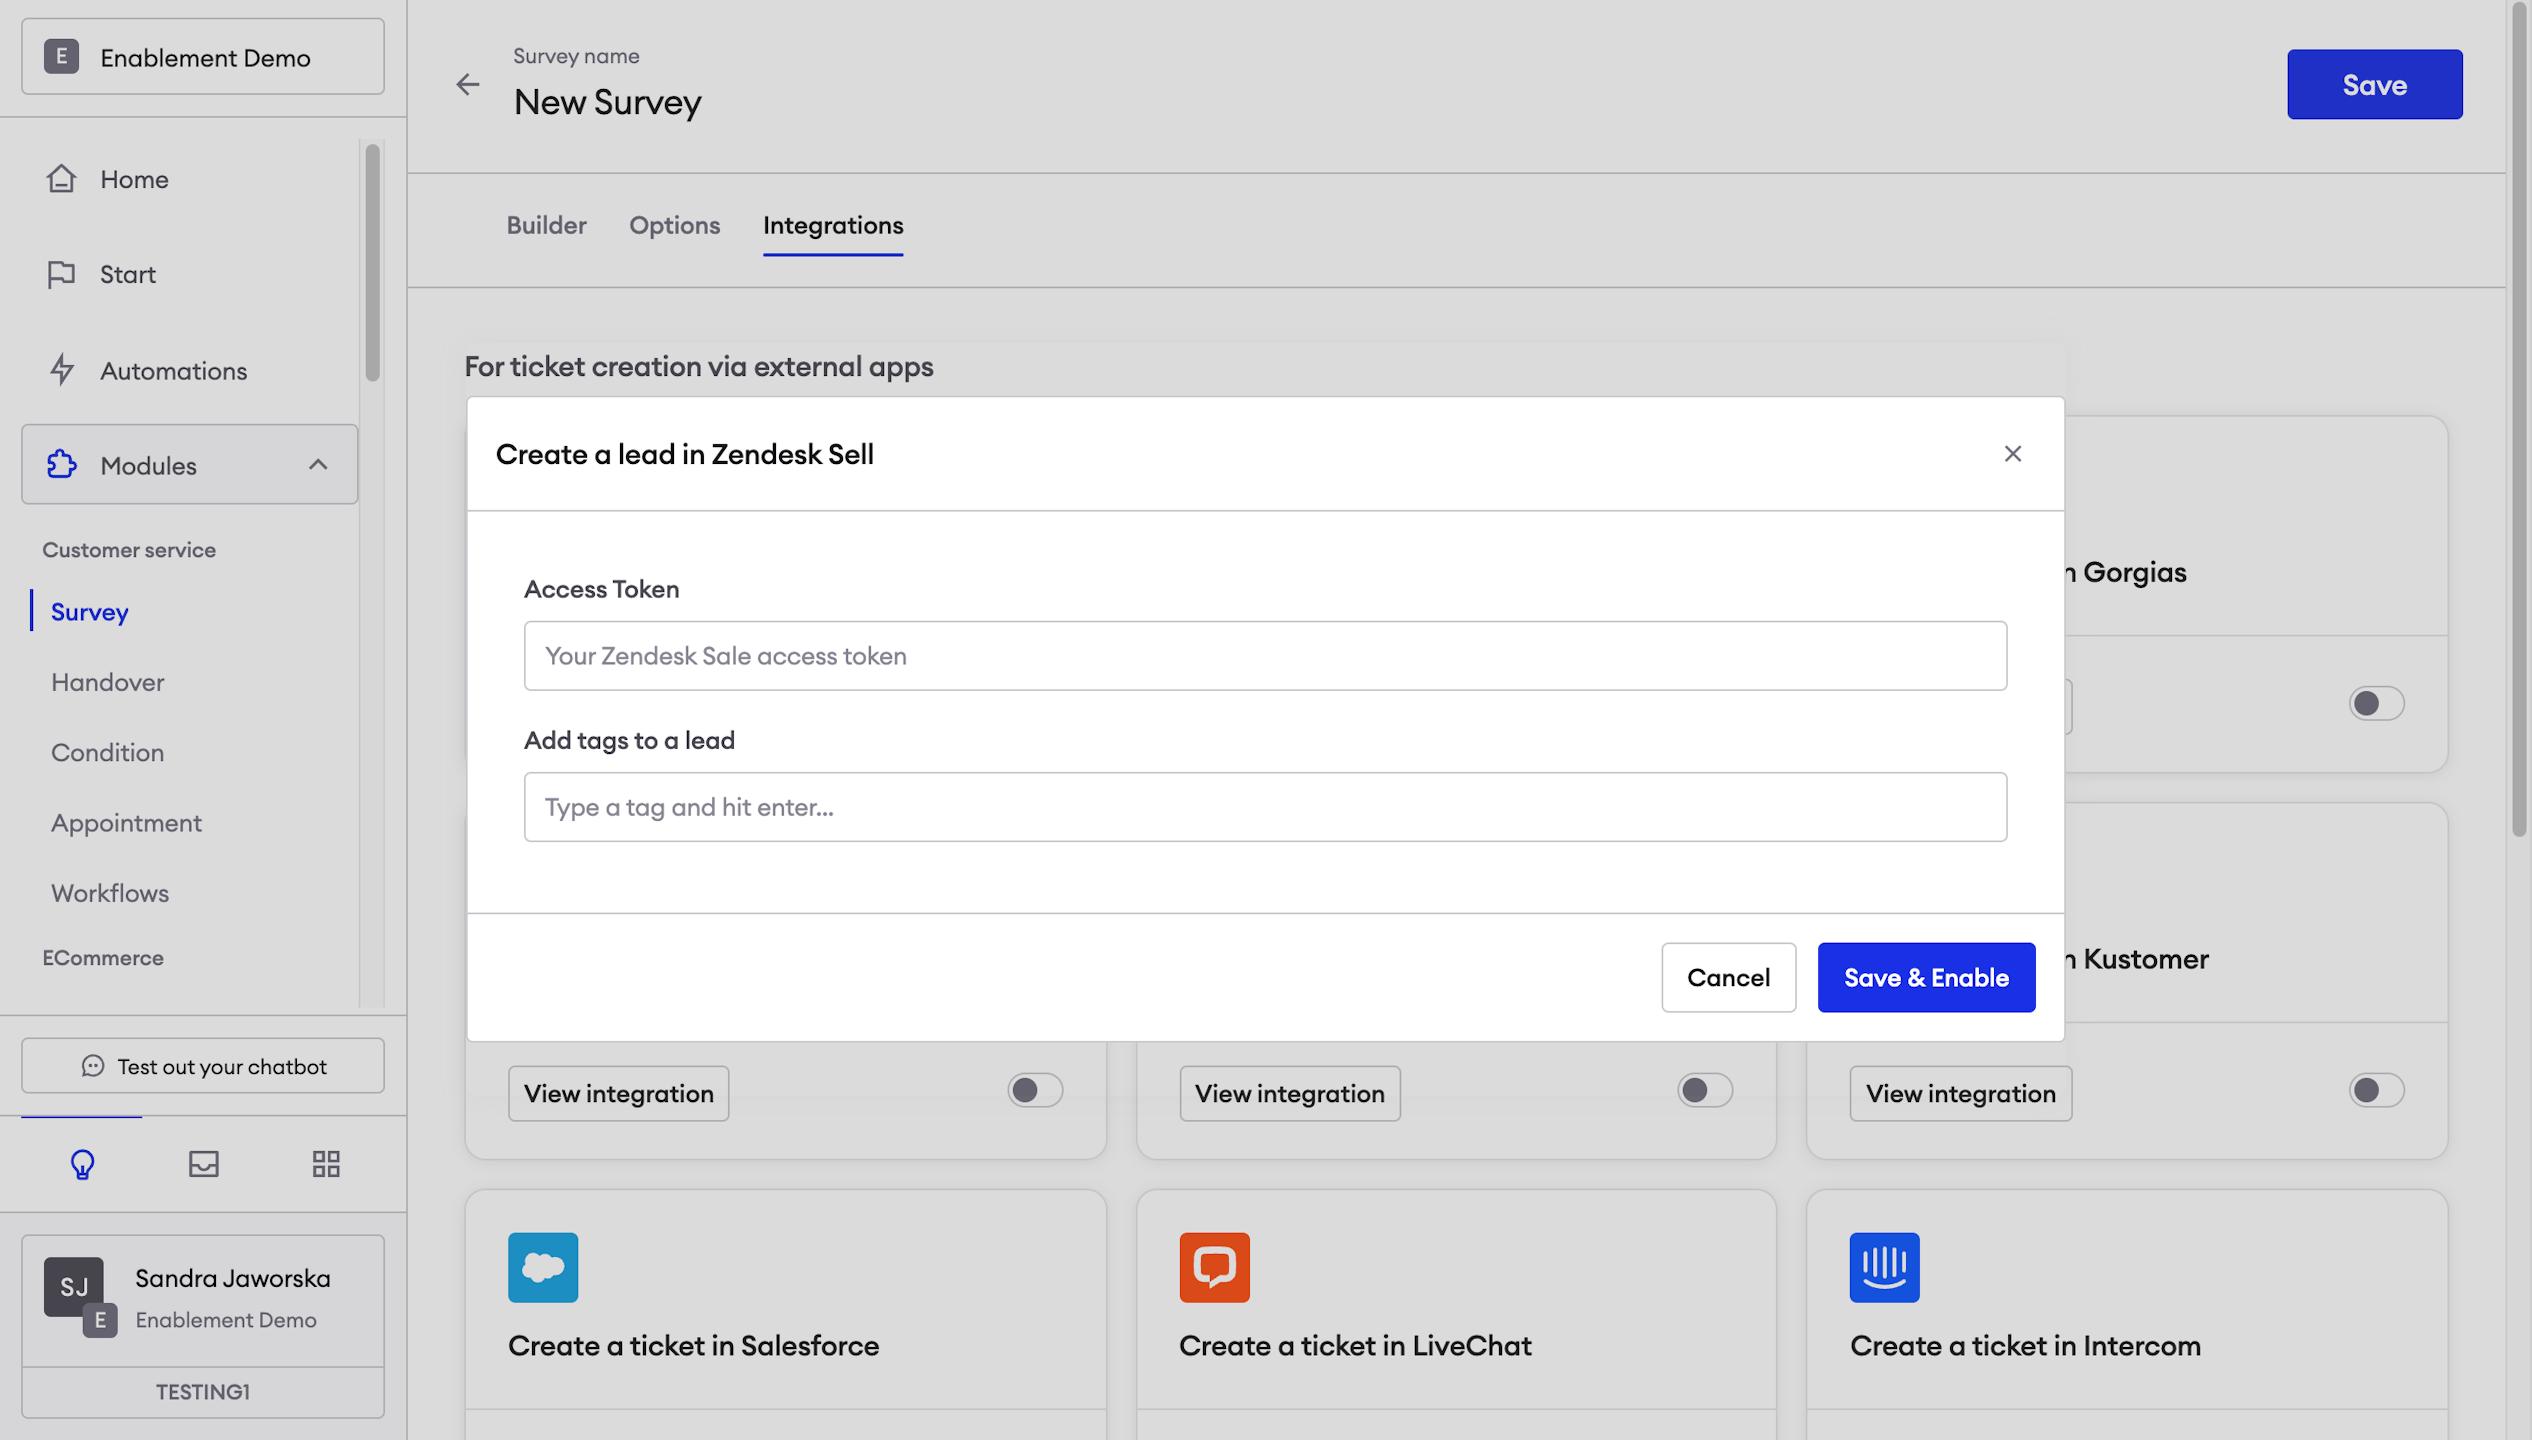
Create a lead in Zendesk Sell
Just like the ticket creation mentioned above this creates a lead in Zendesk Sell, for that the customer needs to provide the following information:
Access Token: Zendesk Sales access token (it may differ from the one provided for Zendesk support ticket creation)
Add a tag to a lead: Simply enter the tag you want to use and hit enter.
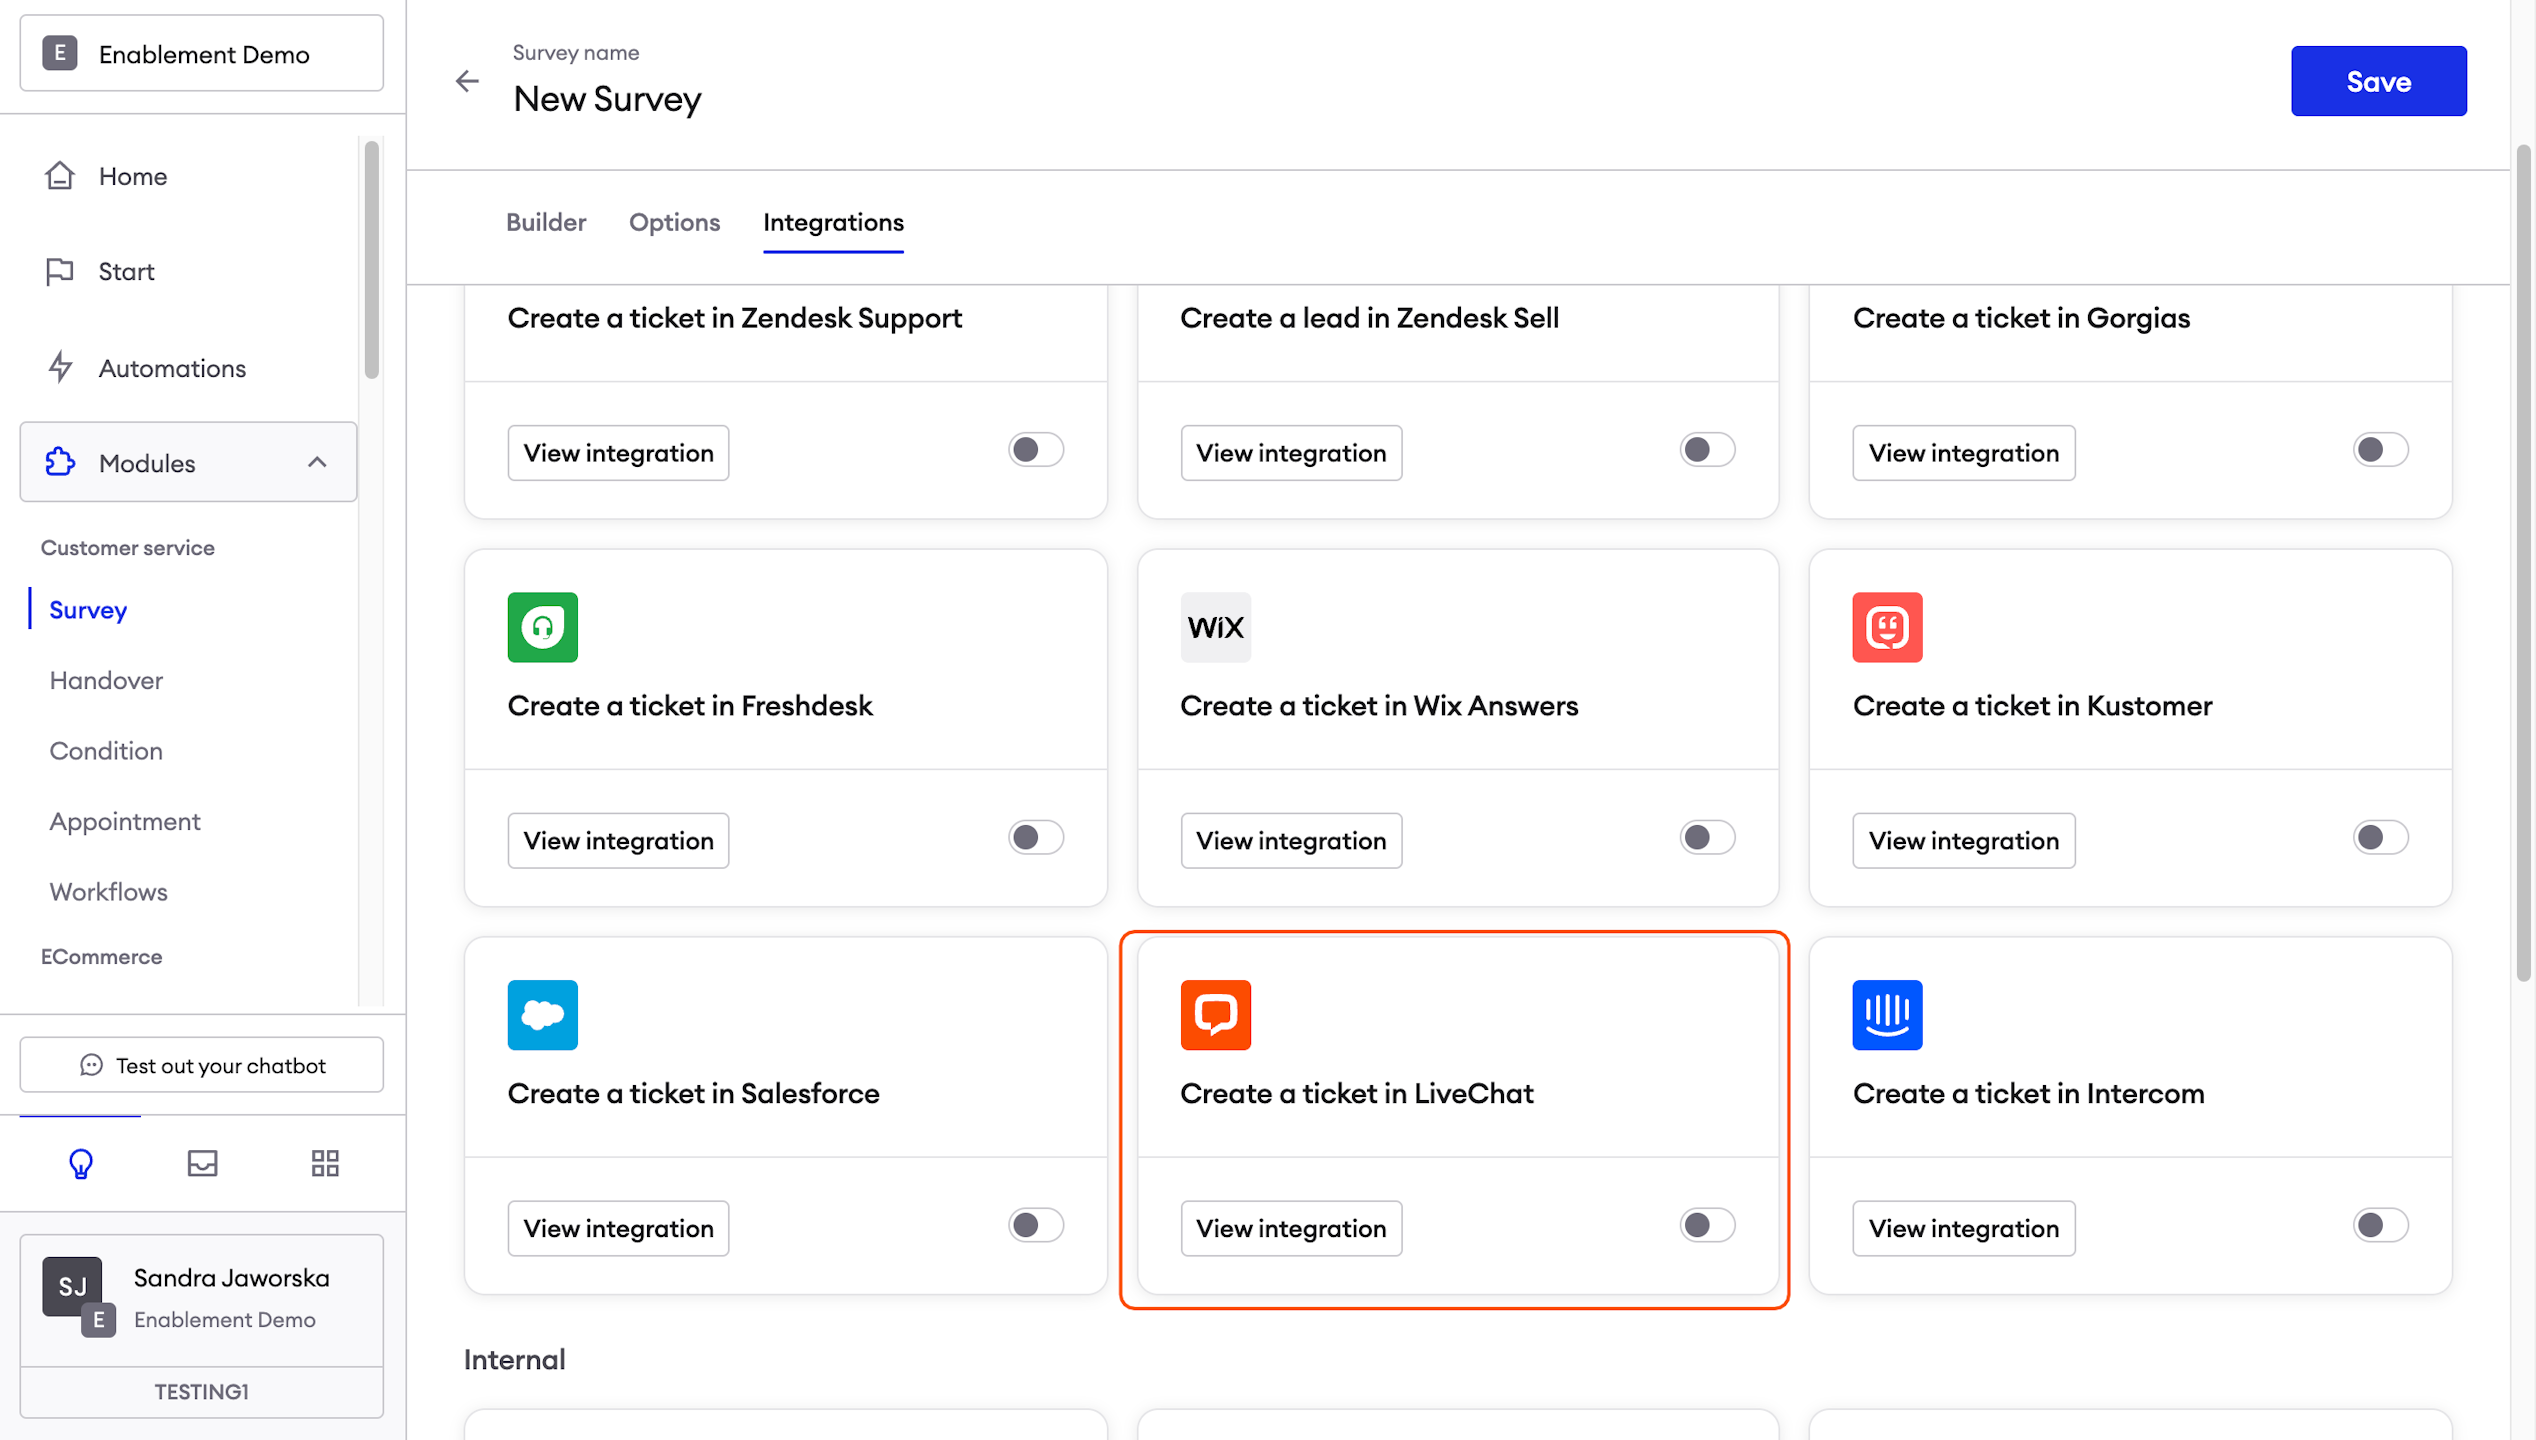
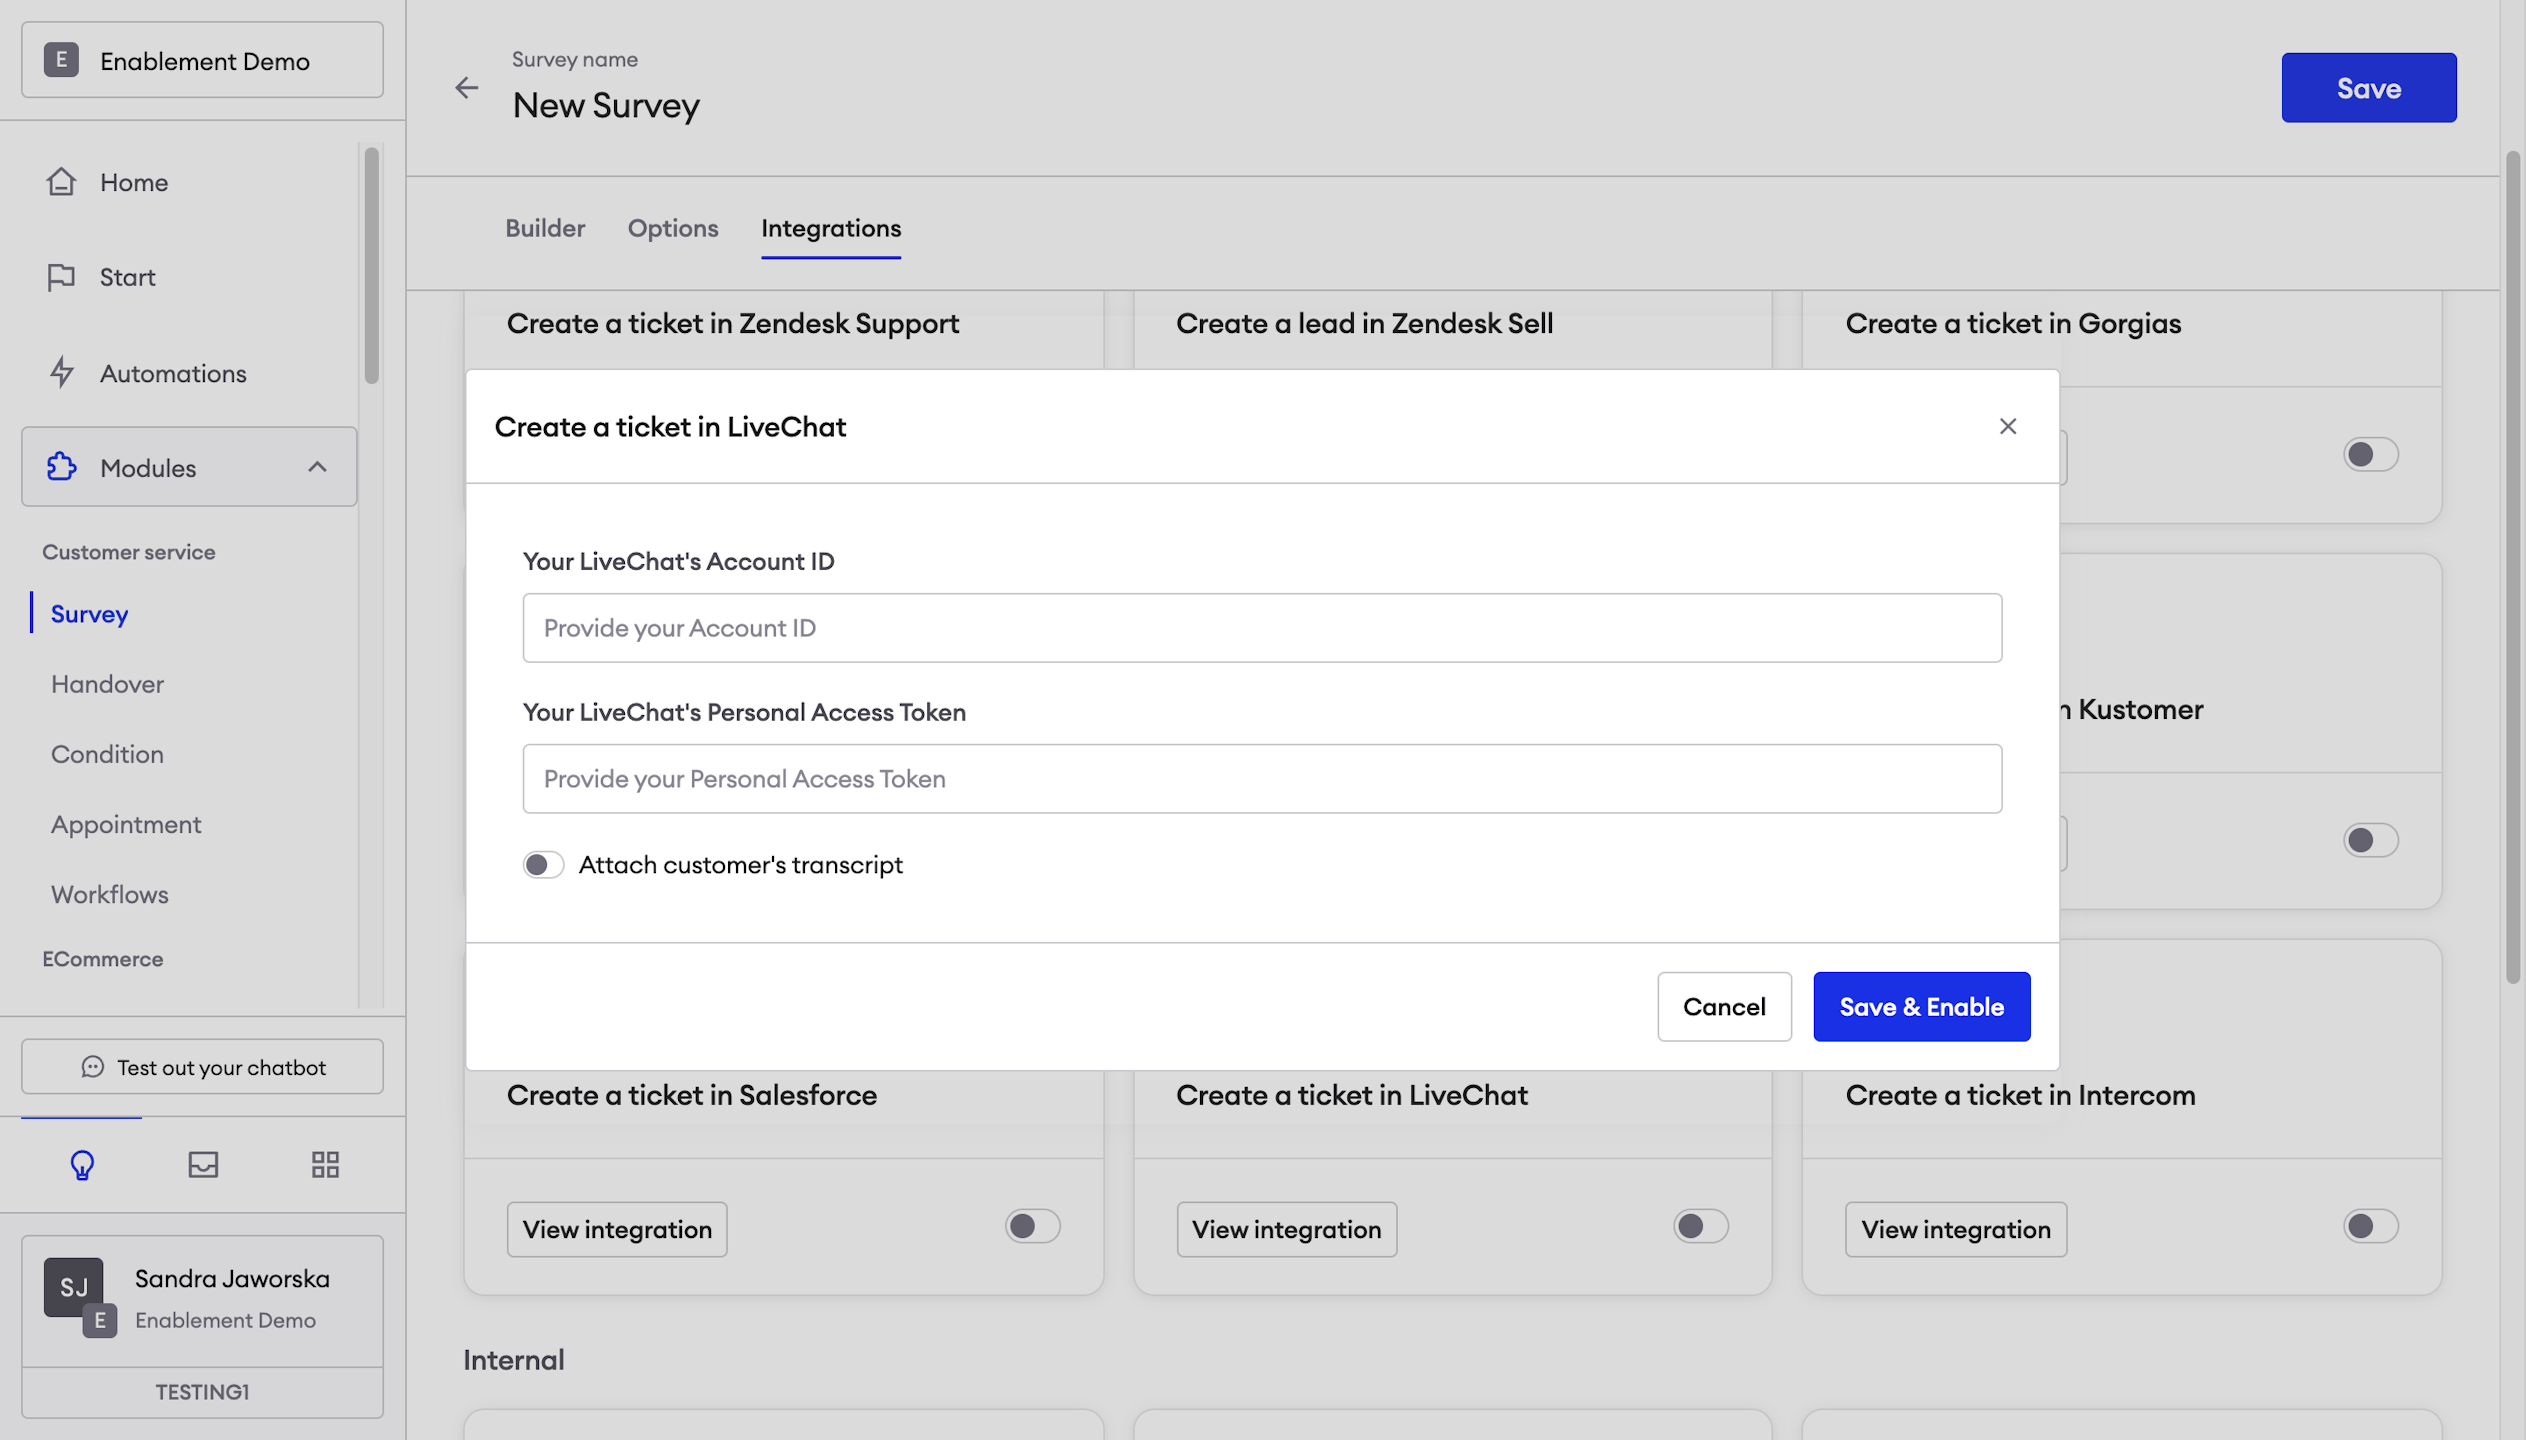
Create a ticket in LiveChat
This creates a ticket on the customer service platform LiveChat, for that the customer needs to provide the following information:
LiveChat`s Account ID
LiveChat`s Personal Access Token
Attach customer's transcript: should be enabled.
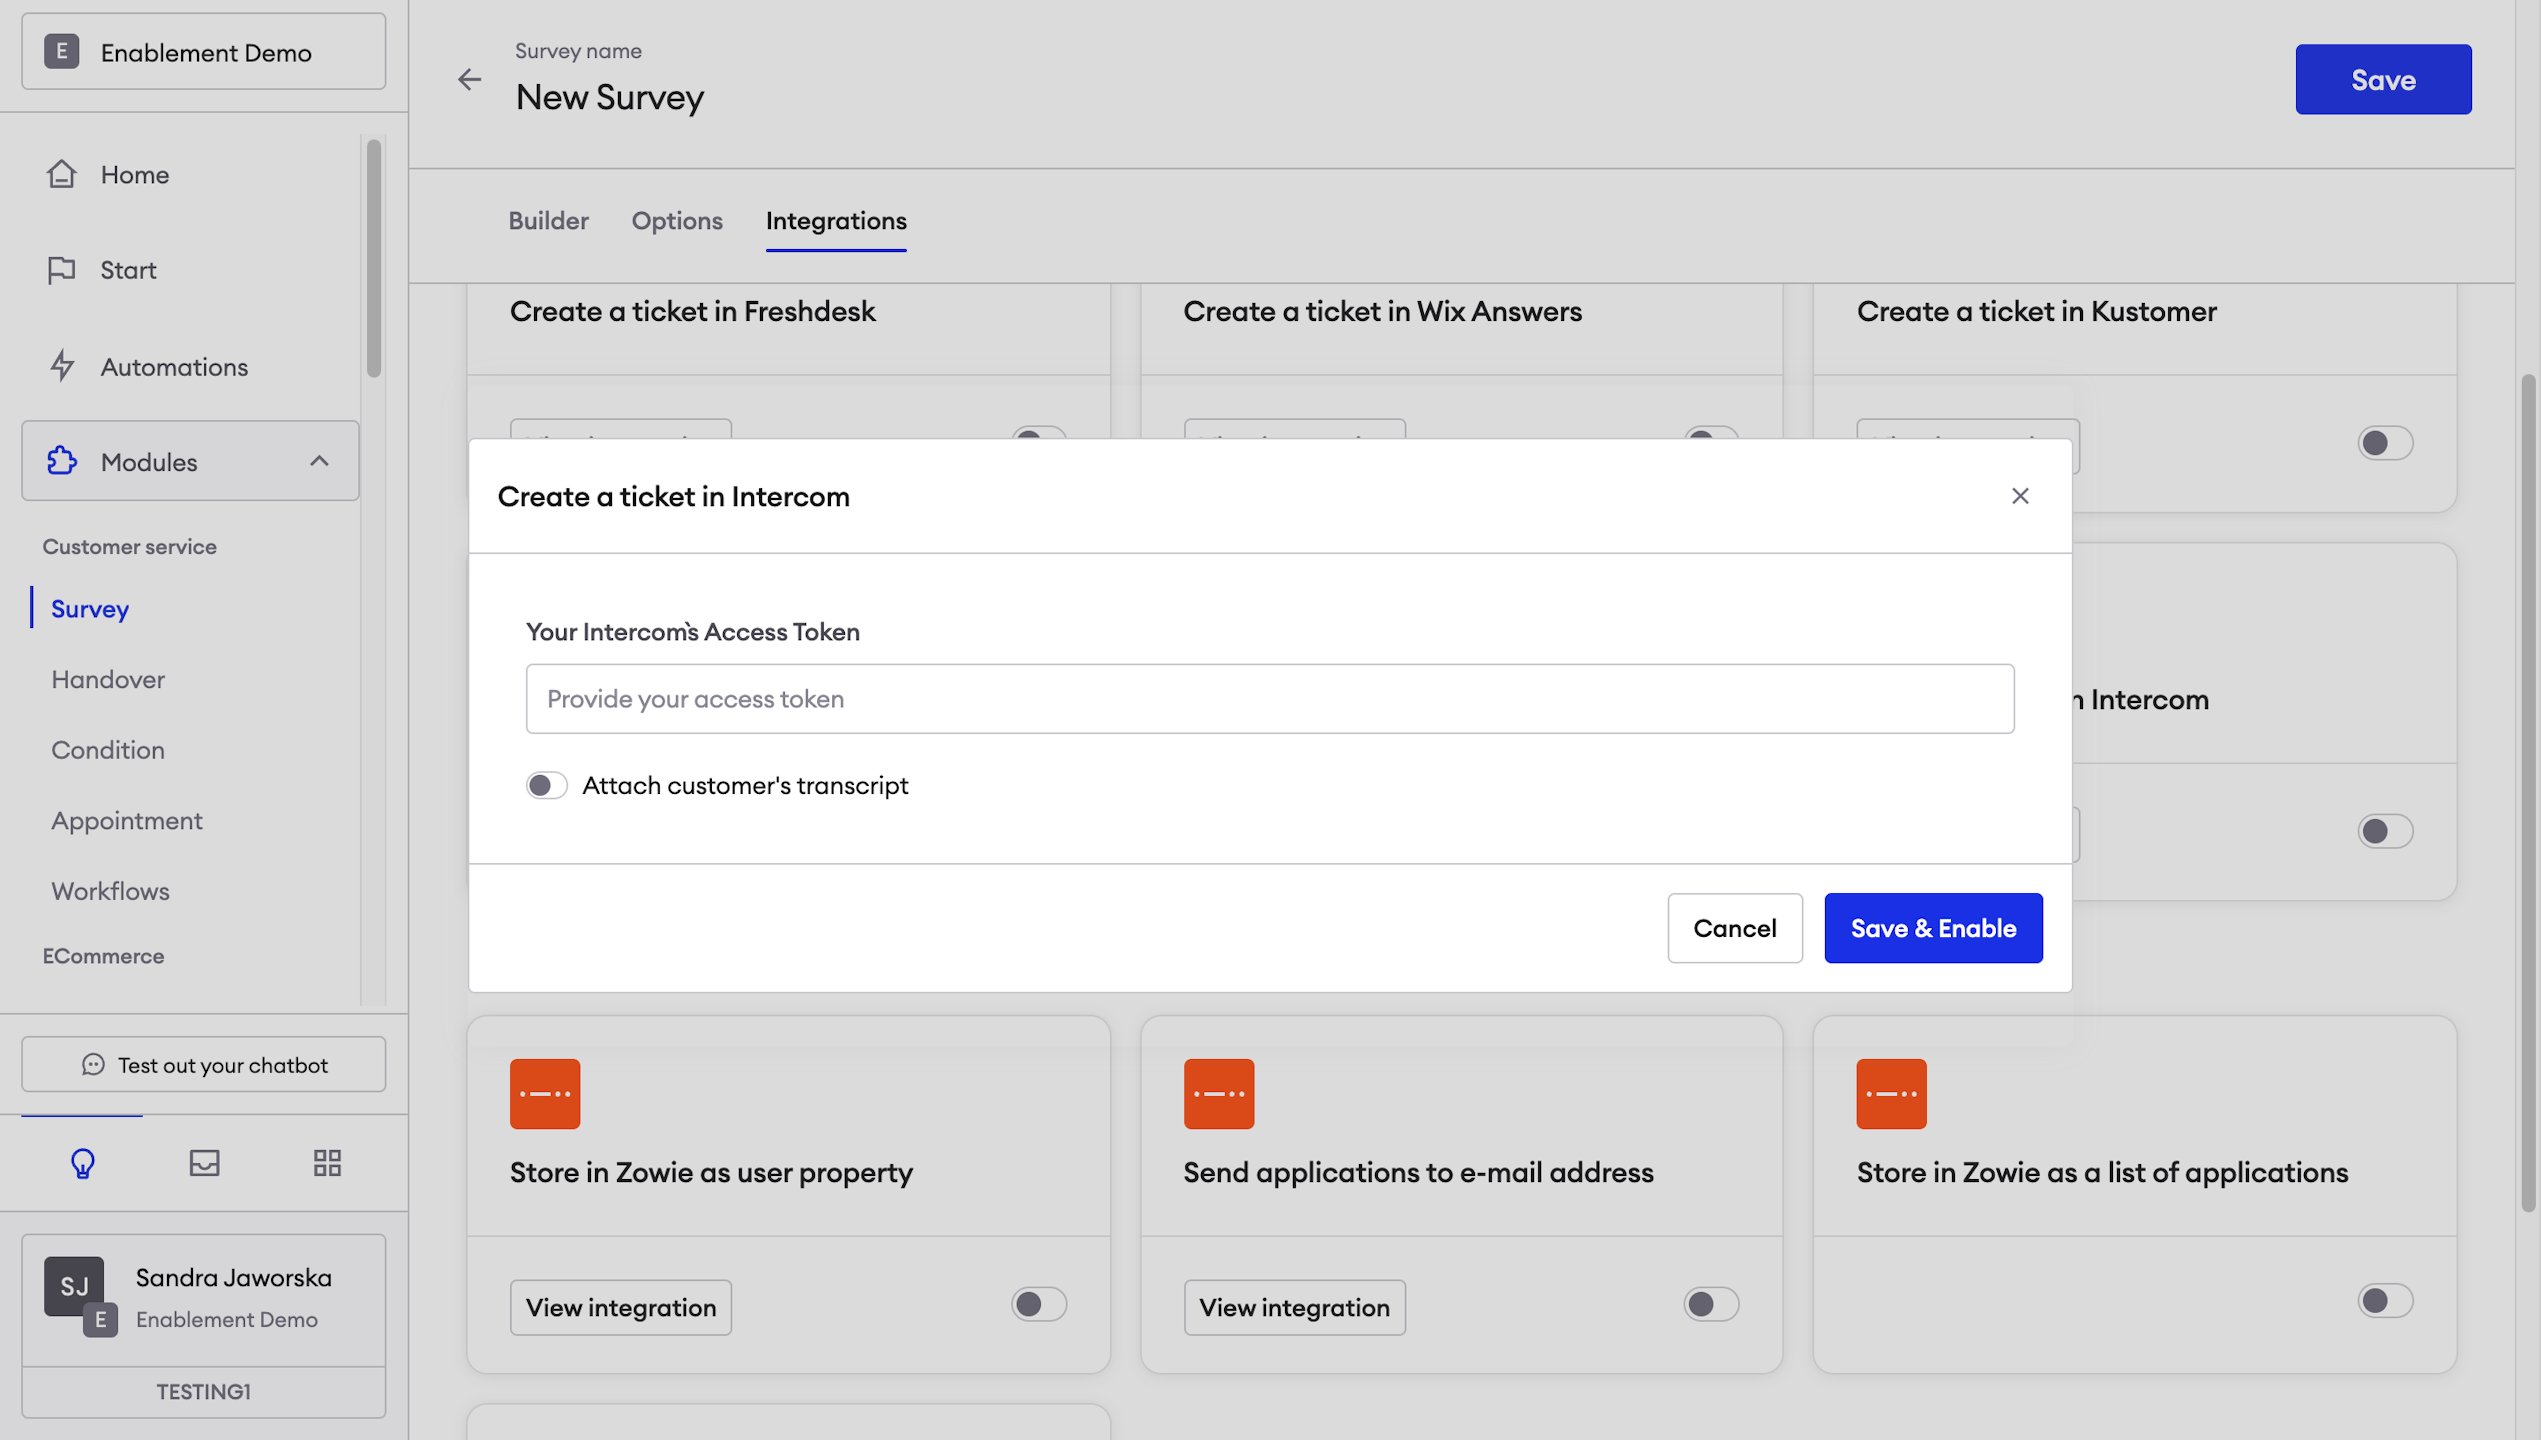
Create a ticket at Intercom
This creates a ticket on the customer service platform Intercom, for that the customer needs to provide the following information:
Intercom`s Access Token
Attach customer's transcript: should be enabled.
Create a ticket at Zowie Inbox
This creates a ticket on Zowie Inbox, for that no action from the customer is required more than filling each field with the desired data:
Ticket title: Name for the tickets created throught this survey
Ticket prefix: Based on the name you can add a prefix
Mode: You can select between Simple and Approval Flow modes
Queue alias at Zowie Inbox: you can link this ticket to a certain queue using the alias of that queue.
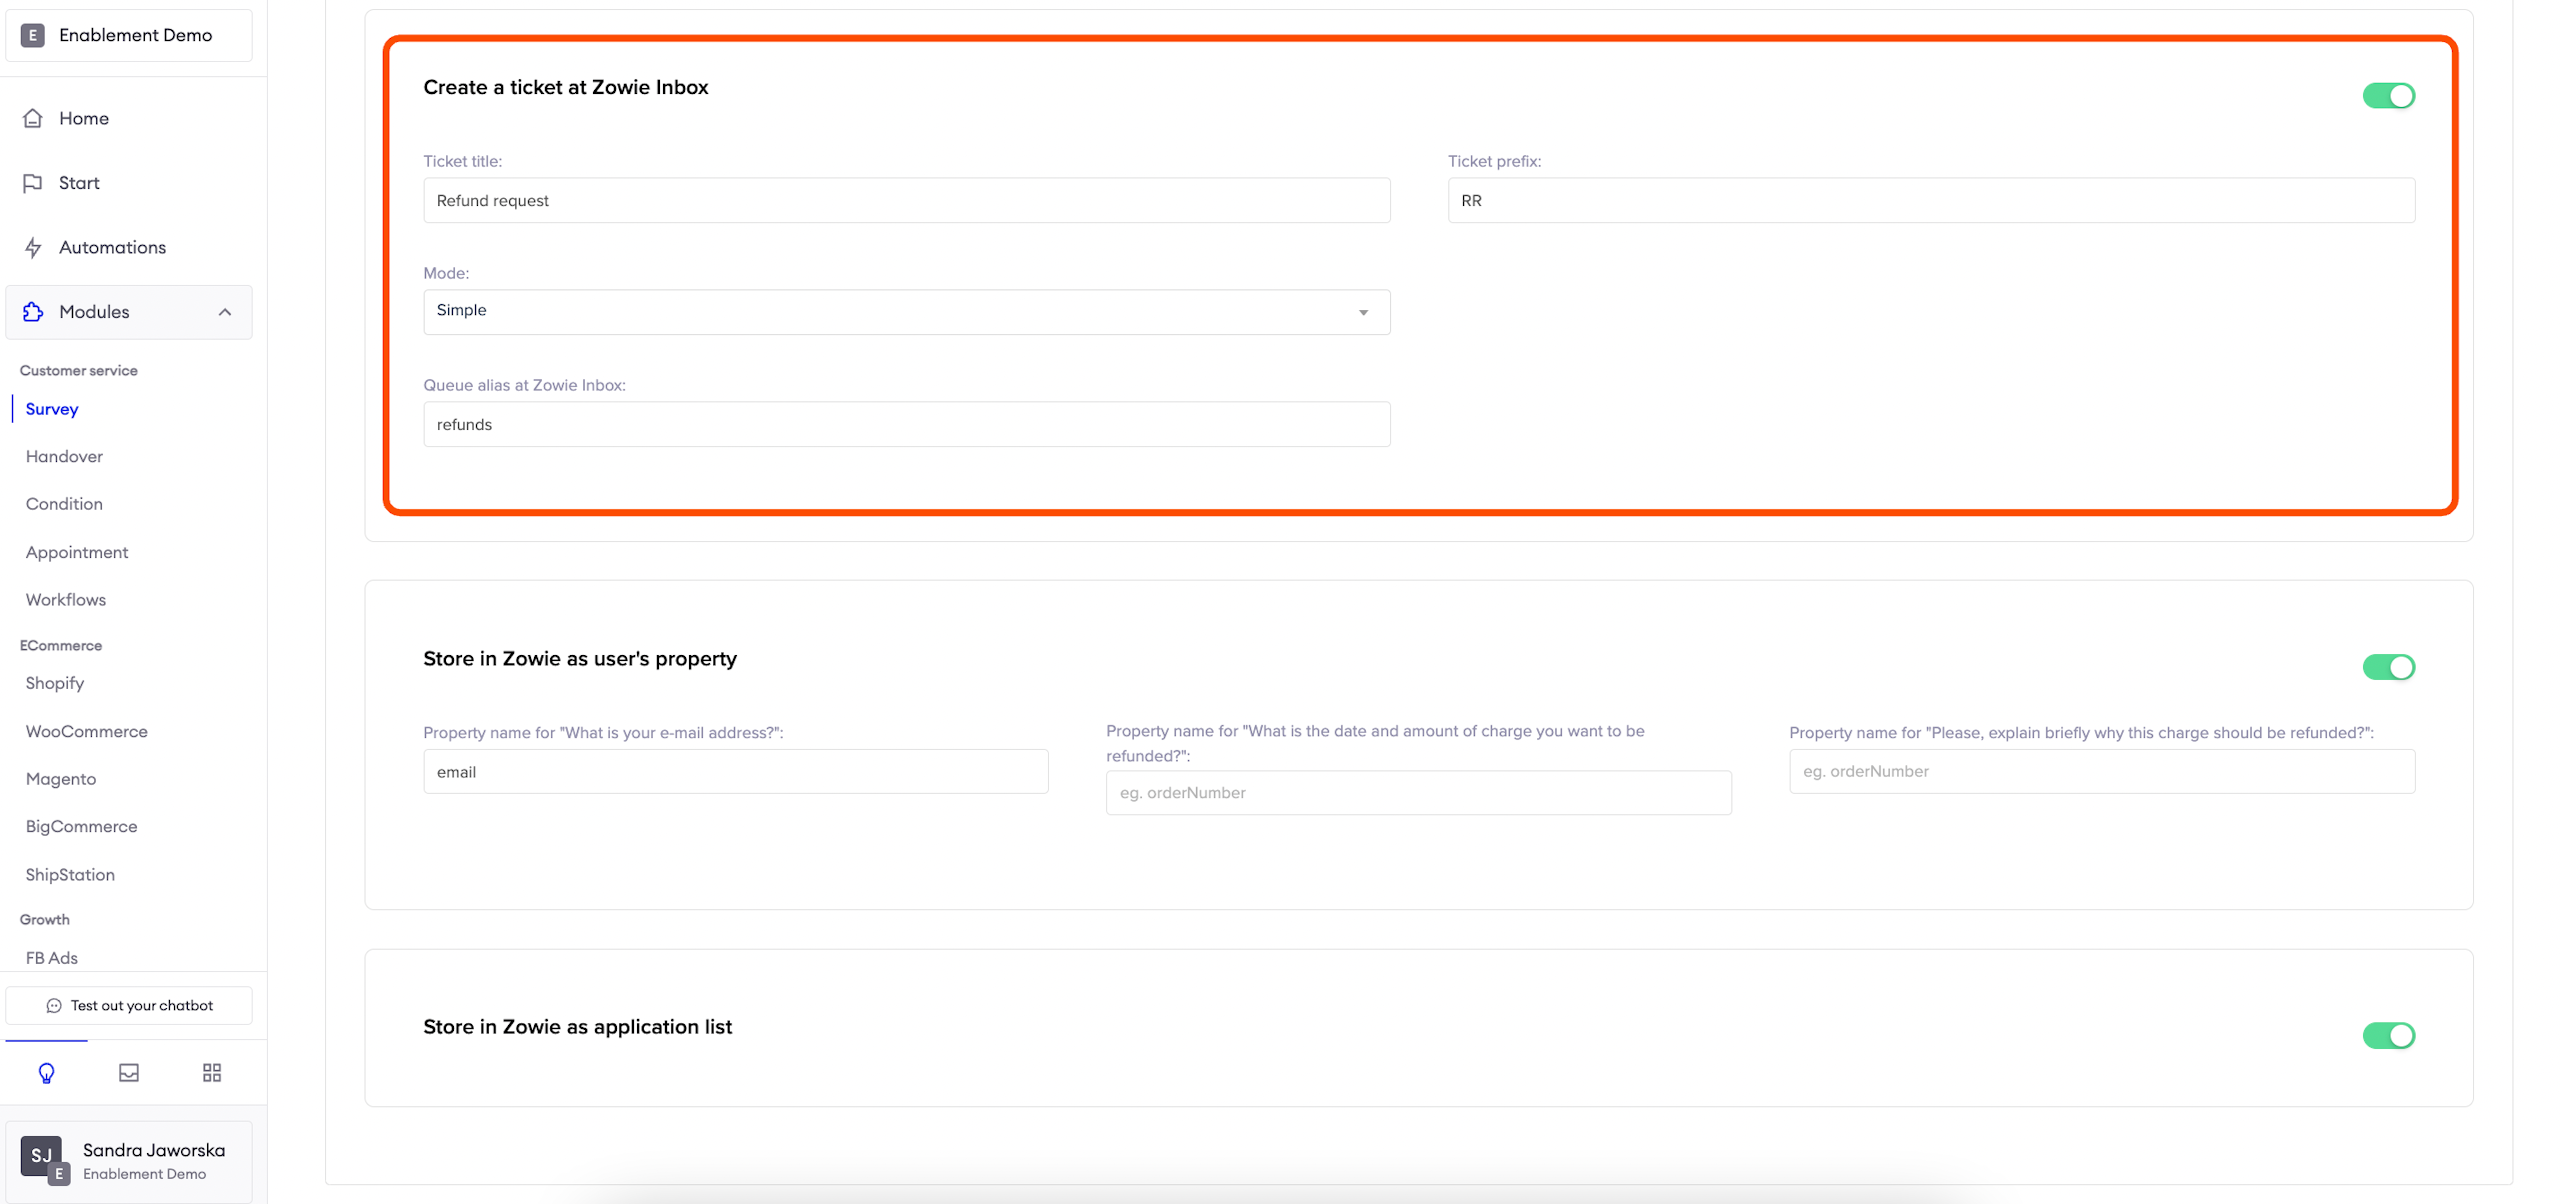
Store in Zowie as user's property
Based on the questions your survey has and using the correct user’s property name we can store these values on each field designed for them within Zowie Inbox insights.
Most common ones to be stored:
Name (use property “firstName”)
Email (use property “email”)
Phone Number (use property“phoneNumber”)
Order Number (use property “orderNumber”)
Store in Zowie as application list
Adds and "applications" button to a list view, and we're storing the answers on the Zowie platform.