Automation
What is an Automation?
Automations are the core functionality of Zowie that allows for automating answers to frequently asked questions. Each automation represents a question or topic that your customers will be able to access when chatting with your bot.
Each automation can trigger written answers or other automated modules to provide effective support.
Why use Automation?
Your automations make up Zowie's Knowledge Base, which together with recommendations becomes the self-learning tool that understands and responds to questions your customers are asking.
Ultimately, the quality of each automation and the breadth of automations added to your Knowledge Base will help you deflect as many support inquiries as possible.
How to access Automations
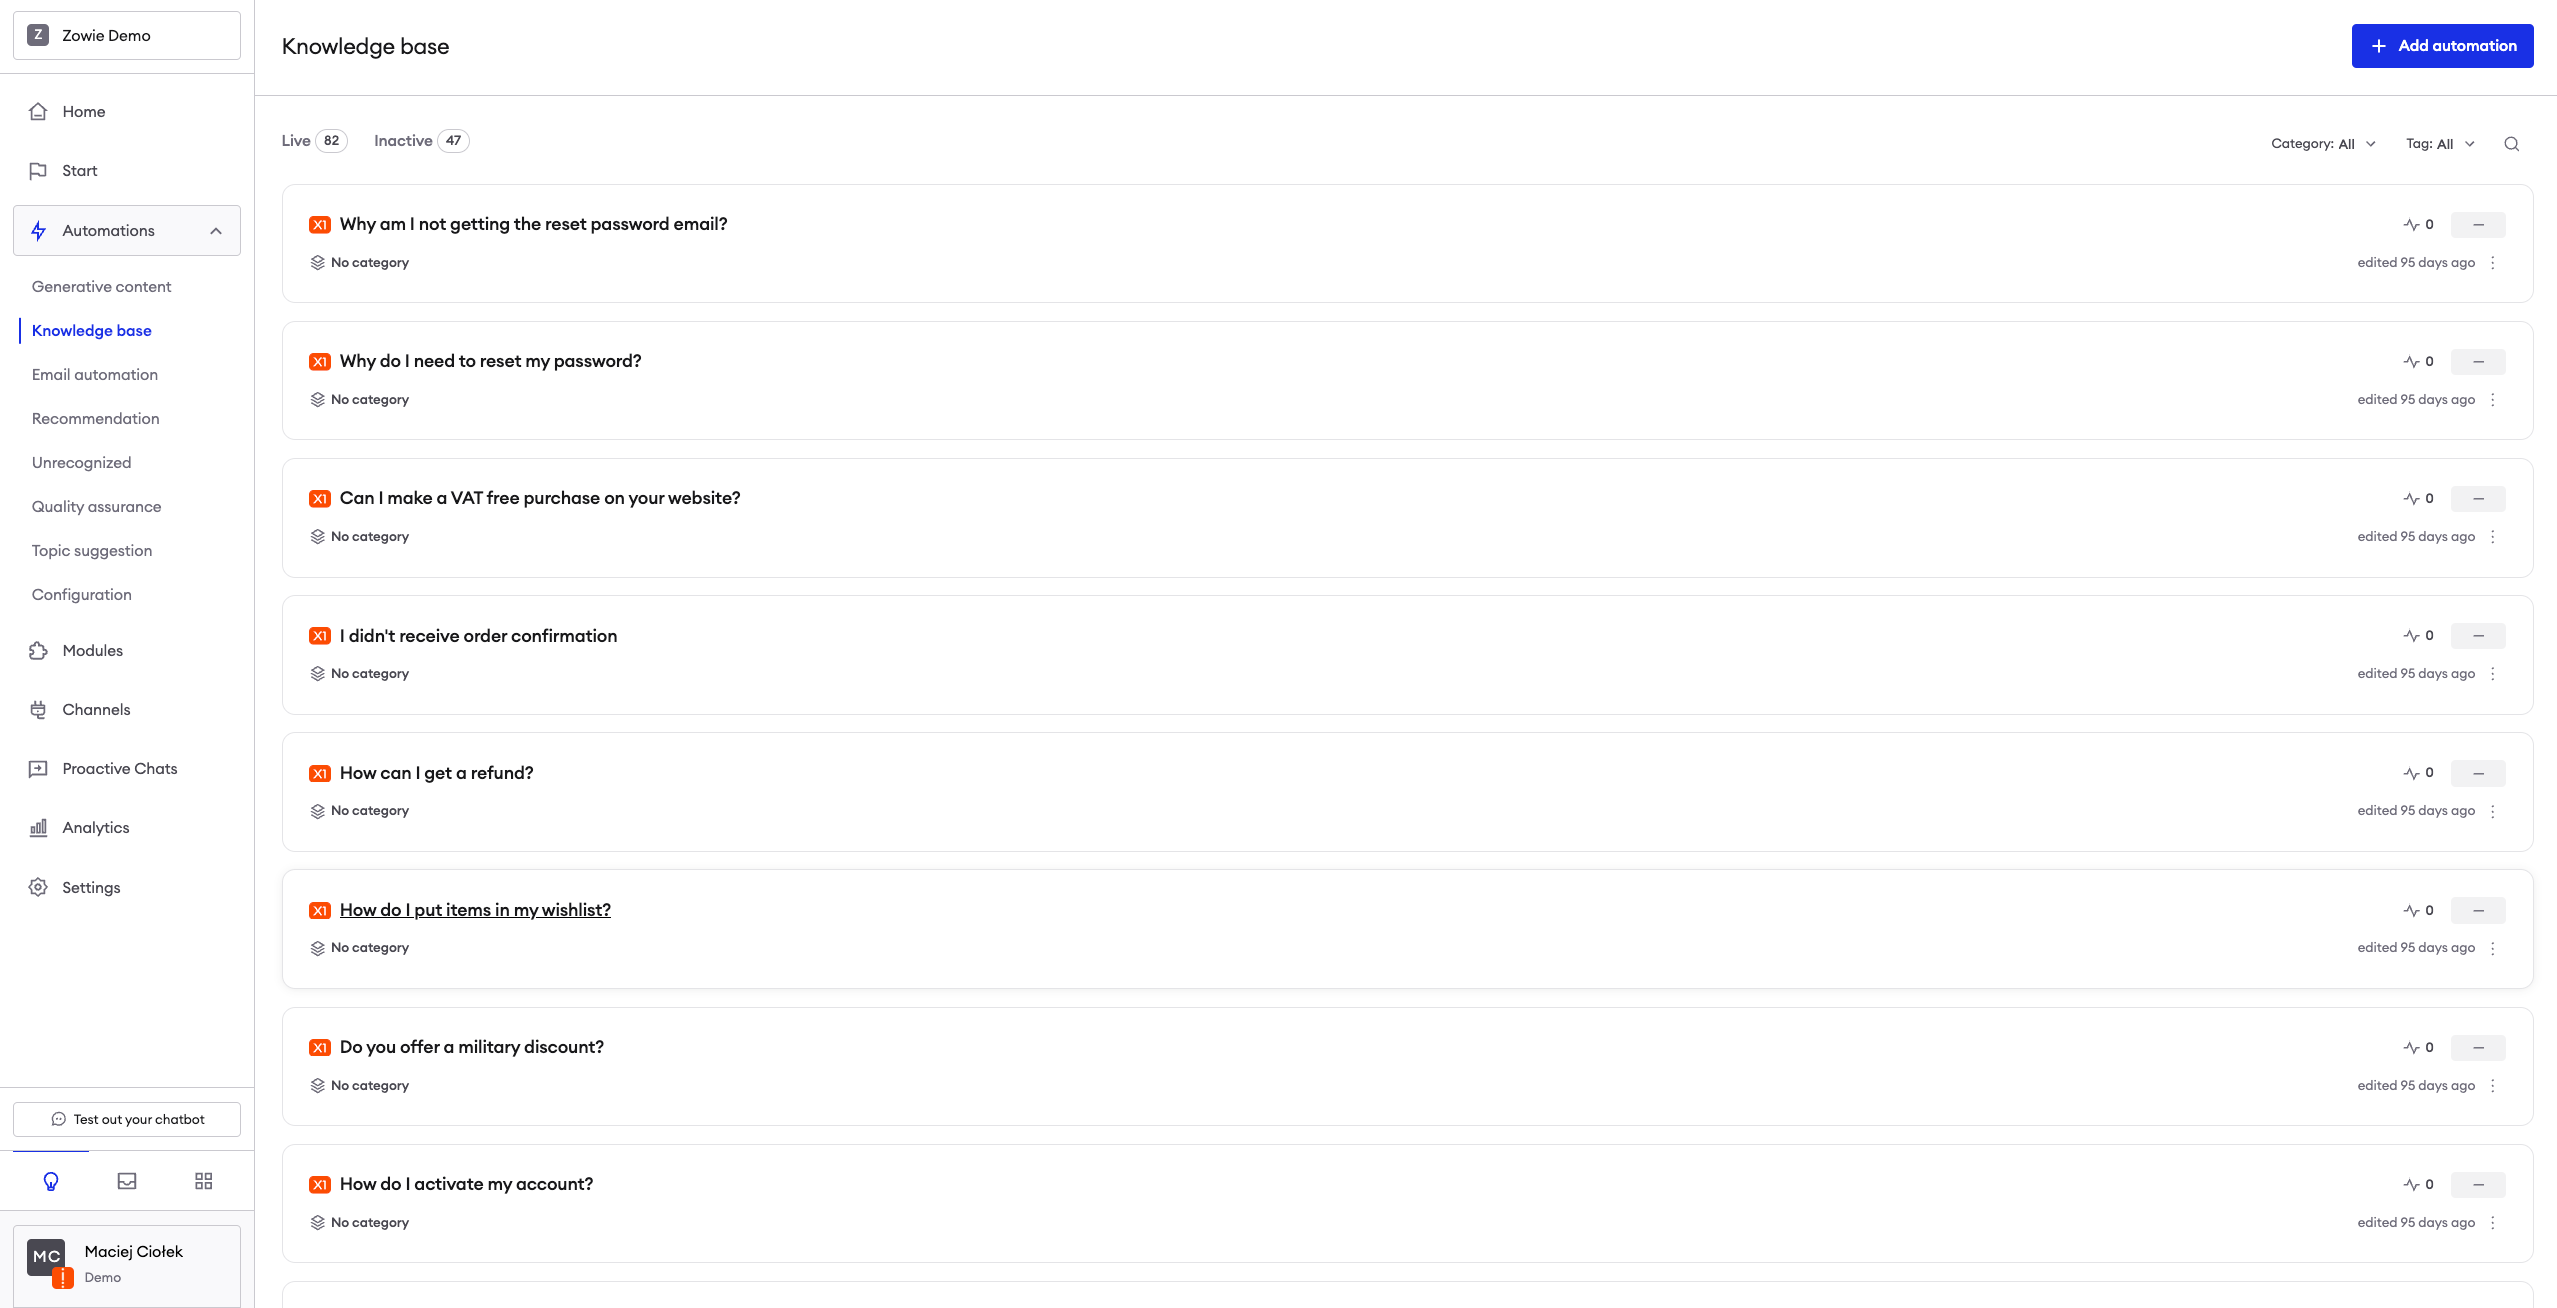
To access the Automations section, navigate to Automations > Knowledge Base.
Creating an Automation
By clicking the "Add automation" button you will open an editor that allows you to create a new Automation.

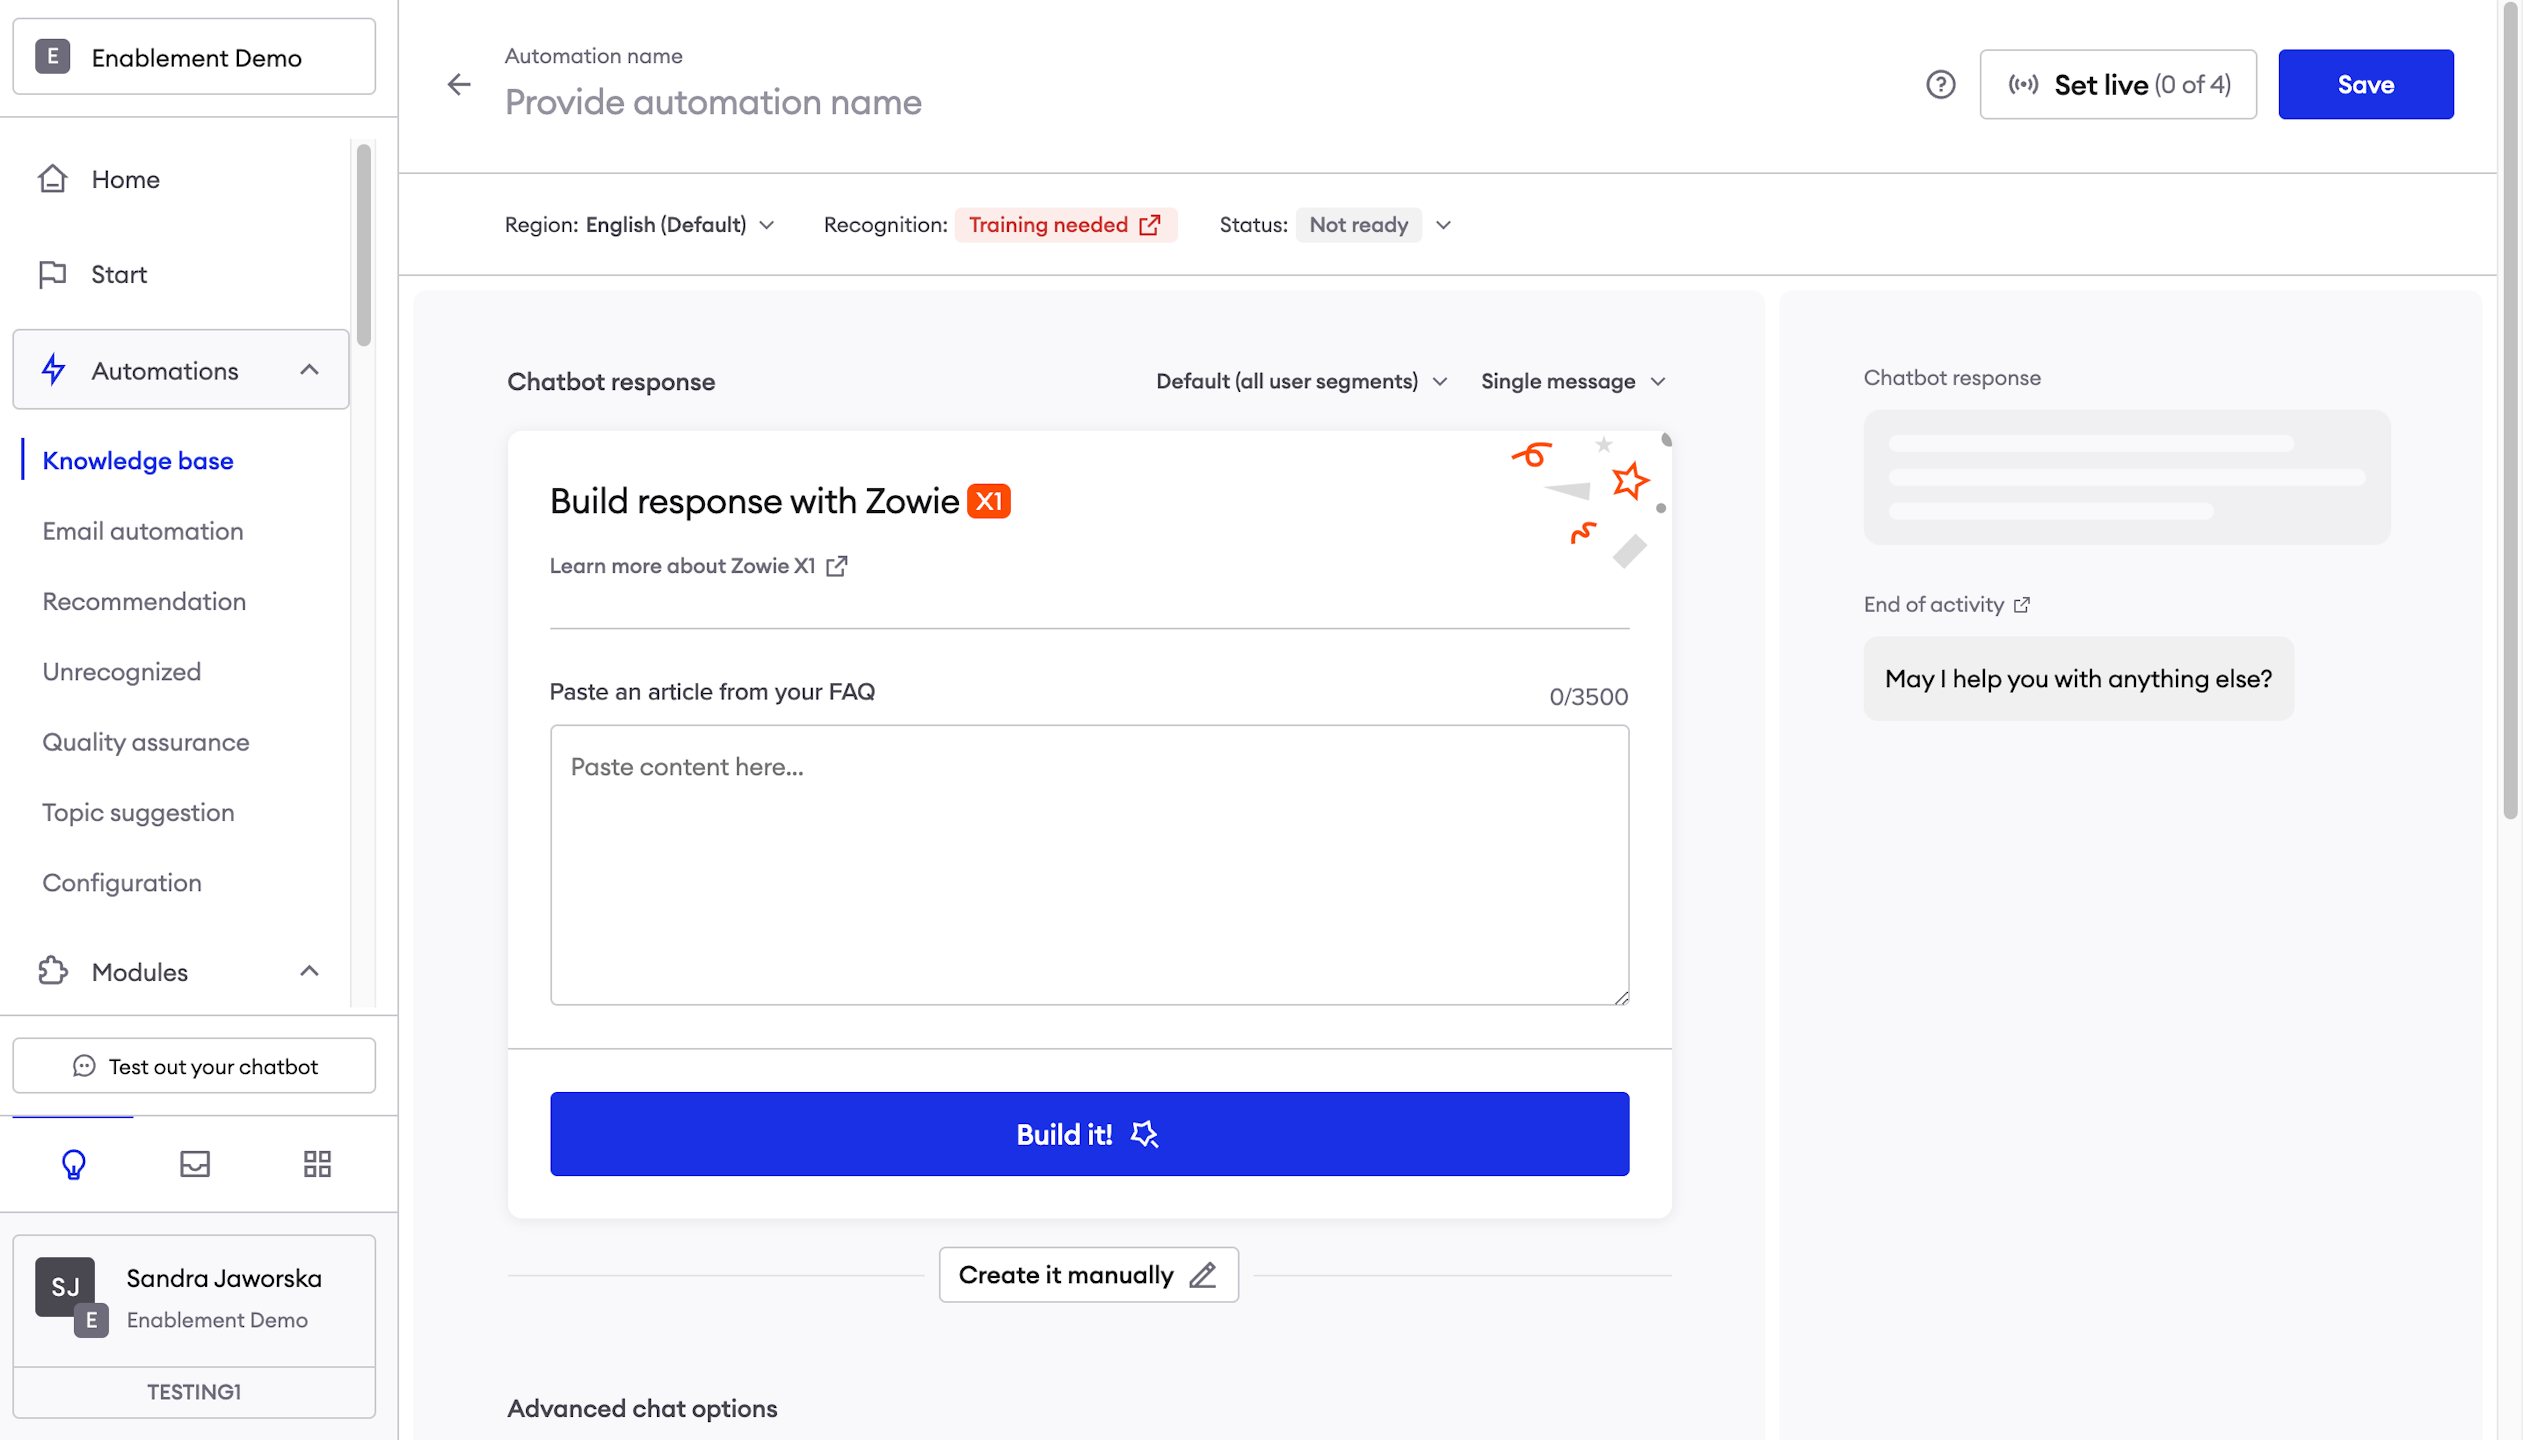
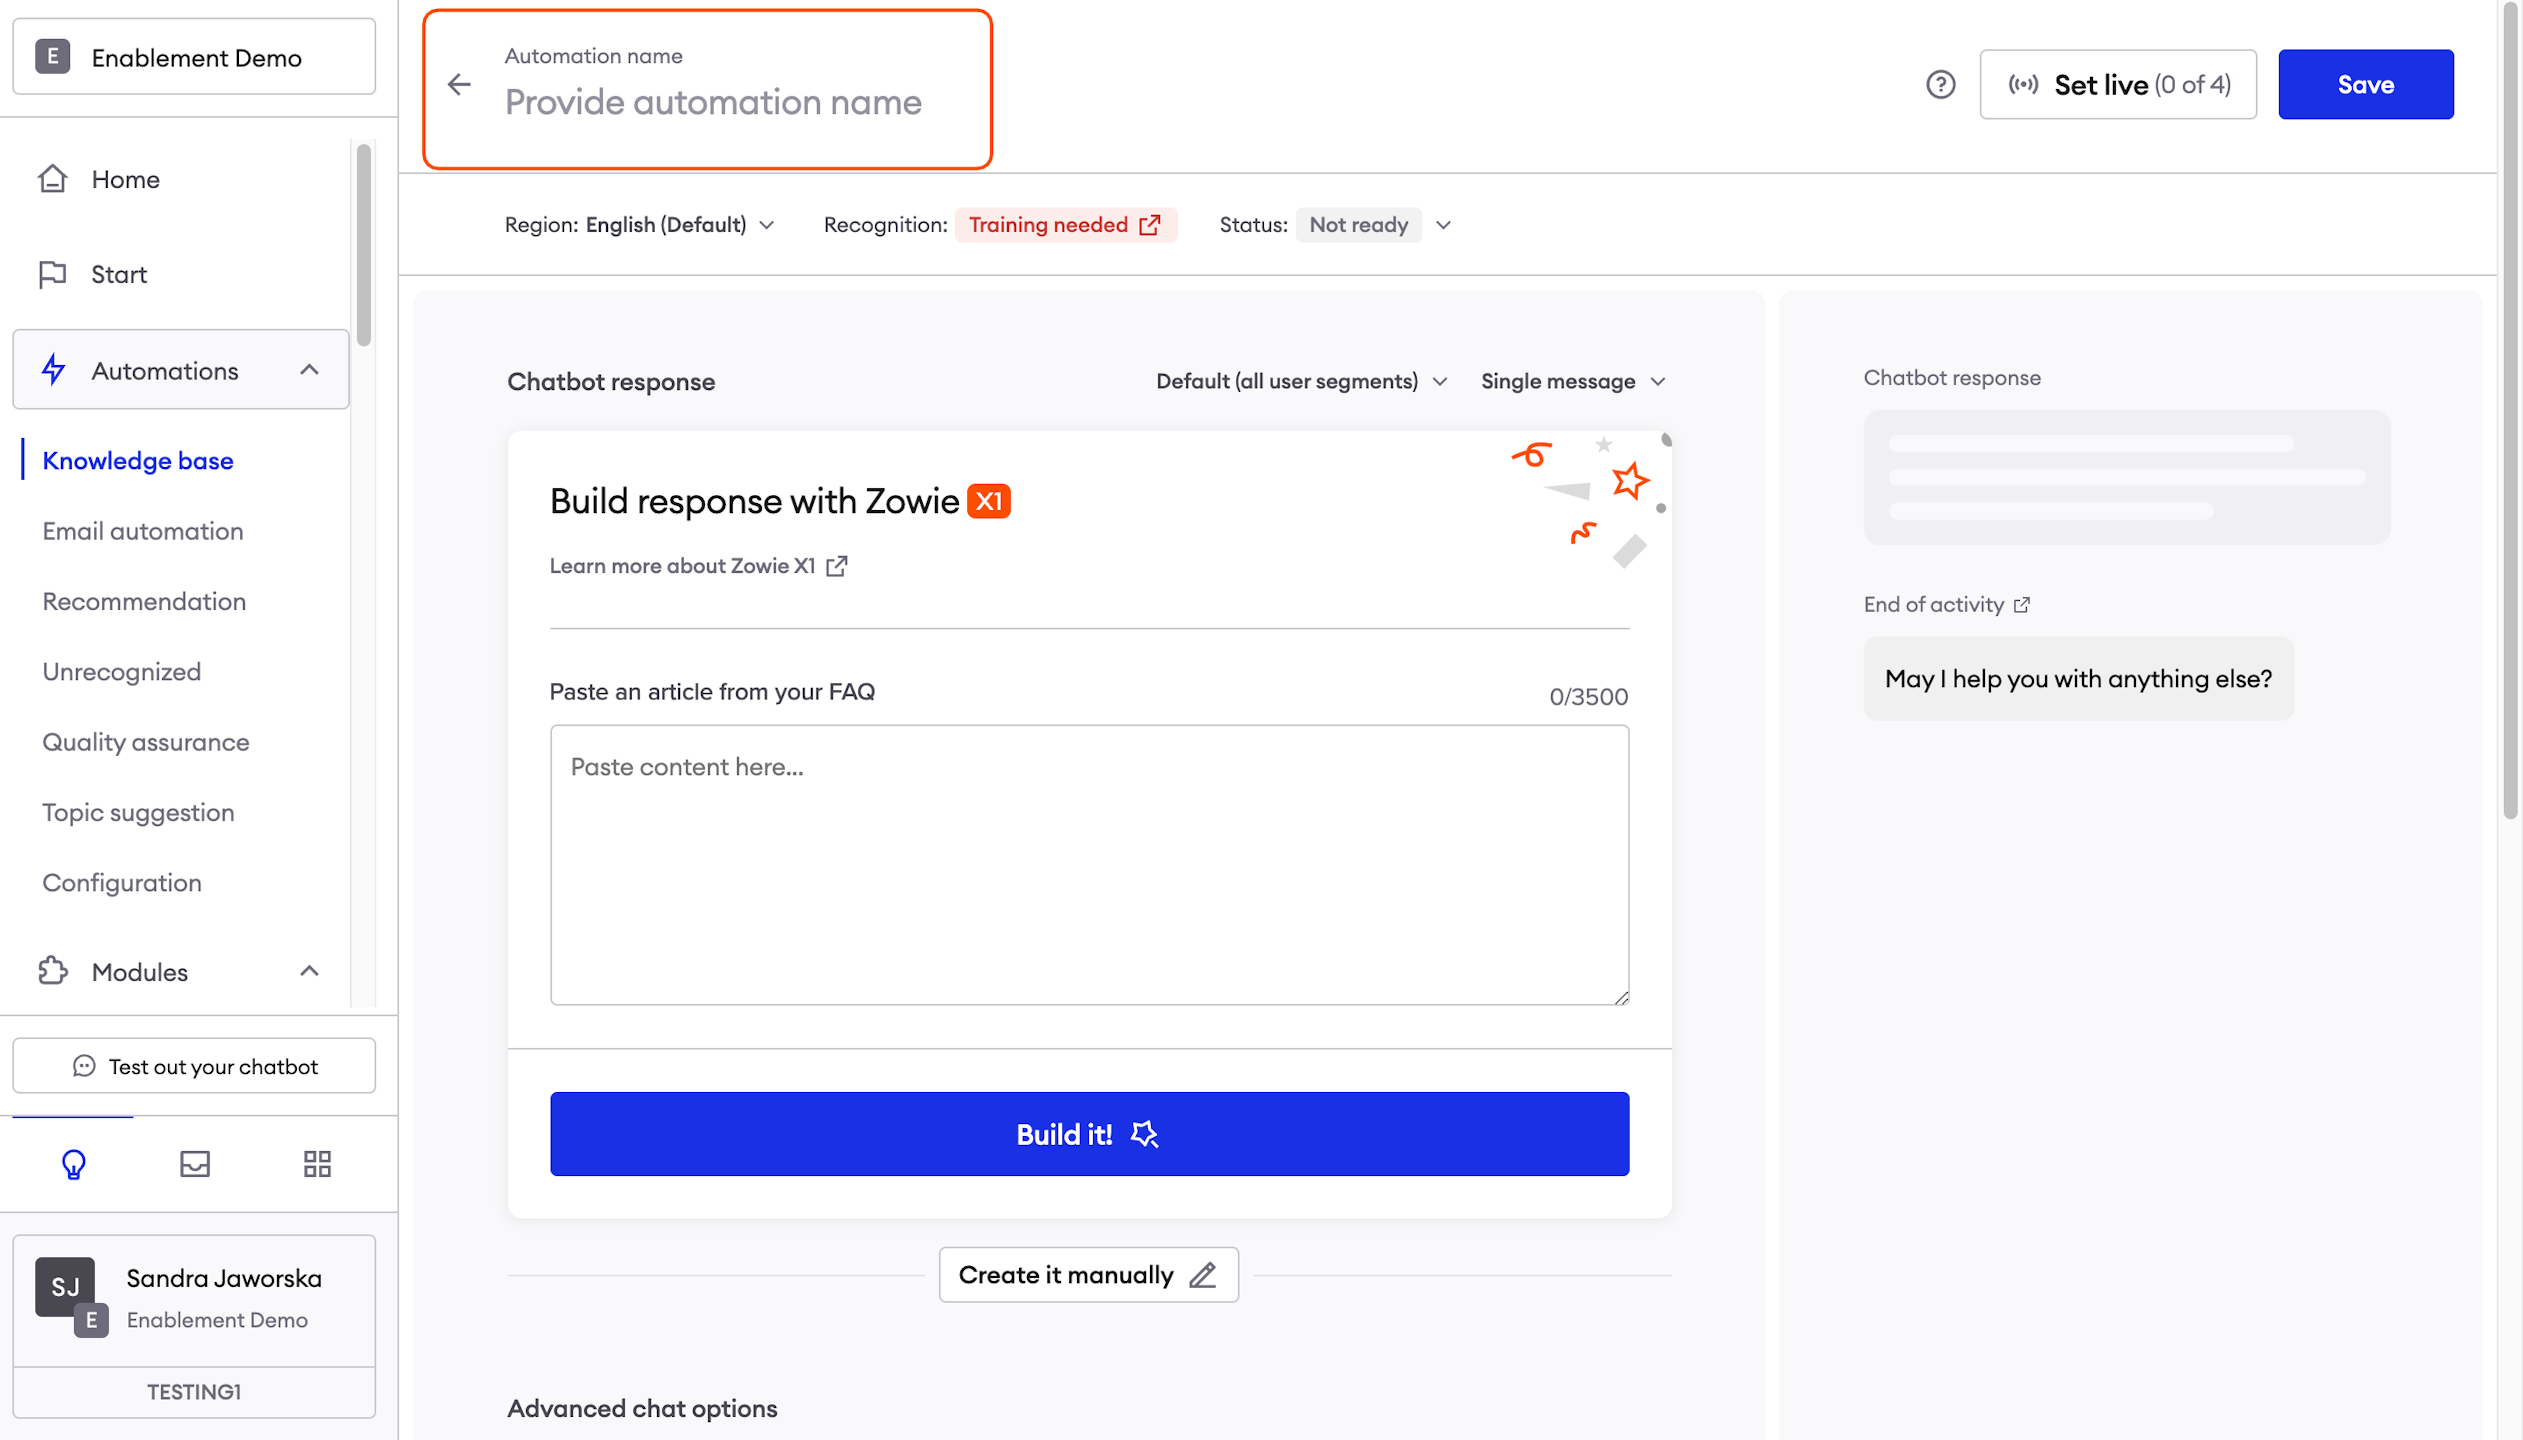
Adding name
Start with entering the title of your Automation at the top of the page. The best practice is to form a question instead of using an affirmative sentence.
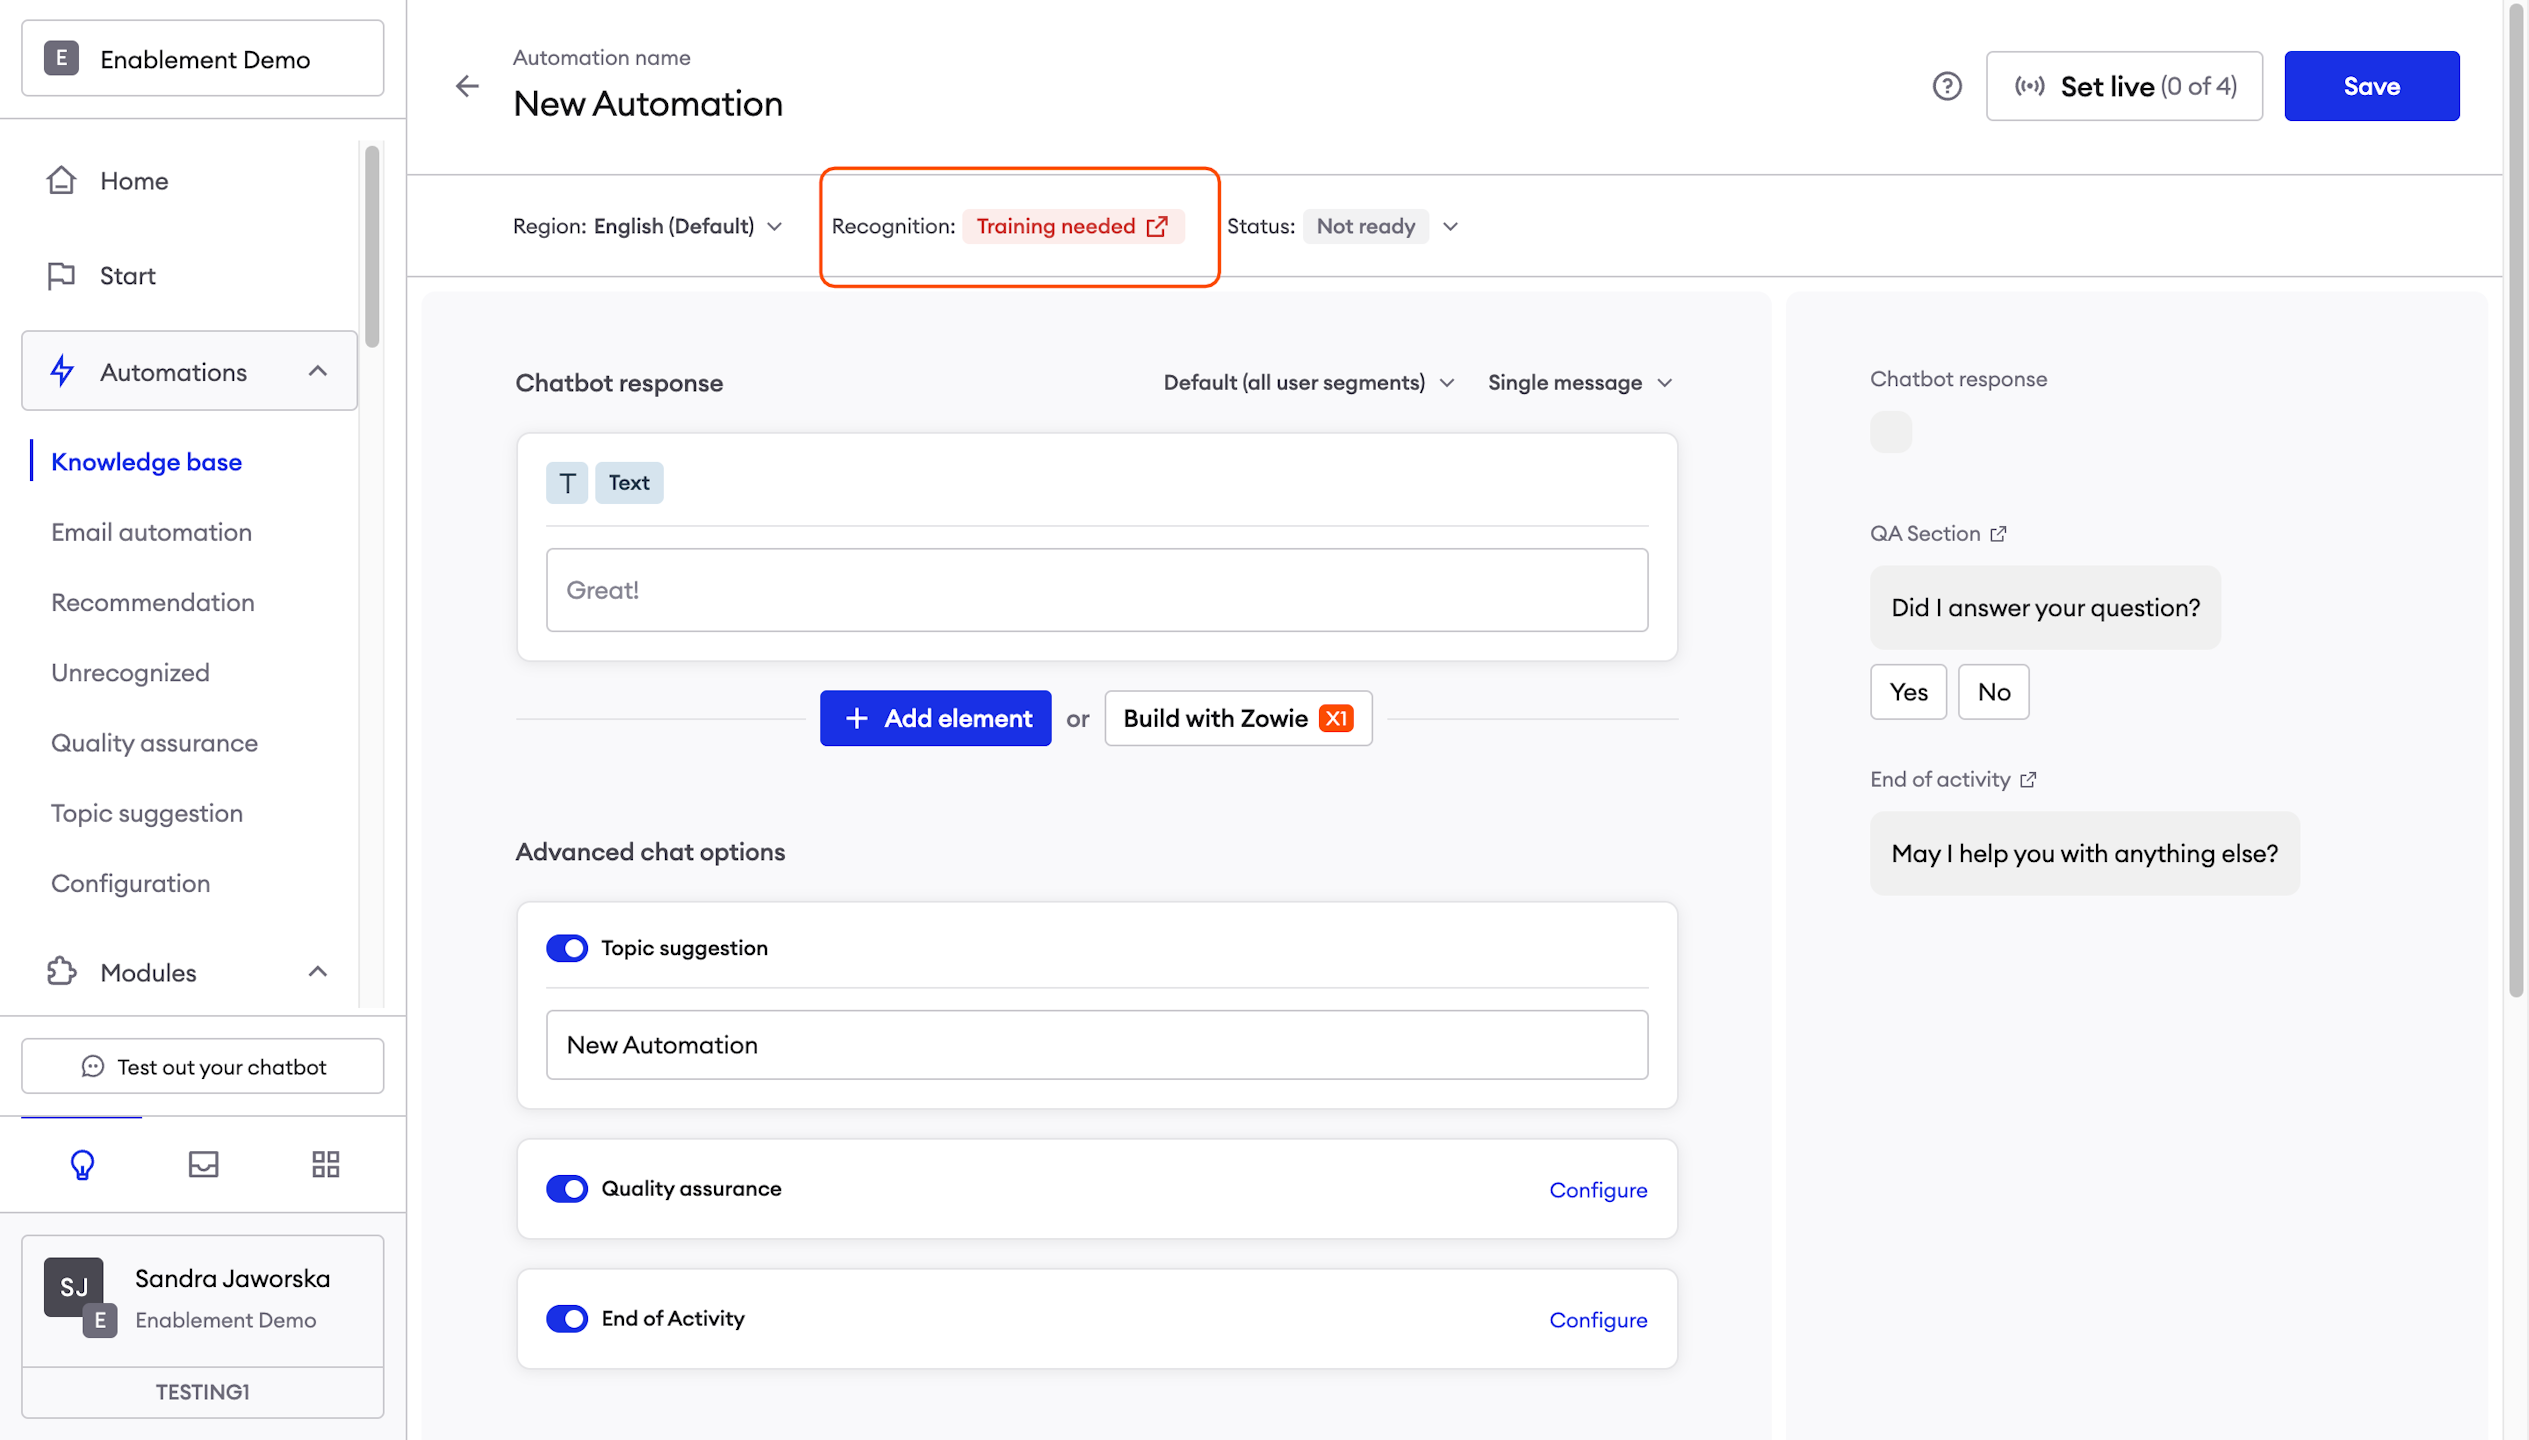
Providing Automation details
Choose one of the above answer types:
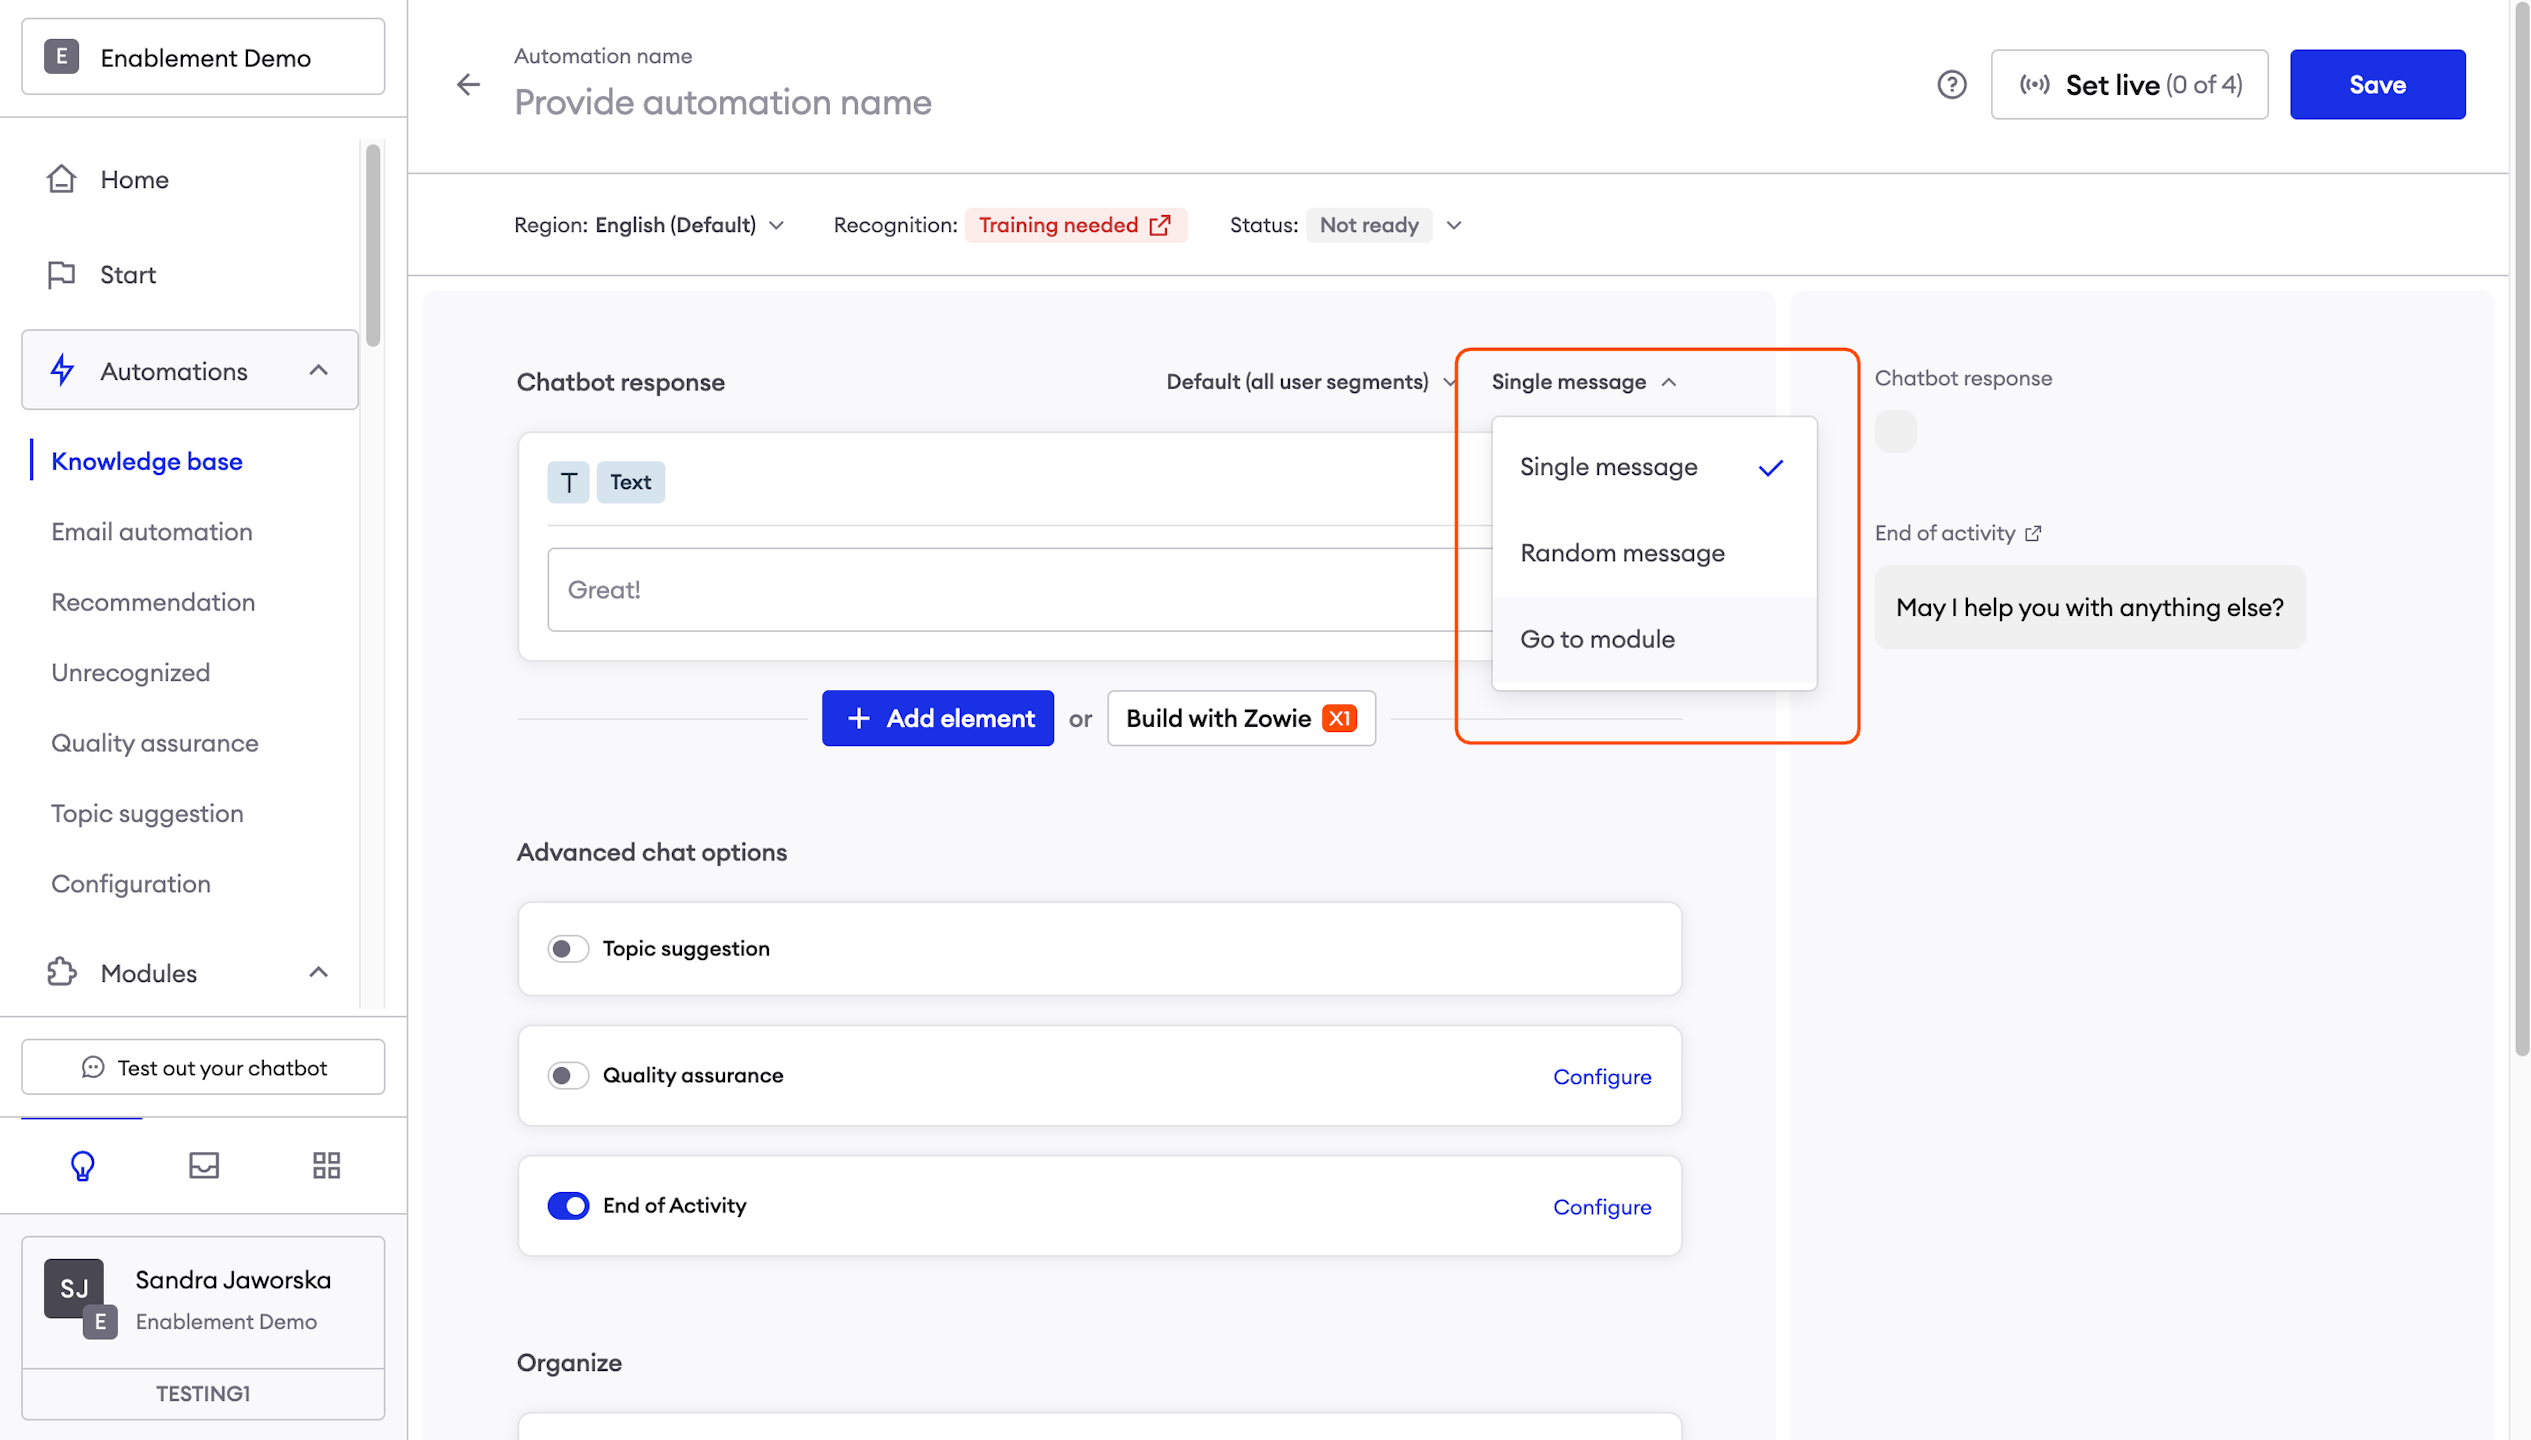
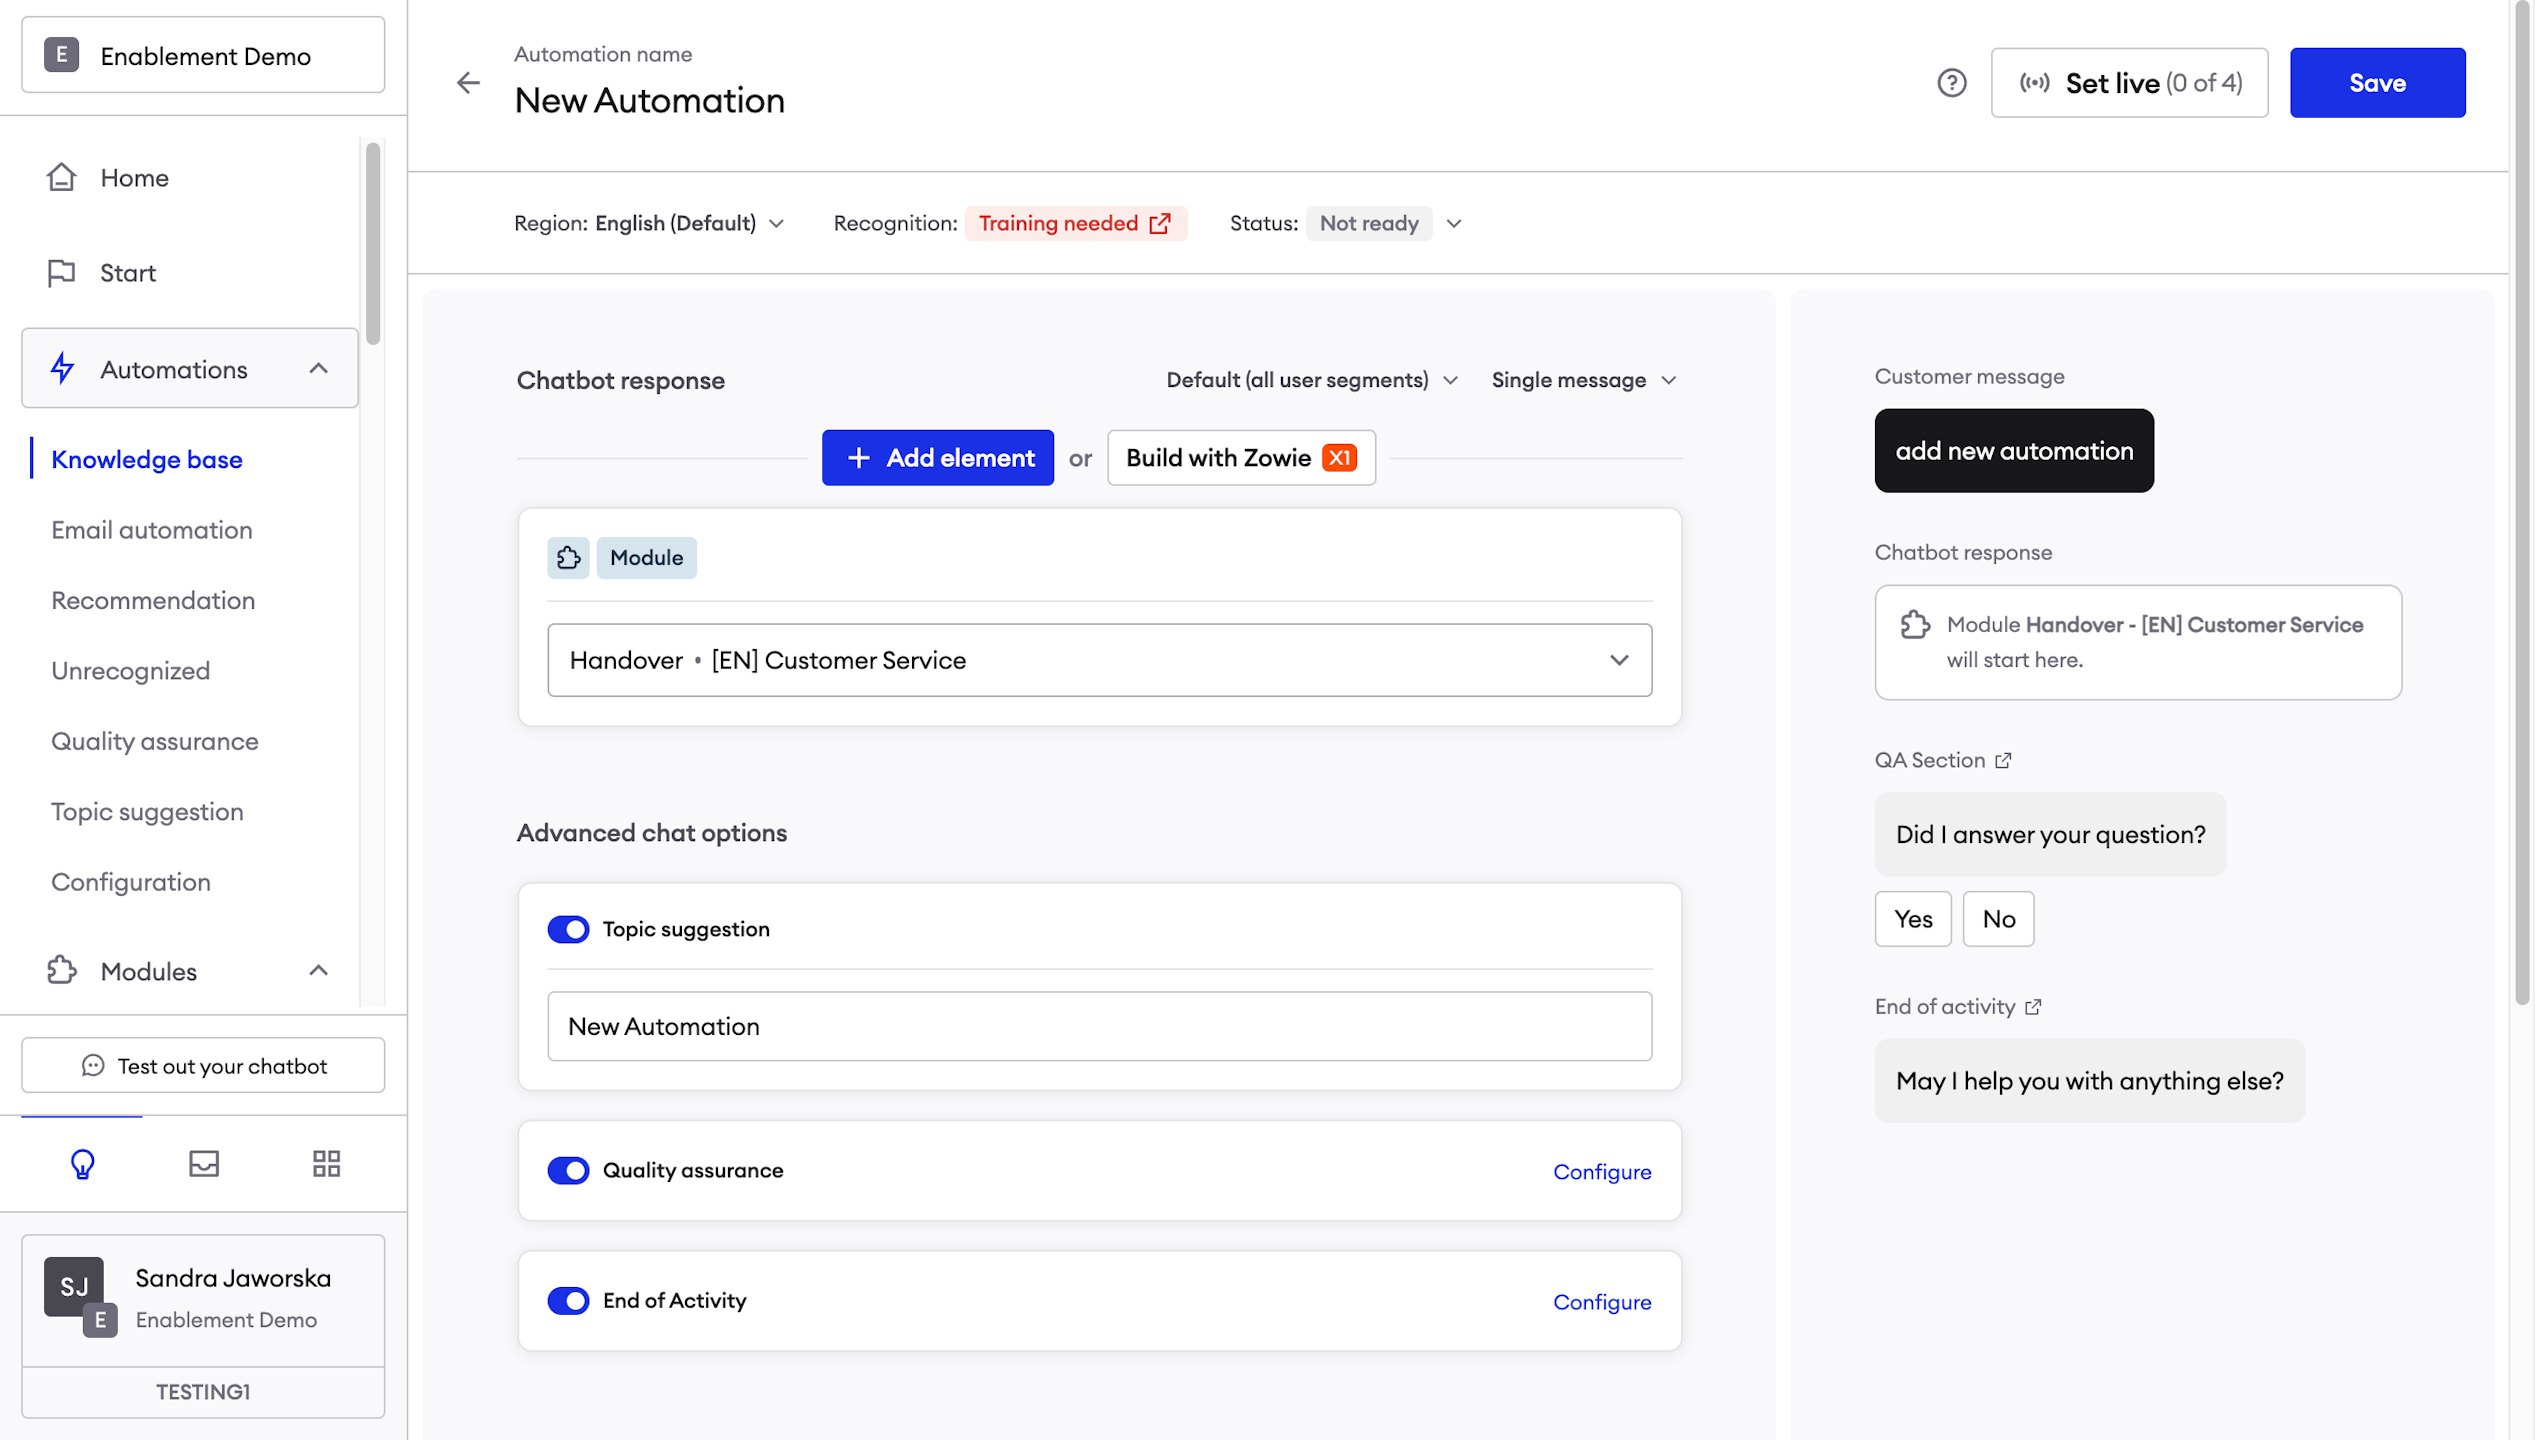
_Go to module: _by choosing this type, you can connect an answer directly with a Module.
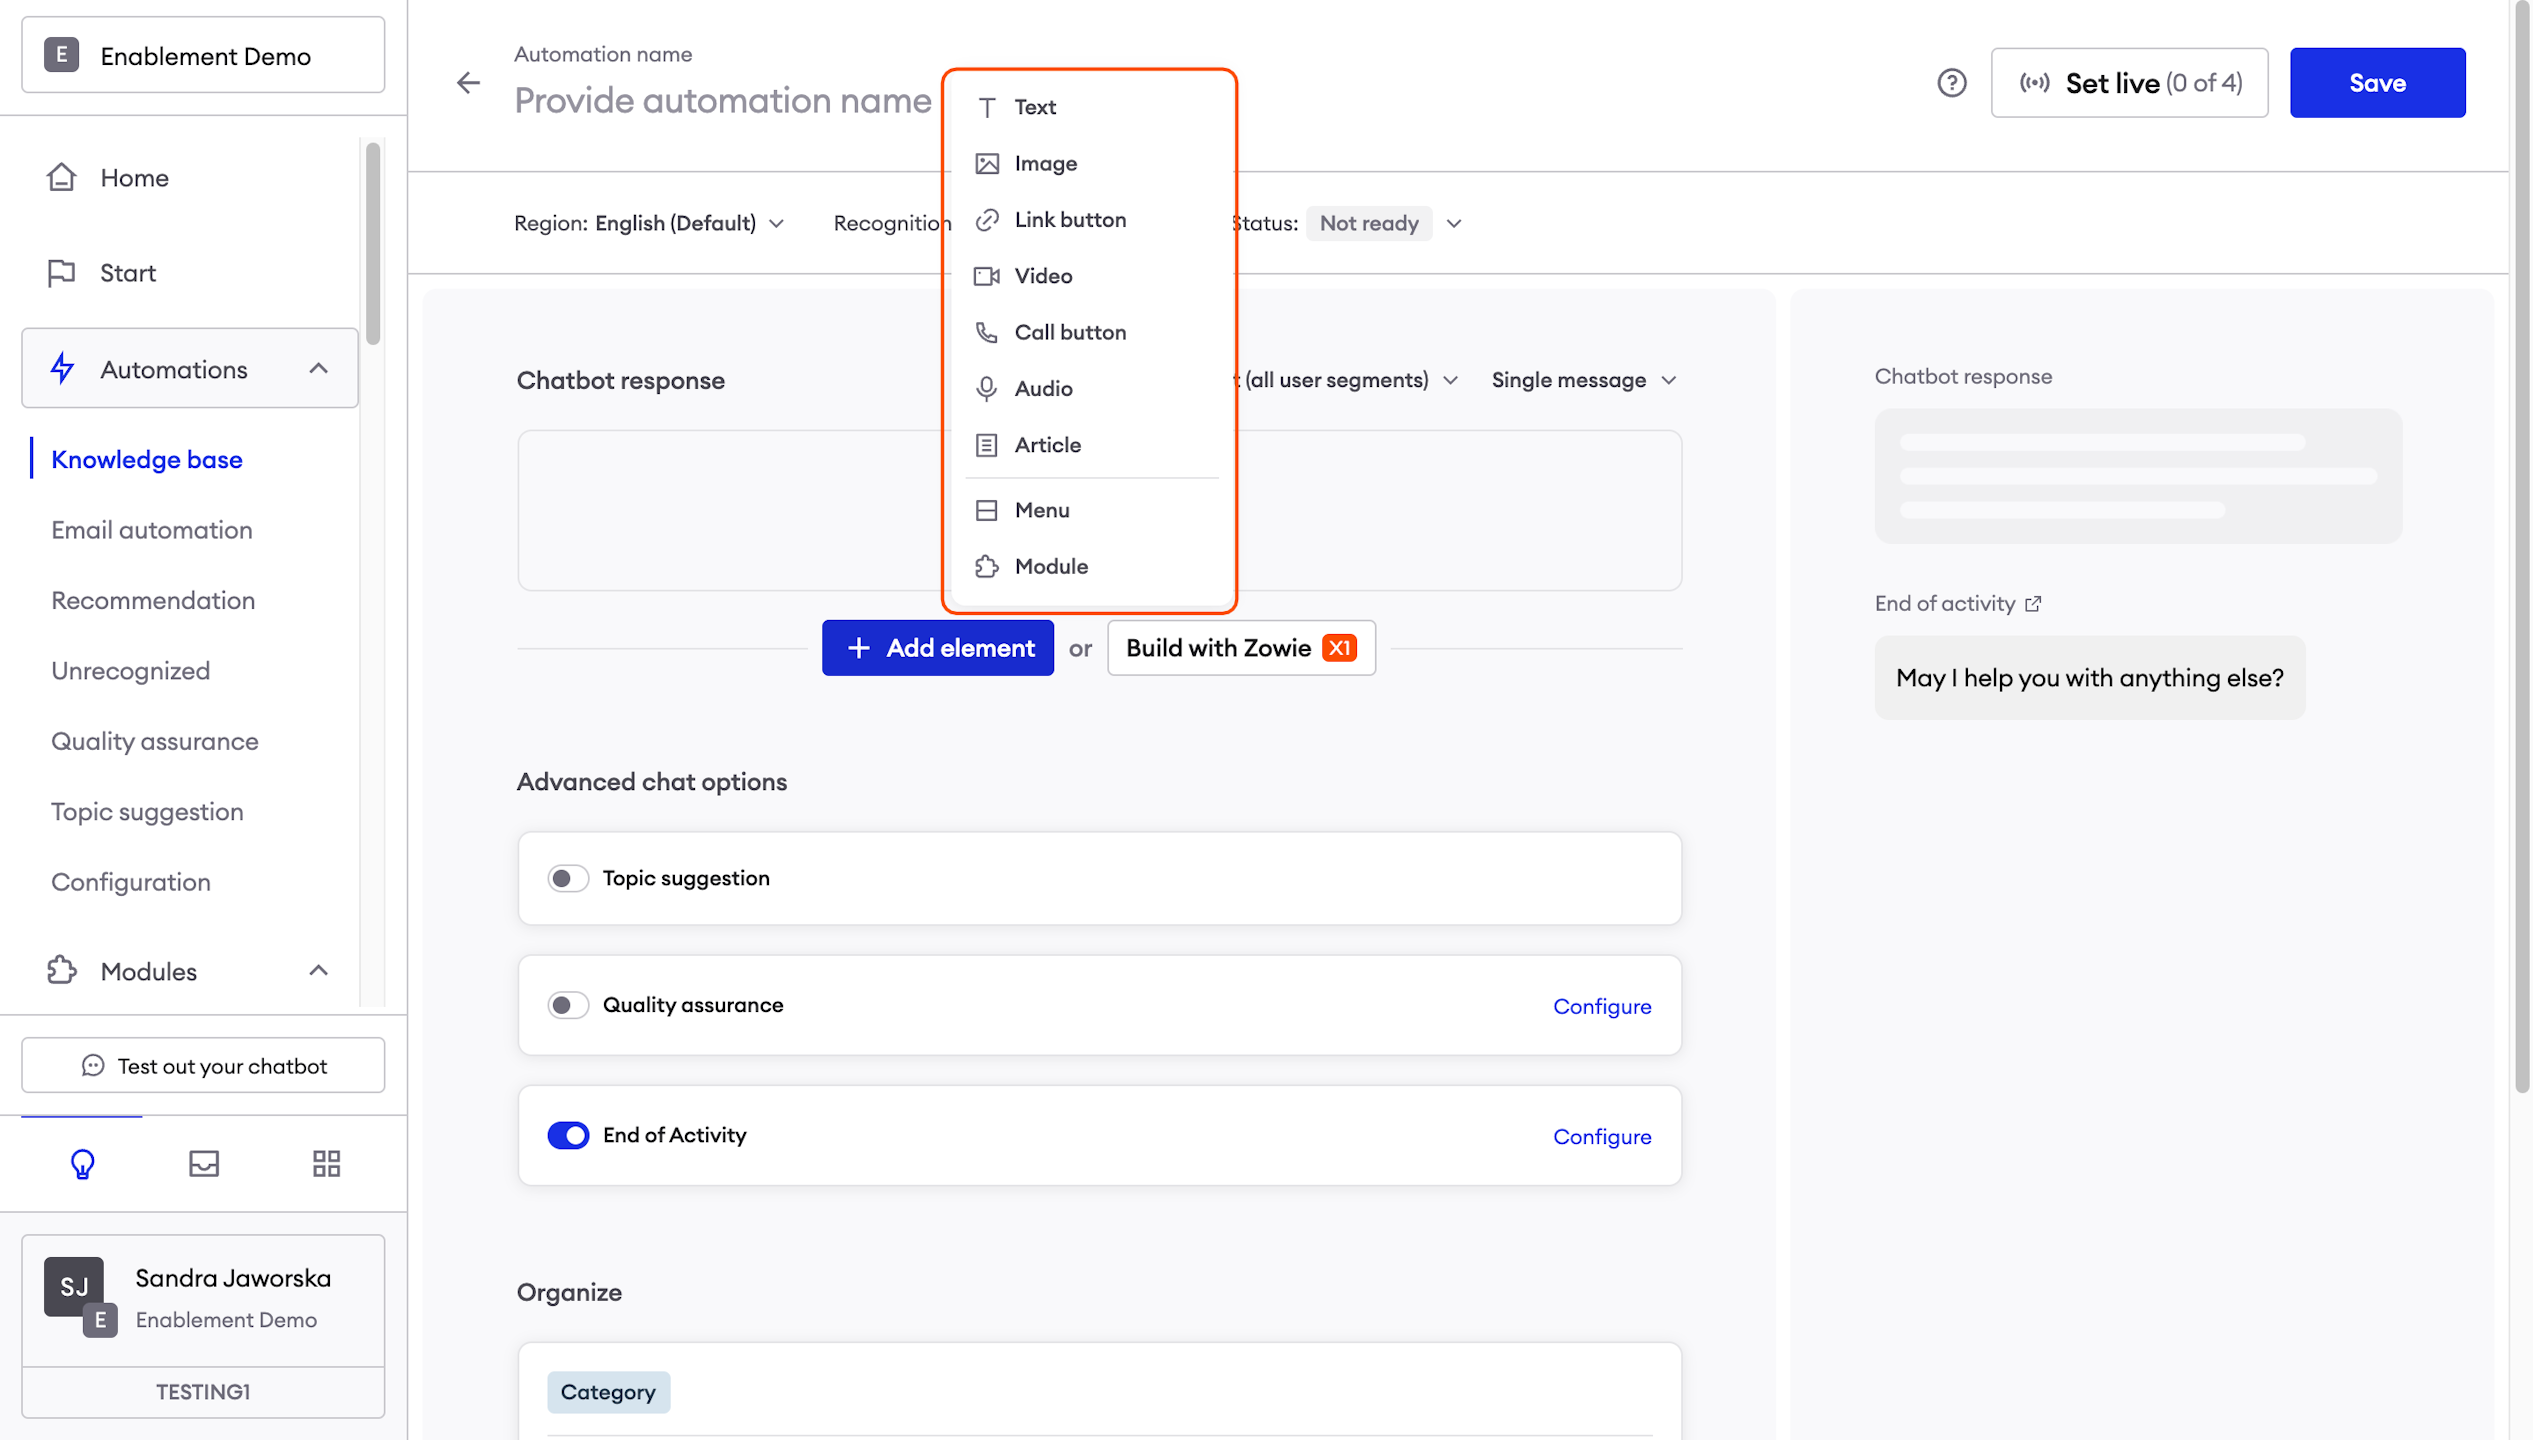
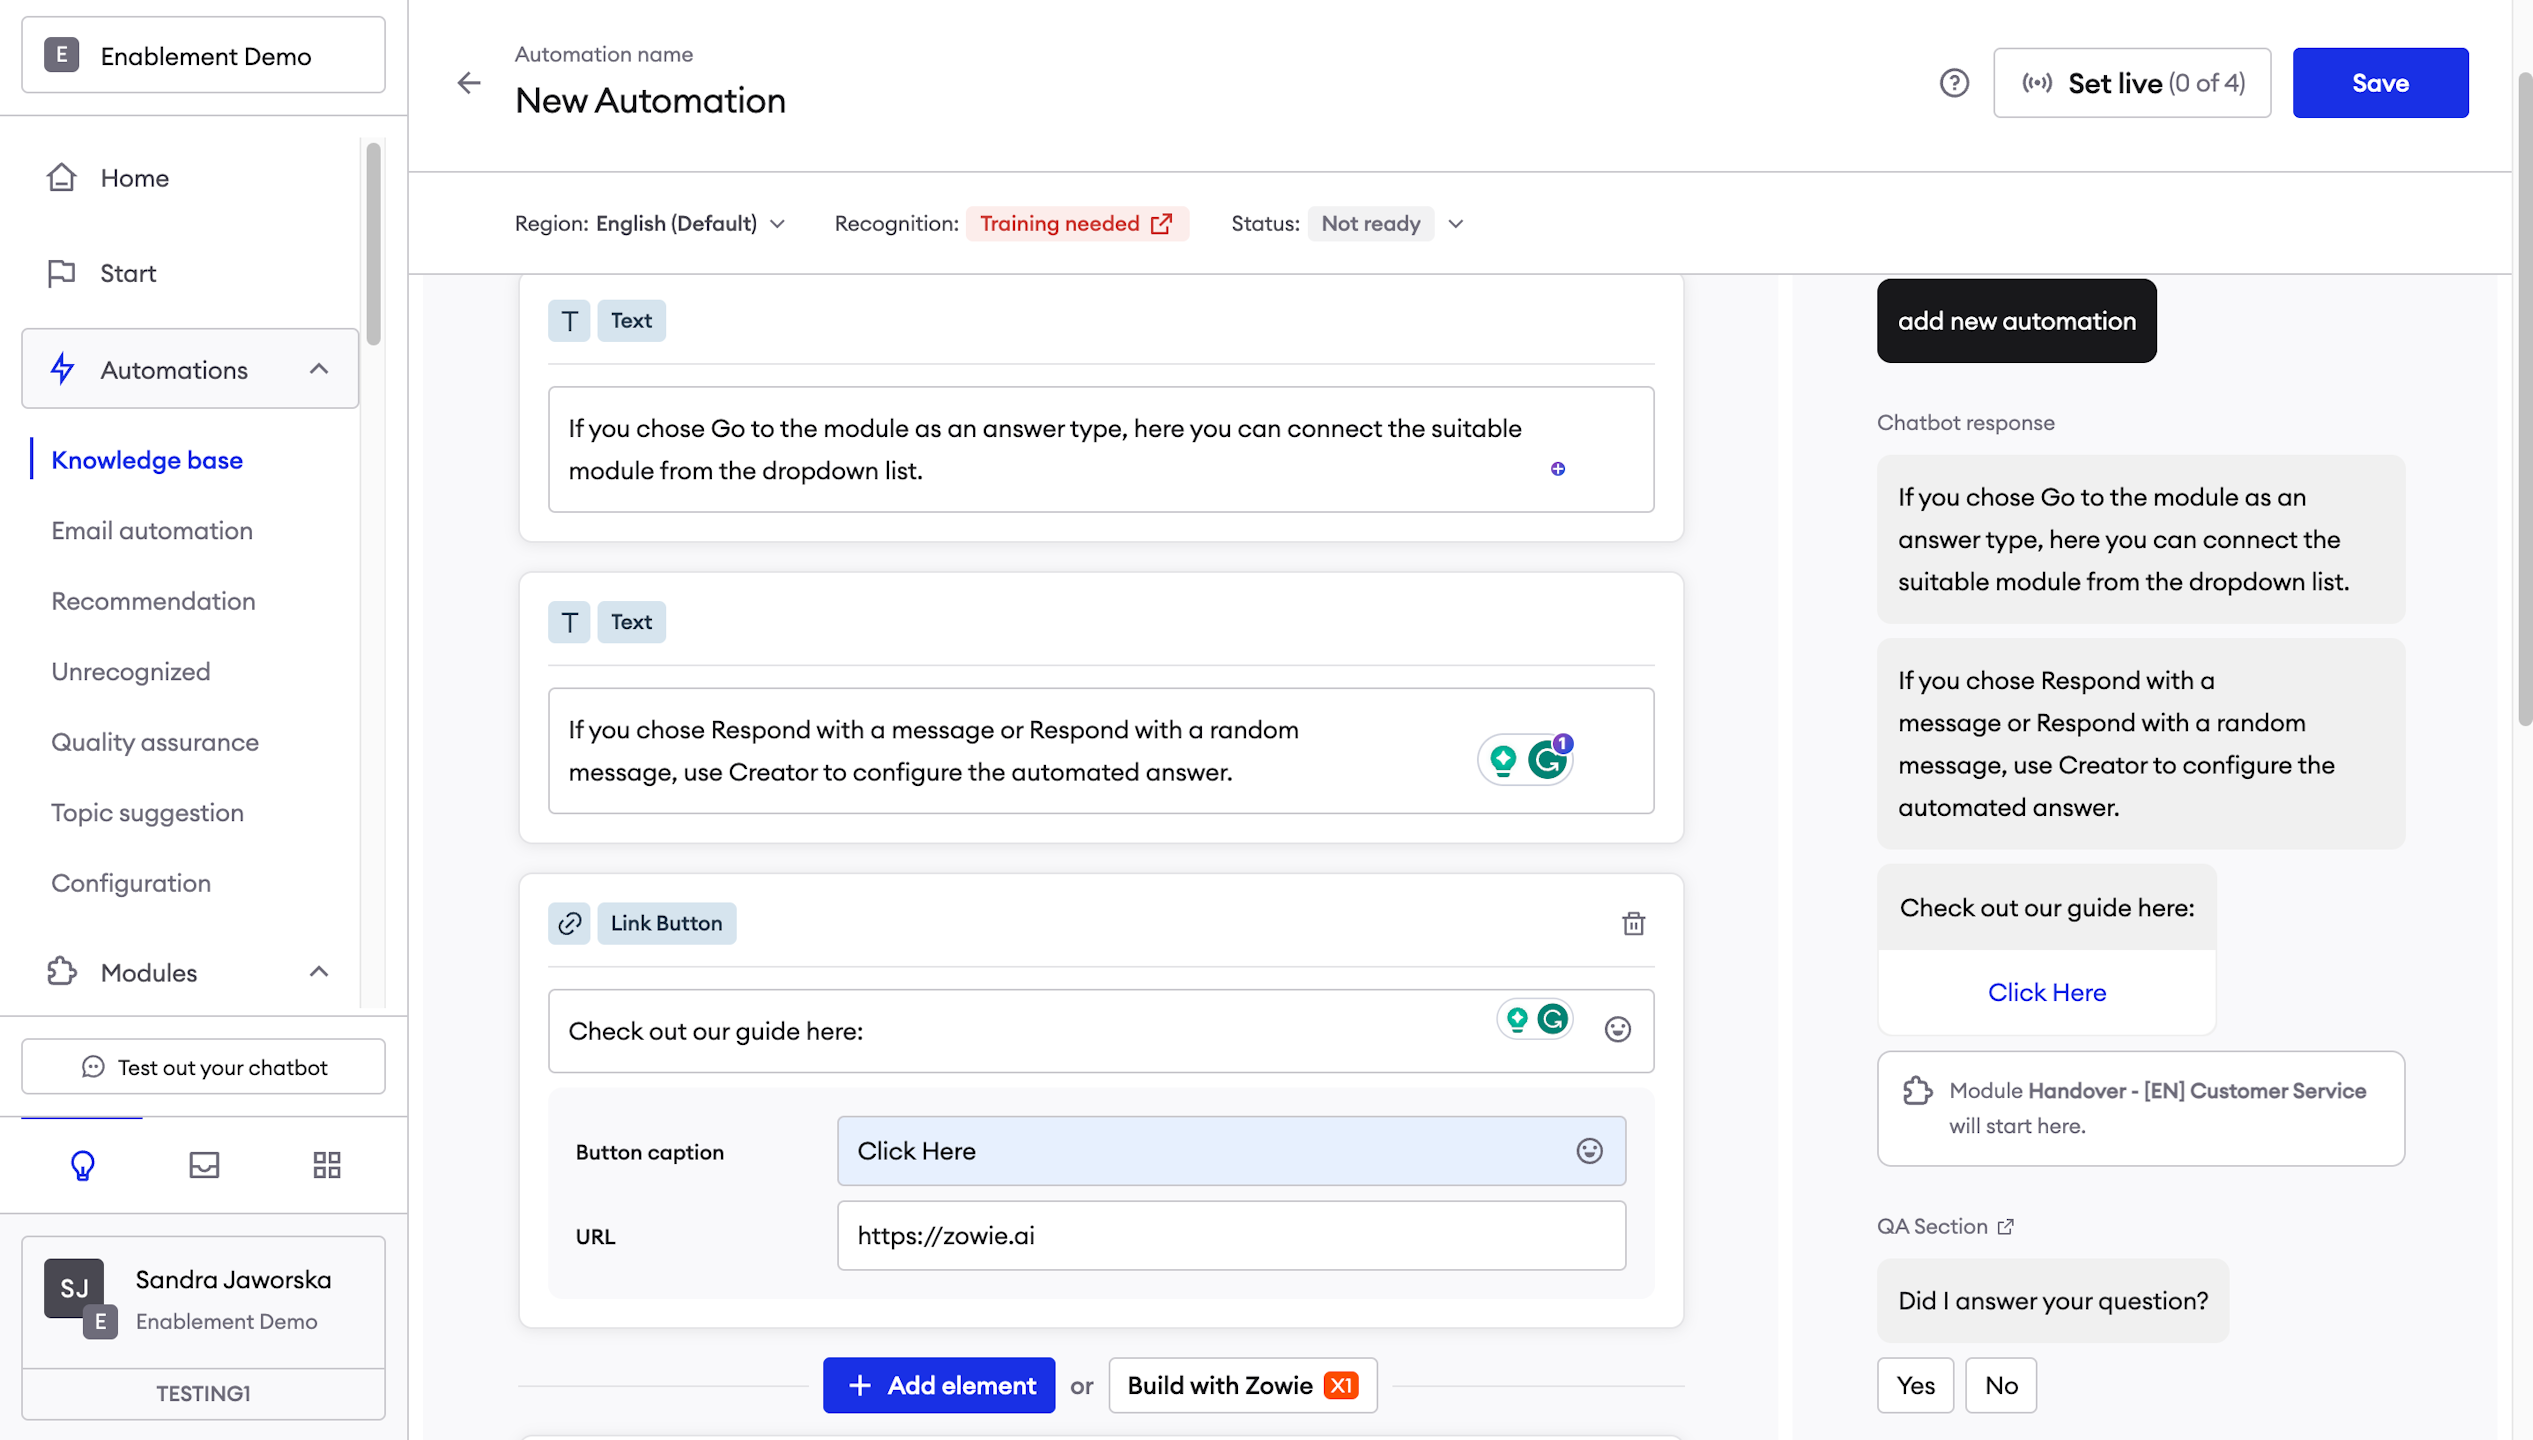
Respond with a message: this is the most popular type of answer. It allows you to add elements that create your answers to the question.
Respond with a random message: this feature allows you to add multiple answers for your Automation. It is especially useful when the chatbot answers certain questions very often and we want it to seem more natural so it doesn’t always answer with the same repetitive response.
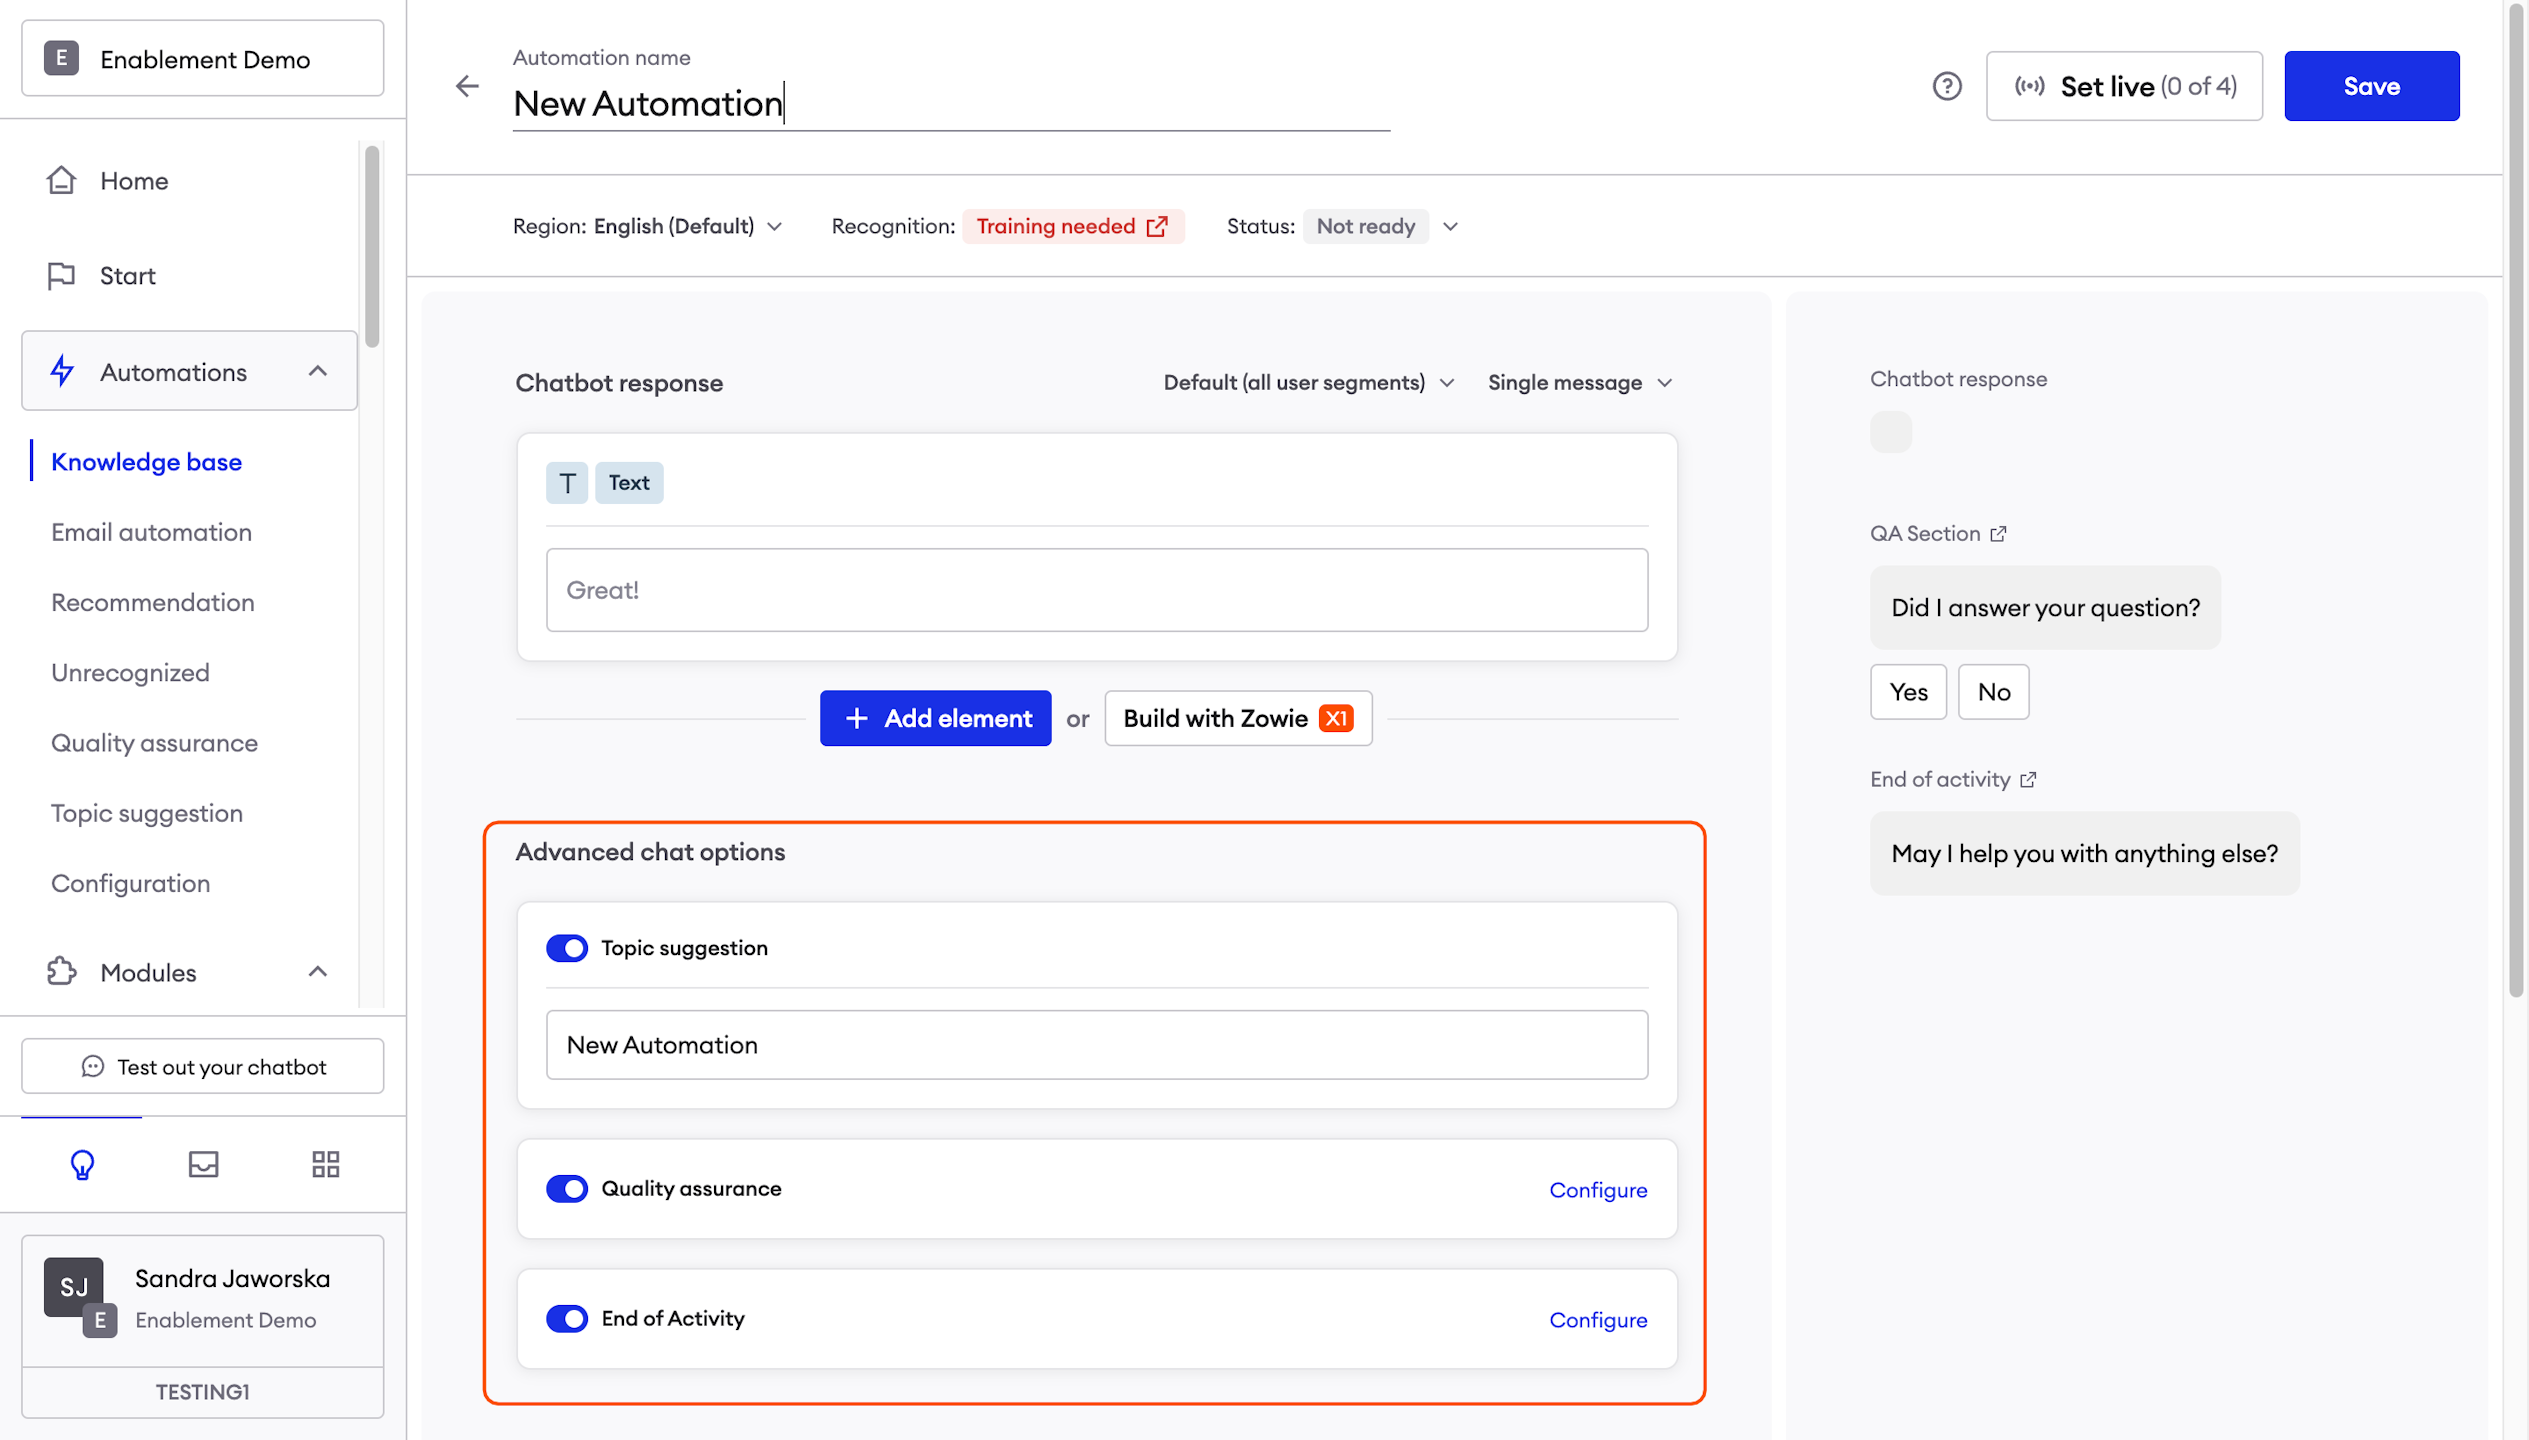
Enabling Quality Assurance and Topic Suggestion
Next, enable Quality Assurance if you want to ask customers for feedback after this Automated interaction to ensure a high-quality experience, and Topic Suggestion if you want your chatbot to suggest this particular Automation.
To enable these mechanisms for your Automation, simply click the relevant sliders. A blue slider means that this function is enabled.
AttentionIf you choose to enable Topic suggestion, remember to populate the Topic suggestion caption.
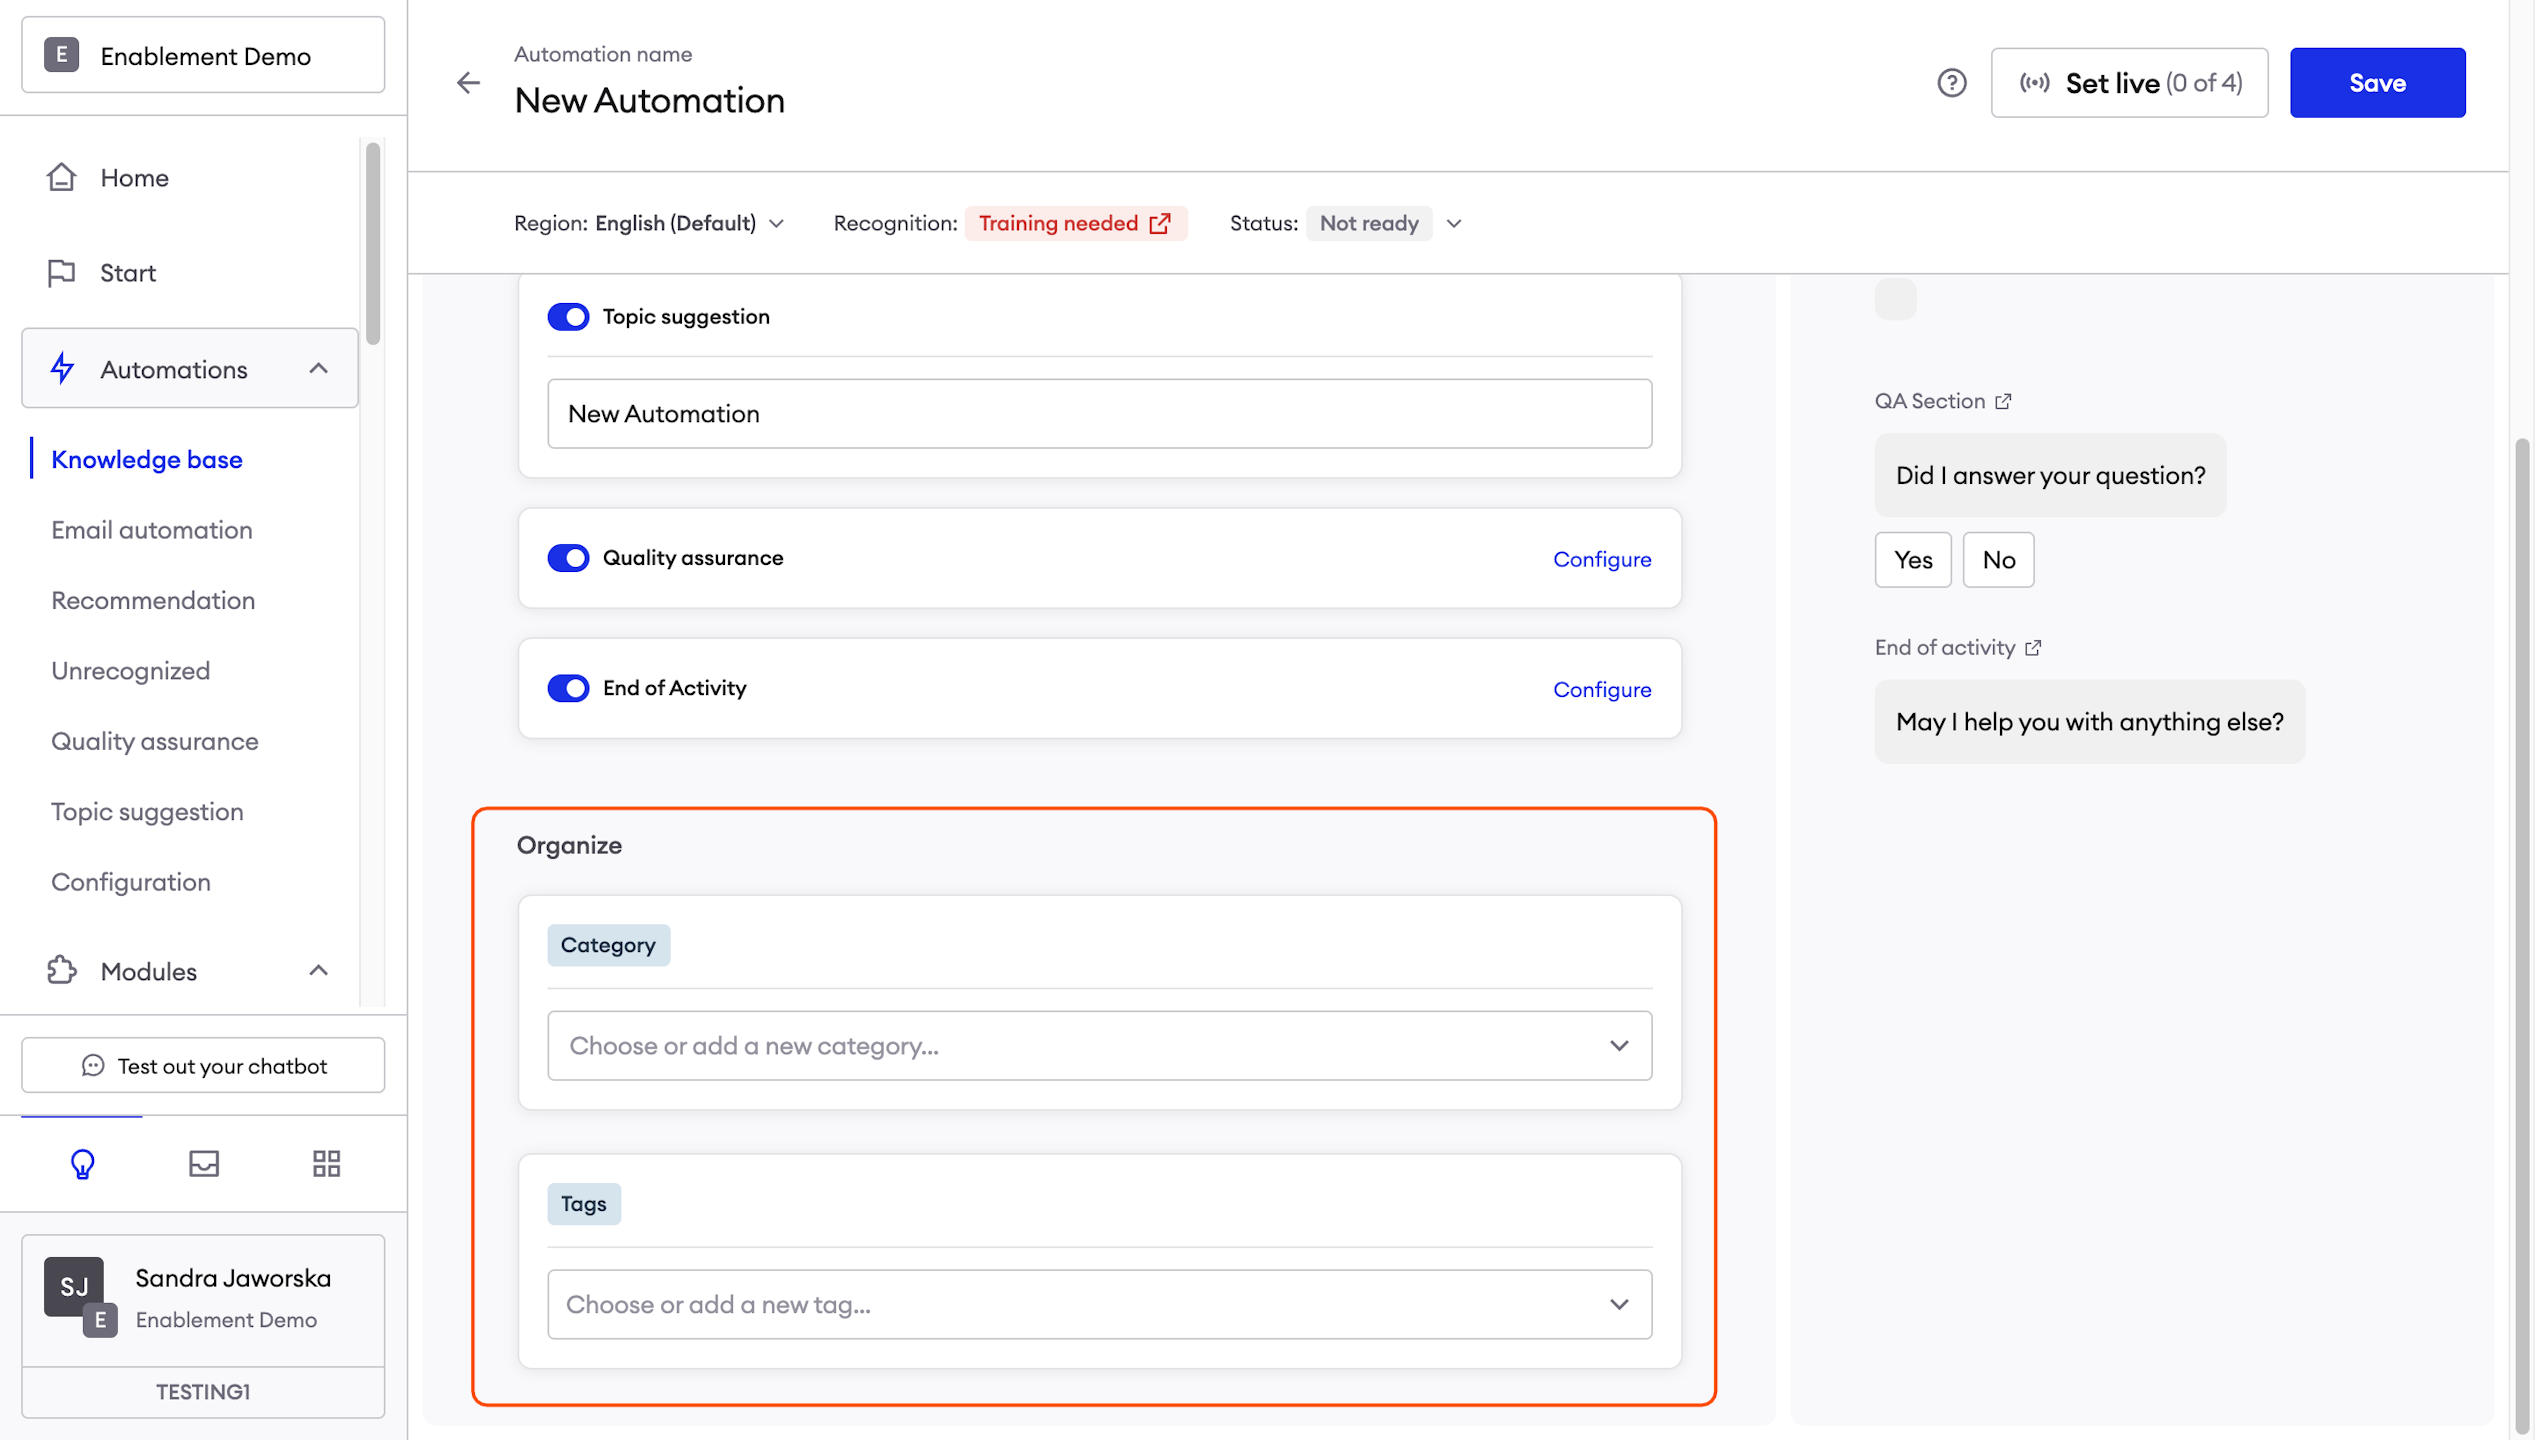
Assigning Category and Tags
Here you can assign previously configured Category and Tags.
Categories and tags help manage the Knowledge Base. For example, all Automations related to product returns may be assigned with the “Return” category.
AttentionThis step is not obligatory to save your Automation.
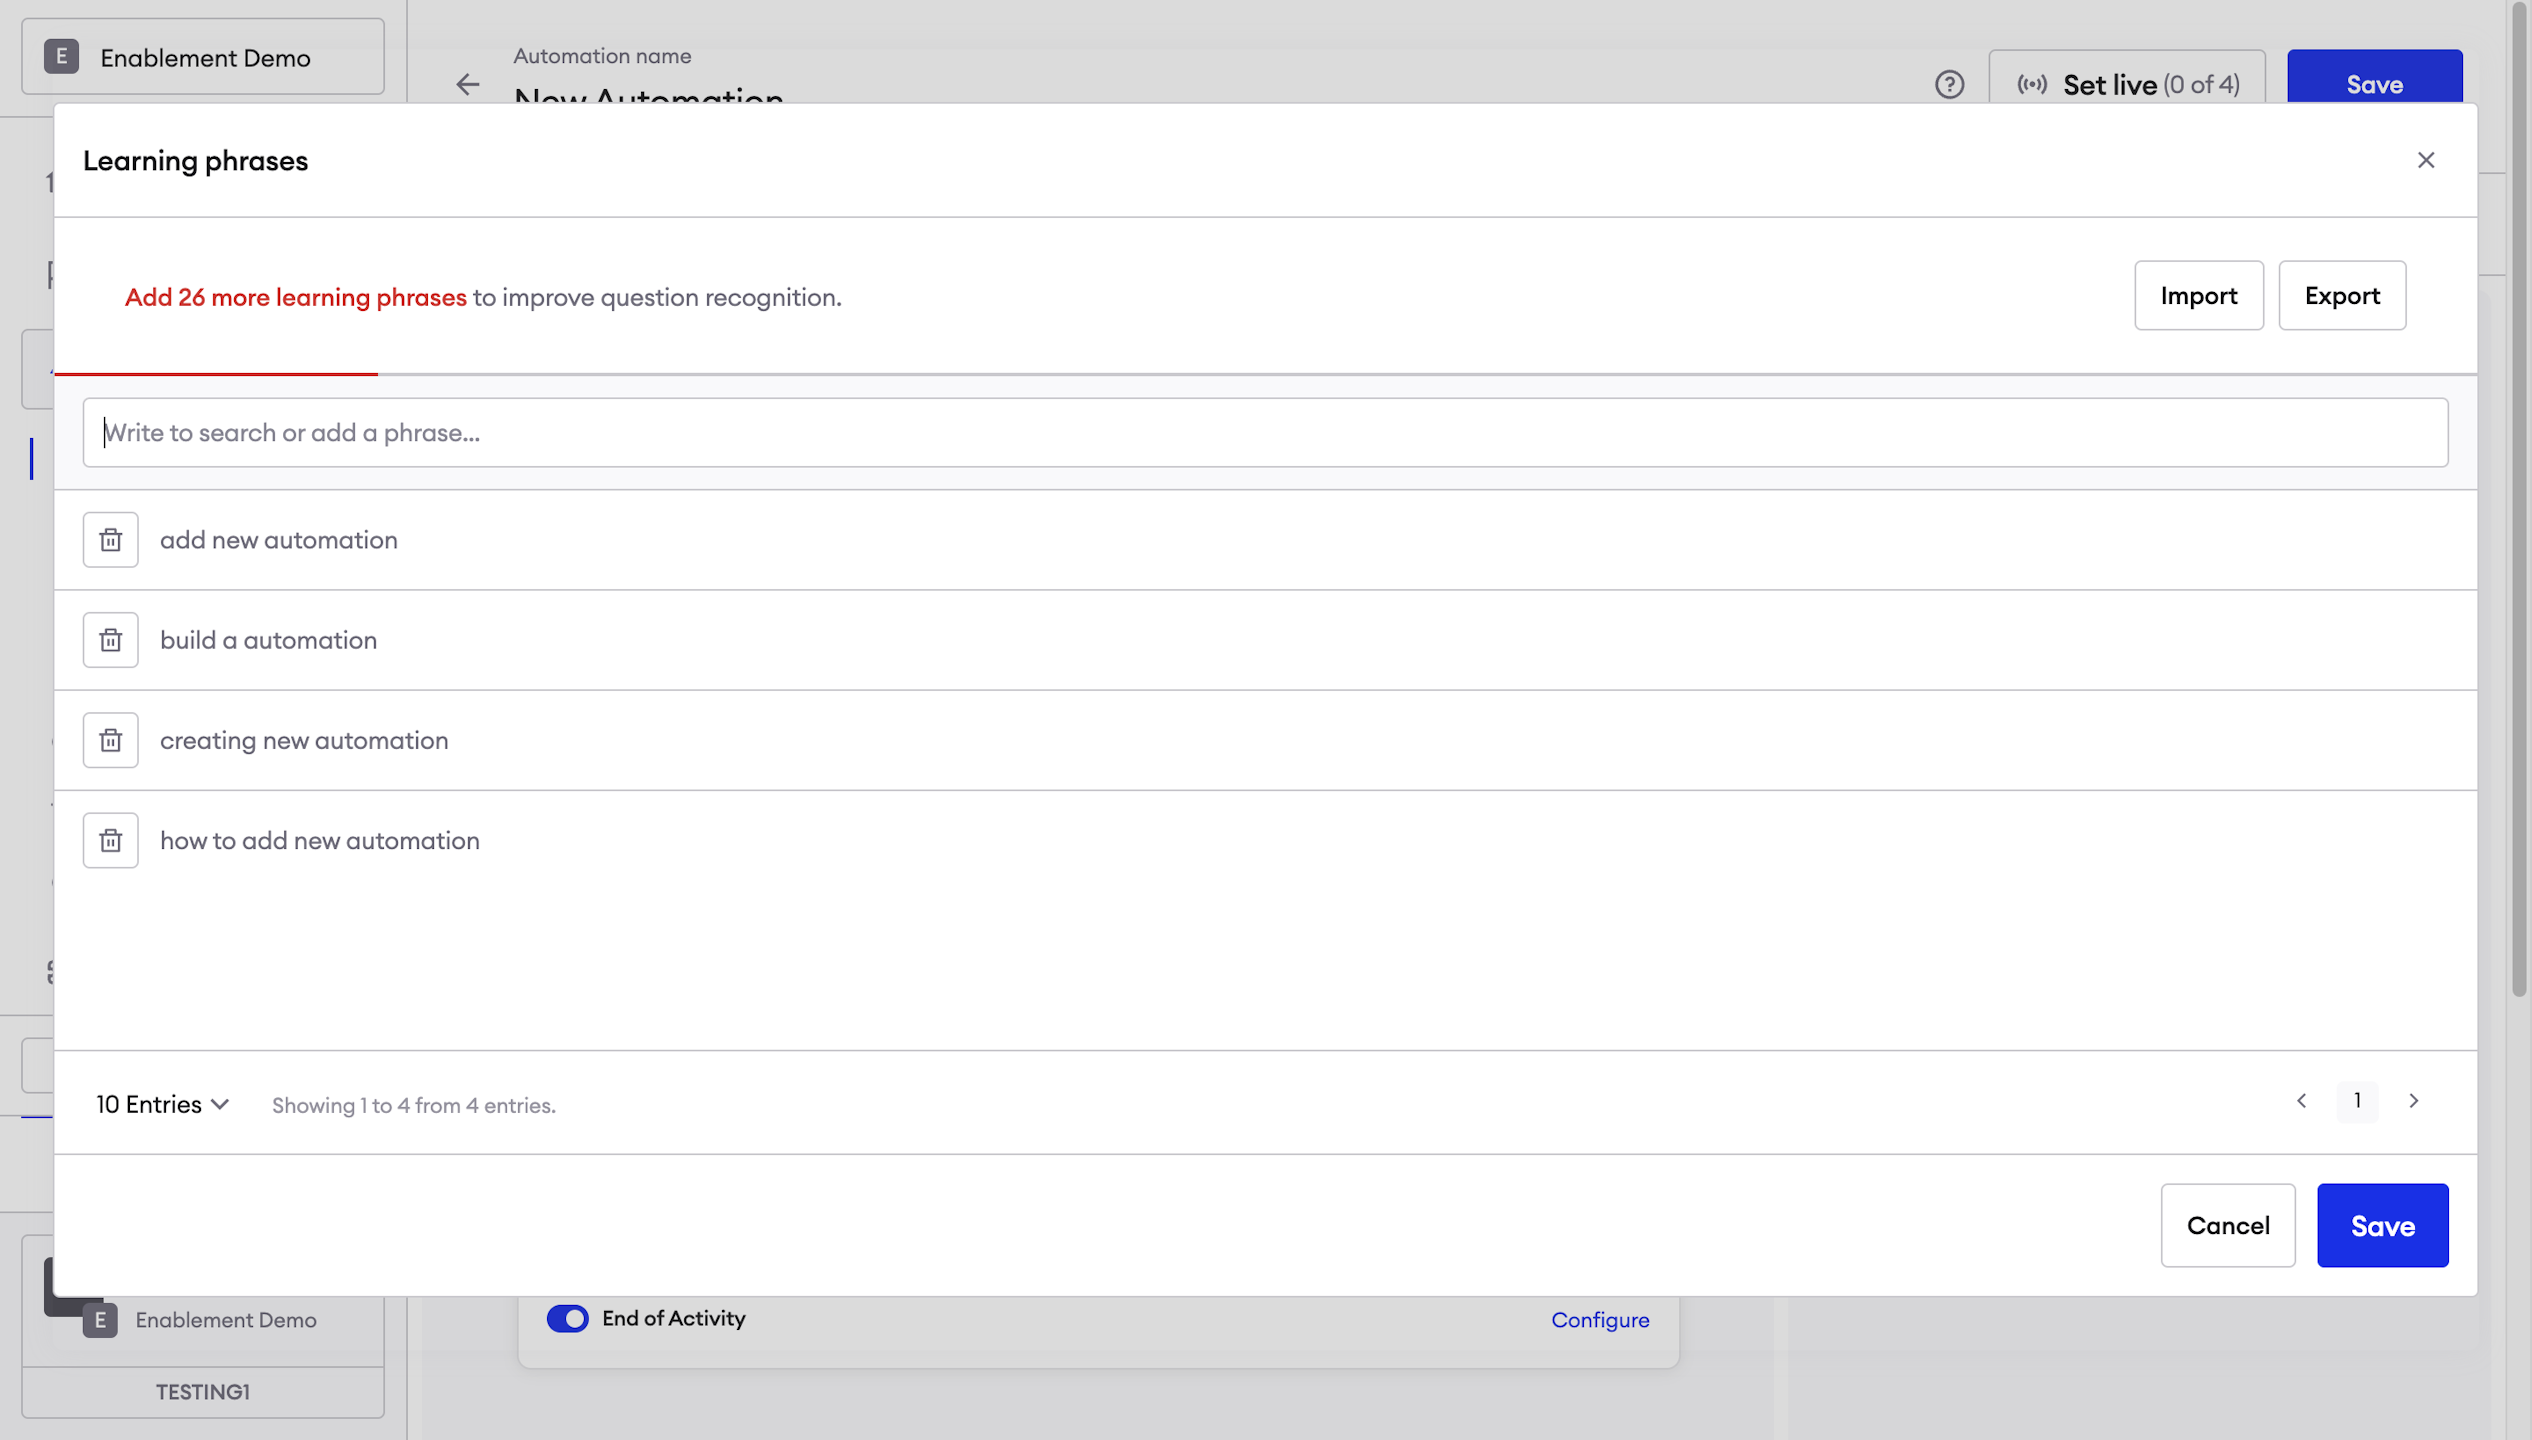
Adding Learning phrases
The next step is to add Learning phrases. Users can ask about the same matter in many different ways so in this section you can train your chatbot to recognize their questions, regardless of how they phrase them.
Add learning phrases that relate to the title of the Automation. The optimal number of phrases in each Automation is 30. You can add them manually one by one or use the Import button and upload a set of phrases.
InformationDon't worry about typos or capitalization of the letters - your chatbot is smart enough to understand users' intentions.
Configuring an Automated answer
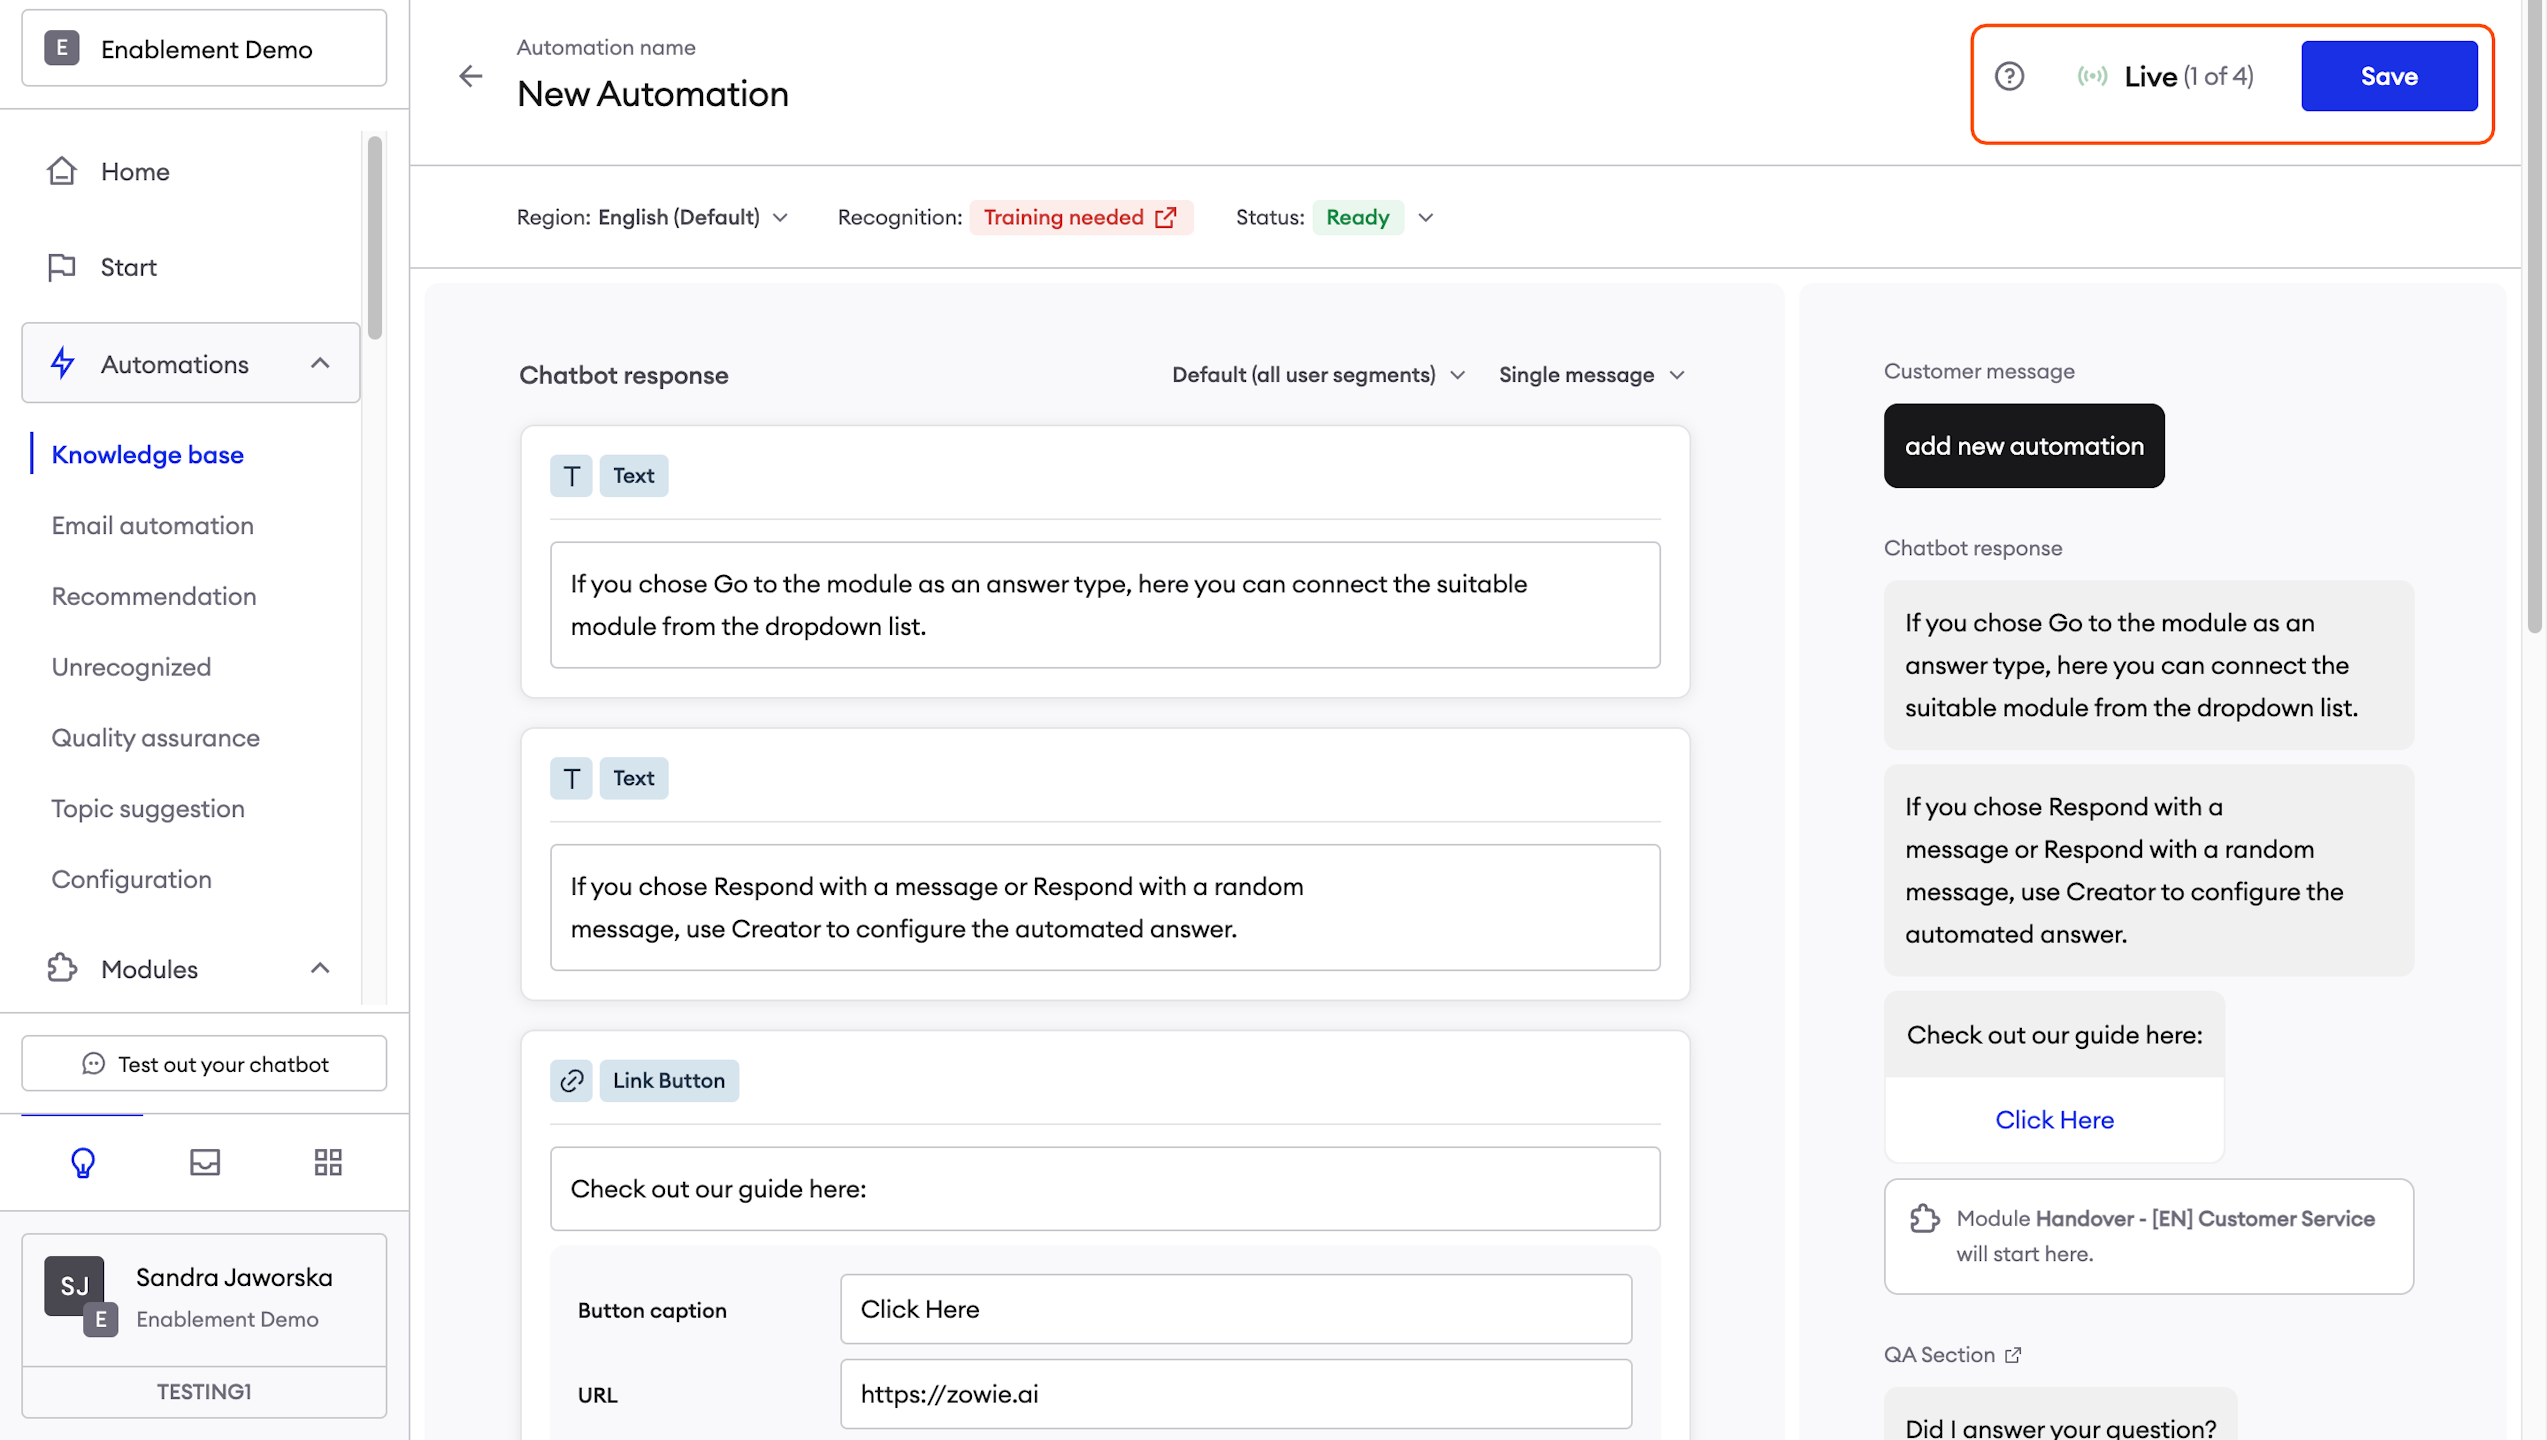
If you chose Go to the module as an answer type, here you can connect the suitable module from the dropdown list.
If you chose Respond with a message or Respond with a random message, use Creator to configure the automated answer.
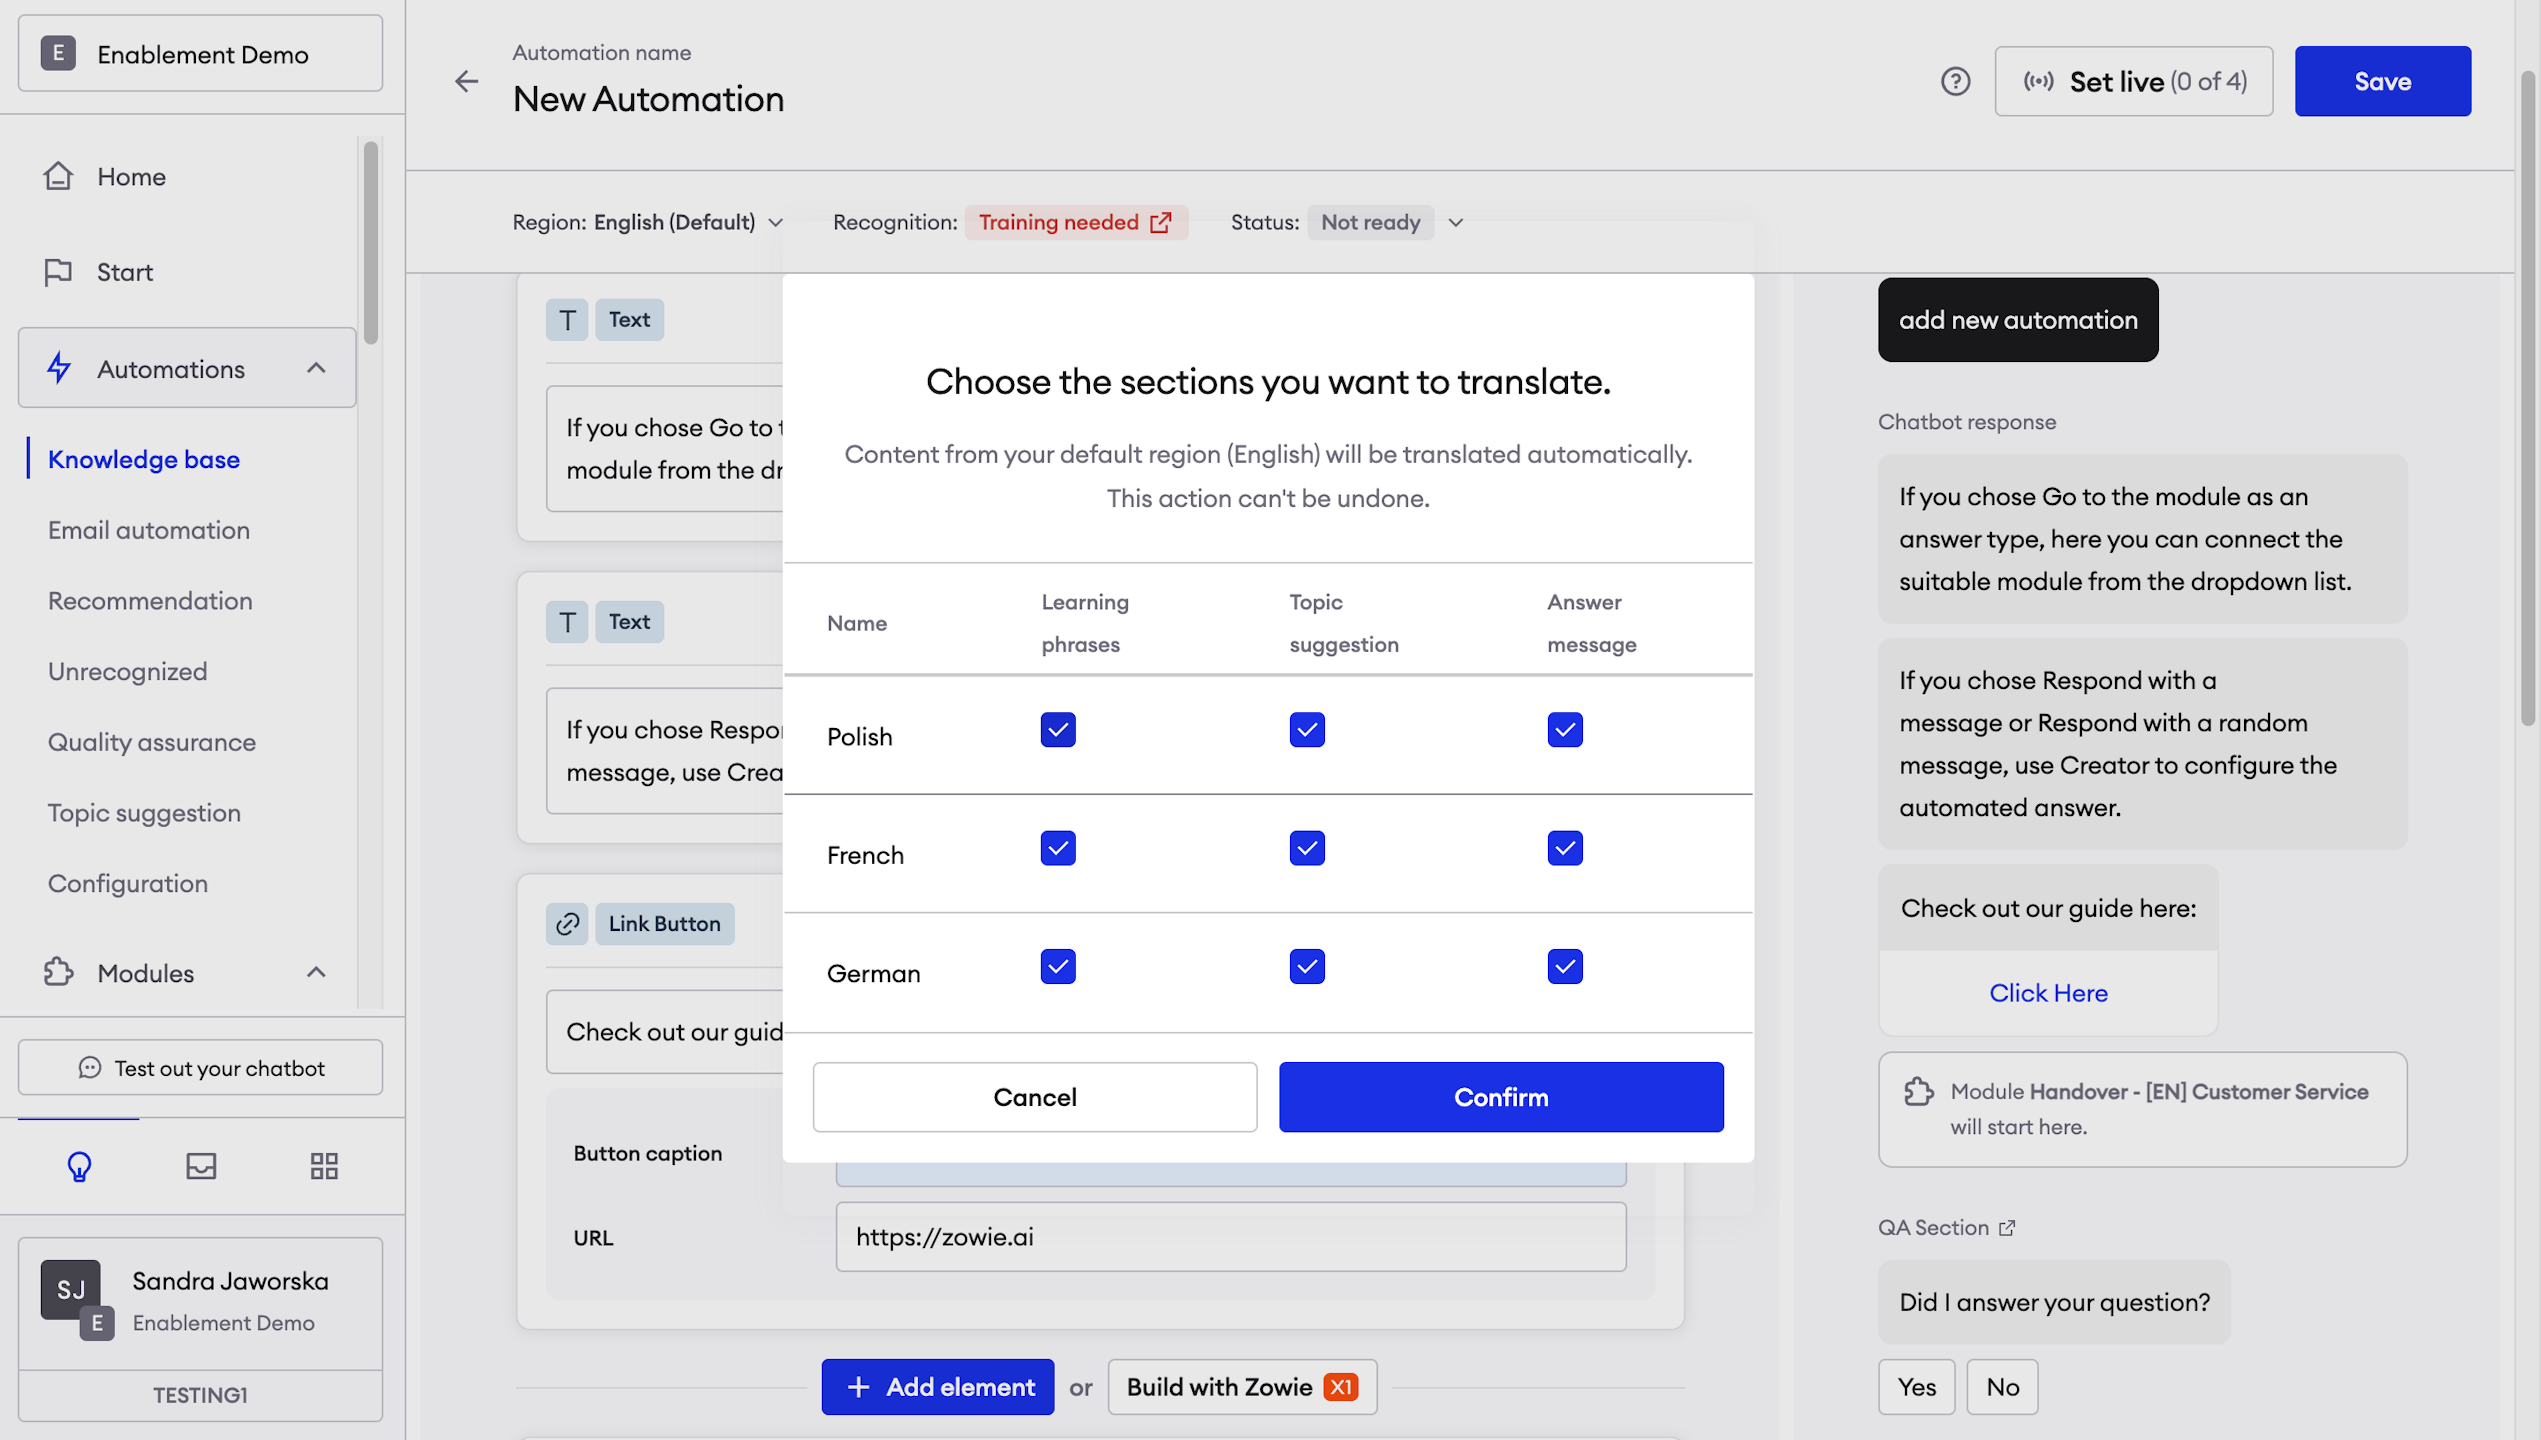
Translating Automation
If you have Regions enabled and you want to translate your fully completed Automation, simply go to the top right-hand drop-down box labeled "English" (If the primary language is set different, that language label will appear) Click the label and then a dropdown menu will appear.
Navigating Languages
Simply click the white boxes under "Topic Suggestion" and "Answer Message" next to the region you want to translate the automation to and click confirm.
After this, you can navigate between languages by using the drop-down menu on your top right-hand side to switch between languages.
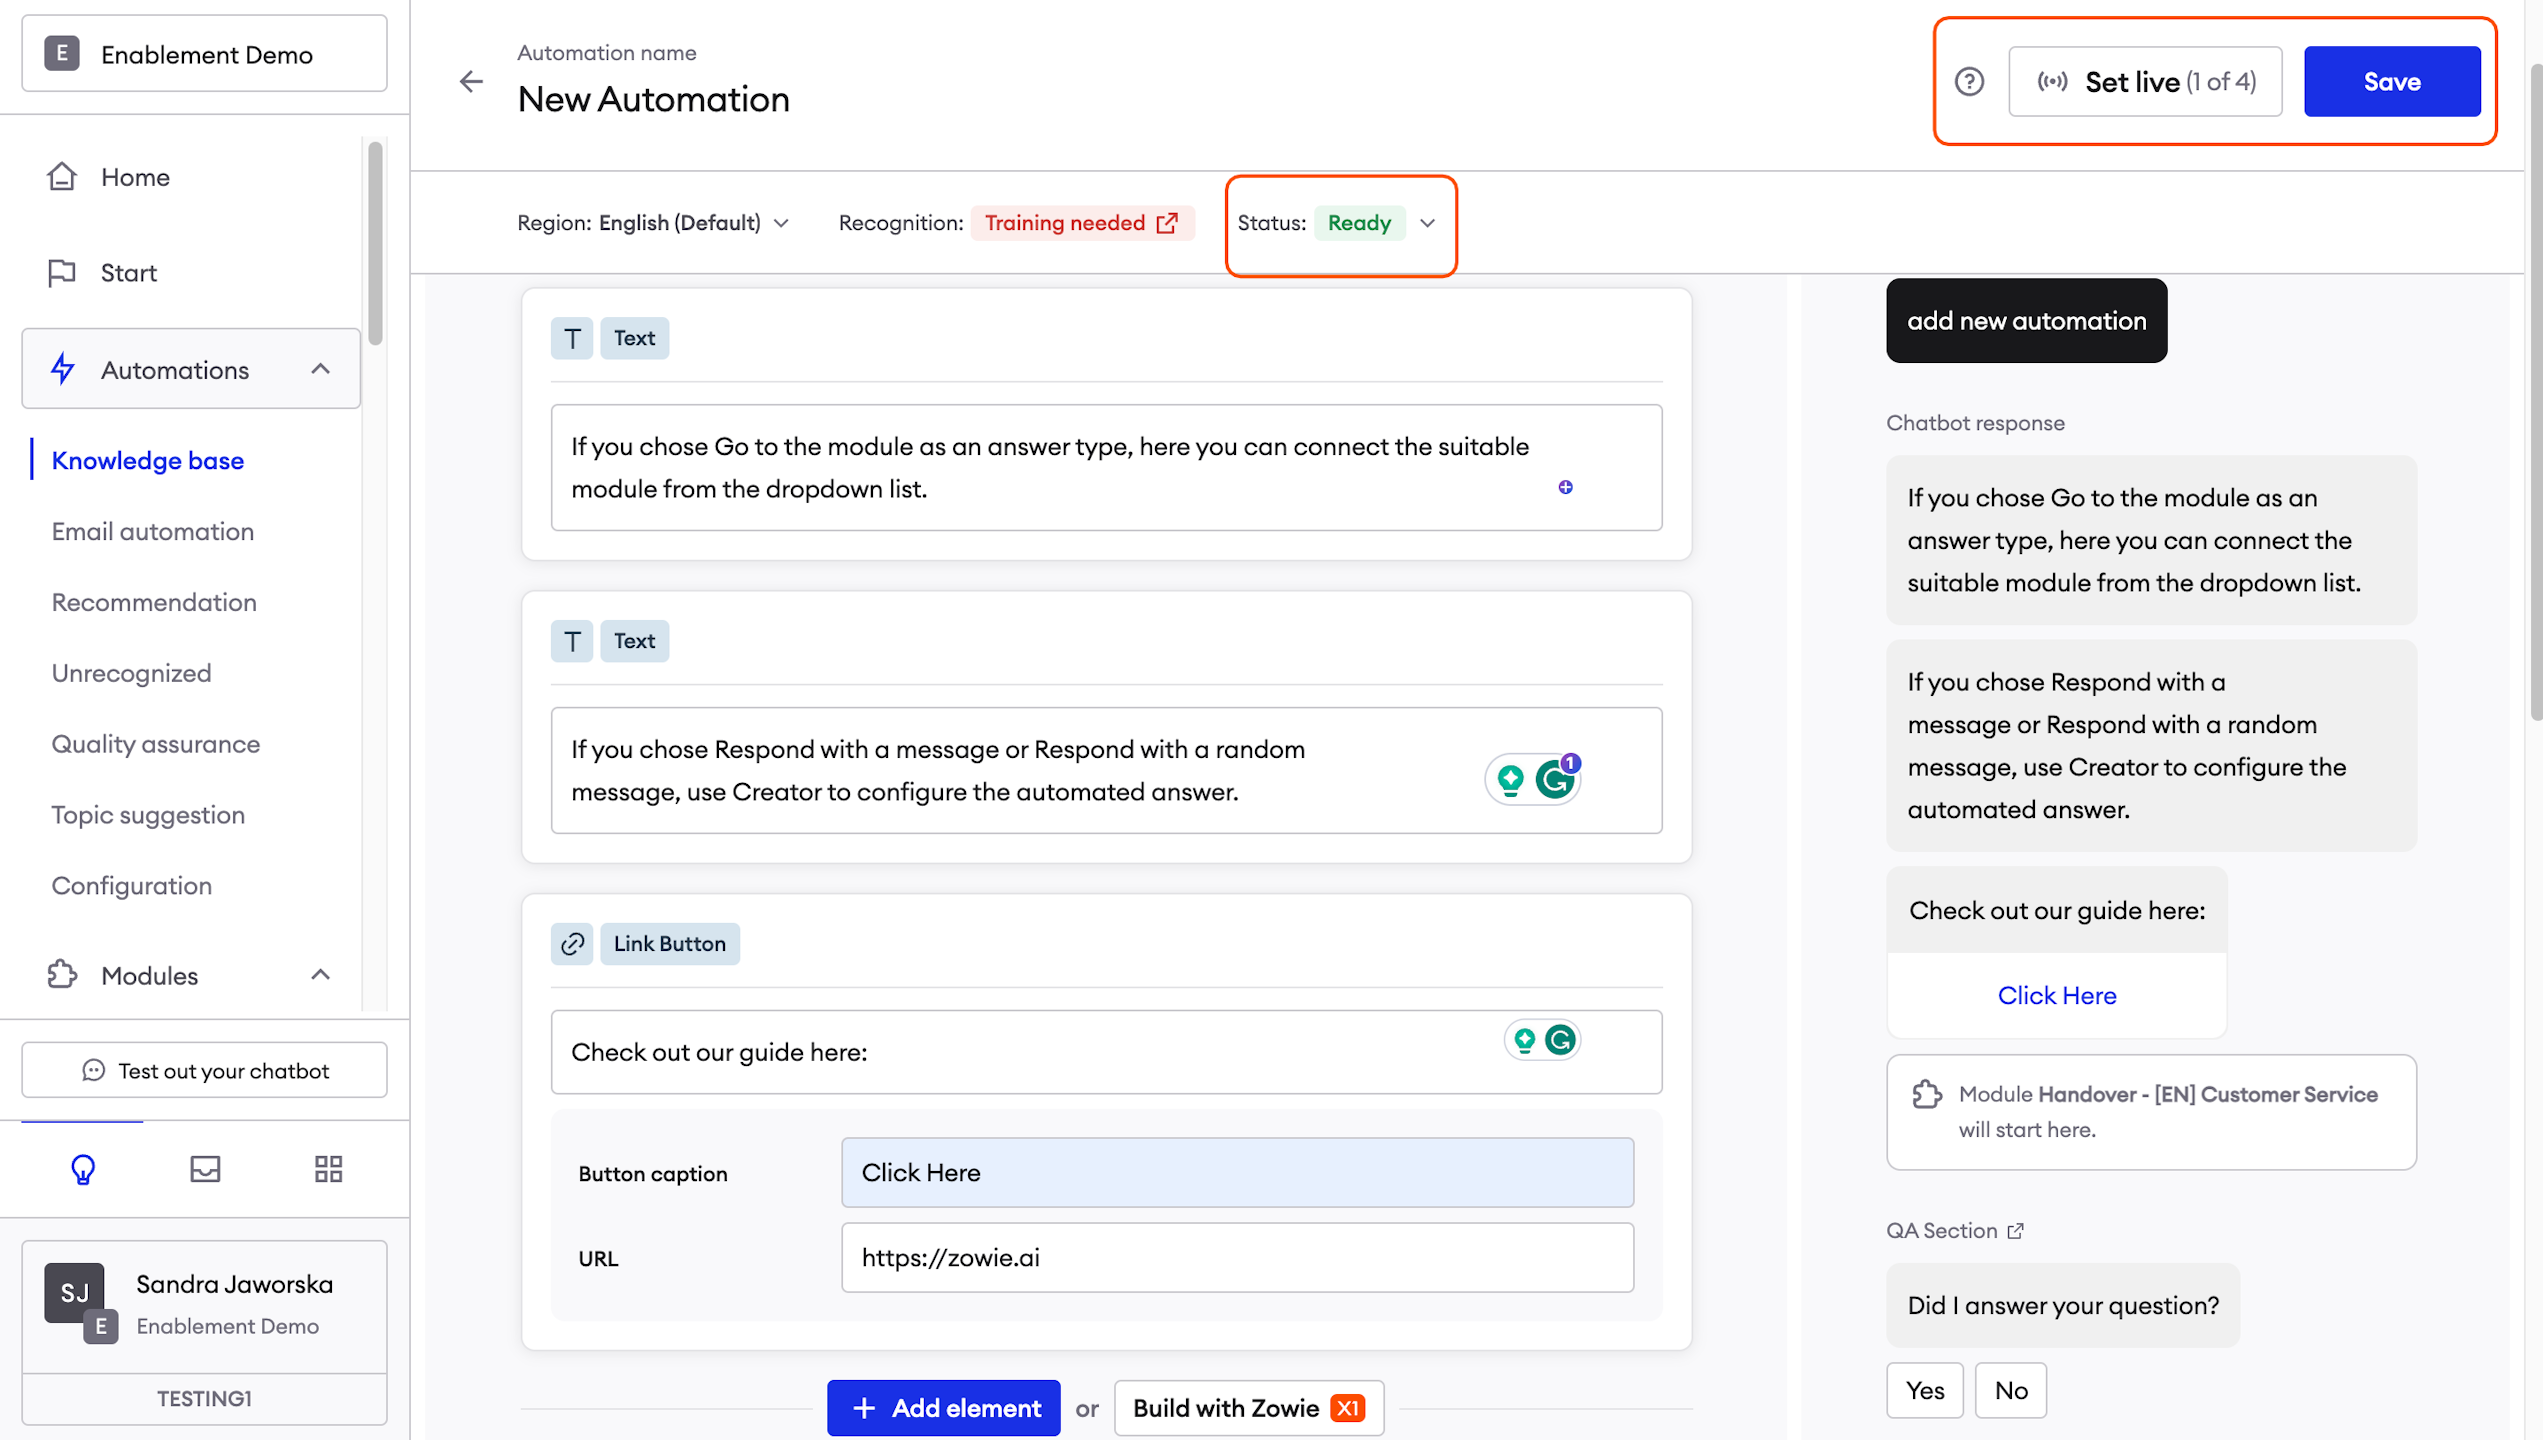
Changing the Automation status
In the top right corner, you can see the Automation status.
A blue slider means that this Automation is enabled and after you save it, it can be triggered by chatbot users.
If you chose to disable it, users won't be able to access it by asking the chatbot a question.
AttentionIf you connect the Automation to any button (e.g. in Workflows Module or Start section), it will get triggered after the user clicks on that button, regardless of the status.
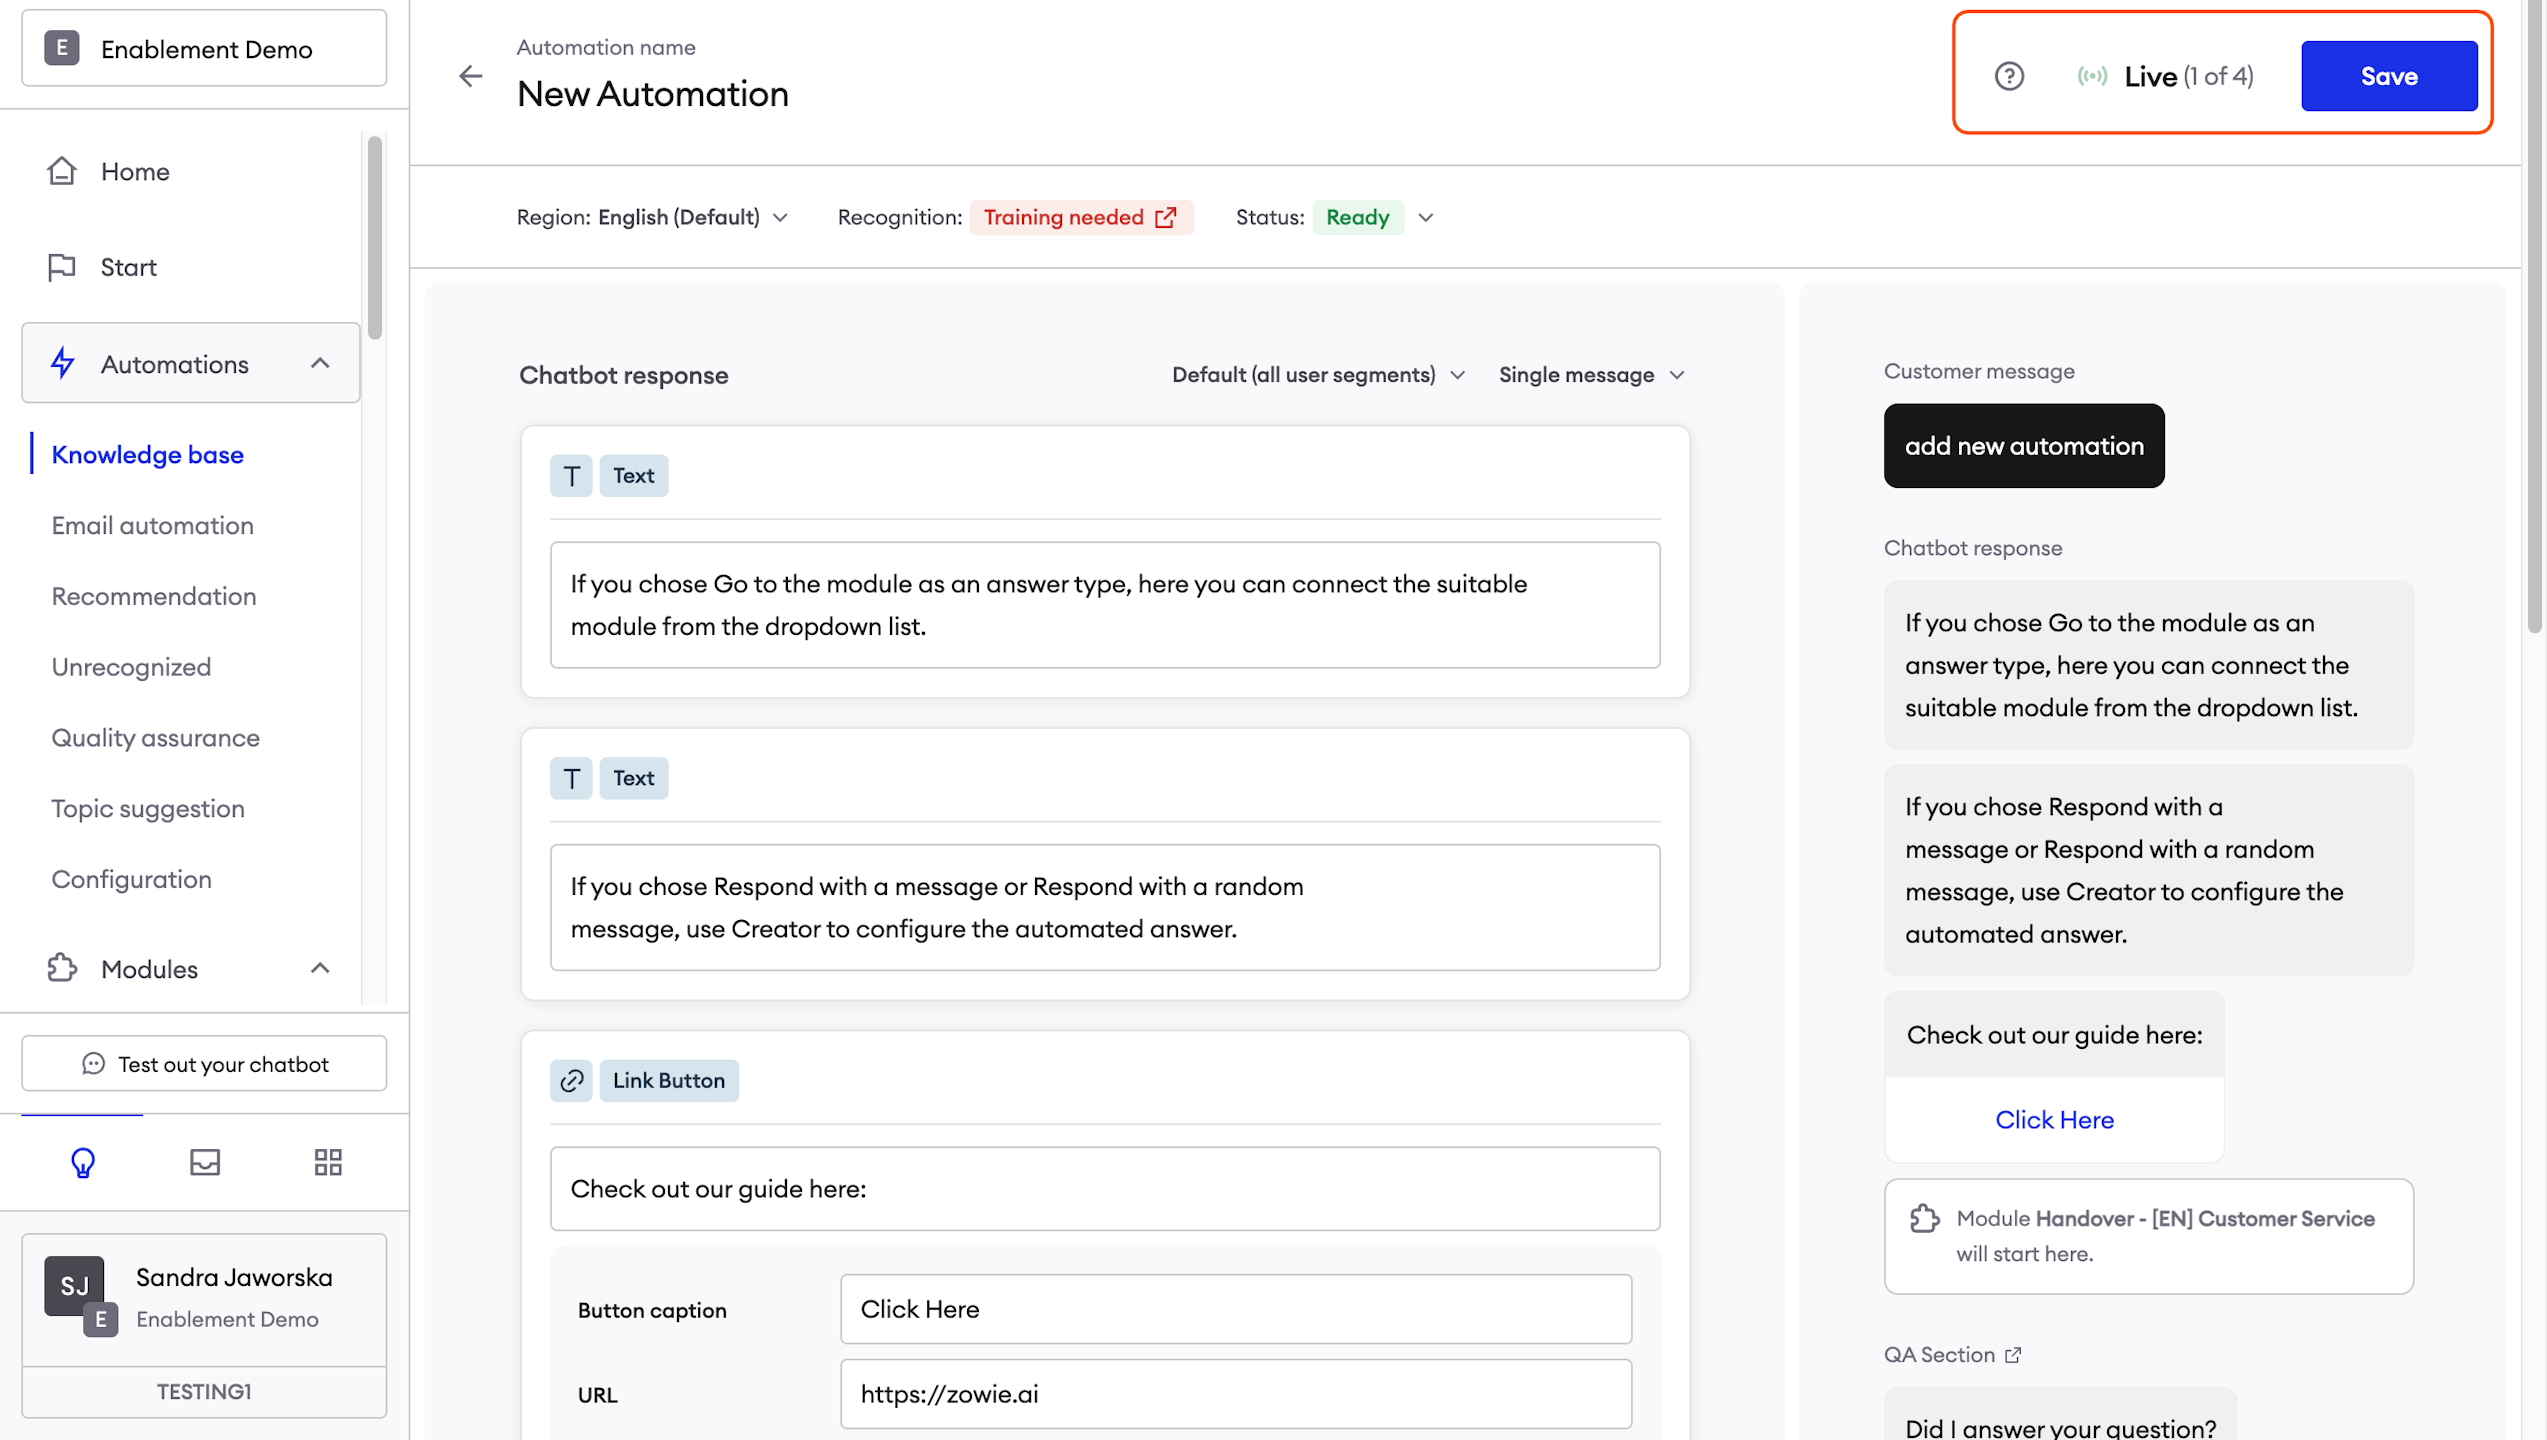
Saving the Automation
Last but not least - save the Automation by clicking the blue "Save" button in the top right corner.
Remember to save the Automation after making any changes in the configuration.